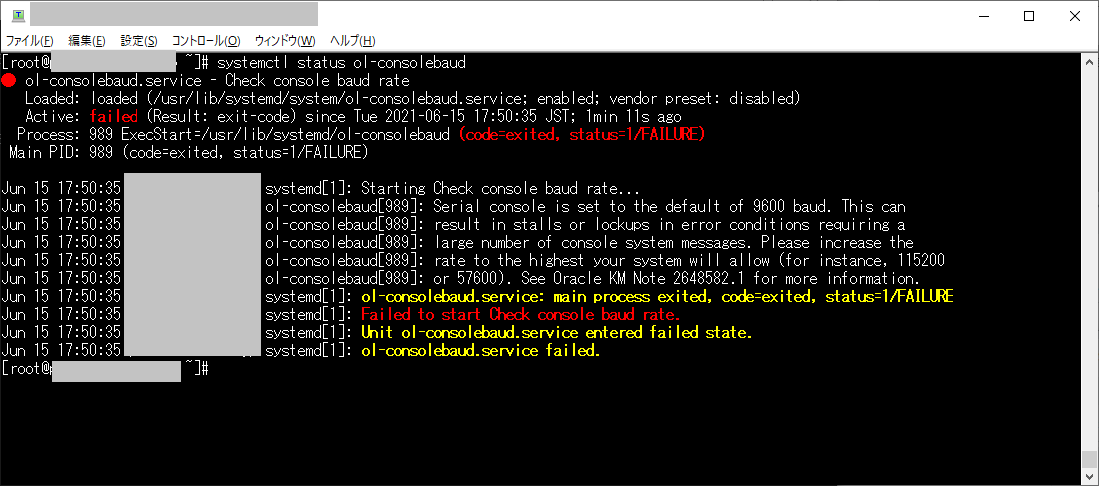
ol-consolebaud.service: main process exited, code=exited, status=1/FAILURE
Failed to start Check console baud rate.
Unit ol-consolebaud.service entered failed state.
ol-consolebaud.service failed.
$ sudo dnf update oci-utils -y
Last metadata expiration check: 4:26:16 ago on Tue 08 Jun 2021 01:30:06 PM JST.
Dependencies resolved.
================================================================================
 Package                  Arch     Version            Repository           Size
================================================================================
Upgrading:
 oci-utils                noarch   0.12.4-1.el8       ol8_oci_included    245 k
Installing dependencies:
 python3-arrow            noarch   0.17.0-1.0.1.el8   ol8_oci_included    101 k
 python3-click            noarch   6.7-8.el8          ol8_appstream       131 k
 python3-convertdate      noarch   2.3.0-1.0.1.el8    ol8_oci_included     83 k
 python3-dateparser       noarch   1.0.0-1.0.1.el8    ol8_oci_included    392 k
 python3-hijri-converter  noarch   2.1.1-1.0.1.el8    ol8_oci_included     30 k
 python3-jmespath         noarch   0.10.0-1.el8       ol8_oci_included     48 k
 python3-pymeeus          noarch   0.3.6-2.0.1.el8    ol8_oci_included    1.1 M
 python3-regex            aarch64  2021.4.4-1.el8     ol8_developer_EPEL  328 k
 python3-retrying         noarch   1.3.3-1.0.1.el8    ol8_oci_included     22 k
 python3-terminaltables   noarch   3.1.0-1.0.1.el8    ol8_oci_included     31 k
 python3-tzlocal          noarch   2.0.0-4.el8        ol8_oci_included     37 k
 python36-oci-cli         noarch   2.22.1-1.el8       ol8_oci_included    6.4 M

Transaction Summary
================================================================================
Install  12 Packages
Upgrade   1 Package

Total download size: 8.9 M
<略>
$
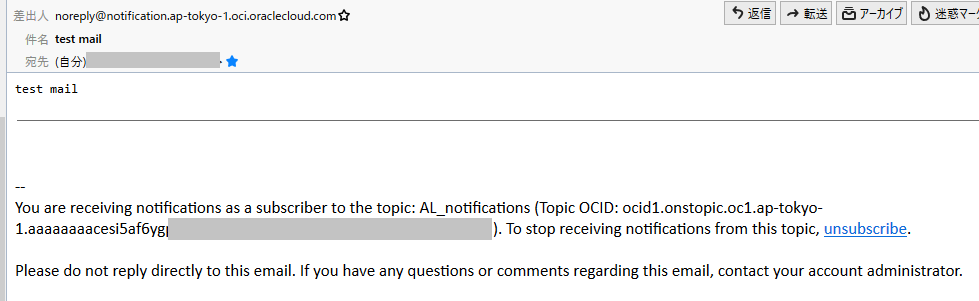
$ oci ons message publish --topic-id ocid1.onstopic.oc1.ap-tokyo-1.<略> --title "test mail" --body "test mail"
ERROR: Could not find config file at /home/opc/.oci/config, please follow the instructions in the link to setup the config file https://docs.cloud.oracle.com/en-us/iaas/Content/API/Concepts/sdkconfig.htm
$
$ oci setup keys
Enter a passphrase for your private key (empty for no passphrase):
Public key written to: /home/opc/.oci/oci_api_key_public.pem
Private key written to: /home/opc/.oci/oci_api_key.pem
Public key fingerprint: xx:xx:xx:xx:xx:xx:xx:xx:xx:xx:xx:xx:xx:xx:xx:xx


    If you haven't already uploaded your API Signing public key through the
    console, follow the instructions on the page linked below in the section
    'How to upload the public key':

        https://docs.cloud.oracle.com/Content/API/Concepts/apisigningkey.htm#How2

$  ls -al ~/.oci
total 8
drwx------. 2 opc opc   59 Jun  7 17:32 .
drwx------. 5 opc opc  138 Jun  7 17:32 ..
-rw-------. 1 opc opc 1679 Jun  7 17:32 oci_api_key.pem
-rw-------. 1 opc opc  451 Jun  7 17:32 oci_api_key_public.pem
$
$ oci ons message publish --topic-id ocid1.onstopic.oc1.ap-tokyo-1.aa<略> --title "test mail" --body "test mail"
WARNING: Permissions on /home/opc/.oci/config are too open.
To fix this please try executing the following command:
oci setup repair-file-permissions --file /home/opc/.oci/config
Alternatively to hide this warning, you may set the environment variable, OCI_CLI_SUPPRESS_FILE_PERMISSIONS_WARNING:
export OCI_CLI_SUPPRESS_FILE_PERMISSIONS_WARNING=True

{
  "data": {
    "message-id": "56ca7636-1605-7a19-5344-<略>",
    "time-stamp": null
  }
}
$
まず、「WARNING: Permissions on /home/opc/.oci/config are too open.」についてはパーミッション問題なので、書いてある通りに対処する。
$ ls -l /home/opc/.oci/config
-rw-rw-rw-. 1 opc opc 299 Jun  7 17:43 /home/opc/.oci/config
$ oci setup repair-file-permissions --file /home/opc/.oci/config
$ ls -l /home/opc/.oci/config
-rw-------. 1 opc opc 299 Jun  7 17:43 /home/opc/.oci/config
$
$ sudo vi /usr/local/bin/oci-notification-mail
$ cat /usr/local/bin/oci-notification-mail
#!/usr/bin/python3
# This is an automatically generated code sample.
# To make this code sample work in your Oracle Cloud tenancy,
# please replace the values for any parameters whose current values do not fit
# your use case (such as resource IDs, strings containing ‘EXAMPLE’ or ‘unique_id’, and
# boolean, number, and enum parameters with values not fitting your use case).

import oci
import sys

argvs=sys.argv
argc = len(argvs)
subject=argvs[1]
textbody="".join(sys.stdin.readlines())

# Create a default config using DEFAULT profile in default location
# Refer to
# https://docs.cloud.oracle.com/en-us/iaas/Content/API/Concepts/sdkconfig.htm#SDK_and_CLI_Configuration_File
# for more info
config = oci.config.from_file()


# Initialize service client with default config file
ons_client = oci.ons.NotificationDataPlaneClient(config)

# Send the request to service, some parameters are not required, see API
# doc for more info
publish_message_response = ons_client.publish_message(
    topic_id="ocid1.onstopic.oc1.ap-tokyo-1.<略>",
    message_details=oci.ons.models.MessageDetails(
        body=textbody,
        title=subject),
    message_type="RAW_TEXT")

# Get the data from response
print(publish_message_response.data)
$ sudo chmod a+x /usr/local/bin/oci-notification-mail
$
Oracle Cloud外の環境でOracle Linux 8をインストールしている場合や古めのOracle Cloudインスタンスの場合、こちらのOS側のコマンドで設定する手順を行います。
現状のレポジトリ設定状況を「sudo dnf repolist –all」を実行して確認します。
$ sudo dnf repolist --all
repo id                          repo name                              status
ol8_MySQL80                      MySQL 8.0 for Oracle Linux 8 (aarch64) enabled
ol8_MySQL80_connectors_community MySQL 8.0 Connectors Community for Ora enabled
ol8_MySQL80_tools_community      MySQL 8.0 Tools Community for Oracle L enabled
ol8_aarch64_userspace_ksplice    Ksplice aware userspace packages for O disabled
ol8_appstream                    Oracle Linux 8 Application Stream (aar enabled
ol8_baseos_latest                Oracle Linux 8 BaseOS Latest (aarch64) enabled
ol8_codeready_builder            Oracle Linux 8 CodeReady Builder (aarc disabled
ol8_developer                    Oracle Linux 8 Development Packages (a disabled
ol8_developer_EPEL               Oracle Linux 8 EPEL Packages for Devel disabled
ol8_developer_UEKR6              Developer Preview of UEK Release 6 (aa disabled
ol8_distro_builder               Oracle Linux 8 Distro Builder (aarch64 disabled
ol8_ksplice                      Ksplice for Oracle Linux 8 (aarch64)   enabled
ol8_oci_included                 Oracle Software for OCI users on Oracl enabled
ol8_u2_baseos_base               Oracle Linux 8.2 BaseOS (aarch64)      disabled
ol8_u3_baseos_base               Oracle Linux 8.3 BaseOS (aarch64)      disabled
ol8_u4_baseos_base               Oracle Linux 8.4 BaseOS (aarch64)      disabled
$
$ sudo dnf config-manager --set-enabled ol8_developer_EPEL
$ sudo dnf repolist --all
repo id                          repo name                              status
ol8_MySQL80                      MySQL 8.0 for Oracle Linux 8 (aarch64) enabled
ol8_MySQL80_connectors_community MySQL 8.0 Connectors Community for Ora enabled
ol8_MySQL80_tools_community      MySQL 8.0 Tools Community for Oracle L enabled
ol8_aarch64_userspace_ksplice    Ksplice aware userspace packages for O disabled
ol8_appstream                    Oracle Linux 8 Application Stream (aar enabled
ol8_baseos_latest                Oracle Linux 8 BaseOS Latest (aarch64) enabled
ol8_codeready_builder            Oracle Linux 8 CodeReady Builder (aarc disabled
ol8_developer                    Oracle Linux 8 Development Packages (a disabled
ol8_developer_EPEL               Oracle Linux 8 EPEL Packages for Devel enabled
ol8_developer_UEKR6              Developer Preview of UEK Release 6 (aa disabled
ol8_distro_builder               Oracle Linux 8 Distro Builder (aarch64 disabled
ol8_ksplice                      Ksplice for Oracle Linux 8 (aarch64)   enabled
ol8_oci_included                 Oracle Software for OCI users on Oracl enabled
ol8_u2_baseos_base               Oracle Linux 8.2 BaseOS (aarch64)      disabled
ol8_u3_baseos_base               Oracle Linux 8.3 BaseOS (aarch64)      disabled
ol8_u4_baseos_base               Oracle Linux 8.4 BaseOS (aarch64)      disabled
$
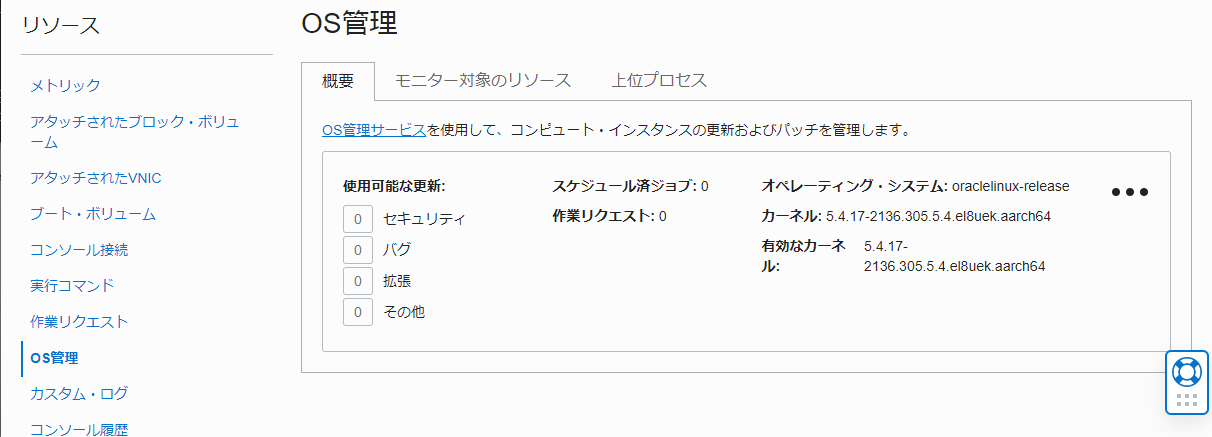
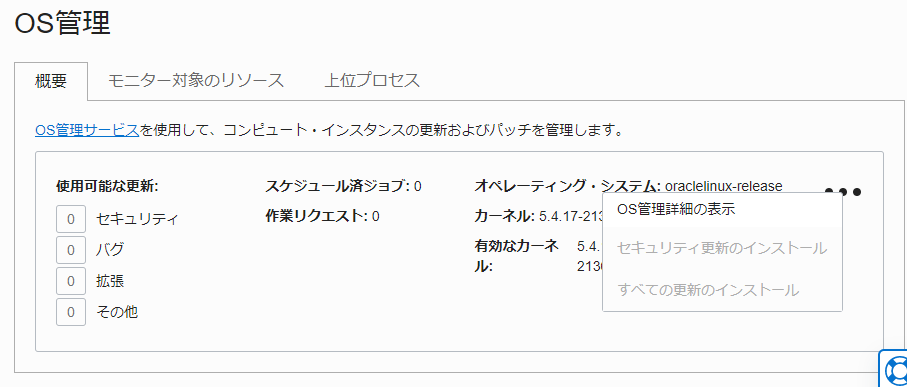
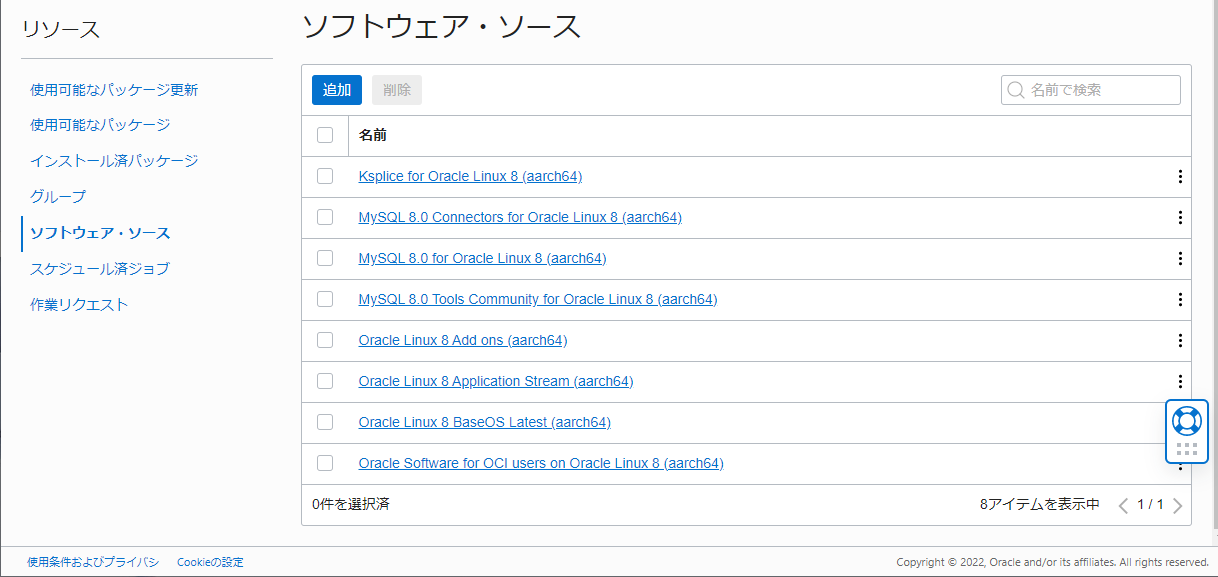
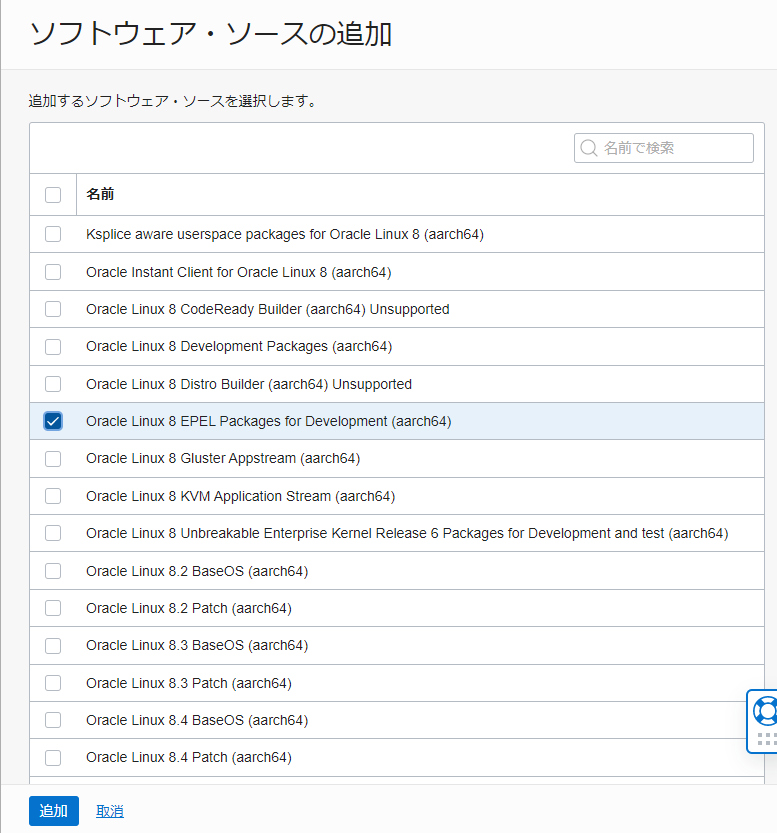
手順3-1b:Oracle CloudのOS管理下にある場合の手順
2022年4月6日時点でOracle Cloud上で提供されているOracle-Linux-8.5-aarch64-2022.03.17-1では「sudo dnf repolist –all」の実行結果に変化があり、「This system is receiving updates from OSMS server.」と書かれた上で、だいぶ整理されたレポジトリのみが表示されます。
$ sudo dnf repolist --all
This system is receiving updates from OSMS server.
repo id                                  repo name                       status
ol8_addons-aarch64                       Oracle Linux 8 Add ons (aarch64 enabled
ol8_appstream-aarch64                    Oracle Linux 8 Application Stre enabled
ol8_baseos_latest-aarch64                Oracle Linux 8 BaseOS Latest (a enabled
ol8_ksplice-aarch64                      Ksplice for Oracle Linux 8 (aar enabled
ol8_mysql80-aarch64                      MySQL 8.0 for Oracle Linux 8 (a enabled
ol8_mysql80_connectors_community-aarch64 MySQL 8.0 Connectors for Oracle enabled
ol8_mysql80_tools_community-aarch64      MySQL 8.0 Tools Community for O enabled
ol8_oci_included-aarch64                 Oracle Software for OCI users o enabled
$
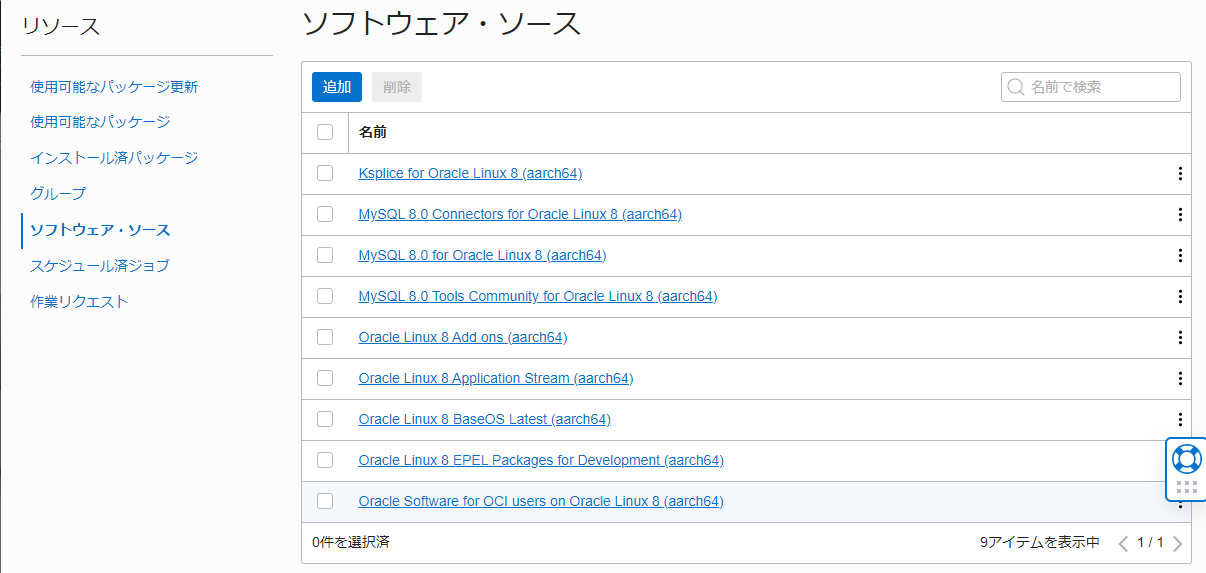
$ sudo dnf repolist --all
This system is receiving updates from OSMS server.
repo id                                  repo name                       status
ol8_addons-aarch64                       Oracle Linux 8 Add ons (aarch64 enabled
ol8_appstream-aarch64                    Oracle Linux 8 Application Stre enabled
ol8_baseos_latest-aarch64                Oracle Linux 8 BaseOS Latest (a enabled
ol8_developer_epel-aarch64               Oracle Linux 8 EPEL Packages fo enabled
ol8_ksplice-aarch64                      Ksplice for Oracle Linux 8 (aar enabled
ol8_mysql80-aarch64                      MySQL 8.0 for Oracle Linux 8 (a enabled
ol8_mysql80_connectors_community-aarch64 MySQL 8.0 Connectors for Oracle enabled
ol8_mysql80_tools_community-aarch64      MySQL 8.0 Tools Community for O enabled
ol8_oci_included-aarch64                 Oracle Software for OCI users o enabled
Oracle Linux 8環境では、moduleという形で複数バージョンのソフトウェアが提供されています。
phpに関してどのようなものがあるのかを「dnf module list | grep php」を実行して確認します。
$ sudo dnf module list | grep php
php                  7.2 [d]         common [d], devel, minimal               PHP scripting language
php                  7.3             common [d], devel, minimal               PHP scripting language
php                  7.4             common [d], devel, minimal               PHP scripting language
$
php 7.2が標準選択で、他にphp 7.3とphp 7.4が選べることがわかります。 2022/07/01時点で提供されているOracle Linux 8.6では php 8.0も選択できるようになっています。
php7.4を指定してパッケージを追加します。
$ sudo dnf install @php:7.4 -y
Last metadata expiration check: 0:07:11 ago on Thu 27 May 2021 01:04:16 PM JST.
Dependencies resolved.
==========================================================================================================================================
 Package                     Architecture       Version                                                Repository                    Size
==========================================================================================================================================
Installing group/module packages:
 php-cli                     aarch64            7.4.6-4.module+el8.3.0+7685+72d70b58                   ol8_appstream                2.8 M
 php-common                  aarch64            7.4.6-4.module+el8.3.0+7685+72d70b58                   ol8_appstream                675 k
 php-fpm                     aarch64            7.4.6-4.module+el8.3.0+7685+72d70b58                   ol8_appstream                1.5 M
 php-json                    aarch64            7.4.6-4.module+el8.3.0+7685+72d70b58                   ol8_appstream                 73 k
 php-mbstring                aarch64            7.4.6-4.module+el8.3.0+7685+72d70b58                   ol8_appstream                474 k
 php-xml                     aarch64            7.4.6-4.module+el8.3.0+7685+72d70b58                   ol8_appstream                166 k
Installing dependencies:
 httpd-filesystem            noarch             2.4.37-39.0.1.module+el8.4.0+20024+b87b2deb            ol8_appstream                 39 k
 libxslt                     aarch64            1.1.32-6.0.1.el8                                       ol8_baseos_latest            239 k
 nginx-filesystem            noarch             1:1.14.1-9.0.1.module+el8.0.0+5347+9282027e            ol8_appstream                 25 k
Installing module profiles:
 php/common
Enabling module streams:
 httpd                                          2.4
 nginx                                          1.14
 php                                            7.4

Transaction Summary
==========================================================================================================================================
Install  9 Packages

Total download size: 5.9 M
Installed size: 23 M
Downloading Packages:
<略>
$
手順6: MySQL設定編
Oralce Linux 8ではわざわざ「MySQL 8.0 for Oracle Linux 8 (aarch64)」を用意していますが、よく見るとそこにmysql-serverはなく、メインのol8_appstream に含まれているという理由はよくわかりませんが、せっかくなのでそのまま使用します。
MySQL 8におけるデータベースユーザ作成と権限の割り当てが従来の「grant all on DB名.* to wordpress@localhost identified by ‘パスワード’;」という一文から、「create user ~」と「grant ~」の2つに分かれている点に注意が必要です。
$ sudo mysql -u root
Welcome to the MySQL monitor.  Commands end with ; or \g.
Your MySQL connection id is 8
Server version: 8.0.21 Source distribution

Copyright (c) 2000, 2020, Oracle and/or its affiliates. All rights reserved.

Oracle is a registered trademark of Oracle Corporation and/or its
affiliates. Other names may be trademarks of their respective
owners.

Type 'help;' or '\h' for help. Type '\c' to clear the current input statement.

mysql> create database DB名 character set utf8;
Query OK, 1 row affected, 1 warning (0.00 sec)

mysql> create user wordpress@localhost  identified by 'パスワード';
Query OK, 0 rows affected (0.01 sec)

mysql> grant all privileges on DB名.* to wordpress@localhost;
Query OK, 0 rows affected (0.00 sec)

mysql> quit
Bye
$
$ sudo dehydrated --register
# INFO: Using main config file /etc/dehydrated/config
# INFO: Using additional config file /etc/dehydrated/conf.d/local.sh

To use dehydrated with this certificate authority you have to agree to their terms of service which you can find here: https://letsencrypt.org/documents/LE-SA-v1.2-November-15-2017.pdf

To accept these terms of service run `/bin/dehydrated --register --accept-terms`.
$ sudo /bin/dehydrated --register --accept-terms
# INFO: Using main config file /etc/dehydrated/config
# INFO: Using additional config file /etc/dehydrated/conf.d/local.sh
+ Generating account key...
+ Registering account key with ACME server...
+ Fetching account ID...
+ Done!
$
初回のSSL証明書発行処理を実行します。
$ sudo dehydrated --cron
# INFO: Using main config file /etc/dehydrated/config
# INFO: Using additional config file /etc/dehydrated/conf.d/local.sh
Processing ホスト1名.ドメイン名 with alternative names: ホスト2名.ドメイン名
 + Signing domains...
 + Generating private key...
 + Generating signing request...
 + Requesting new certificate order from CA...
 + Received 2 authorizations URLs from the CA
 + Handling authorization for ホスト1名.ドメイン名
 + Handling authorization for ホスト2名.ドメイン名
 + 2 pending challenge(s)
 + Deploying challenge tokens...
 + Responding to challenge for ホスト1名.ドメイン名 authorization...
 + Challenge is valid!
 + Responding to challenge for ホスト2名.ドメイン名 authorization...
 + Challenge is valid!
 + Cleaning challenge tokens...
 + Requesting certificate...
 + Checking certificate...
 + Done!
 + Creating fullchain.pem...
 + Done!
$
手順7-3: WebサーバへのSSL証明書設定
まず、httpdにmod_sslを追加します。
$ sudo dnf install mod_ssl -y
Last metadata expiration check: 1:36:21 ago on Thu 27 May 2021 01:04:16 PM JST.
Dependencies resolved.
================================================================================
 Package
      Arch    Version                                       Repository     Size
================================================================================
Installing:
 mod_ssl
      aarch64 1:2.4.37-39.0.1.module+el8.4.0+20024+b87b2deb ol8_appstream 126 k

Transaction Summary
================================================================================
Install  1 Package

Total download size: 126 k
Installed size: 274 k
Downloading Packages:
<略>
$
$ cd /var/www/html/
$ ls
$ sudo curl -O https://wordpress.org/latest.tar.gz
  % Total    % Received % Xferd  Average Speed   Time    Time     Time  Current
                                 Dload  Upload   Total   Spent    Left  Speed
100 15.0M  100 15.0M    0     0  6978k      0  0:00:02  0:00:02 --:--:-- 6978k
$ ls
latest.tar.gz
$ sudo tar xfz latest.tar.gz
$ ls -l
total 15388
-rw-r--r--. 1 root   root   15750424 May 27 14:54 latest.tar.gz
drwxr-xr-x. 5 nobody nobody     4096 May 13 08:49 wordpress
$ sudo rm latest.tar.gz
$
現在の設定値を「sudo getsebool -a |grep httpd_can_network」で確認し、「sudo setsebool -P httpd_can_network_connect on」で有効にする
$ sudo getsebool -a |grep httpd_can_network
httpd_can_network_connect --> off
httpd_can_network_connect_cobbler --> off
httpd_can_network_connect_db --> off
httpd_can_network_memcache --> off
httpd_can_network_relay --> off
$ sudo setsebool -P httpd_can_network_connect on
$ sudo getsebool -a |grep httpd_can_network
httpd_can_network_connect --> on
httpd_can_network_connect_cobbler --> off
httpd_can_network_connect_db --> off
httpd_can_network_memcache --> off
httpd_can_network_relay --> off
$
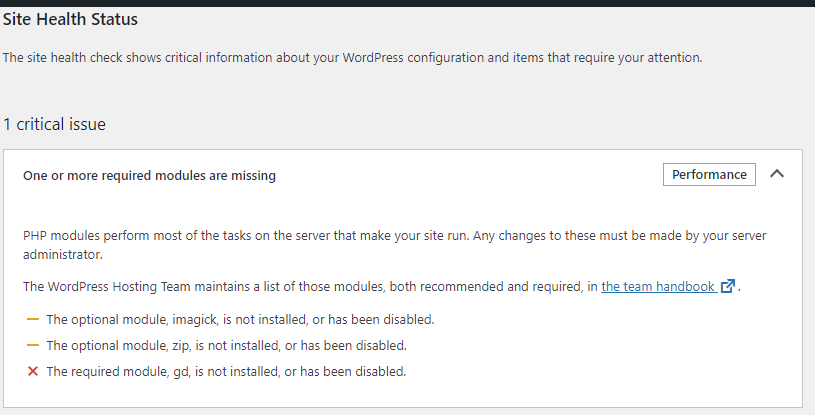
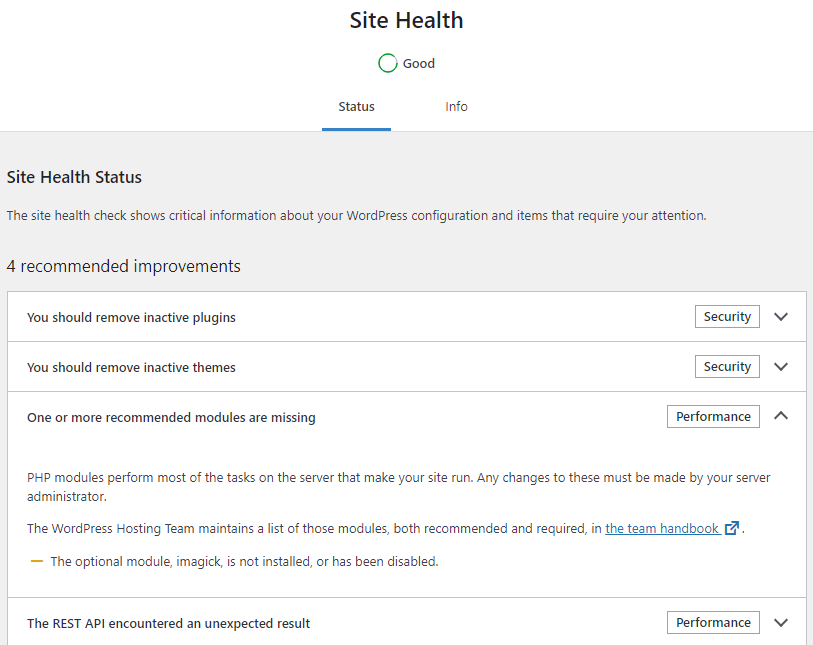
$ dnf search magick
Last metadata expiration check: 2:56:09 ago on Thu 27 May 2021 01:10:22 PM JST.
======================== Name & Summary Matched: magick ========================
GraphicsMagick.aarch64 : An ImageMagick fork, offering faster image generation
                       : and better quality
GraphicsMagick.src : An ImageMagick fork, offering faster image generation and
                   : better quality
GraphicsMagick-c++.aarch64 : GraphicsMagick Magick++ library (C++ bindings)
GraphicsMagick-c++-devel.aarch64 : C++ bindings for the GraphicsMagick library
GraphicsMagick-debugsource.aarch64 : Debug sources for package GraphicsMagick
GraphicsMagick-devel.aarch64 : Libraries and header files for GraphicsMagick app
                             : development
GraphicsMagick-doc.noarch : GraphicsMagick documentation
GraphicsMagick-perl.aarch64 : GraphicsMagick perl bindings
ImageMagick-c++.aarch64 : ImageMagick Magick++ library (C++ bindings)
ImageMagick-c++-devel.aarch64 : C++ bindings for the ImageMagick library
ImageMagick-devel.aarch64 : Library links and header files for ImageMagick app
                          : development
ImageMagick-doc.aarch64 : ImageMagick html documentation
ImageMagick-libs.aarch64 : ImageMagick libraries to link with
ImageMagick-perl.aarch64 : ImageMagick perl bindings
============================= Name Matched: magick =============================
ImageMagick.aarch64 : An X application for displaying and manipulating images
ImageMagick.src : An X application for displaying and manipulating images
=========================== Summary Matched: magick ============================
converseen.aarch64 : A batch image conversion tool written in C++ with Qt5 and
                   : Magick++
converseen.src : A batch image conversion tool written in C++ with Qt5 and
               : Magick++
$
$ sudo vi /etc/dnf/automatic.conf
$ cat /etc/dnf/automatic.conf
[commands]
#  What kind of upgrade to perform:
# default                            = all available upgrades
# security                           = only the security upgrades
upgrade_type = default
random_sleep = 0

# Maximum time in seconds to wait until the system is on-line and able to
# connect to remote repositories.
network_online_timeout = 60

# To just receive updates use dnf-automatic-notifyonly.timer

# Whether updates should be downloaded when they are available, by
# dnf-automatic.timer. notifyonly.timer, download.timer and
# install.timer override this setting.
download_updates = yes

# Whether updates should be applied when they are available, by
# dnf-automatic.timer. notifyonly.timer, download.timer and
# install.timer override this setting.
apply_updates = yes


[emitters]
# Name to use for this system in messages that are emitted.  Default is the
# hostname.
# system_name = my-host

# How to send messages.  Valid options are stdio, email and motd.  If
# emit_via includes stdio, messages will be sent to stdout; this is useful
# to have cron send the messages.  If emit_via includes email, this
# program will send email itself according to the configured options.
# If emit_via includes motd, /etc/motd file will have the messages. if
# emit_via includes command_email, then messages will be send via a shell
# command compatible with sendmail.
# Default is email,stdio.
# If emit_via is None or left blank, no messages will be sent.
emit_via = stdio


[email]
# The address to send email messages from.
email_from = root@example.com

# List of addresses to send messages to.
email_to = root

# Name of the host to connect to to send email messages.
email_host = localhost


[command]
# The shell command to execute. This is a Python format string, as used in
# str.format(). The format function will pass a shell-quoted argument called
# `body`.
# command_format = "cat"

# The contents of stdin to pass to the command. It is a format string with the
# same arguments as `command_format`.
# stdin_format = "{body}"


[command_email]
# The shell command to use to send email. This is a Python format string,
# as used in str.format(). The format function will pass shell-quoted arguments
# called body, subject, email_from, email_to.
# command_format = "mail -Ssendwait -s {subject} -r {email_from} {email_to}"

# The contents of stdin to pass to the command. It is a format string with the
# same arguments as `command_format`.
# stdin_format = "{body}"

# The address to send email messages from.
email_from = root@example.com

# List of addresses to send messages to.
email_to = root


[base]
# This section overrides dnf.conf

# Use this to filter DNF core messages
debuglevel = 1
$
そしてdnf-automatic.timerを有効化し、開始します。
$ sudo systemctl enable dnf-automatic.timer
Created symlink /etc/systemd/system/timers.target.wants/dnf-automatic.timer → /usr/lib/systemd/system/dnf-automatic.timer.
$ sudo systemctl status dnf-automatic
● dnf-automatic.service - dnf automatic
   Loaded: loaded (/usr/lib/systemd/system/dnf-automatic.service; static; vendo>
   Active: inactive (dead)
$ sudo systemctl start dnf-automatic.timer
$ sudo systemctl status dnf-automatic.timer
● dnf-automatic.timer - dnf-automatic timer
   Loaded: loaded (/usr/lib/systemd/system/dnf-automatic.timer; enabled; vendor>
   Active: active (waiting) since Wed 2021-06-02 17:26:38 JST; 2s ago
  Trigger: Thu 2021-06-03 06:07:23 JST; 12h left

Jun 02 17:26:38 ホスト名 systemd[1]: Started dnf-automatic timer.
$
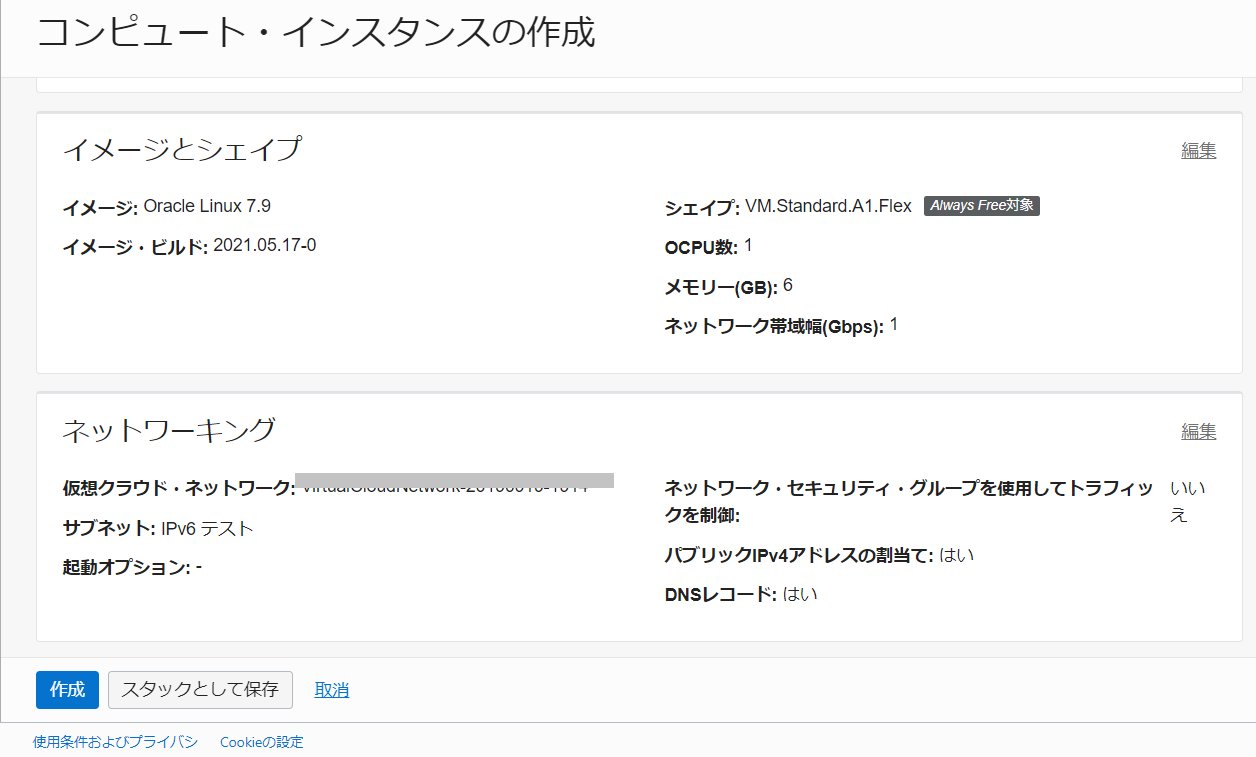
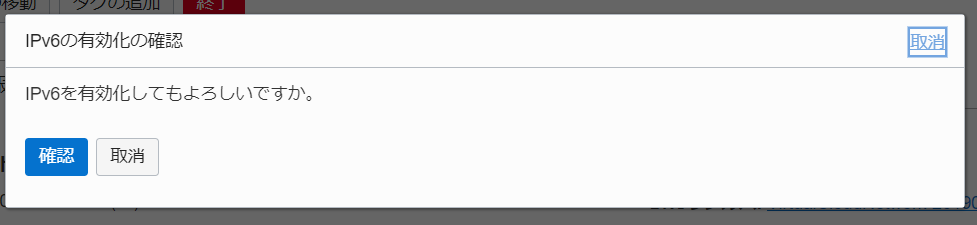
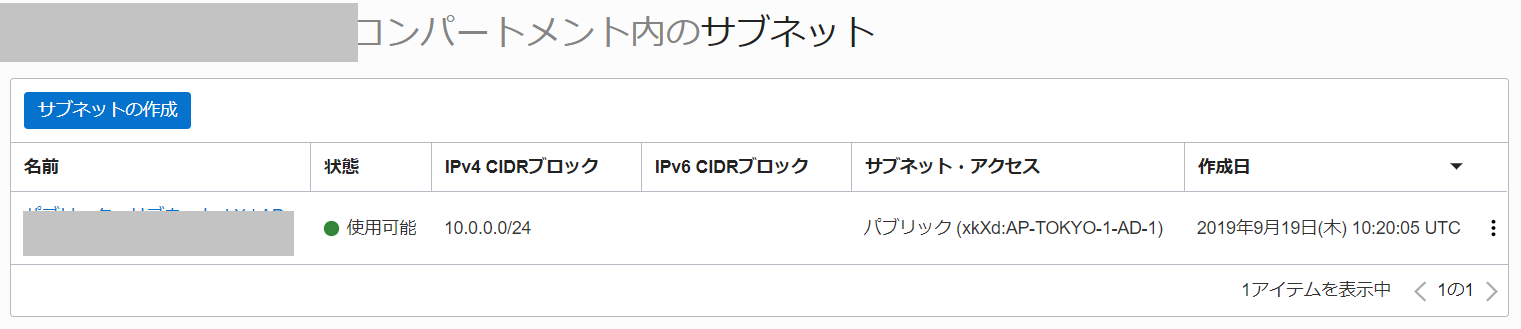
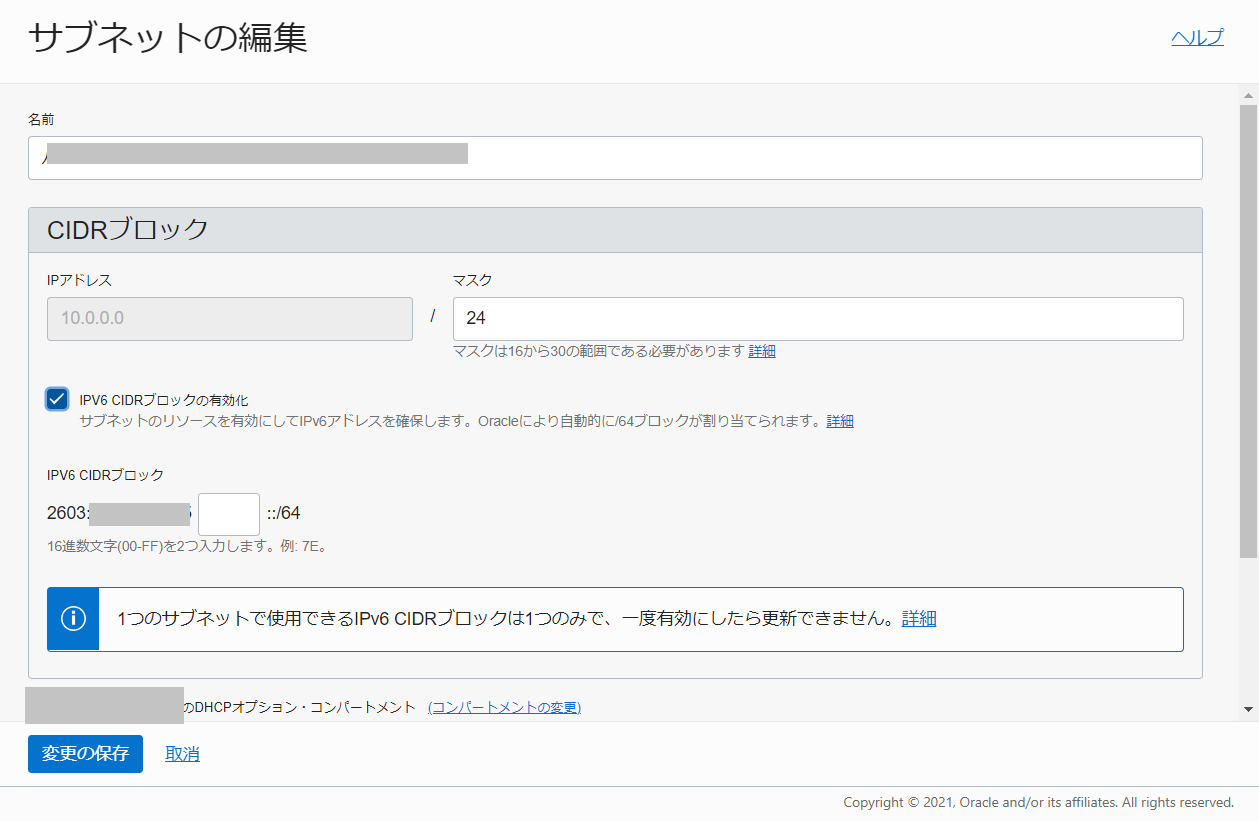
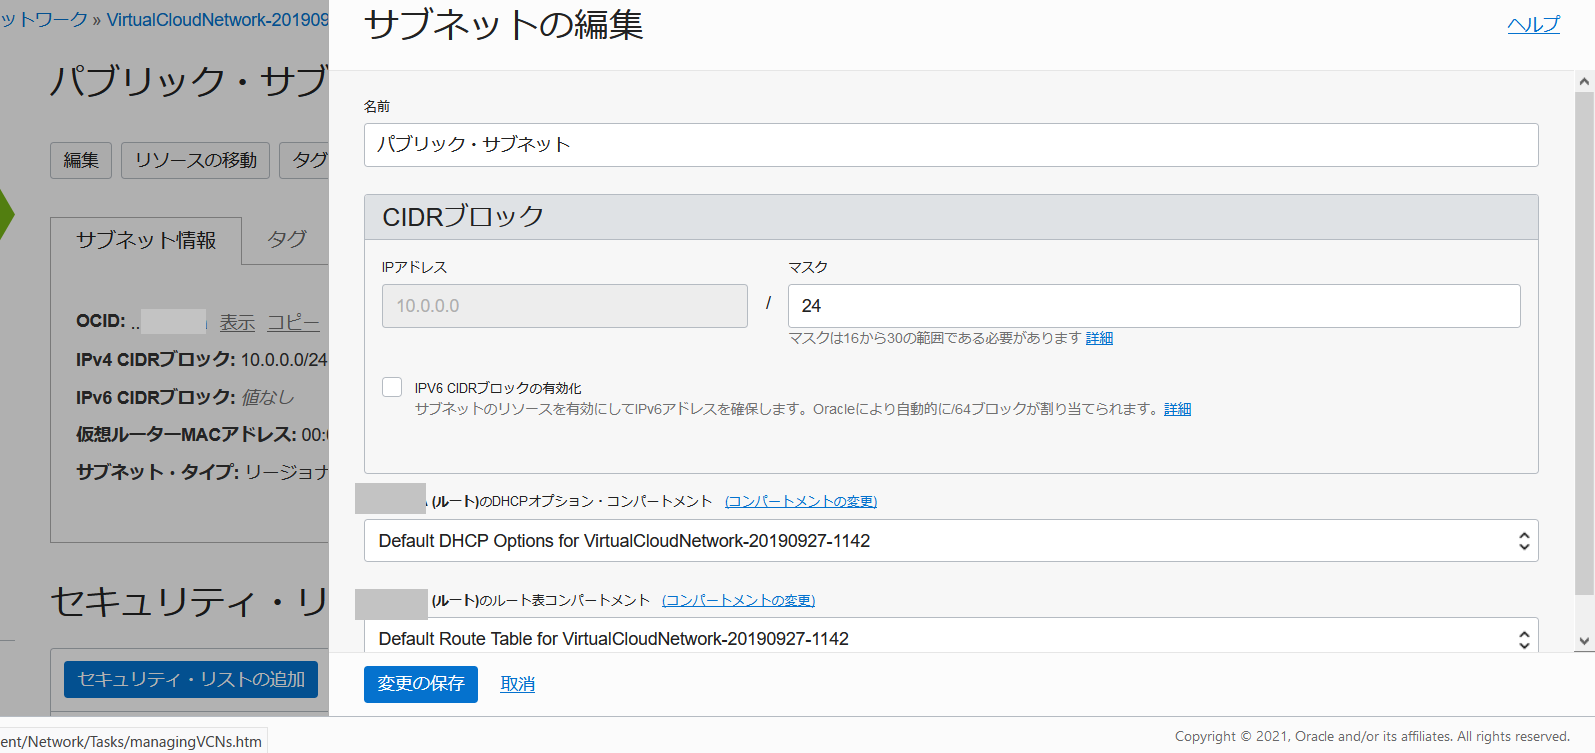
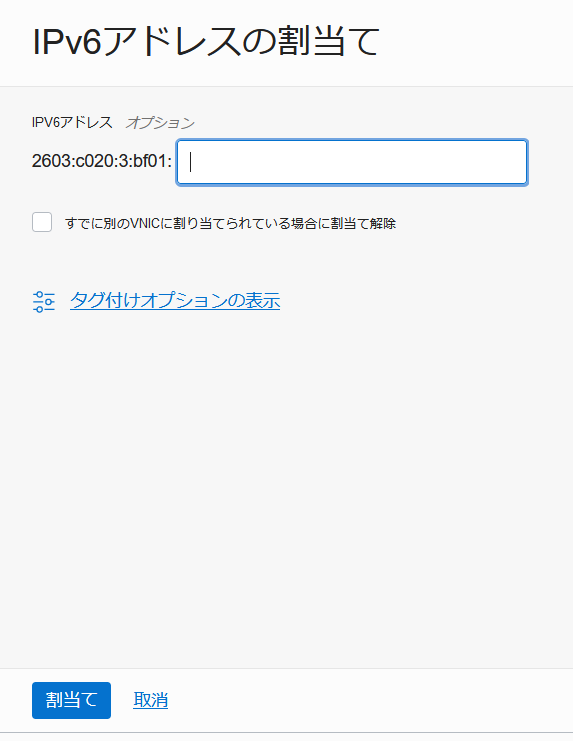
また、2021/05/26時点でのOracle Linux 7提供イメージでは、IPv6アドレスが有効化されていないため、インスタンス内のOS設定を変更する必要があり、DHCPv6アドレス取得ができなかったので、disable-ipv6.confと01_ipv6を作成した。 Oracle Linux 8だとIPv6有効化されていたがDHCPv6アドレス取得ができなかったので01_ipv6を作成したfirewalldにdhcpv6-clientの設定がされていないのでDHCPv6アドレス取得に失敗していたので設定を変更した。 Ubuntu 20.04ではIPv6有効化されておりDHCPv6アドレス取得はできたものの起動時に自動取得はしなかったので01_ipv6を作成しdhclient -6の方を有効にした。