Oracle Cloud上に作成したインスタンスのうち、Oracle Autonomouse Linux 7インスタンスだと適切に設定している場合、yum-cronなどが実行された際に 送信者 noreply@notification.~.oci.oraclecloud.com でメールを送信する設定になっている。
Oralce Linux 8インスタンスだとそのような設定にはなっていない。
似たような形でインスタンスのrootから送信されるメールを noreply@notification.~.oci.oraclecloud.com で発信する方法があるかを確認した。
参考ドキュメント
Oracle Cloud Infrastructureドキュメント「電子メール配信の開始」
Oracle Cloud Infrastructureドキュメント「Postfixと電子メール配信の統合」
しかし、「電子メール配信」については有料アカウントが必要になるようだ。
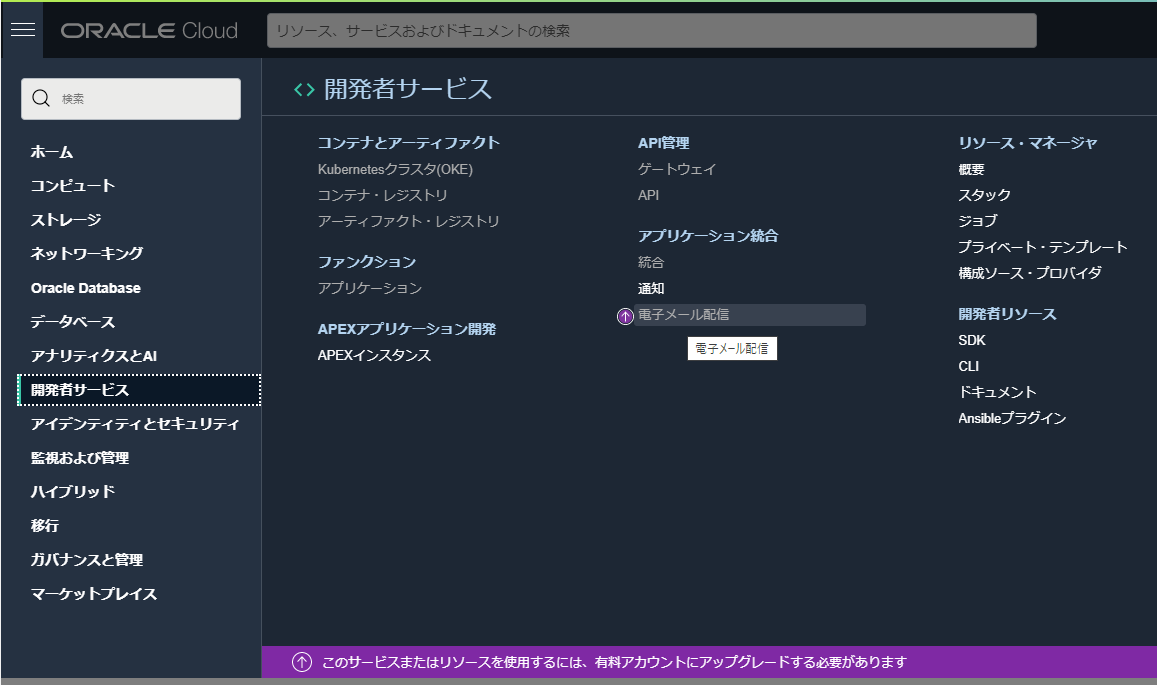
Oracle Autonomouse Linux 7インスタンスが利用しているのは「通知」の方になっている


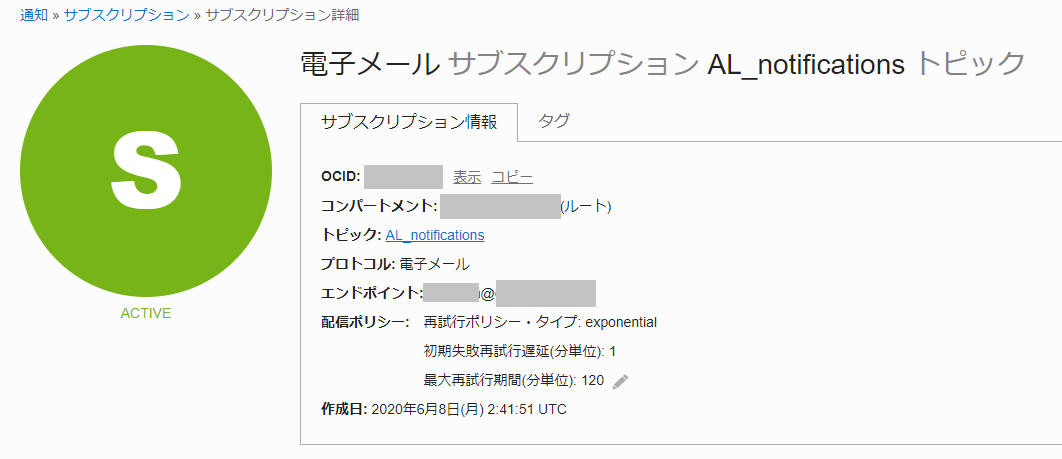
このサブスクリプション設定が流用できればいいんですけど・・・
「Oracle Cloud : 通知サービスとoci-cliを使って一時間ごとにDBCSの状態を通知する」
この情報が使えそうです。
今回の環境ではすでに[開発者サービス]-[アプリケーション統合]-[通知]に

すでにAutonomouse Linux用で作成したトピックが作成されているため、それを流用します。
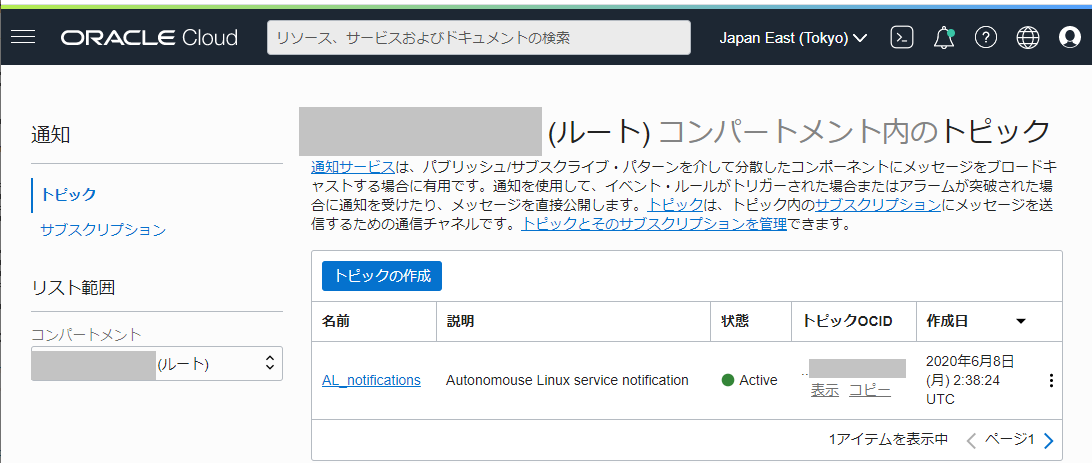
上記の「AL_notification」のトピックOCIDを使用してコマンドを実行・・・
$ oci ons message publish --topic-id ocid1.onstopic.oc1.ap-tokyo-1.<略> --title "test mail" --body "test mail"
-bash: oci: command not found
$
oci-utilsのパッケージがアップデートされていないとエラーになります。その場合はアップデートします。
2024/10/15: いまは python39-oci-cli か python36-oci-cli にociコマンドが含まれているようなので、 oci-utils と python3?-oci-cli をインストールします。
$ sudo dnf update oci-utils -y
Last metadata expiration check: 4:26:16 ago on Tue 08 Jun 2021 01:30:06 PM JST.
Dependencies resolved.
================================================================================
 Package                  Arch     Version            Repository           Size
================================================================================
Upgrading:
 oci-utils                noarch   0.12.4-1.el8       ol8_oci_included    245 k
Installing dependencies:
 python3-arrow            noarch   0.17.0-1.0.1.el8   ol8_oci_included    101 k
 python3-click            noarch   6.7-8.el8          ol8_appstream       131 k
 python3-convertdate      noarch   2.3.0-1.0.1.el8    ol8_oci_included     83 k
 python3-dateparser       noarch   1.0.0-1.0.1.el8    ol8_oci_included    392 k
 python3-hijri-converter  noarch   2.1.1-1.0.1.el8    ol8_oci_included     30 k
 python3-jmespath         noarch   0.10.0-1.el8       ol8_oci_included     48 k
 python3-pymeeus          noarch   0.3.6-2.0.1.el8    ol8_oci_included    1.1 M
 python3-regex            aarch64  2021.4.4-1.el8     ol8_developer_EPEL  328 k
 python3-retrying         noarch   1.3.3-1.0.1.el8    ol8_oci_included     22 k
 python3-terminaltables   noarch   3.1.0-1.0.1.el8    ol8_oci_included     31 k
 python3-tzlocal          noarch   2.0.0-4.el8        ol8_oci_included     37 k
 python36-oci-cli         noarch   2.22.1-1.el8       ol8_oci_included    6.4 M

Transaction Summary
================================================================================
Install  12 Packages
Upgrade   1 Package

Total download size: 8.9 M
<略>
$
$ oci ons message publish --topic-id ocid1.onstopic.oc1.ap-tokyo-1.<略> --title "test mail" --body "test mail"
ERROR: Could not find config file at /home/opc/.oci/config, please follow the instructions in the link to setup the config file https://docs.cloud.oracle.com/en-us/iaas/Content/API/Concepts/sdkconfig.htm
$
ociコマンドに必要な諸設定を行っていないのでエラーになりました。
まず、キーを作成します。なお、passphraseは何も入力せずエンターキーのみにします(そうしないとスクリプト実行の時にpassphraseを要求される)
$ oci setup keys
Enter a passphrase for your private key (empty for no passphrase):
Public key written to: /home/opc/.oci/oci_api_key_public.pem
Private key written to: /home/opc/.oci/oci_api_key.pem
Public key fingerprint: xx:xx:xx:xx:xx:xx:xx:xx:xx:xx:xx:xx:xx:xx:xx:xx


    If you haven't already uploaded your API Signing public key through the
    console, follow the instructions on the page linked below in the section
    'How to upload the public key':

        https://docs.cloud.oracle.com/Content/API/Concepts/apisigningkey.htm#How2

$  ls -al ~/.oci
total 8
drwx------. 2 opc opc   59 Jun  7 17:32 .
drwx------. 5 opc opc  138 Jun  7 17:32 ..
-rw-------. 1 opc opc 1679 Jun  7 17:32 oci_api_key.pem
-rw-------. 1 opc opc  451 Jun  7 17:32 oci_api_key_public.pem
$
作成された oci_api_key_public.pem の内容を[アイデンティティとセキュリティ]-[アイデンティティ]-[ユーザー]に登録されている各ユーザから、使用するユーザを選択し[リソース]-[APIキー]に登録します。

なお、APIキーは無料アカウントでは3つまで登録可能で、それ以上は登録できませんでした。
使ってないものを消すには面倒くさいですが、各ユーザの~/.oci/oci_api_key.pem のフィンガープリントを計算して、登録されているものを比較する必要があります。
フィンガープリントの計算手法はOracle Cloudドキュメント「キーのフィンガープリントの取得方法」にあるように「openssl rsa -pubout -outform DER -in ~/.oci/oci_api_key.pem | openssl md5 -c」で実施出来ます。
つぎに~/.oci/config ファイル作成のために
[ガバナンスと管理]-[アカウント管理]-[テナンシ詳細]にて、テナントのOCIDを取得

また、ユーザのOCIDと先ほど登録したAPIキーのフィンガープリントを configファイルに記載する。
$ cat ~/.oci/config
[DEFAULT]
key_file=/home/opc/.oci/oci_api_key.pem
region=ap-tokyo-1
tenancy=ocid1.tenancy.oc1..aaaaaaaa7lml<略>
user=ocid1.user.oc1..aaaaaaaamenibh4iny<略>
fingerprint=<略>
$
記載してociコマンドを再実行
$ oci ons message publish --topic-id ocid1.onstopic.oc1.ap-tokyo-1.aa<略> --title "test mail" --body "test mail"
WARNING: Permissions on /home/opc/.oci/config are too open.
To fix this please try executing the following command:
oci setup repair-file-permissions --file /home/opc/.oci/config
Alternatively to hide this warning, you may set the environment variable, OCI_CLI_SUPPRESS_FILE_PERMISSIONS_WARNING:
export OCI_CLI_SUPPRESS_FILE_PERMISSIONS_WARNING=True

{
  "data": {
    "message-id": "56ca7636-1605-7a19-5344-<略>",
    "time-stamp": null
  }
}
$
まず、「WARNING: Permissions on /home/opc/.oci/config are too open.」についてはパーミッション問題なので、書いてある通りに対処する。
$ ls -l /home/opc/.oci/config
-rw-rw-rw-. 1 opc opc 299 Jun  7 17:43 /home/opc/.oci/config
$ oci setup repair-file-permissions --file /home/opc/.oci/config
$ ls -l /home/opc/.oci/config
-rw-------. 1 opc opc 299 Jun  7 17:43 /home/opc/.oci/config
$
再実行
$ oci ons message publish --topic-id ocid1.onstopic.oc1.ap-tokyo-1.aaaaaaaacesi5<略> --title "test mail" --body "test mail"
{
  "data": {
    "message-id": "c491e672-9401-beb3-16f5-<略>",
    "time-stamp": null
  }
}
$
成功か失敗か分かりづらいですが、成功していました。(WARNING: Permissions の時のやつもメール送信は出来ていました)
というわけで、ociコマンドを使用することで、Oracle Cloudの通知を使ってシステムメールを送信することができそうなことがわかりました。
ociコマンドは https://github.com/oracle/oci-cli にソースがある
つぎに dnf automaticでそれを実行するにはどういう手法が最適化の検討です。
「DNF Automatic」には「[command] section」と「[command_email] section」があり、利用できそうです。
違いの詳細については「RHEL8/CentOS8のdnf automaticのemitters設定を調べた」に書きましたが、今回の場合は[command_email]sectionを使うことにします。
dnf automaticではメール本文を標準入力で指定することになっていて、そのままではociコマンドのbodyオプションとして渡すことができません。
なので、Oracle Cloud Infrastructure Document Notifications Publish Messages(日本語版) を起点に調べていったところOracle Cloud Infrastructure Documentation / API Reference and Endpoints の「PublishMessage」にて、REST API/Java SDK/Python SDK/Go SDK/TypeScript SDK/.NET SDK/Ruby SDKを使った場合のコードサンプルを発見。
ociコマンドはpyhonを使っているので、Python SDKのサンプルコードを利用した /usr/local/bin/oci-notification-mail を作って使用します。
topic_id=のところは自分の環境に合わせてください。
$ sudo vi /usr/local/bin/oci-notification-mail
$ cat /usr/local/bin/oci-notification-mail
#!/usr/bin/python3
# This is an automatically generated code sample.
# To make this code sample work in your Oracle Cloud tenancy,
# please replace the values for any parameters whose current values do not fit
# your use case (such as resource IDs, strings containing ‘EXAMPLE’ or ‘unique_id’, and
# boolean, number, and enum parameters with values not fitting your use case).

import oci
import sys

argvs=sys.argv
argc = len(argvs)
subject=argvs[1]
textbody="".join(sys.stdin.readlines())

# Create a default config using DEFAULT profile in default location
# Refer to
# https://docs.cloud.oracle.com/en-us/iaas/Content/API/Concepts/sdkconfig.htm#SDK_and_CLI_Configuration_File
# for more info
config = oci.config.from_file()


# Initialize service client with default config file
ons_client = oci.ons.NotificationDataPlaneClient(config)

# Send the request to service, some parameters are not required, see API
# doc for more info
publish_message_response = ons_client.publish_message(
    topic_id="ocid1.onstopic.oc1.ap-tokyo-1.<略>",
    message_details=oci.ons.models.MessageDetails(
        body=textbody,
        title=subject),
    message_type="RAW_TEXT")

# Get the data from response
print(publish_message_response.data)
$ sudo chmod a+x /usr/local/bin/oci-notification-mail
$
まずこれを作成したあと、送信テストをします。
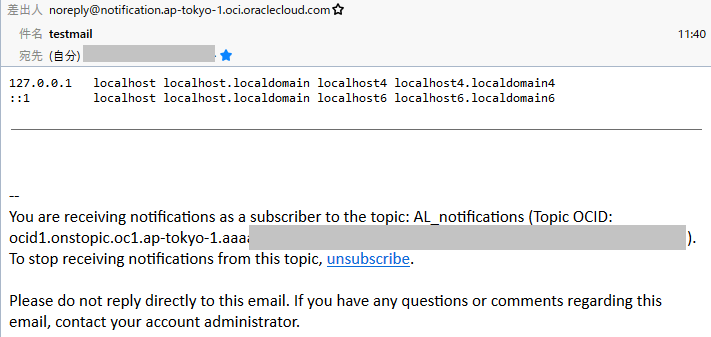
$ cat /etc/hosts | /usr/local/bin/oci-notification-mail testmail
{
  "message_id": "ef1aa15b-98d0-1824-68ef-<略>",
  "time_stamp": null
}
$
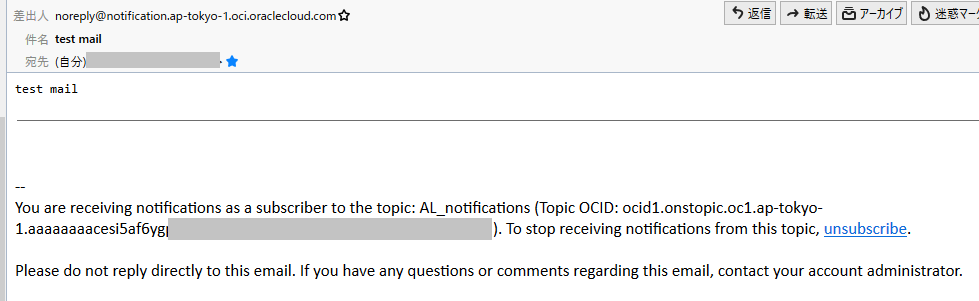
これを実行してしばらく待つと、「Subject:testmail」 で、本文が/etc/hostsの中身になっているメールが届きます。
スクリプトが正常に動作することを確認できたら、ociコマンドがrootユーザでも実行できるように .oci ディレクトリの内容を /root/.oci にコピーします。書かれてるpemファイルのパスなどはそのままでかまいません。注意点は /root/.oci ディレクトリの権限を 700 にしておく、ということです。
最後にdnf automaticの設定を変更します。
変更する場所は2つ
「[emitters] セクション」のemit_via を「emit_via=command_email」に変更
「[command_email]セクション」のcommand_formatを「command_format = “/usr/local/bin/oci-notification-mail {subject}”」、「#stdin_format = “{body}”」を「stdin_format = “{body}”」に変更します。
これにより、dnf automaticでパッチが適用された場合に下記の様なメールが届くようになりました。

おまけ
ちなみに、Oracle Linux 8の標準インスタンスではpostfixやsendmailではなく、esmtp というパッケージでメール送信が行われるようです。
$ ls -l /usr/sbin/sendmail
lrwxrwxrwx. 1 root root 21 May 27 13:04 /usr/sbin/sendmail -> /etc/alternatives/mta
$ ls -l /etc/alternatives/mta
lrwxrwxrwx. 1 root root 22 May 27 13:04 /etc/alternatives/mta -> /usr/bin/esmtp-wrapper
$ ls -l /usr/bin/esmtp-wrapper
-rwxr-xr-x. 1 root root 3374 Jul  2  2020 /usr/bin/esmtp-wrapper
$  rpm -qa|grep smtp
esmtp-1.2-15.el8.aarch64
libesmtp-1.0.6-18.el8.aarch64
$ alternatives --display mta
mta - status is auto.
 link currently points to /usr/bin/esmtp-wrapper
/usr/bin/esmtp-wrapper - priority 30
 slave mta-sendmail: /usr/bin/esmtp-wrapper
 slave mta-sendmailman: /usr/share/man/man1/esmtp.1.gz
 slave mta-mailq: /usr/bin/esmtp-wrapper
 slave mta-mailqman: /usr/share/man/man1/esmtp.1.gz
Current `best' version is /usr/bin/esmtp-wrapper.
$
公式ページに「THIS PROJECT IS NO LONGER BEING MAINTAINED. IF IT DOESN’T WORK FOR YOU SEE THESE LINKS.」って書いてあるのにRHEL/CentOS/Oracle Linux 8で使っているのか・・・
“Oracle Cloud上のインスタンスから管理メールを送信する手法” への1件の返信