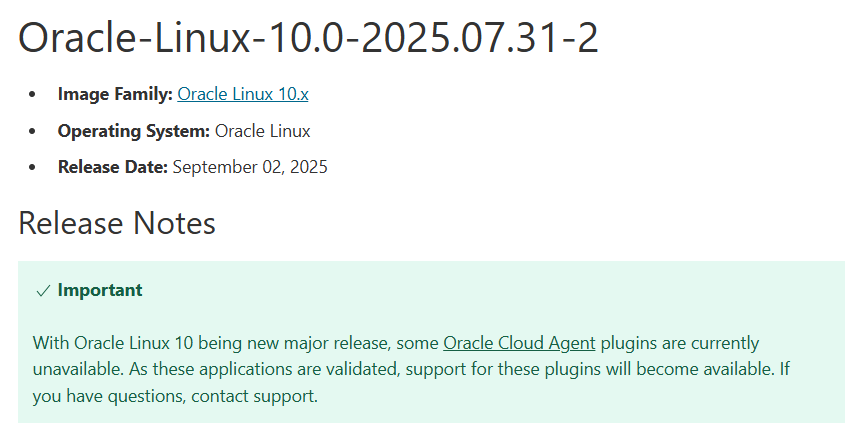
Oracle Cloud InfrastructureでOracle Linux 10イメージがリリースされました。
2025/09/09時点では Oracle-Linux-10.0-2025.08.31-0 というバージョンでした。
こちらを使用してWordPressサーバを立ててみる手順です
ただ、2025/09/09時点ではOracle Linux 10用のOracle Cloud Agentが完成していない、ということで、いまいちお勧めできない状況です。
記事修正履歴
2025/09/09: 作成
2025/09/10:
手順14 SSL証明書自動更新設定を追加
準備1-3: イングレスルールとエグレスルールにIPv6用設定を追加
2025/09/19: トラブル対応手順
トラブル対応手順1: python3-pyOpenSSLのconflict問題
2026/04/30: 修正
Oracle-Linux-10.1-2026.03.31-0 で実施した場合の情報を反映
準備1: Oracle Cloud用手順
準備1-1: IPv6アドレス割り当て:Oracle Cloudコンソール側
Oracle Cloudのコンソールを開いて、インスタンスにIPv6アドレスを割り当てます。
また、割り当てられたIPv6アドレスを確認します。
準備1-2: インスタンス側操作
Oracle Linux 10のイメージではIPv6が有効化されていたので、特に設定する必要はありませんでした。
準備 1-3: クラウドネットワークのセキュリティリストにhttp,https用設定
Oracle Cloudの[ネットワーキング]-[仮想クラウドネットワーク]にて、作成されているvcnを選択
[セキュリティ]をクリックし、「セキュリティリスト」を開き、登録されている「Default Security List for vcn~」をクリック
[セキュリティルール]タブにて、「イングレスルール」として以下を追加する
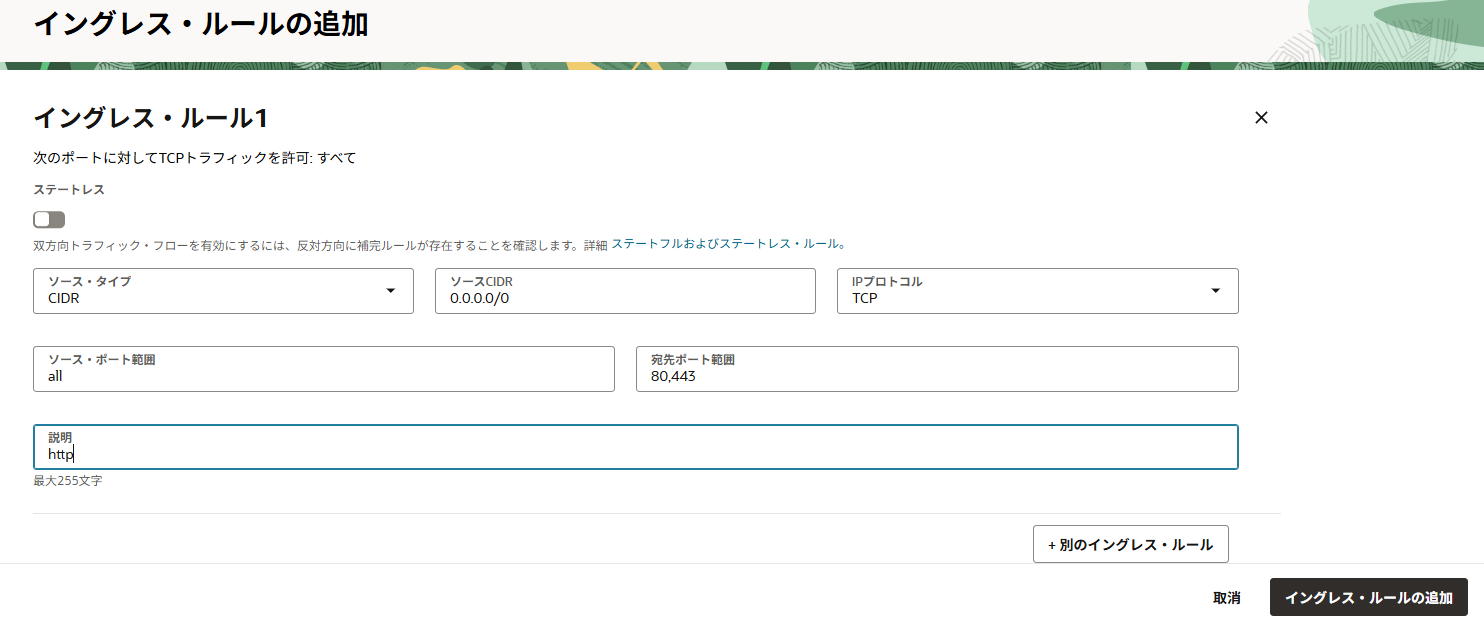
ソースタイプ: CIDR
ソースCIDR: 0.0.0.0/0
IPプロトコル: TCP
ソースポート範囲: all
宛先ポート範囲: 80,443
説明: http
ソースタイプ: CIDR
ソースCIDR: ::/0
IPプロトコル: TCP
ソースポート範囲: all
宛先ポート範囲: 80,443
説明: http for IPv6
また、IPv6経由のsshでアクセスしたい場合にルールがない場合は下記も追加
ソースタイプ: CIDR
ソースCIDR: ::/0
IPプロトコル: TCP
ソースポート範囲: all
宛先ポート範囲: 22
説明: ssh for IPv6
[セキュリティルール]タブにて、「エグレスルール」として以下を追加する(IPv4用の登録はすでにあるが、IPv6用の登録がないので追加する)
宛先タイプ: CIDR
宛先CIDR: ::/0
IPプロトコル: すべてのポートのすべてのトラフィック
説明:
準備2: 一般的な前準備
準備2-1: 日本時間にする
日本に住んでいる場合、日本時間表記の方が使いやすいので、OSも日本時間表示に設定する。
$ sudo timedatectl set-timezone Japan
$
手順2-2:swap追加
Oracle Linux 8からメモリ1GB環境ではEPELレポジトリ追加後のdnfコマンド処理で応答がなくなることが多発している。
調査した結果、メモリとスワップが少ないと発生し、Oracle Linux 9環境では合計で5GB程度ないと支障がでる、ということがわかった。
2025/09/09時点での Oracle-Linux-10.0-2025.08.31-0 ではスワップは約1GBと足らない状態となっている。
追加のファイルスワップを作成できそうな領域は「/パーテーション」か「/var/oledパーテーション」となるので、どちらかにファイルスワップを作成する
[opc@oci10 ~]$ sudo fallocate -l 4G /var/oled/swapfile
[opc@oci10 ~]$ ls -l /var/oled/swapfile
-rw-r--r--. 1 root root 4294967296 Sep  9 13:35 /var/oled/swapfile
[opc@oci10 ~]$ sudo chmod 600 /var/oled/swapfile
[opc@oci10 ~]$ ls -l /var/oled/swapfile
-rw-------. 1 root root 4294967296 Sep  9 13:35 /var/oled/swapfile
[opc@oci10 ~]$ sudo mkswap /var/oled/swapfile
Setting up swapspace version 1, size = 4 GiB (4294963200 bytes)
no label, UUID=bdd4f7a6-1dcc-43c8-bb2d-8f42ac2faf3f
[opc@oci10 ~]$
作成したファイルをスワップとして登録
[opc@oci10 ~]$ sudo swapon /var/oled/swapfile
[opc@oci10 ~]$ swapon --show
NAME               TYPE SIZE   USED PRIO
/.swapfile         file 951M 144.4M   -2
/var/oled/swapfile file   4G     0B   -3
[opc@oci10 ~]$ cat /proc/swaps
Filename                                Type            Size            Used            Priority
/.swapfile                              file            973820          147908          -2
/var/oled/swapfile                      file            4194300         0               -3
[opc@oci10 ~]$
/etc/fstabにスワップファイルの記述「/var/oled/swapfile none swap sw 0 0」を追加
[opc@oci10 ~]$ sudo vi /etc/fstab
[opc@oci10 ~]$ cat /etc/fstab
#
# /etc/fstab
# Created by anaconda on Wed Jul 16 02:09:25 2025
#
# Accessible filesystems, by reference, are maintained under '/dev/disk/'.
# See man pages fstab(5), findfs(8), mount(8) and/or blkid(8) for more info.
#
# After editing this file, run 'systemctl daemon-reload' to update systemd
# units generated from this file.
#
UUID=7d252e5c-0a4d-4f09-afca-58d232b956c2 /                       xfs     defaults        0 0
UUID=02208839-bc64-488a-9f5f-b87452a0f76d /boot                   xfs     defaults        0 0
UUID=9A6D-CFD1          /boot/efi               vfat    defaults,uid=0,gid=0,umask=077,shortname=winnt 0 2
UUID=81c1f07e-ee73-470f-b0ec-d21ad8693c3e /var/oled               xfs     defaults        0 0
tmpfs                   /dev/shm                tmpfs   defaults,nodev,nosuid,noexec      0 0
######################################
## ORACLE CLOUD INFRASTRUCTURE CUSTOMERS
##
## If you are adding an iSCSI remote block volume to this file you MUST
## include the '_netdev' mount option or your instance will become
## unavailable after the next reboot.
## SCSI device names are not stable across reboots; please use the device UUID instead of /dev path.
##
## Example:
## UUID="94c5aade-8bb1-4d55-ad0c-388bb8aa716a"   /data1    xfs       defaults,noatime,_netdev      0      2
##
## More information:
## https://docs.cloud.oracle.com/Content/Block/Tasks/connectingtoavolume.htm
/.swapfile      none    swap    sw      0       0
/var/oled/swapfile      none    swap    sw      0       0
[opc@oci10 ~]$
準備2-3: パッケージを最新にアップデートする
現時点でインストール済みパッケージを最新にします。
$ sudo dnf update -y
<略>
$ sudo reboot
2025/09/19時点ではpython3-pyOpenSSL関連で失敗したので、その場合は、後述の「トラブル対応手順1: python3-pyOpenSSLのconflict問題」を行う (2026/04/30時点ではこの問題は発生しなくなった)
手順2-4:日本語Locale対応
ja_JP.UTF-8など日本語Localeで設定した際、「Failed to set locale, defaulting to C.UTF-8」というメッセージが出力される場合があります。
その場合は日本語Localeを追加インストールします。
$ sudo dnf install langpacks-ja
<略>
$
手順2-5:kdump無効化
メモリが1GBしかないので、kdump.serviceの実行に失敗したりしている。
[opc@oci10 ~]$ systemctl status kdump
× kdump.service - Crash recovery kernel arming
     Loaded: loaded (/usr/lib/systemd/system/kdump.service; enabled; preset: enabled)
     Active: failed (Result: exit-code) since Tue 2025-09-09 12:01:53 JST; 1h 24min ago
 Invocation: 1833096bfd314195995486c8d6963173
   Main PID: 2556 (code=exited, status=1/FAILURE)
   Mem peak: 3.3M
        CPU: 59ms

Sep 09 12:01:52 oci10 systemd[1]: Starting kdump.service - Crash recovery kernel arming...
Sep 09 12:01:53 oci10 kdumpctl[2586]: kdump: No memory reserved for crash kernel
Sep 09 12:01:53 oci10 kdumpctl[2586]: kdump: Starting kdump: [FAILED]
Sep 09 12:01:53 oci10 systemd[1]: kdump.service: Main process exited, code=exited, status=1/FAILURE
Sep 09 12:01:53 oci10 systemd[1]: kdump.service: Failed with result 'exit-code'.
Sep 09 12:01:53 oci10 systemd[1]: Failed to start kdump.service - Crash recovery kernel arming.
[opc@oci10 ~]$
ダンプとっても使わないし、エラーとならないようkdumpを無効化してしまいます。
[opc@oci10 ~]$ sudo systemctl disable kdump.service
Removed '/etc/systemd/system/multi-user.target.wants/kdump.service'.
[opc@oci10 ~]$
手順3: EPELレポジトリの追加
EPELレポジトリを使うので、使用できるようにします。
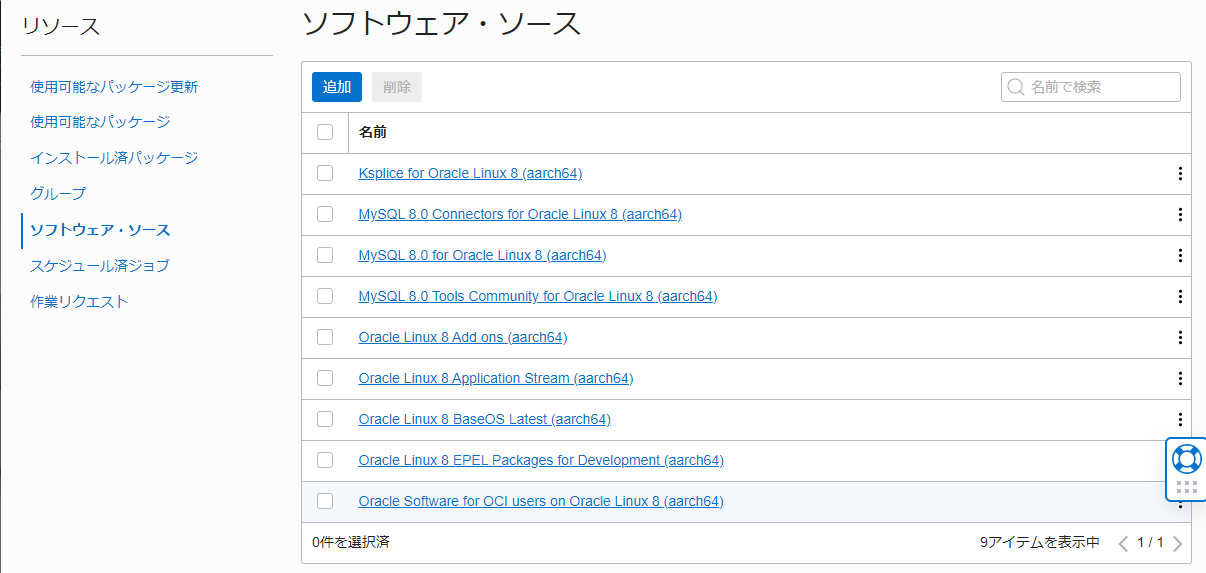
手順3-1:レポジトリの状態を確認
現状のレポジトリ設定状況を「sudo dnf repolist –all」を実行して確認します。
[opc@oci10 ~]$ sudo dnf repolist --all
repo id                                                                                                                                 repo name                                                                                                                                                                status
ol10_RDMA                                                                                                                               Oracle Linux 10 (x86_64) RDMA                                                                                                                                            disabled
ol10_UEKR8                                                                                                                              Oracle Linux 10 UEK Release 8 (x86_64)                                                                                                                                   enabled
ol10_addons                                                                                                                             Oracle Linux 10 Addons (x86_64)                                                                                                                                          enabled
ol10_appstream                                                                                                                          Oracle Linux 10 Application Stream Packages (x86_64)                                                                                                                     enabled
ol10_baseos_latest                                                                                                                      Oracle Linux 10 BaseOS Latest (x86_64)                                                                                                                                   enabled
ol10_codeready_builder                                                                                                                  Oracle Linux 10 CodeReady Builder (x86_64) - (Unsupported)                                                                                                               disabled
ol10_developer                                                                                                                          Oracle Linux 10 Development Packages (x86_64)                                                                                                                            disabled
ol10_distro_builder                                                                                                                     Oracle Linux 10 Distro Builder (x86_64) - (Unsupported)                                                                                                                  disabled
ol10_ksplice                                                                                                                            Ksplice for Oracle Linux 10 (x86_64)                                                                                                                                     enabled
ol10_oci_included                                                                                                                       Oracle Linux 10 OCI Included Packages (x86_64)                                                                                                                           enabled
ol10_u0_baseos_base                                                                                                                     Oracle Linux 10 BaseOS GA (x86_64)                                                                                                                                       disabled
ol10_u0_developer_EPEL                                                                                                                  Oracle Linux 10.0 EPEL Packages for Development (x86_64)                                                                                                                 disabled
ol10_x86_64_userspace_ksplice                                                                                                           Ksplice aware userspace packages for Oracle Linux 10 (x86_64)                                                                                                            disabled
[opc@oci10 ~]$
有効化するために「sudo dnf config-manager –set-enabled ol10_u0_developer_EPEL」を実行します。
2026/04/30時点では「sudo dnf config-manager –set-enabled ol10_u1_developer_EPEL」です
[opc@oci10 ~]$ sudo dnf config-manager --set-enabled ol10_u0_developer_EPEL
[opc@oci10 ~]$ sudo dnf repolist --all
repo id                                                                                                                                 repo name                                                                                                                                                                status
ol10_RDMA                                                                                                                               Oracle Linux 10 (x86_64) RDMA                                                                                                                                            disabled
ol10_UEKR8                                                                                                                              Oracle Linux 10 UEK Release 8 (x86_64)                                                                                                                                   enabled
ol10_addons                                                                                                                             Oracle Linux 10 Addons (x86_64)                                                                                                                                          enabled
ol10_appstream                                                                                                                          Oracle Linux 10 Application Stream Packages (x86_64)                                                                                                                     enabled
ol10_baseos_latest                                                                                                                      Oracle Linux 10 BaseOS Latest (x86_64)                                                                                                                                   enabled
ol10_codeready_builder                                                                                                                  Oracle Linux 10 CodeReady Builder (x86_64) - (Unsupported)                                                                                                               disabled
ol10_developer                                                                                                                          Oracle Linux 10 Development Packages (x86_64)                                                                                                                            disabled
ol10_distro_builder                                                                                                                     Oracle Linux 10 Distro Builder (x86_64) - (Unsupported)                                                                                                                  disabled
ol10_ksplice                                                                                                                            Ksplice for Oracle Linux 10 (x86_64)                                                                                                                                     enabled
ol10_oci_included                                                                                                                       Oracle Linux 10 OCI Included Packages (x86_64)                                                                                                                           enabled
ol10_u0_baseos_base                                                                                                                     Oracle Linux 10 BaseOS GA (x86_64)                                                                                                                                       disabled
ol10_u0_developer_EPEL                                                                                                                  Oracle Linux 10.0 EPEL Packages for Development (x86_64)                                                                                                                 enabled
ol10_x86_64_userspace_ksplice                                                                                                           Ksplice aware userspace packages for Oracle Linux 10 (x86_64)                                                                                                            disabled
[opc@oci10 ~]$
手順4: インターネット公開用設定
手順4-1: fail2ban導入
公開サーバは各種のアタックにさらされます。管理用sshポートにもやってきます。
多少なりとも軽減するためにEPELレポジトリ収録のfail2banを使用します。
$ sudo dnf install fail2ban -y
<略>
$
カスタム設定は/etc/fail2ban/jail.local に対して行います。
[opc@oci10 ~]$ sudo vi /etc/fail2ban/jail.local
[opc@oci10 ~]$ cat /etc/fail2ban/jail.local
[DEFAULT]
# 86400秒=24時間以内に5回不審なアクセスがあったら24時間BAN
bantime  = 86400
findtime  = 86400
maxretry = 5
# 259200秒=3日以内に5回不審なアクセスがあったら3日間BAN
#bantime  = 259200
#findtime  = 259200
#maxretry = 5
# 除外IP
ignoreip = 127.0.0.1 127.0.0.0/8 10.0.0.0/8 172.16.0.0/12 192.168.0.0/16
[sshd]
enabled = true
banaction = firewallcmd-ipset
[opc@oci10 ~]$
上記設定では24時間BANにしていますが、まぁ、3日BANでもかまわないとは思います。(本当に間違えた場合に困るのでほどほどにしておくとよい)
fail2banをOS起動時に実行する設定と、今すぐfail2banを起動するコマンドを実行します。
[opc@oci10 ~]$ sudo systemctl enable --now fail2ban
Created symlink '/etc/systemd/system/multi-user.target.wants/fail2ban.service' → '/usr/lib/systemd/system/fail2ban.service'.
[opc@oci10 ~]$
以降、アタックがあると /var/log/fail2ban.log にログが出ます。
手順4-2: Webサーバ用ポート公開設定
この段階では、dhcpv6-clientとsshのみが許可されています。
Webサーバ公開用にhttp(ポート80)とhttps(ポート443)を追加します。
[opc@oci10 ~]$ sudo firewall-cmd --list-all
public (default, active)
  target: default
  ingress-priority: 0
  egress-priority: 0
  icmp-block-inversion: no
  interfaces: ens3
  sources:
  services: dhcpv6-client ssh
  ports:
  protocols:
  forward: yes
  masquerade: no
  forward-ports:
  source-ports:
  icmp-blocks:
  rich rules:
[opc@oci10 ~]$
[opc@oci10 ~]$ sudo firewall-cmd --permanent --add-service=http
success
[opc@oci10 ~]$ sudo firewall-cmd --permanent --add-service=https
success
[opc@oci10 ~]$ sudo firewall-cmd --reload
success
[opc@oci10 ~]$ sudo firewall-cmd --list-all
public (default, active)
  target: default
  ingress-priority: 0
  egress-priority: 0
  icmp-block-inversion: no
  interfaces: ens3
  sources:
  services: dhcpv6-client http https ssh
  ports:
  protocols:
  forward: yes
  masquerade: no
  forward-ports:
  source-ports:
  icmp-blocks:
  rich rules:
[opc@oci10 ~]$
手順5: php 追加
Oracle Linux 8と9であったmoduleで複数バージョン提供という機能はOracle Linux 10ではなくなりました。(Using DNF Modules and Application Streams)
No modular packages are available for Oracle Linux 10. Different versions of userspace packages continue to be available as Application Streams but don’t use the package modularity available in previous releases.
なので、単純に「dnf install php」でインストールします。
[opc@oci10 ~]$ sudo dnf install php -y
Last metadata expiration check: 0:13:46 ago on Tue 09 Sep 2025 01:42:02 PM JST.
Dependencies resolved.
=========================================================================================================================================================================================================================================================================================================================
Package Architecture Version Repository Size
=========================================================================================================================================================================================================================================================================================================================
Installing:
php x86_64 8.3.19-1.el10_0 ol10_appstream 75 k
Installing dependencies:
apr x86_64 1.7.5-2.el10 ol10_appstream 135 k
apr-util x86_64 1.6.3-21.el10 ol10_appstream 102 k
apr-util-lmdb x86_64 1.6.3-21.el10 ol10_appstream 14 k
capstone x86_64 5.0.1-6.el10 ol10_appstream 1.0 M
httpd-core x86_64 2.4.63-1.0.1.el10_0.2 ol10_appstream 1.8 M
httpd-filesystem noarch 2.4.63-1.0.1.el10_0.2 ol10_appstream 9.1 k
httpd-tools x86_64 2.4.63-1.0.1.el10_0.2 ol10_appstream 91 k
libxslt x86_64 1.1.39-8.el10_0 ol10_appstream 208 k
mailcap noarch 2.1.54-8.el10 ol10_baseos_latest 39 k
nginx-filesystem noarch 2:1.26.3-1.0.1.el10 ol10_appstream 31 k
oracle-logos-httpd noarch 100.1-1.0.3.el10 ol10_baseos_latest 53 k
php-common x86_64 8.3.19-1.el10_0 ol10_appstream 815 k
Installing weak dependencies:
apr-util-openssl x86_64 1.6.3-21.el10 ol10_appstream 16 k
httpd x86_64 2.4.63-1.0.1.el10_0.2 ol10_appstream 63 k
mod_http2 x86_64 2.0.29-2.el10_0.1 ol10_appstream 177 k
mod_lua x86_64 2.4.63-1.0.1.el10_0.2 ol10_appstream 55 k
php-cli x86_64 8.3.19-1.el10_0 ol10_appstream 3.7 M
php-fpm x86_64 8.3.19-1.el10_0 ol10_appstream 1.9 M
php-mbstring x86_64 8.3.19-1.el10_0 ol10_appstream 584 k
php-opcache x86_64 8.3.19-1.el10_0 ol10_appstream 430 k
php-pdo x86_64 8.3.19-1.el10_0 ol10_appstream 158 k
php-xml x86_64 8.3.19-1.el10_0 ol10_appstream 225 k
Transaction Summary
=========================================================================================================================================================================================================================================================================================================================
Install 23 Packages
Total download size: 12 M
Installed size: 57 M
Downloading Packages:
<略>
Running scriptlet: httpd-2.4.63-1.0.1.el10_0.2.x86_64 23/23
Running scriptlet: php-8.3.19-1.el10_0.x86_64 23/23
Installed:
apr-1.7.5-2.el10.x86_64 apr-util-1.6.3-21.el10.x86_64 apr-util-lmdb-1.6.3-21.el10.x86_64 apr-util-openssl-1.6.3-21.el10.x86_64 capstone-5.0.1-6.el10.x86_64 httpd-2.4.63-1.0.1.el10_0.2.x86_64 httpd-core-2.4.63-1.0.1.el10_0.2.x86_64
httpd-filesystem-2.4.63-1.0.1.el10_0.2.noarch httpd-tools-2.4.63-1.0.1.el10_0.2.x86_64 libxslt-1.1.39-8.el10_0.x86_64 mailcap-2.1.54-8.el10.noarch mod_http2-2.0.29-2.el10_0.1.x86_64 mod_lua-2.4.63-1.0.1.el10_0.2.x86_64 nginx-filesystem-2:1.26.3-1.0.1.el10.noarch
oracle-logos-httpd-100.1-1.0.3.el10.noarch php-8.3.19-1.el10_0.x86_64 php-cli-8.3.19-1.el10_0.x86_64 php-common-8.3.19-1.el10_0.x86_64 php-fpm-8.3.19-1.el10_0.x86_64 php-mbstring-8.3.19-1.el10_0.x86_64 php-opcache-8.3.19-1.el10_0.x86_64
php-pdo-8.3.19-1.el10_0.x86_64 php-xml-8.3.19-1.el10_0.x86_64
Complete!
[opc@oci10 ~]$
php 8.3.19がインストールされました。
手順6: MySQL設定編
Oralce Linux 10ではMySQL 8.4.4 か mariadb 10.11.11が提供されています。
とりあえず、Oracle直営なのでMySQLを使っておきます。
[opc@oci10 ~]$ sudo dnf install mysql8.4-server -y
Last metadata expiration check: 0:17:41 ago on Tue 09 Sep 2025 01:42:02 PM JST.
Dependencies resolved.
=========================================================================================================================================================================================================================================================================================================================
 Package                                                                               Architecture                                                      Version                                                                     Repository                                                                     Size
=========================================================================================================================================================================================================================================================================================================================
Installing:
 mysql8.4-server                                                                       x86_64                                                            8.4.4-2.el10                                                                ol10_appstream                                                                 18 M
Installing dependencies:
 libicu                                                                                x86_64                                                            74.2-5.el10_0                                                               ol10_baseos_latest                                                             10 M
 mariadb-connector-c-config                                                            noarch                                                            3.4.4-1.el10                                                                ol10_baseos_latest                                                            8.8 k
 mecab                                                                                 x86_64                                                            0.996-9.el10                                                                ol10_appstream                                                                390 k
 mysql-selinux                                                                         noarch                                                            1.0.13-2.el10                                                               ol10_appstream                                                                 37 k
 mysql8.4                                                                              x86_64                                                            8.4.4-2.el10                                                                ol10_appstream                                                                2.4 M
 mysql8.4-common                                                                       noarch                                                            8.4.4-2.el10                                                                ol10_appstream                                                                102 k
 mysql8.4-errmsg                                                                       noarch                                                            8.4.4-2.el10                                                                ol10_appstream                                                                545 k
 protobuf-lite                                                                         x86_64                                                            3.19.6-11.el10                                                              ol10_appstream                                                                262 k

Transaction Summary
=========================================================================================================================================================================================================================================================================================================================
Install  9 Packages

Total download size: 32 M
Installed size: 199 M
Downloading Packages:
<略>
  Running scriptlet: mysql8.4-server-8.4.4-2.el10.x86_64                                                                                                                                                                                                                                                             9/9

Installed:
  libicu-74.2-5.el10_0.x86_64            mariadb-connector-c-config-3.4.4-1.el10.noarch    mecab-0.996-9.el10.x86_64    mysql-selinux-1.0.13-2.el10.noarch    mysql8.4-8.4.4-2.el10.x86_64    mysql8.4-common-8.4.4-2.el10.noarch    mysql8.4-errmsg-8.4.4-2.el10.noarch    mysql8.4-server-8.4.4-2.el10.x86_64
  protobuf-lite-3.19.6-11.el10.x86_64

Complete!
[opc@oci10 ~]$
mysqldを自動起動する設定といますぐ起動する設定をします。
[opc@oci10 ~]$ sudo systemctl enable --now mysqld
Created symlink '/etc/systemd/system/multi-user.target.wants/mysqld.service' → '/usr/lib/systemd/system/mysqld.service'.
[opc@oci10 ~]$
WordPress用データベースを作成します。
[opc@oci10 ~]$ sudo mysql -u root
Welcome to the MySQL monitor.  Commands end with ; or \g.
Your MySQL connection id is 8
Server version: 8.4.4 Source distribution

Copyright (c) 2000, 2025, Oracle and/or its affiliates.

Oracle is a registered trademark of Oracle Corporation and/or its
affiliates. Other names may be trademarks of their respective
owners.

Type 'help;' or '\h' for help. Type '\c' to clear the current input statement.

mysql> create database DB名 character set utf8;
Query OK, 1 row affected, 1 warning (0.01 sec)

mysql> create user wordpress@localhost identified by 'パスワード';
Query OK, 0 rows affected (0.02 sec)

mysql> grant all privileges on DB名.* to wordpress@localhost;
Query OK, 0 rows affected (0.01 sec)

mysql> quit
Bye
[opc@oci10 ~]$
手順7-1: httpdインストール
httpdをインストールします。
Oracle Linux 10.0ではWebサーバとして Apache(httpd) 2.4.63 、nginx 1.26.3が使えるが、apacheを使う。
[opc@oci10 ~]$ sudo dnf install httpd -y
Last metadata expiration check: 0:23:31 ago on Tue 09 Sep 2025 01:42:02 PM JST.
Package httpd-2.4.63-1.0.1.el10_0.2.x86_64 is already installed.
Dependencies resolved.
Nothing to do.
Complete!
[opc@oci10 ~]$
よく見たらphpインストール時にインストールされていました。
手順7-2: dehydratedによるLet’s Encrypt導入
Let’s EncryptによるSSL証明書導入はcertbotを使うのが一般的ではあるのだが、python環境とあわせてパッケージサイズが大きいので、コンパクトでEPELにも収録されているdehydratedを使用する。
[opc@oci10 ~]$ sudo dnf install dehydrated -y
Last metadata expiration check: 0:25:08 ago on Tue 09 Sep 2025 01:42:02 PM JST.
Dependencies resolved.
=========================================================================================================================================================================================================================================================================================================================
 Package                                                                  Architecture                                                         Version                                                                        Repository                                                                            Size
=========================================================================================================================================================================================================================================================================================================================
Installing:
 dehydrated                                                               noarch                                                               0.7.1-6.el10_0                                                                 ol10_u0_developer_EPEL                                                               156 k
Installing dependencies:
 s-nail                                                                   x86_64                                                               14.9.24-12.el10                                                                ol10_appstream                                                                       641 k

Transaction Summary
=========================================================================================================================================================================================================================================================================================================================
Install  2 Packages

Total download size: 797 k
Installed size: 1.4 M
Downloading Packages:
<略>
Installed:
  dehydrated-0.7.1-6.el10_0.noarch                                                                                                                             s-nail-14.9.24-12.el10.x86_64

Complete!
[opc@oci10 ~]$
dehydratedによるSSL証明書取得処理には /var/www/dehydrated が使用されるためディレクトリを作成します。
[opc@oci10 ~]$ sudo mkdir /var/www/dehydrated
[opc@oci10 ~]$
http://~/.well-known/acme-challenge でアクセスした時に上記ディレクトリが開くようApacheの設定を /etc/httpd/conf.d/dehydrated.conf として作成します。(sudo vi /etc/httpd/conf.d/dehydrated.conf )
[opc@oci10 ~]$ sudo vi /etc/httpd/conf.d/dehydrated.conf
[opc@oci10 ~]$ cat /etc/httpd/conf.d/dehydrated.conf
Alias /.well-known/acme-challenge /var/www/dehydrated
<Directory /var/www/dehydrated/>
</Directory>
[opc@oci10 ~]$
httpdを起動します
[opc@oci10 ~]$ sudo systemctl start httpd
[opc@oci10 ~]$
SSL証明書を発行するホスト名を /etc/dehydrated/domains.txt に記載する。(sudo vi /etc/dehydrated/domains.txt)
$ sudo vi /etc/dehydrated/domains.txt
$ sudo cat /etc/dehydrated/domains.txt
ホスト1名.ドメイン名 ホスト2名.ドメイン名
$
登録操作を開始します。
[opc@oci10 ~]$ sudo dehydrated --register
# INFO: Using main config file /etc/dehydrated/config
# INFO: Using additional config file /etc/dehydrated/conf.d/local.sh

To use dehydrated with this certificate authority you have to agree to their terms of service which you can find here: https://letsencrypt.org/documents/LE-SA-v1.5-February-24-2025.pdf

To accept these terms of service run "/bin/dehydrated --register --accept-terms".
[opc@oci10 ~]$ sudo dehydrated --register --accept-terms
# INFO: Using main config file /etc/dehydrated/config
# INFO: Using additional config file /etc/dehydrated/conf.d/local.sh
+ Generating account key...
+ Registering account key with ACME server...
+ Fetching account URL...
+ Done!
[opc@oci10 ~]$
初回のSSL証明書発行処理を実行します。
$ sudo dehydrated --cron
# INFO: Using main config file /etc/dehydrated/config
# INFO: Using additional config file /etc/dehydrated/conf.d/local.sh
 + Creating chain cache directory /etc/dehydrated/chains
Processing ホスト1名.ドメイン名 with alternative names: ホスト2名.ドメイン名
 + Creating new directory /etc/dehydrated/certs/ホスト1名.ドメイン名 ...
 + Signing domains...
 + Generating private key...
 + Generating signing request...
 + Requesting new certificate order from CA...
 + Received 2 authorizations URLs from the CA
 + Handling authorization for ホスト1名.ドメイン名
 + Handling authorization for ホスト2名.ドメイン名
 + 2 pending challenge(s)
 + Deploying challenge tokens...
 + Responding to challenge for ホスト1名.ドメイン名 authorization...
 + Challenge is valid!
 + Responding to challenge for ホスト2名.ドメイン名 authorization...
 + Challenge is valid!
 + Cleaning challenge tokens...
 + Requesting certificate...
 + Checking certificate...
 + Done!
 + Creating fullchain.pem...
 + Done!
 + Running automatic cleanup
$
手順7-3: WebサーバへのSSL証明書設定
まず、httpdにmod_sslを追加します。
[opc@oci10 ~]$ sudo dnf install mod_ssl -y
Last metadata expiration check: 0:33:34 ago on Tue 09 Sep 2025 01:42:02 PM JST.
Dependencies resolved.
=========================================================================================================================================================================================================================================================================================================================
 Package                                                                Architecture                                                          Version                                                                                Repository                                                                     Size
=========================================================================================================================================================================================================================================================================================================================
Installing:
 mod_ssl                                                                x86_64                                                                1:2.4.63-1.0.1.el10_0.2                                                                ol10_appstream                                                                113 k
Installing dependencies:
 sscg                                                                   x86_64                                                                3.0.5-9.el10                                                                           ol10_appstream                                                                 50 k

Transaction Summary
=========================================================================================================================================================================================================================================================================================================================
Install  2 Packages

Total download size: 163 k
Installed size: 366 k
Downloading Packages:
<略>
Installed:
  mod_ssl-1:2.4.63-1.0.1.el10_0.2.x86_64                                                                                                                             sscg-3.0.5-9.el10.x86_64

Complete!
[opc@oci10 ~]$
標準の /etc/httpd/conf.d/ssl.conf は使わず、Mozilla SSL Configuration Generatorベースの設定を /etc/httpd/conf.d/ssl-mozilla.conf として作成します。(なお、ssl.conf には”Listen 443 https”設定もあるので、そのままにしています)
また、Let’s encryptingを使用する場合2025年5月以降OCSPに対応しなくなりました(Removing OCSP URLs from Certificates)
このため、「SSLUseStapling Off」を設定します
# generated 2025-09-09, Mozilla Guideline v5.7, Apache 2.4.63, OpenSSL 3.2.2, intermediate config
# https://ssl-config.mozilla.org/#server=apache&version=2.4.63&config=intermediate&openssl=3.2.2&guideline=5.7

# this configuration requires mod_ssl, mod_rewrite, mod_headers, and mod_socache_shmcb
<VirtualHost *:80>
    RewriteEngine On
    RewriteCond %{REQUEST_URI} !^/.well-known/acme-challenge/
    RewriteRule ^.*$ https://%{HTTP_HOST}%{REQUEST_URI} [R=301,QSA,L]
</VirtualHost>

<VirtualHost *:443>
    SSLEngine on

    # curl https://ssl-config.mozilla.org/ffdhe2048.txt >> /path/to/signed_cert_and_intermediate_certs_and_dhparams
    SSLCertificateFile      /etc/dehydrated/certs/<ホスト名>/fullchain.pem
    SSLCertificateKeyFile   /etc/dehydrated/certs/<ホスト名>/privkey.pem

    # enable HTTP/2, if available
    Protocols h2 http/1.1

    # HTTP Strict Transport Security (mod_headers is required) (63072000 seconds)
    Header always set Strict-Transport-Security "max-age=63072000"
</VirtualHost>

# intermediate configuration
SSLProtocol             -all +TLSv1.2 +TLSv1.3
SSLOpenSSLConfCmd       Curves X25519:prime256v1:secp384r1
SSLCipherSuite          ECDHE-ECDSA-AES128-GCM-SHA256:ECDHE-RSA-AES128-GCM-SHA256:ECDHE-ECDSA-AES256-GCM-SHA384:ECDHE-RSA-AES256-GCM-SHA384:ECDHE-ECDSA-CHACHA20-POLY1305:ECDHE-RSA-CHACHA20-POLY1305:DHE-RSA-AES128-GCM-SHA256:DHE-RSA-AES256-GCM-SHA384:DHE-RSA-CHACHA20-POLY1305
SSLHonorCipherOrder     off
SSLSessionTickets       off

SSLUseStapling Off
SSLStaplingCache "shmcb:logs/ssl_stapling(32768)"
httpdを再起動します。
[opc@oci10 ~]$ sudo systemctl restart httpd
[opc@oci10 ~]$
手順8: WordPress導入
手順8-1: WordPressの基本インストール
WordPressのWebから最新版をダウンロードして、/var/www/html以下に展開します。
(日本語環境向けのlatest-ja.tar.gzファイルを使っていないのはWordpressプラグインが正常にインストールできるかを確認するためにWP Multibyte Patchを手動インストールする手順を入れているためです)
[opc@oci10 ~]$ cd /var/www/html
[opc@oci10 html]$ ls
[opc@oci10 html]$ sudo curl -O https://wordpress.org/latest.tar.gz
  % Total    % Received % Xferd  Average Speed   Time    Time     Time  Current
                                 Dload  Upload   Total   Spent    Left  Speed
100 25.6M  100 25.6M    0     0  4909k      0  0:00:05  0:00:05 --:--:-- 5921k
[opc@oci10 html]$ ls
latest.tar.gz
[opc@oci10 html]$ sudo tar xfz latest.tar.gz
[opc@oci10 html]$ ls -l
total 26300
-rw-r--r--. 1 root root 26925441 Sep  9 14:33 latest.tar.gz
drwxr-xr-x. 5 root root     4096 Jul 16 00:09 wordpress
[opc@oci10 html]$ sudo rm latest.tar.gz
[opc@oci10 html]$ ls
wordpress
[opc@oci10 html]$
WordPressディレクトリの所有者をWebサービスのユーザである「apache」に変更します。
[opc@oci10 html]$ ps -ef|grep http
root       66623       1  0 14:30 ?        00:00:00 /usr/sbin/httpd -DFOREGROUND
apache     66624   66623  0 14:30 ?        00:00:00 /usr/sbin/httpd -DFOREGROUND
apache     66625   66623  0 14:30 ?        00:00:00 /usr/sbin/httpd -DFOREGROUND
apache     66639   66623  0 14:30 ?        00:00:00 /usr/sbin/httpd -DFOREGROUND
apache     66644   66623  0 14:30 ?        00:00:00 /usr/sbin/httpd -DFOREGROUND
apache     66808   66623  0 14:31 ?        00:00:00 /usr/sbin/httpd -DFOREGROUND
opc        66961    7040  0 14:34 pts/0    00:00:00 grep --color=auto http
[opc@oci10 html]$ sudo chown -R apache:apache wordpress/
[opc@oci10 html]$ ls -l
total 4
drwxr-xr-x. 5 apache apache 4096 Jul 16 00:09 wordpress
[opc@oci10 html]$
/var/www/html/wordpress をDocumentRootとするように ssl-mozilla.conf に追加して、httpdを再起動します。
[opc@oci10 html]$ sudo vi /etc/httpd/conf.d/ssl-mozilla.conf
[opc@oci10 html]$ cat /etc/httpd/conf.d/ssl-mozilla.conf
# generated 2025-09-09, Mozilla Guideline v5.7, Apache 2.4.63, OpenSSL 3.2.2, intermediate config
# https://ssl-config.mozilla.org/#server=apache&version=2.4.63&config=intermediate&openssl=3.2.2&guideline=5.7

# this configuration requires mod_ssl, mod_rewrite, mod_headers, and mod_socache_shmcb
<VirtualHost *:80>
    RewriteEngine On
    RewriteCond %{REQUEST_URI} !^/.well-known/acme-challenge/
    RewriteRule ^.*$ https://%{HTTP_HOST}%{REQUEST_URI} [R=301,QSA,L]
</VirtualHost>

<VirtualHost *:443>
    DocumentRoot /var/www/html/wordpress
    SSLEngine on

    # curl https://ssl-config.mozilla.org/ffdhe2048.txt >> /path/to/signed_cert_and_intermediate_certs_and_dhparams
    SSLCertificateFile      /etc/dehydrated/certs/<ホスト名>/fullchain.pem
    SSLCertificateKeyFile   /etc/dehydrated/certs/<ホスト名>/privkey.pem

    # enable HTTP/2, if available
    Protocols h2 http/1.1

    # HTTP Strict Transport Security (mod_headers is required) (63072000 seconds)
    Header always set Strict-Transport-Security "max-age=63072000"
</VirtualHost>

# intermediate configuration
SSLProtocol             -all +TLSv1.2 +TLSv1.3
SSLOpenSSLConfCmd       Curves X25519:prime256v1:secp384r1
SSLCipherSuite          ECDHE-ECDSA-AES128-GCM-SHA256:ECDHE-RSA-AES128-GCM-SHA256:ECDHE-ECDSA-AES256-GCM-SHA384:ECDHE-RSA-AES256-GCM-SHA384:ECDHE-ECDSA-CHACHA20-POLY1305:ECDHE-RSA-CHACHA20-POLY1305:DHE-RSA-AES128-GCM-SHA256:DHE-RSA-AES256-GCM-SHA384:DHE-RSA-CHACHA20-POLY1305
SSLHonorCipherOrder     off
SSLSessionTickets       off

SSLUseStapling Off
SSLStaplingCache "shmcb:logs/ssl_stapling(32768)"
[opc@oci10 html]$
[opc@oci10 html]$ sudo systemctl restart httpd
[opc@oci10 html]$
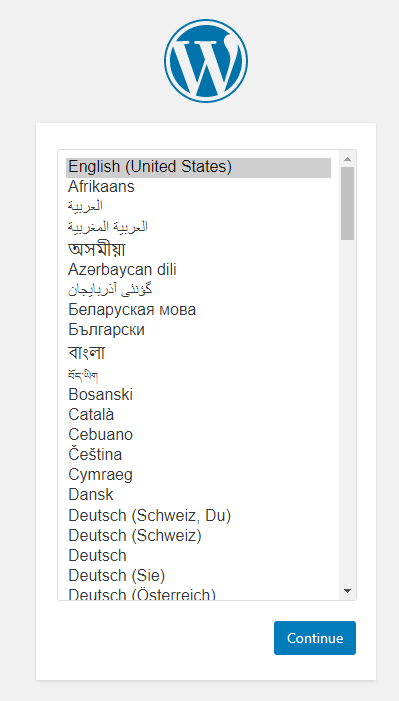
手順8-2: 「missing the MySQL extension」がでる場合の手順
いまの状態でブラウザからアクセスすると、下記の表示になります。
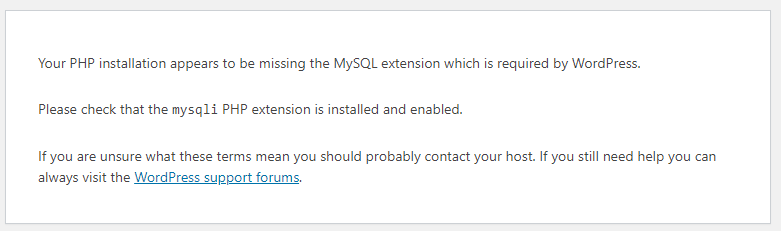
これはphpからMySQLにアクセスするためのパッケージがインストールされていないためなので、php-mysqlndを追加して、httpdを再起動します。
[opc@oci10 ~]$ sudo dnf install php-mysqlnd -y
Last metadata expiration check: 0:55:51 ago on Tue 09 Sep 2025 01:42:02 PM JST.
Dependencies resolved.
=========================================================================================================================================================================================================================================================================================================================
 Package                                                                     Architecture                                                           Version                                                                         Repository                                                                      Size
=========================================================================================================================================================================================================================================================================================================================
Installing:
 php-mysqlnd                                                                 x86_64                                                                 8.3.19-1.el10_0                                                                 ol10_appstream                                                                 211 k

Transaction Summary
=========================================================================================================================================================================================================================================================================================================================
Install  1 Package

Total download size: 211 k
Installed size: 378 k
Downloading Packages:
<略>
Installed:
  php-mysqlnd-8.3.19-1.el10_0.x86_64

Complete!
[opc@oci10 ~]$ sudo systemctl restart httpd
[opc@oci10 ~]$
WordPressの設定手順を進めると wp-config.php に書き込めない、と出ますので、「sudo vi /var/www/html/wordpress/wp-config.php」を実行し、指定された内容を記載します。
よくヤル凡ミスとして、wordpress DBのユーザ名を指定するところで「ユーザ名@localhost」としてしまう、ということ。「ユーザ名」だけじゃないと接続できません
なお、wordpressの表示言語を日本語にすることは手順9-3で、パーマリンクのURL型式を変更する、というのは手順12の .htaccess に関する設定を入れてからにします。
手順9: SELinux設定
手順9-1: httpdのネットワーク接続問題
一見するとここまででうまく動いているように見えます。
しかし、プラグインをインストールしようとするとエラーになります。
/var/log/audit/audit.logを確認すると下記のようなログが出ています。
type=AVC msg=audit(1622095859.957:2064): avc:  denied  { name_connect } for  pid=8908 comm="php-fpm" dest=443 scontext=system_u:system_r:httpd_t:s0 tcontext=system_u:object_r:http_port_t:s0 tclass=tcp_socket permissive=0
type=AVC msg=audit(1622095868.397:2065): avc:  denied  { name_connect } for  pid=8313 comm="php-fpm" dest=443 scontext=system_u:system_r:httpd_t:s0 tcontext=system_u:object_r:http_port_t:s0 tclass=tcp_socket permissive=0
type=AVC msg=audit(1622095868.401:2066): avc:  denied  { name_connect } for  pid=8313 comm="php-fpm" dest=80 scontext=system_u:system_r:httpd_t:s0 tcontext=system_u:object_r:http_port_t:s0 tclass=tcp_socket permissive=0
これはhttpd_can_network_connect という値で制御されている
現在の設定値を「sudo getsebool -a |grep httpd_can_network」で確認し、「sudo setsebool -P httpd_can_network_connect on」で有効にする
[opc@oci10 ~]$ sudo vi /var/www/html/wordpress/wp-config.php
[opc@oci10 ~]$ sudo getsebool -a |grep httpd_can_network
httpd_can_network_connect --> off
httpd_can_network_connect_cobbler --> off
httpd_can_network_connect_db --> off
httpd_can_network_memcache --> off
httpd_can_network_redis --> off
httpd_can_network_relay --> off
[opc@oci10 ~]$ sudo setsebool -P httpd_can_network_connect on
[opc@oci10 ~]$ sudo getsebool -a |grep httpd_can_network
httpd_can_network_connect --> on
httpd_can_network_connect_cobbler --> off
httpd_can_network_connect_db --> off
httpd_can_network_memcache --> off
httpd_can_network_redis --> off
httpd_can_network_relay --> off
[opc@oci10 ~]$
この変更ではhttpdの再起動は不要。
手順9-2: php-fpmの書き込み権限問題
プラグインやテーマのインストールについては問題なくても、WordPressのアップデートが出来ない。
このときの/var/log/audit/audit.logは下記
type=AVC msg=audit(1694506911.363:1538): avc: denied { write } for pid=51364 comm="php-fpm" name="wordpress" dev="dm-0" ino=34891933 scontext=system_u:system_r:httpd_t:s0 tcontext=unconfined_u:object_r:httpd_sys_content_t:s0 tclass=dir permissive=0
こちらは/var/www/html/wordpress に対して httpdから書き込みが行えるような SELinuxのコンテキストをつけることで解決する。
「sudo chcon -R -t httpd_sys_script_rw_t /var/www/html/wordpress」
[opc@oci10 ~]$ sudo ls -lZ /var/www/html/
total 4
drwxr-xr-x. 5 apache apache unconfined_u:object_r:httpd_sys_content_t:s0 4096 Sep  9 14:39 wordpress
[opc@oci10 ~]$ sudo chcon -R -t httpd_sys_script_rw_t /var/www/html/wordpress
[opc@oci10 ~]$ sudo ls -lZ /var/www/html/
total 4
drwxr-xr-x. 5 apache apache unconfined_u:object_r:httpd_sys_rw_content_t:s0 4096 Sep  9 14:39 wordpress
[opc@oci10 ~]$
手順9-3:Wordpressプラグイン追加の動作確認
WordPressプラグインがインストールできる状態になっているかを確認するために「WP Multibyte Patch」をインストールします。
これをインストールするとWordpressの設定画面([Settings]-[General])に「Site language(サイトの言語)」が追加され、「日本語」表示に切り替えることができるようになります。
手順10: WordPressで取り扱えるファイルサイズの拡大
WordPressで取り扱えるファイルは標準状態だと2MBになっている。
WordPressのドキュメントのFile Upload Sizes を見ると、これはphpの設定ファイル /etc/php.ini による制限となっている。
Oracle Linux 10の標準設定では下記の値となっている。
<略>
post_max_size = 8M
<略>
upload_max_filesize = 2M
<略>
よくある手順だと軽率に /etc/php.ini を書き換えていますが、 /etc/php.d/ 以下にファイルを追加することで、そちらの設定項目を優先させることができる機能があるため、 /etc/php.d/90-wordpress.ini に変更したい2行だけを記載したファイルを作成します。
[opc@oci10 ~]$ sudo vi /etc/php.d/90-wordpress.ini
[opc@oci10 ~]$ cat /etc/php.d/90-wordpress.ini
post_max_size = 100M
upload_max_filesize = 100M
[opc@oci10 ~]$
phpの設定変更を反映させるために「sudo systemctl restart php-fpm」を実行します。
[opc@oci10 ~]$ sudo systemctl restart php-fpm
[opc@oci10 ~]$
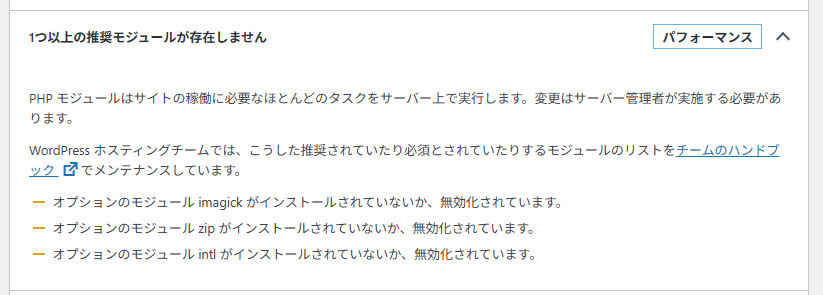
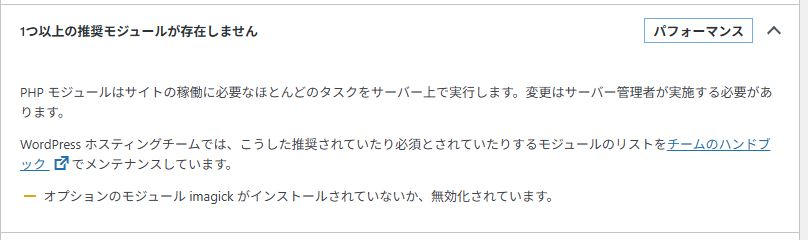
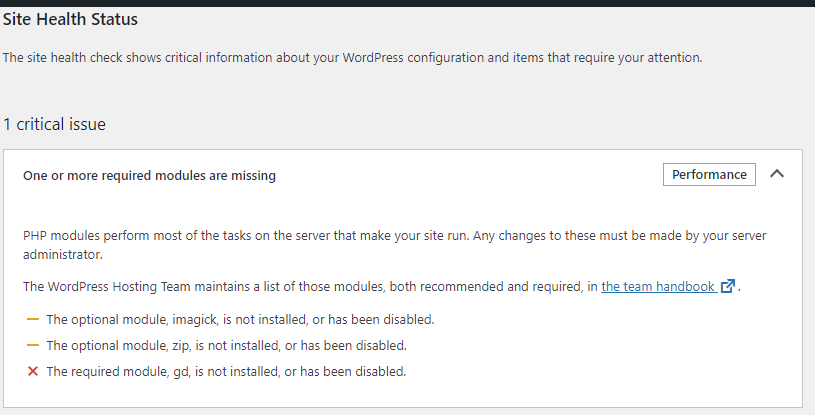
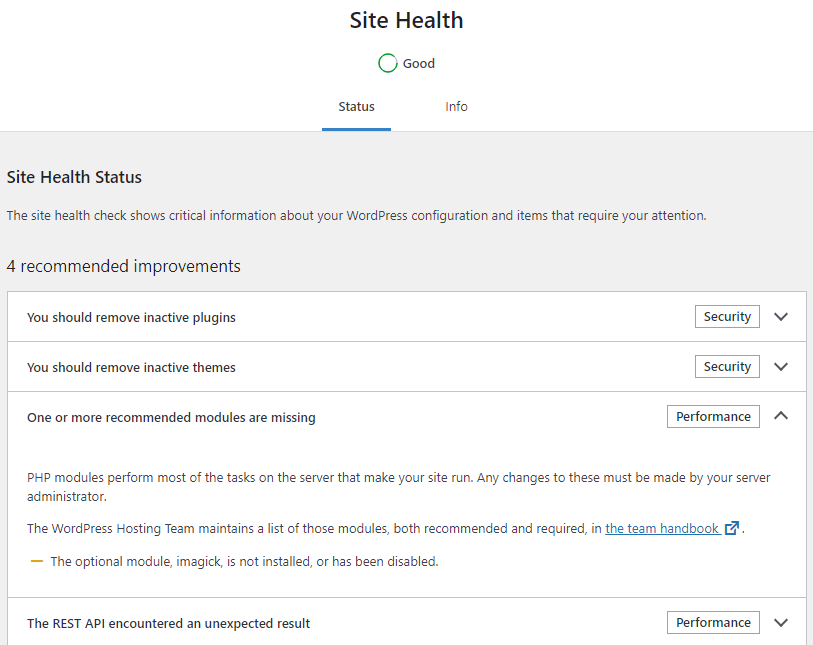
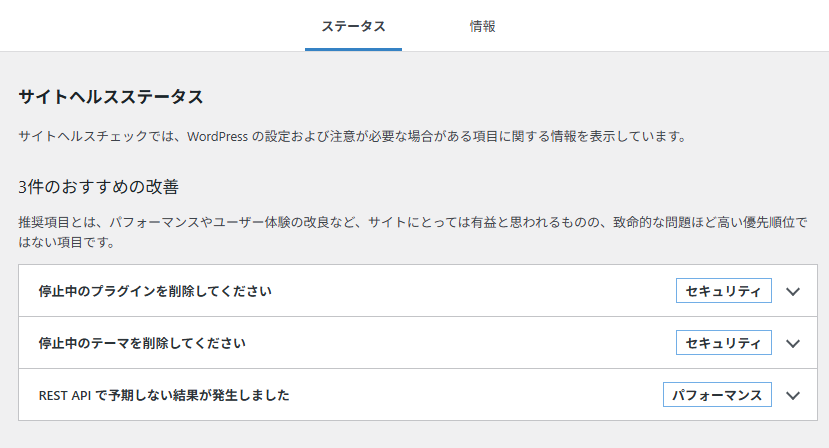
手順11: WordPressのSite Health Status対応
WordPressのサイトステータスを見てみると、いくつかパッケージを要求されている。
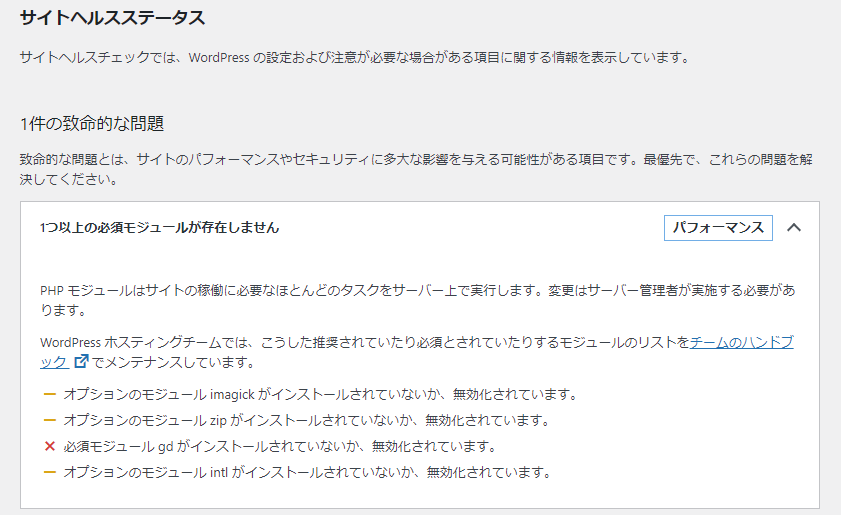
Oracle Linux 10.0では php-pecl-imagick php-pecl-zip php-intl をインストールする
[opc@oci10 ~]$ sudo dnf install php-pecl-imagick php-pecl-zip php-intl -y
Last metadata expiration check: 1:10:03 ago on Tue 09 Sep 2025 01:42:02 PM JST.
Dependencies resolved.
=========================================================================================================================================================================================================================================================================================================================
Package Architecture Version Repository Size
=========================================================================================================================================================================================================================================================================================================================
Installing:
php-intl x86_64 8.3.19-1.el10_0 ol10_appstream 228 k
php-pecl-imagick x86_64 3.8.0-1.el10_0 ol10_u0_developer_EPEL 163 k
php-pecl-zip x86_64 1.22.3-5.el10 ol10_appstream 82 k
Installing dependencies:
ImageMagick-libs x86_64 1:7.1.1.43-1.el10_0 ol10_u0_developer_EPEL 2.7 M
LibRaw x86_64 0.21.3-1.el10_0 ol10_u0_developer_EPEL 430 k
adobe-mappings-cmap noarch 20230622-5.el10 ol10_appstream 2.3 M
adobe-mappings-cmap-deprecated noarch 20230622-5.el10 ol10_appstream 128 k
adobe-mappings-pdf noarch 20190401-9.el10 ol10_appstream 728 k
cairo x86_64 1.18.2-2.el10 ol10_appstream 725 k
cairo-gobject x86_64 1.18.2-2.el10 ol10_appstream 17 k
cups-filesystem noarch 1:2.4.10-11.el10 ol10_baseos_latest 13 k
cups-libs x86_64 1:2.4.10-11.el10 ol10_baseos_latest 266 k
fftw-libs-double x86_64 3.3.10-15.el10 ol10_appstream 1.1 M
fontconfig x86_64 2.15.0-7.el10 ol10_appstream 333 k
fribidi x86_64 1.0.14-4.el10 ol10_appstream 101 k
gd x86_64 2.3.3-20.el10_0 ol10_appstream 149 k
gdk-pixbuf2 x86_64 2.42.12-4.el10_0 ol10_appstream 605 k
giflib x86_64 5.2.1-22.el10 ol10_appstream 57 k
google-droid-sans-fonts noarch 20200215-22.el10 ol10_appstream 2.7 M
gpgmepp x86_64 1.23.2-6.el10 ol10_appstream 139 k
graphviz x86_64 9.0.0-15.el10 ol10_appstream 1.6 M
highway x86_64 1.2.0-7.el10_0 ol10_u0_developer_EPEL 455 k
imath x86_64 3.1.10-4.el10 ol10_appstream 104 k
jasper-libs x86_64 4.1.0-5.el10 ol10_appstream 166 k
jbig2dec-libs x86_64 0.20-7.el10 ol10_appstream 79 k
jbigkit-libs x86_64 2.1-31.el10 ol10_appstream 59 k
lcms2 x86_64 2.16-6.el10 ol10_appstream 188 k
libXft x86_64 2.3.8-8.el10 ol10_appstream 77 k
libXpm x86_64 3.5.17-5.el10 ol10_appstream 70 k
libXrender x86_64 0.9.11-8.el10 ol10_appstream 28 k
libdatrie x86_64 0.2.13-11.el10 ol10_appstream 32 k
libgs x86_64 10.02.1-16.el10_0 ol10_appstream 3.7 M
libijs x86_64 0.35-24.el10 ol10_appstream 29 k
libjpeg-turbo x86_64 3.0.2-4.el10 ol10_appstream 256 k
libjxl x86_64 1:0.10.4-1.el10_0 ol10_u0_developer_EPEL 1.2 M
liblerc x86_64 4.0.0-8.el10 ol10_appstream 221 k
liblqr-1 x86_64 0.4.2-26.el10_0 ol10_u0_developer_EPEL 57 k
libpaper x86_64 1:2.1.1-7.el10 ol10_appstream 32 k
libraqm x86_64 0.10.1-1.el10_0 ol10_u0_developer_EPEL 25 k
librsvg2 x86_64 2.57.1-9.el10 ol10_appstream 1.5 M
libthai x86_64 0.1.29-10.el10 ol10_appstream 219 k
libtiff x86_64 4.6.0-6.el10_0 ol10_appstream 239 k
libtool-ltdl x86_64 2.4.7-13.el10 ol10_appstream 35 k
libwebp x86_64 1.3.2-8.el10 ol10_appstream 298 k
libwmf-lite x86_64 0.2.13-6.el10_0 ol10_u0_developer_EPEL 87 k
libzip x86_64 1.10.1-5.el10 ol10_appstream 67 k
openexr-libs x86_64 3.1.10-8.el10 ol10_appstream 1.1 M
openjpeg2 x86_64 2.5.2-4.el10_0.1 ol10_appstream 203 k
pango x86_64 1.54.0-3.el10 ol10_appstream 367 k
pixman x86_64 0.43.4-2.el10 ol10_appstream 286 k
poppler x86_64 24.02.0-6.el10 ol10_appstream 1.2 M
poppler-data noarch 0.4.11-9.el10 ol10_appstream 2.2 M
poppler-glib x86_64 24.02.0-6.el10 ol10_appstream 191 k
rsvg-pixbuf-loader x86_64 2.57.1-9.el10 ol10_appstream 15 k
urw-base35-bookman-fonts noarch 20200910-21.el10 ol10_appstream 861 k
urw-base35-c059-fonts noarch 20200910-21.el10 ol10_appstream 888 k
urw-base35-d050000l-fonts noarch 20200910-21.el10 ol10_appstream 80 k
urw-base35-fonts noarch 20200910-21.el10 ol10_appstream 9.5 k
urw-base35-fonts-common noarch 20200910-21.el10 ol10_appstream 20 k
urw-base35-gothic-fonts noarch 20200910-21.el10 ol10_appstream 656 k
urw-base35-nimbus-mono-ps-fonts noarch 20200910-21.el10 ol10_appstream 808 k
urw-base35-nimbus-roman-fonts noarch 20200910-21.el10 ol10_appstream 870 k
urw-base35-nimbus-sans-fonts noarch 20200910-21.el10 ol10_appstream 1.3 M
urw-base35-p052-fonts noarch 20200910-21.el10 ol10_appstream 987 k
urw-base35-standard-symbols-ps-fonts noarch 20200910-21.el10 ol10_appstream 45 k
urw-base35-z003-fonts noarch 20200910-21.el10 ol10_appstream 280 k
xml-common noarch 0.6.3-65.el10 ol10_appstream 42 k
Transaction Summary
=========================================================================================================================================================================================================================================================================================================================
Install 67 Packages
Total download size: 36 M
Installed size: 128 M
Downloading Packages:
<略>
Installed:
ImageMagick-libs-1:7.1.1.43-1.el10_0.x86_64 LibRaw-0.21.3-1.el10_0.x86_64 adobe-mappings-cmap-20230622-5.el10.noarch adobe-mappings-cmap-deprecated-20230622-5.el10.noarch adobe-mappings-pdf-20190401-9.el10.noarch
cairo-1.18.2-2.el10.x86_64 cairo-gobject-1.18.2-2.el10.x86_64 cups-filesystem-1:2.4.10-11.el10.noarch cups-libs-1:2.4.10-11.el10.x86_64 fftw-libs-double-3.3.10-15.el10.x86_64
fontconfig-2.15.0-7.el10.x86_64 fribidi-1.0.14-4.el10.x86_64 gd-2.3.3-20.el10_0.x86_64 gdk-pixbuf2-2.42.12-4.el10_0.x86_64 giflib-5.2.1-22.el10.x86_64
google-droid-sans-fonts-20200215-22.el10.noarch gpgmepp-1.23.2-6.el10.x86_64 graphviz-9.0.0-15.el10.x86_64 highway-1.2.0-7.el10_0.x86_64 imath-3.1.10-4.el10.x86_64
jasper-libs-4.1.0-5.el10.x86_64 jbig2dec-libs-0.20-7.el10.x86_64 jbigkit-libs-2.1-31.el10.x86_64 lcms2-2.16-6.el10.x86_64 libXft-2.3.8-8.el10.x86_64
libXpm-3.5.17-5.el10.x86_64 libXrender-0.9.11-8.el10.x86_64 libdatrie-0.2.13-11.el10.x86_64 libgs-10.02.1-16.el10_0.x86_64 libijs-0.35-24.el10.x86_64
libjpeg-turbo-3.0.2-4.el10.x86_64 libjxl-1:0.10.4-1.el10_0.x86_64 liblerc-4.0.0-8.el10.x86_64 liblqr-1-0.4.2-26.el10_0.x86_64 libpaper-1:2.1.1-7.el10.x86_64
libraqm-0.10.1-1.el10_0.x86_64 librsvg2-2.57.1-9.el10.x86_64 libthai-0.1.29-10.el10.x86_64 libtiff-4.6.0-6.el10_0.x86_64 libtool-ltdl-2.4.7-13.el10.x86_64
libwebp-1.3.2-8.el10.x86_64 libwmf-lite-0.2.13-6.el10_0.x86_64 libzip-1.10.1-5.el10.x86_64 openexr-libs-3.1.10-8.el10.x86_64 openjpeg2-2.5.2-4.el10_0.1.x86_64
pango-1.54.0-3.el10.x86_64 php-intl-8.3.19-1.el10_0.x86_64 php-pecl-imagick-3.8.0-1.el10_0.x86_64 php-pecl-zip-1.22.3-5.el10.x86_64 pixman-0.43.4-2.el10.x86_64
poppler-24.02.0-6.el10.x86_64 poppler-data-0.4.11-9.el10.noarch poppler-glib-24.02.0-6.el10.x86_64 rsvg-pixbuf-loader-2.57.1-9.el10.x86_64 urw-base35-bookman-fonts-20200910-21.el10.noarch
urw-base35-c059-fonts-20200910-21.el10.noarch urw-base35-d050000l-fonts-20200910-21.el10.noarch urw-base35-fonts-20200910-21.el10.noarch urw-base35-fonts-common-20200910-21.el10.noarch urw-base35-gothic-fonts-20200910-21.el10.noarch
urw-base35-nimbus-mono-ps-fonts-20200910-21.el10.noarch urw-base35-nimbus-roman-fonts-20200910-21.el10.noarch urw-base35-nimbus-sans-fonts-20200910-21.el10.noarch urw-base35-p052-fonts-20200910-21.el10.noarch urw-base35-standard-symbols-ps-fonts-20200910-21.el10.noarch
urw-base35-z003-fonts-20200910-21.el10.noarch xml-common-0.6.3-65.el10.noarch
Complete!
[opc@oci10 ~]$
これで、サイトヘルスステータスのパッケージ関連のメッセージは消えた。
手順12: WordPressの.htaccess有効化
/var/www/html/wordpress/.htaccess が作成されているが、Oracle Linux 10のhttpd標準設定ではこれを読み込むようにはなっていない。
これが有効になっていないと、パーマリンク設定を「基本」から変えた場合に個別記事にアクセスできなくなる。
/etc/httpd/conf.d/wordpress.conf にファイルを作って設定する。
[opc@oci10 ~]$ sudo vi /etc/httpd/conf.d/wordpress.conf
[opc@oci10 ~]$ cat /etc/httpd/conf.d/wordpress.conf
<Directory /var/www/html/wordpress/>
 Allowoverride All
</Directory>
[opc@oci10 ~]$ sudo systemctl restart httpd
[opc@oci10 ~]$
手順13: OS自動更新の設定
メンテナンスがめんどくさくなって忘れる可能性があるので、Oracle Linux 10の自動更新設定を実施。
dnf-automatic パッケージをインストールします。
[opc@oci10 ~]$ sudo dnf install dnf-automatic -y
Last metadata expiration check: 1:14:05 ago on Tue 09 Sep 2025 01:42:02 PM JST.
Dependencies resolved.
=========================================================================================================================================================================================================================================================================================================================
 Package                                                                    Architecture                                                        Version                                                                            Repository                                                                       Size
=========================================================================================================================================================================================================================================================================================================================
Installing:
 dnf-automatic                                                              noarch                                                              4.20.0-12.0.1.el10_0                                                               ol10_baseos_latest                                                              191 k

Transaction Summary
=========================================================================================================================================================================================================================================================================================================================
Install  1 Package

Total download size: 191 k
Installed size: 77 k
Downloading Packages:
<略>
Installed:
  dnf-automatic-4.20.0-12.0.1.el10_0.noarch

Complete!
[opc@oci10 ~]$
/etc/dnf/automatic.conf 内の「apply_updates = no」を「apply_updates = yes」に変更
[opc@oci10 ~]$ sudo vi /etc/dnf/automatic.conf
[opc@oci10 ~]$ cat /etc/dnf/automatic.conf
[commands]
#  What kind of upgrade to perform:
# default                            = all available upgrades
# security                           = only the security upgrades
upgrade_type = default
random_sleep = 0

# Maximum time in seconds to wait until the system is on-line and able to
# connect to remote repositories.
network_online_timeout = 60

# To just receive updates use dnf-automatic-notifyonly.timer

# Whether updates should be downloaded when they are available, by
# dnf-automatic.timer. notifyonly.timer, download.timer and
# install.timer override this setting.
download_updates = yes

# Whether updates should be applied when they are available, by
# dnf-automatic.timer. notifyonly.timer, download.timer and
# install.timer override this setting.
apply_updates = yes

# When the system should reboot following upgrades:
# never                              = don't reboot after upgrades
# when-changed                       = reboot after any changes
# when-needed                        = reboot when necessary to apply changes
reboot = never

# The command that is run to trigger a system reboot.
reboot_command = "shutdown -r +5 'Rebooting after applying package updates'"


[emitters]
# Name to use for this system in messages that are emitted.  Default is the
# hostname.
# system_name = my-host

# How to send messages.  Valid options are stdio, email and motd.  If
# emit_via includes stdio, messages will be sent to stdout; this is useful
# to have cron send the messages.  If emit_via includes email, this
# program will send email itself according to the configured options.
# If emit_via includes motd, /etc/motd file will have the messages. if
# emit_via includes command_email, then messages will be send via a shell
# command compatible with sendmail.
# Default is email,stdio.
# If emit_via is None or left blank, no messages will be sent.
emit_via = stdio


[email]
# The address to send email messages from.
email_from = root@example.com

# List of addresses to send messages to.
email_to = root

# Name of the host to connect to to send email messages.
email_host = localhost

# Port number to connect to at the email host.
email_port = 25

# Use TLS or STARTTLS to connect to the email host.
email_tls = no


[command]
# The shell command to execute. This is a Python format string, as used in
# str.format(). The format function will pass a shell-quoted argument called
# `body`.
# command_format = "cat"

# The contents of stdin to pass to the command. It is a format string with the
# same arguments as `command_format`.
# stdin_format = "{body}"


[command_email]
# The shell command to use to send email. This is a Python format string,
# as used in str.format(). The format function will pass shell-quoted arguments
# called body, subject, email_from, email_to.
# command_format = "mail -Ssendwait -s {subject} -r {email_from} {email_to}"

# The contents of stdin to pass to the command. It is a format string with the
# same arguments as `command_format`.
# stdin_format = "{body}"

# The address to send email messages from.
email_from = root@example.com

# List of addresses to send messages to.
email_to = root


[base]
# This section overrides dnf.conf

# Use this to filter DNF core messages
debuglevel = 1
[opc@oci10 ~]$
そしてdnf-automatic.timerを有効化し、開始します。
$ sudo systemctl enable dnf-automatic.timer
Created symlink /etc/systemd/system/timers.target.wants/dnf-automatic.timer → /usr/lib/systemd/system/dnf-automatic.timer.
$ sudo systemctl status dnf-automatic
○ dnf-automatic.service - dnf automatic
     Loaded: loaded (/usr/lib/systemd/system/dnf-automatic.service; static)
     Active: inactive (dead)
TriggeredBy: ○ dnf-automatic.timer
$ sudo systemctl start dnf-automatic.timer
$ sudo systemctl status dnf-automatic.timer
● dnf-automatic.timer - dnf-automatic timer
     Loaded: loaded (/usr/lib/systemd/system/dnf-automatic.timer; enabled; pres>
     Active: active (waiting) since Tue 2023-09-12 13:11:00 JST; 5s ago
      Until: Tue 2023-09-12 13:11:00 JST; 5s ago
    Trigger: Wed 2023-09-13 06:44:33 JST; 17h left
   Triggers: ● dnf-automatic.service
Sep 12 13:11:00 ホスト名 systemd[1]: Started dnf-automatic timer.
$
手順14 SSL証明書の自動更新設定
dehydratedによるLet’s Encrypt SSL証明書を自動的に更新する設定を行う。
更新した場合だけ、httpdを再起動させたいので /etc/dehydrated/hook.sh の deploy_cert()関数定義のところで「systemctl restart httpd」を追加する
ただ、せっかく /etc/dehydrated/hook.d/ というディレクトリがあり、/etc/dehydrated/hook.shの最後の方で /etc/dehydrated/hook.d/*.sh を読み込んでいるという処理をしているので、そちらで設定を独立させたい。
ということで /etc/dehydrated/hook.d/httpd.sh を作成し、以下を記載
#!/bin/bash

case "$1" in
    "deploy_cert")
        /bin/systemctl restart httpd
    ;;
esac

exit 0
強制的にSSL証明書再発行を実行「sudo dehydrated –cron –force」
[opc@oci10 ~]$ sudo dehydrated --cron --force
# INFO: Using main config file /etc/dehydrated/config
# INFO: Using additional config file /etc/dehydrated/conf.d/local.sh
Processing <ホスト名>
 + Checking expire date of existing cert...
 + Valid till Dec  9 01:51:44 2025 GMT (Longer than 30 days). Ignoring because renew was forced!
 + Signing domains...
 + Generating signing request...
 + Requesting new certificate order from CA...
 + Received 1 authorizations URLs from the CA
 + Handling authorization for <ホスト名>
 + Found valid authorization for <ホスト名>
 + 0 pending challenge(s)
 + Requesting certificate...
Warning: Will read cert request from stdin since no -in option is given
 + Checking certificate...
 + Done!
 + Creating fullchain.pem...
 + Done!
 + Running automatic cleanup
Moving unused file to archive directory: <ホスト名>/cert-1757472608.csr
Moving unused file to archive directory: <ホスト名>/cert-1757472608.pem
Moving unused file to archive directory: <ホスト名>/chain-1757472608.pem
Moving unused file to archive directory: <ホスト名>/fullchain-1757472608.pem
[opc@oci10 ~]$
ちゃんとhttpdが再起動しているかを「systemctl status httpd」を実行して確認
下記の「Active:」のsinceの後ろの時刻がつい最近であることを確認する
[opc@oci10 ~]$ systemctl status httpd
● httpd.service - The Apache HTTP Server
     Loaded: loaded (/usr/lib/systemd/system/httpd.service; disabled; preset: disabled)
    Drop-In: /etc/systemd/system/httpd.service.d
             └─php-fpm.conf
     Active: active (running) since Wed 2025-09-10 11:51:21 JST; 7s ago
 Invocation: cae425cfbaae4ba68fa746588b2dde05
       Docs: man:httpd.service(8)
   Main PID: 110426 (httpd)
     Status: "Started, listening on: port 443, port 80"
      Tasks: 177 (limit: 5249)
     Memory: 14.6M (peak: 14.8M)
        CPU: 216ms
     CGroup: /system.slice/httpd.service
             ├─110426 /usr/sbin/httpd -DFOREGROUND
             ├─110427 /usr/sbin/httpd -DFOREGROUND
             ├─110428 /usr/sbin/httpd -DFOREGROUND
             ├─110429 /usr/sbin/httpd -DFOREGROUND
             └─110430 /usr/sbin/httpd -DFOREGROUND

Sep 10 11:51:21 oci10 systemd[1]: Starting httpd.service - The Apache HTTP Server...
Sep 10 11:51:21 oci10 (httpd)[110426]: httpd.service: Referenced but unset environment variable evaluates to an empty string: OPTIONS
Sep 10 11:51:21 oci10 systemd[1]: Started httpd.service - The Apache HTTP Server.
Sep 10 11:51:21 oci10 httpd[110426]: Server configured, listening on: port 443, port 80
[opc@oci10 ~]$
次にdehydratedが定期的に実行される設定になっているかを「systemctl status dehydrated.timer」を実行して確認する
[opc@oci10 ~]$ systemctl status dehydrated.timer
● dehydrated.timer - dehydrated client for signing certificates with an ACME server
     Loaded: loaded (/usr/lib/systemd/system/dehydrated.timer; enabled; preset: enabled)
     Active: active (waiting) since Tue 2025-09-09 14:07:18 JST; 21h ago
 Invocation: d81b66fc4dd943368689b90f756ab156
    Trigger: Thu 2025-09-11 01:41:37 JST; 13h left
   Triggers: ● dehydrated.service

Sep 09 14:07:18 oci10 systemd[1]: Started dehydrated.timer - dehydrated client for signing certificates with an ACME server.
[opc@oci10 ~]$
Oracle Linux 10においては標準でenabledとなっているので、自動的に実行されるようになっていた。
(dehydrated.service は disable だが、これはdehydrated.timer から起動されるやつなのでそのままで良い)
トラブル対応手順1: python3-pyOpenSSLのconflict問題
2025/09/19時点ではdnf updateが失敗した。(2026/04/30に実施した際はこの問題は発生しなかった)
[opc@oci10 ~]$ sudo dnf update -y
Last metadata expiration check: 1:18:42 ago on Fri 19 Sep 2025 12:26:32 PM JST.
Error:
 Problem: package python3-oci-sdk-2.159.0-1.el10.x86_64 from ol10_oci_included requires (python3.12dist(pyopenssl) < 25~~ with python3.12dist(pyopenssl) >= 17.5), but none of the providers can be installed
  - cannot install both python3-pyOpenSSL-25.0.0-1.el10_0.noarch from ol10_u0_developer_EPEL and python3-pyOpenSSL-24.2.1-1.0.1.el10.noarch from @System
  - cannot install both python3-pyOpenSSL-25.0.0-1.el10_0.noarch from ol10_u0_developer_EPEL and python3-pyOpenSSL-24.2.1-1.el10_0.noarch from ol10_u0_developer_EPEL
  - cannot install both python3-pyOpenSSL-24.2.1-1.0.1.el10.noarch from ol10_appstream and python3-pyOpenSSL-25.0.0-1.el10_0.noarch from ol10_u0_developer_EPEL
  - cannot install the best update candidate for package python3-pyOpenSSL-24.2.1-1.0.1.el10.noarch
  - cannot install the best update candidate for package python3-oci-sdk-2.158.0-1.el10.x86_64
(try to add '--allowerasing' to command line to replace conflicting packages or '--skip-broken' to skip uninstallable packages or '--nobest' to use not only best candidate packages)
[opc@oci10 ~]$
python3-pyOpenSSLがOracle Linux 10標準提供の python3-pyOpenSSL-24.2.1 系列と、EPEL提供の python3-pyOpenSSL-25.0.0 系列の2種類があるために発生している模様
とりあえず、EPEL側のpython3-pyOpenSSL-25.0.0 を使用しないようにしたところ、問題はなさそう。
設定は /etc/yum.repos.d/oracle-epel-ol10.repoに「exclude=python3-pyOpenSSL*」を追加する
[opc@oci10 ~]$ cat /etc/yum.repos.d/oracle-epel-ol10.repo
[ol10_u0_developer_EPEL]
name=Oracle Linux $releasever.0 EPEL Packages for Development ($basearch)
baseurl=https://yum$ociregion.$ocidomain/repo/OracleLinux/OL10/0/developer/EPEL/$basearch/
gpgkey=file:///etc/pki/rpm-gpg/RPM-GPG-KEY-oracle
gpgcheck=1
enabled=1
exclude=python3-pyOpenSSL*
[opc@oci10 ~]$