$ telnet メールサーバホスト名 25
Trying 192.168.x.x...
Connected to 192.168.x.x.
Escape character is '^]'
220 メールサーバホスト名 ESMTP Postfix
ehlo testhost
250-メールサーバホスト名
250-<以下省略>
mail from: <>
250 2.1.0 Ok
rcpt to: nothing@your.domain.here
250 2.1.5 Ok
存在しないアドレスを指定した「rcpt to: nothing@your.domain.here」に対する応答として「550 5.1.1 ~」が返ってくることを期待したものの、「250 2.1.5 Ok」という、メールアドレスが存在する場合と同じ応答となっている。
$ sudo vi /etc/fstab
$ cat /etc/fstab
#
# /etc/fstab
# Created by anaconda on Thu Jun 12 01:18:32 2025
#
# Accessible filesystems, by reference, are maintained under '/dev/disk/'.
# See man pages fstab(5), findfs(8), mount(8) and/or blkid(8) for more info.
#
# After editing this file, run 'systemctl daemon-reload' to update systemd
# units generated from this file.
#
/dev/mapper/ocivolume-root / xfs defaults 0 0
UUID=dd88872e-0527-4193-8282-b8281f1ae6fd /boot xfs defaults 0 0
UUID=AE3C-806E /boot/efi vfat defaults,uid=0,gid=0,umask=077,shortname=winnt 0 2
/dev/mapper/ocivolume-oled /var/oled xfs defaults 0 0
tmpfs /dev/shm tmpfs defaults,nodev,nosuid,noexec 0 0
######################################
## ORACLE CLOUD INFRASTRUCTURE CUSTOMERS
##
## If you are adding an iSCSI remote block volume to this file you MUST
## include the '_netdev' mount option or your instance will become
## unavailable after the next reboot.
## SCSI device names are not stable across reboots; please use the device UUID instead of /dev path.
##
## Example:
## UUID="94c5aade-8bb1-4d55-ad0c-388bb8aa716a" /data1 xfs defaults,noatime,_netdev 0 2
##
## More information:
## https://docs.us-phoenix-1.oraclecloud.com/Content/Block/Tasks/connectingtoavolume.htm
/.swapfile none swap sw 0 0
/var/oled/swapfile none swap sw 0 0
$
準備2-3: パッケージを最新へアップデート
現時点での最新へアップデートする
$ sudo dnf update -y
<略>
$ sudo reboot
手順1-4: 日本語Locale対応
ja_JP.UTF-8など日本語Localeで設定した際、「Failed to set locale, defaulting to C.UTF-8」というメッセージが出力される場合があります。
[opc@ocimail ~]$ sudo dehydrated --register
# INFO: Using main config file /etc/dehydrated/config
# INFO: Using additional config file /etc/dehydrated/conf.d/local.sh
To use dehydrated with this certificate authority you have to agree to their terms of service which you can find here: https://letsencrypt.org/documents/LE-SA-v1.5-February-24-2025.pdf
To accept these terms of service run "/bin/dehydrated --register --accept-terms".
[opc@ocimail ~]$ sudo dehydrated --register --accept-terms
# INFO: Using main config file /etc/dehydrated/config
# INFO: Using additional config file /etc/dehydrated/conf.d/local.sh
+ Generating account key...
+ Registering account key with ACME server...
+ Fetching account URL...
+ Done!
[opc@ocimail ~]$
初回のSSL証明書発行処理を実行します。
[opc@ocimail ~]$ sudo dehydrated --cron
# INFO: Using main config file /etc/dehydrated/config
# INFO: Using additional config file /etc/dehydrated/conf.d/local.sh
Processing ocimail.websa.jp
+ Signing domains...
+ Generating private key...
+ Generating signing request...
+ Requesting new certificate order from CA...
+ Received 1 authorizations URLs from the CA
+ Handling authorization for ホスト名
+ 1 pending challenge(s)
+ Deploying challenge tokens...
+ Responding to challenge for ocimail.websa.jp authorization...
+ Challenge is valid!
+ Cleaning challenge tokens...
+ Requesting certificate...
Warning: Will read cert request from stdin since no -in option is given
+ Checking certificate...
+ Done!
+ Creating fullchain.pem...
+ Done!
+ Running automatic cleanup
Moving unused file to archive directory: ホスト名/cert-1761722366.csr
Moving unused file to archive directory: ホスト名/cert-1761722366.pem
Moving unused file to archive directory: ホスト名/privkey-1761722366.pem
[opc@ocimail ~]$
これで/etc/dehydrated/certs/ホスト名/ にSSL証明書が作成される
[opc@ocimail ~]$ sudo ls -l /etc/dehydrated/certs/ホスト名/
total 20
-rw-------. 1 root root 1655 Oct 29 07:26 cert-1761722787.csr
-rw-------. 1 root root 2134 Oct 29 07:26 cert-1761722787.pem
lrwxrwxrwx. 1 root root 19 Oct 29 07:26 cert.csr -> cert-1761722787.csr
lrwxrwxrwx. 1 root root 19 Oct 29 07:26 cert.pem -> cert-1761722787.pem
-rw-------. 1 root root 1802 Oct 29 07:26 chain-1761722787.pem
lrwxrwxrwx. 1 root root 20 Oct 29 07:26 chain.pem -> chain-1761722787.pem
-rw-------. 1 root root 3936 Oct 29 07:26 fullchain-1761722787.pem
lrwxrwxrwx. 1 root root 24 Oct 29 07:26 fullchain.pem -> fullchain-1761722787.pem
-rw-------. 1 root root 3272 Oct 29 07:26 privkey-1761722787.pem
lrwxrwxrwx. 1 root root 22 Oct 29 07:26 privkey.pem -> privkey-1761722787.pem
[opc@ocimail ~]$
dovecot設定
dovecot ssl設定
/etc/dovecot/conf.d/10-ssl.conf にて
「ssl = required」を「ssl = yes」に変更
# SSL/TLS support: yes, no, required. <doc/wiki/SSL.txt>
# disable plain pop3 and imap, allowed are only pop3+TLS, pop3s, imap+TLS and imaps
# plain imap and pop3 are still allowed for local connections
ssl = yes
ssl_certとssl_keyをdehydratedが出力したファイルに置き換え
# PEM encoded X.509 SSL/TLS certificate and private key. They're opened before
# dropping root privileges, so keep the key file unreadable by anyone but
# root. Included doc/mkcert.sh can be used to easily generate self-signed
# certificate, just make sure to update the domains in dovecot-openssl.cnf
ssl_cert = </etc/dehydrated/certs/ホスト名/fullchain.pem
ssl_key = </etc/dehydrated/certs/ホスト名/privkey.pem
dhパラメータのコメントを取る
# SSL DH parameters
# Generate new params with `openssl dhparam -out /etc/dovecot/dh.pem 4096`
# Or migrate from old ssl-parameters.dat file with the command dovecot
# gives on startup when ssl_dh is unset.
ssl_dh = </etc/dovecot/dh.pem
# Space separated list of plugins to load for all services. Plugins specific to
# IMAP, LDA, etc. are added to this list in their own .conf files.
mail_plugins = $mail_plugins quota
##
## Mailbox handling optimizations
##
# Mailbox list indexes can be used to optimize IMAP STATUS commands. They are
# also required for IMAP NOTIFY extension to be enabled.
mailbox_list_index = yes
# Disable LOGIN command and all other plaintext authentications unless
# SSL/TLS is used (LOGINDISABLED capability). Note that if the remote IP
# matches the local IP (ie. you're connecting from the same computer), the
# connection is considered secure and plaintext authentication is allowed.
# See also ssl=required setting.
#disable_plaintext_auth = yes
また、下記を「auth_mechanism = plain login」に変更する
# Space separated list of wanted authentication mechanisms:
# plain login digest-md5 cram-md5 ntlm rpa apop anonymous gssapi otp
# gss-spnego
# NOTE: See also disable_plaintext_auth setting.
auth_mechanisms = plain
protocol imap {
# Space separated list of plugins to load (default is global mail_plugins).
mail_plugins = $mail_plugins imap_quota
# Maximum number of IMAP connections allowed for a user from each IP address.
# NOTE: The username is compared case-sensitively.
#mail_max_userip_connections = 10
}
##
## Mailbox definitions
##
# Each mailbox is specified in a separate mailbox section. The section name
# specifies the mailbox name. If it has spaces, you can put the name
# "in quotes". These sections can contain the following mailbox settings:
#
# auto:
# Indicates whether the mailbox with this name is automatically created
# implicitly when it is first accessed. The user can also be automatically
# subscribed to the mailbox after creation. The following values are
# defined for this setting:
#
# no - Never created automatically.
# create - Automatically created, but no automatic subscription.
# subscribe - Automatically created and subscribed.
#
# special_use:
# A space-separated list of SPECIAL-USE flags (RFC 6154) to use for the
# mailbox. There are no validity checks, so you could specify anything
# you want in here, but it's not a good idea to use flags other than the
# standard ones specified in the RFC:
#
# \All - This (virtual) mailbox presents all messages in the
# user's message store.
# \Archive - This mailbox is used to archive messages.
# \Drafts - This mailbox is used to hold draft messages.
# \Flagged - This (virtual) mailbox presents all messages in the
# user's message store marked with the IMAP \Flagged flag.
# \Important - This (virtual) mailbox presents all messages in the
# user's message store deemed important to user.
# \Junk - This mailbox is where messages deemed to be junk mail
# are held.
# \Sent - This mailbox is used to hold copies of messages that
# have been sent.
# \Trash - This mailbox is used to hold messages that have been
# deleted.
#
# comment:
# Defines a default comment or note associated with the mailbox. This
# value is accessible through the IMAP METADATA mailbox entries
# "/shared/comment" and "/private/comment". Users with sufficient
# privileges can override the default value for entries with a custom
# value.
# NOTE: Assumes "namespace inbox" has been defined in 10-mail.conf.
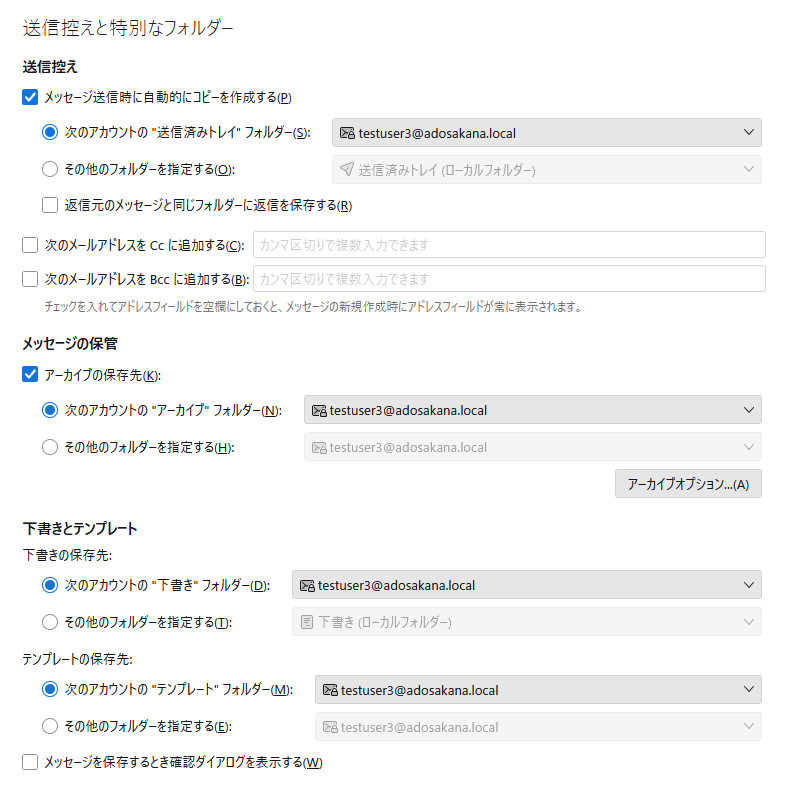
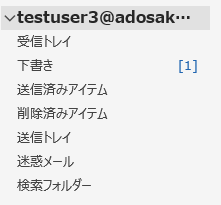
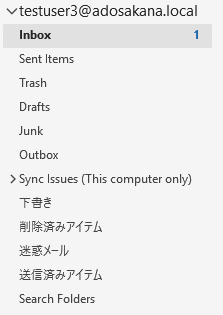
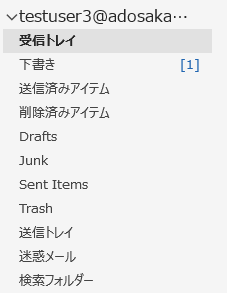
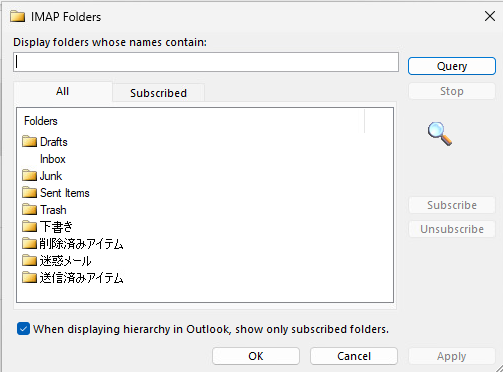
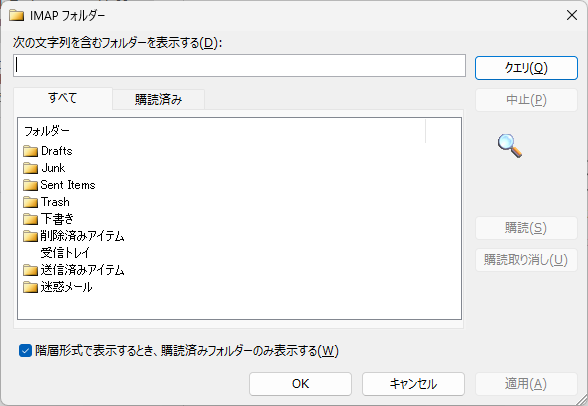
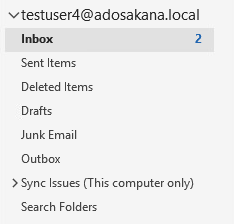
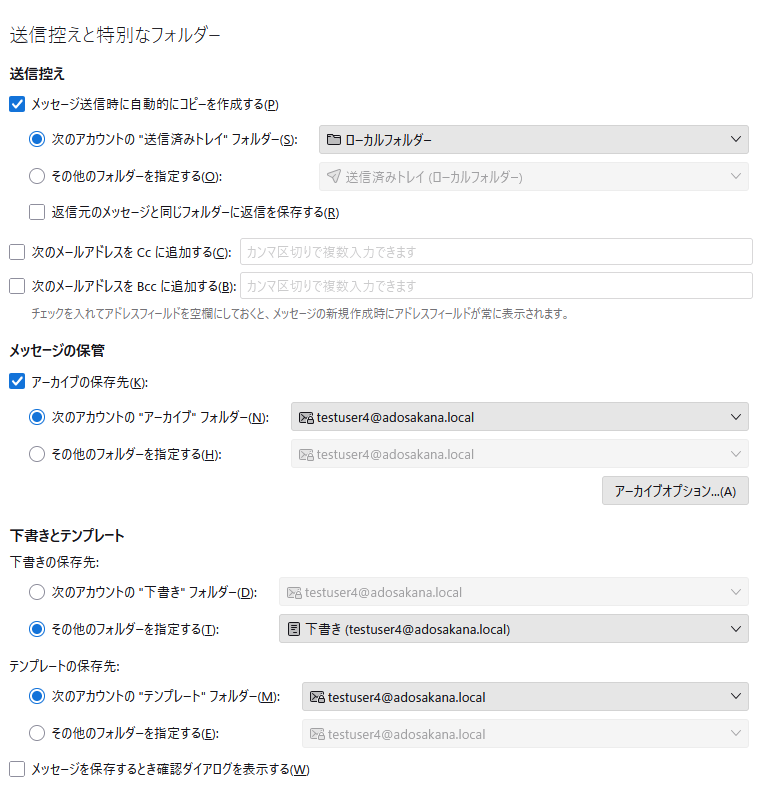
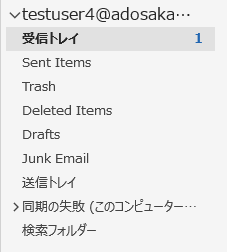
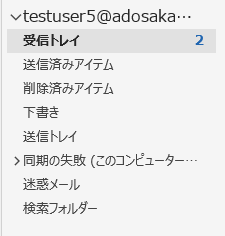
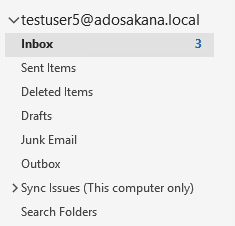
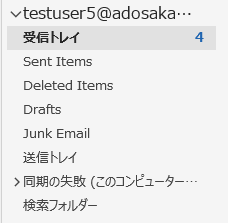
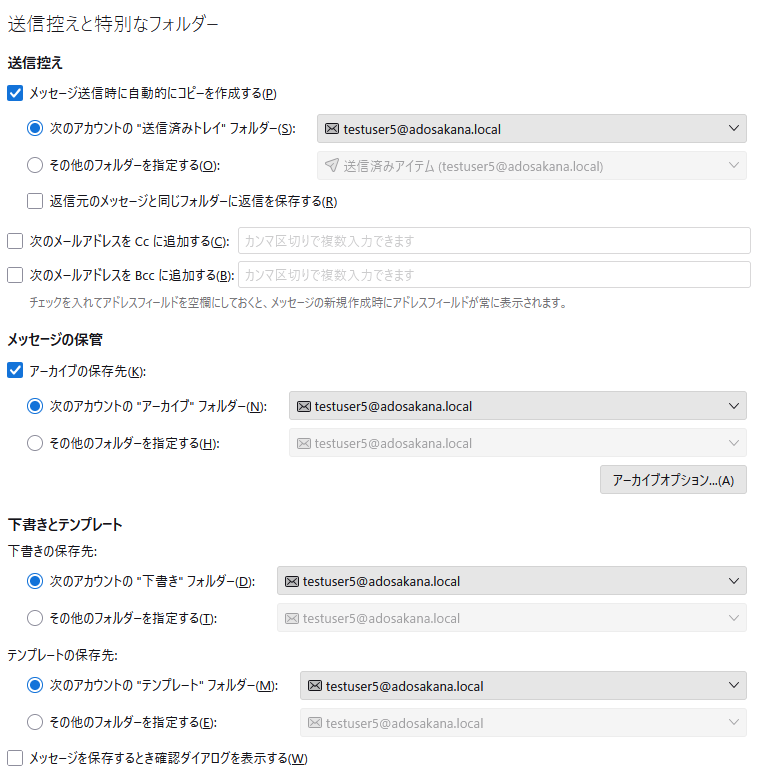
namespace inbox {
# These mailboxes are widely used and could perhaps be created automatically:
mailbox Drafts {
special_use = \Drafts
}
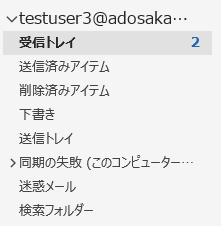
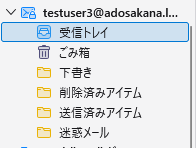
mailbox "下書き" {
special_use = \Drafts
}
mailbox INBOX.Drafts {
special_use = \Drafts
}
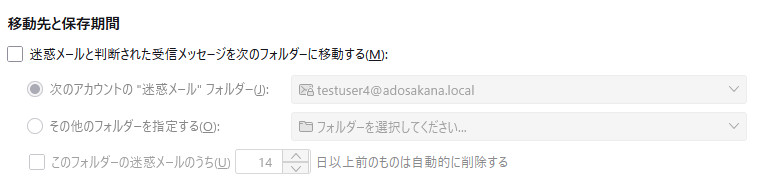
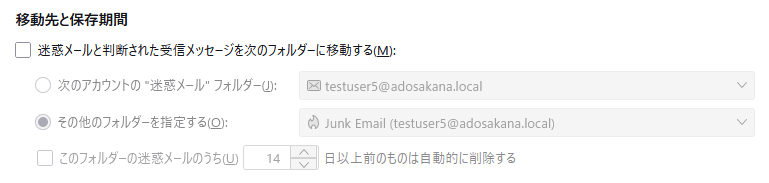
mailbox Junk {
special_use = \Junk
}
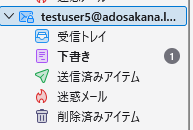
mailbox "迷惑メール" {
special_use = \Junk
}
mailbox "Junk Email" {
special_use = \Junk
}
mailbox "INBOX.Junk Email" {
special_use = \Junk
}
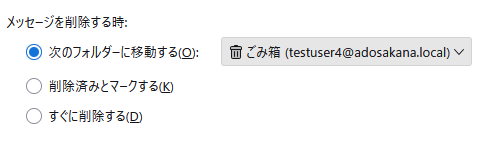
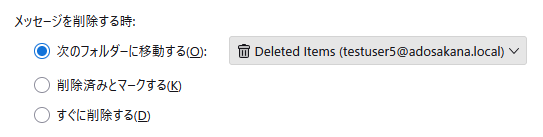
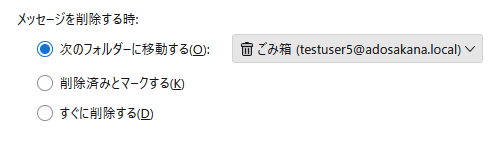
mailbox Trash {
special_use = \Trash
}
mailbox "削除済みアイテム" {
special_use = \Trash
}
mailbox "Deleted Items" {
special_use = \Trash
}
mailbox "INBOX.Deleted Items" {
special_use = \Trash
}
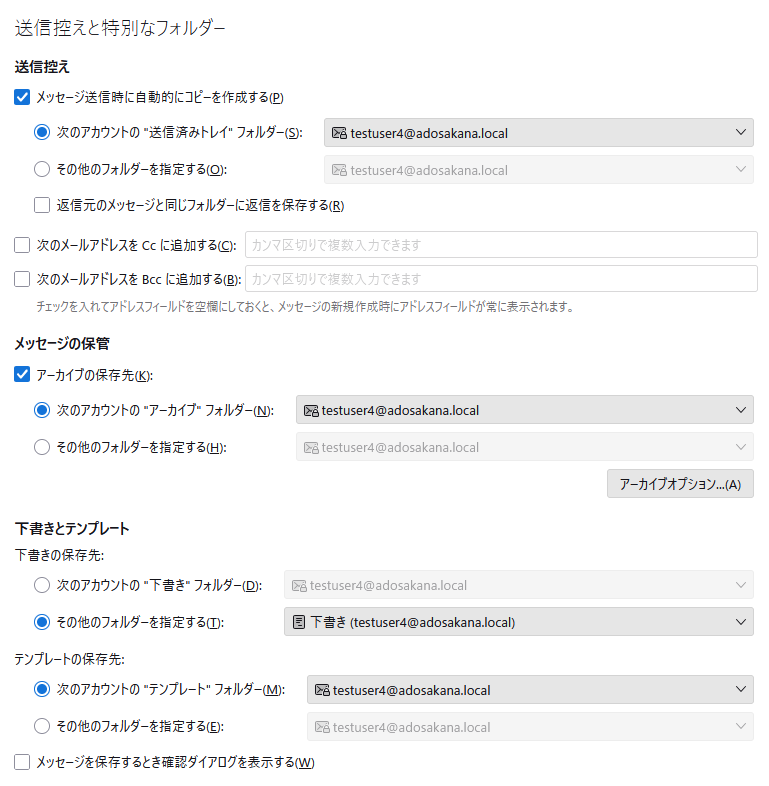
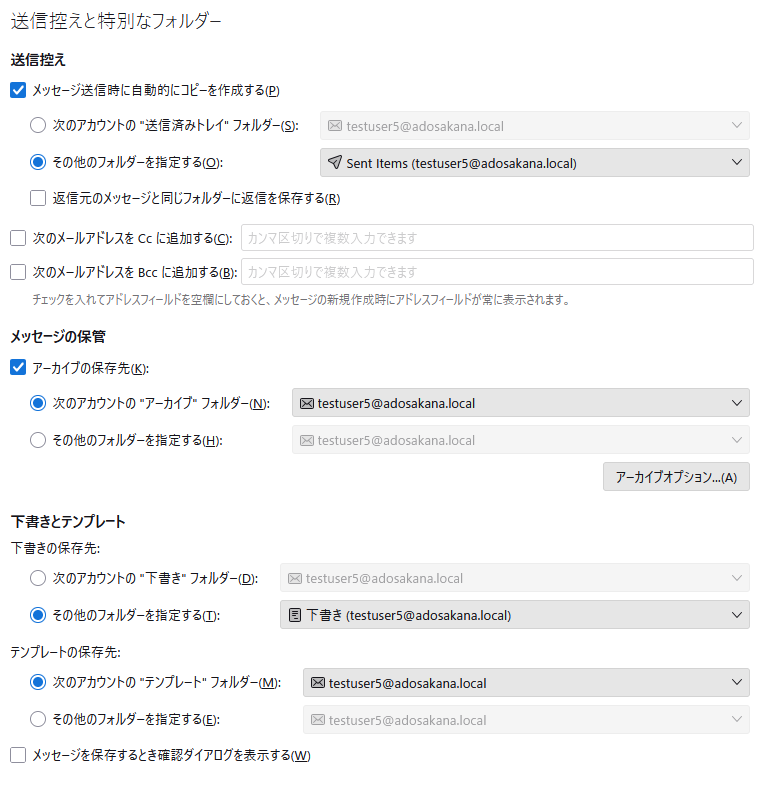
# For \Sent mailboxes there are two widely used names. We'll mark both of
# them as \Sent. User typically deletes one of them if duplicates are created.
mailbox Sent {
special_use = \Sent
}
mailbox "Sent Messages" {
special_use = \Sent
}
mailbox "送信済みアイテム" {
special_use = \Sent
}
mailbox "Sent Items" {
special_use = \Sent
}
mailbox "INBOX.Sent Items" {
special_use = \Sent
}
# If you have a virtual "All messages" mailbox:
#mailbox virtual/All {
# special_use = \All
# comment = All my messages
#}
# If you have a virtual "Flagged" mailbox:
#mailbox virtual/Flagged {
# special_use = \Flagged
# comment = All my flagged messages
#}
# If you have a virtual "Important" mailbox:
#mailbox virtual/Important {
# special_use = \Important
# comment = All my important messages
#}
}
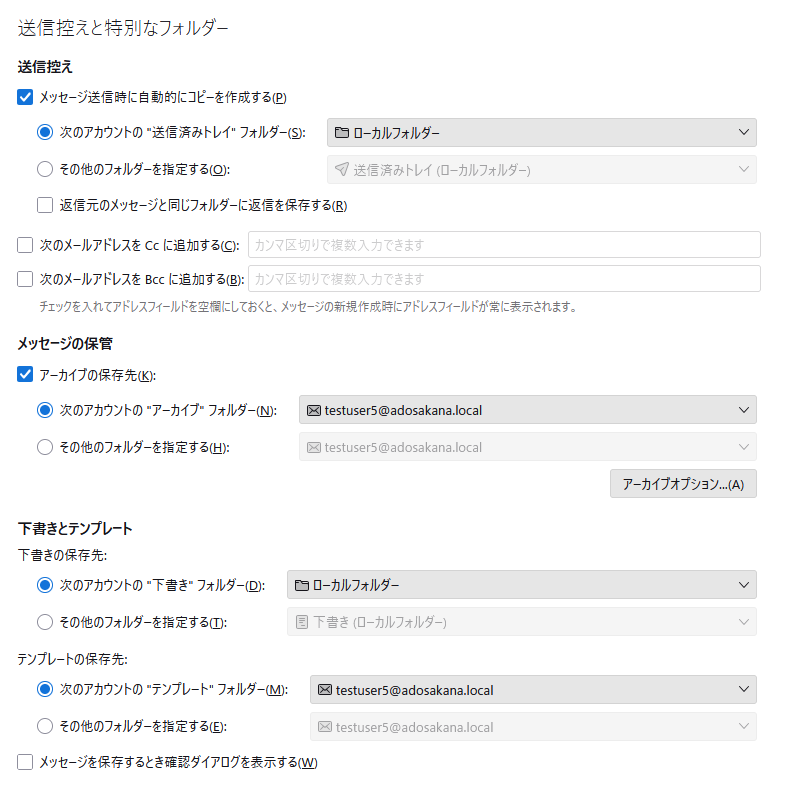
dovecotのquota設定
既存の /etc/dovecot/conf.d/90-quota.conf の最後に下記を追加する
これは100MBで制限する例
mailbox_list_index = yes
# Avoid spending excessive time waiting for the quota calculation to finish
# when mails' vsizes aren't already cached. If this many mails are opened,
# finish the quota calculation on background in indexer-worker process. Mail
# deliveries will be assumed to succeed, and explicit quota lookups will
# return internal error. (v2.2.28+)
protocol !indexer-worker {
mail_vsize_bg_after_count = 100
}
plugin {
quota = count:User quota
quota_rule = *:storage=100M
#quota_rule2 = Trash:storage=+100M
# This is required - it uses "virtual sizes" rather than "physical sizes"
# for quota counting:
quota_vsizes = yes
}
# Relay server configuration:
#
# The Dovecot SMTP submission service directly proxies the mail transaction
# to the SMTP relay configured here.
# Host name for the relay server (required)
submission_relay_host = ホスト名.ドメン名
# INTERNET HOST AND DOMAIN NAMES
#
# The myhostname parameter specifies the internet hostname of this
# mail system. The default is to use the fully-qualified domain name
# from gethostname(). $myhostname is used as a default value for many
# other configuration parameters.
#
#myhostname = host.domain.tld
#myhostname = virtual.domain.tld
myhostname = ホスト名.ドメイン名
続いてmydomain も 外部で認識させたいドメイン名を入れる
# The mydomain parameter specifies the local internet domain name.
# The default is to use $myhostname minus the first component.
# $mydomain is used as a default value for many other configuration
# parameters.
#
#mydomain = domain.tld
mydomain = ドメイン名
# SENDING MAIL
#
# The myorigin parameter specifies the domain that locally-posted
# mail appears to come from. The default is to append $myhostname,
# which is fine for small sites. If you run a domain with multiple
# machines, you should (1) change this to $mydomain and (2) set up
# a domain-wide alias database that aliases each user to
# user@that.users.mailhost.
#
# For the sake of consistency between sender and recipient addresses,
# myorigin also specifies the default domain name that is appended
# to recipient addresses that have no @domain part.
#
#myorigin = $myhostname
myorigin = $mydomain
# The inet_interfaces parameter specifies the network interface
# addresses that this mail system receives mail on. By default,
# the software claims all active interfaces on the machine. The
# parameter also controls delivery of mail to user@[ip.address].
#
# See also the proxy_interfaces parameter, for network addresses that
# are forwarded to us via a proxy or network address translator.
#
# Note: you need to stop/start Postfix when this parameter changes.
#
inet_interfaces = all
#inet_interfaces = $myhostname
#inet_interfaces = $myhostname, localhost
#inet_interfaces = localhost
# Enable IPv4, and IPv6 if supported
inet_protocols = all
自サーバで受信するメールドメインの設定は2番目のドメイン宛ても受け取るやつにします
# See also below, section "REJECTING MAIL FOR UNKNOWN LOCAL USERS".
#
#mydestination = $myhostname, localhost.$mydomain, localhost
mydestination = $myhostname, localhost.$mydomain, localhost, $mydomain
#mydestination = $myhostname, localhost.$mydomain, localhost, $mydomain,
# mail.$mydomain, www.$mydomain, ftp.$mydomain
# The right-hand side of the lookup tables is conveniently ignored.
# In the left-hand side, specify a bare username, an @domain.tld
# wild-card, or specify a user@domain.tld address.
#
local_recipient_maps = unix:passwd.byname $alias_maps
#local_recipient_maps = proxy:unix:passwd.byname $alias_maps
#local_recipient_maps =
# With Postfix version before 2.10, use smtpd_recipient_restrictions
smtpd_relay_restrictions = permit_mynetworks, permit_sasl_authenticated, reject_unauth_destination
postfixのssl証明書設定
/etc/postfix/main.cf の最後の方にSSL関連の設定がある
# The full pathname of a file with the Postfix SMTP server RSA certificate
# in PEM format. Intermediate certificates should be included in general,
# the server certificate first, then the issuing CA(s) (bottom-up order).
#
smtpd_tls_cert_file = /etc/dehydrated/certs/ocimail.websa.jp/fullchain.pem
# The full pathname of a file with the Postfix SMTP server RSA private key
# in PEM format. The private key must be accessible without a pass-phrase,
# i.e. it must not be encrypted.
#
smtpd_tls_key_file = /etc/dehydrated/certs/ocimail.websa.jp/privkey.pem
postfix側からdovecotを起動する設定
/etc/postfix/master.cf の最終行に以下を追加
dovecot   unix  -       n       n       -       -       pipe
  flags=DRhu user=vmail:vmail argv=/usr/libexec/dovecot/dovecot-lda -f ${sender} -d ${recipient}
smtpd_sasl_auth_enable = yes
broken_sasl_auth_clients = yes
# dovecot sasl configuration
smtpd_sasl_type = dovecot
# Can be an absolute path, or relative to $queue_directory
# Debian/Ubuntu users: Postfix is setup by default to run chrooted, so it is best to leave it as-is below
smtpd_sasl_path = private/auth
# and the common settings to enable SASL:
smtpd_sasl_auth_enable = yes
smtpd_sasl_security_options = noanonymous
トラブル対応
gmail宛てがgmail側で受け取り拒否
gmailに送ったところ、メールがなかなか届かないので/var/log/maillogを確認
Oct 30 10:15:28 ocimail postfix/smtp[5898]: AA57A309E87E: to=<アドレス@gmail.com>, relay=gmail-smtp-in.l.google.com[2404:6800:4008:c15::1b]:25, delay=2.6, delays=0.29/0.19/1.2/0.9, dsn=5.7.1, status=bounced (host gmail-
smtp-in.l.google.com[2404:6800:4008:c15::1b] said: 550-5.7.1 [2603:c023:f:9000:0:7a41:2e84:f27f] Gmail has detected that this 550-5.7.1 message does not meet IPv6 sending guidelines regarding PTR records 550-5.7.1 and auth
entication. For more information, go to 550 5.7.1  https://support.google.com/mail/?p=IPv6AuthError 41be03b00d2f7-b71f4ba78c7si7488417a12.1056 - gsmtp (in reply to end of DATA command))
「Gmail has detected that this 550-5.7.1 message does not meet IPv6 sending guidelines regarding PTR records 550-5.7.1 and authentication. For more information, go to 550 5.7.1 https://support.google.com/mail/?p=IPv6AuthError」という形で拒否されていた。
IPv6 認証エラーの例を次に示します。 550-5.7.1: Message does not meet IPv6 sending guidelines regarding PTR records and authentication.(メールが PTR レコードと認証に関する IPv6 の送信ガイドラインに準拠していません。)
あと、最初の方に書かれているIPアドレスに対する要件も関係している
インフラストラクチャ設定の要件とガイドライン IP アドレス 重要: 送信元 IP アドレスは、ポインタ(PTR)レコードで指定されたホスト名の IP アドレスと一致している必要があります。
送信元 SMTP サーバーのパブリック IP アドレスには、対応するホスト名を参照する PTR レコードが必要です。これは、リバース DNS ルックアップと呼ばれます。このホスト名には、送信元サーバーと同じパブリック IP アドレスを参照する A レコード(IPv4 の場合)または AAAA レコード(IPv6 の場合)も必要です。これは、フォワード DNS ルックアップと呼ばれます。 送信元サーバーの IP アドレスとドメインを対応付ける有効なリバース DNS レコードを設定します。Google 管理者ツールボックスの Dig ツールを使用して PTR レコードを確認します。 重要: 送信元 IP アドレスは、ポインタ(PTR)レコードで指定されたホスト名の IP アドレスと一致している必要があります。
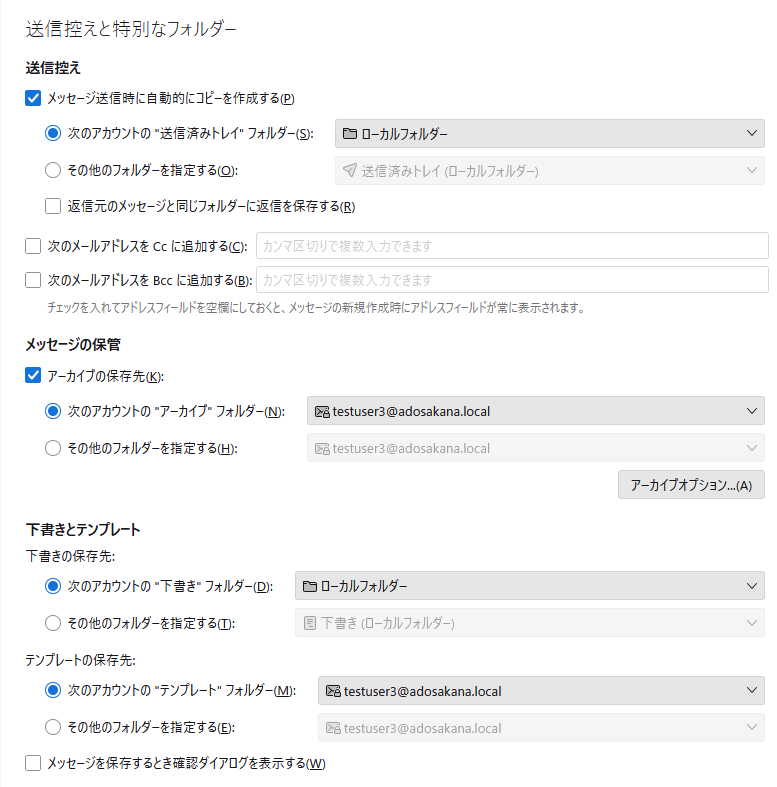
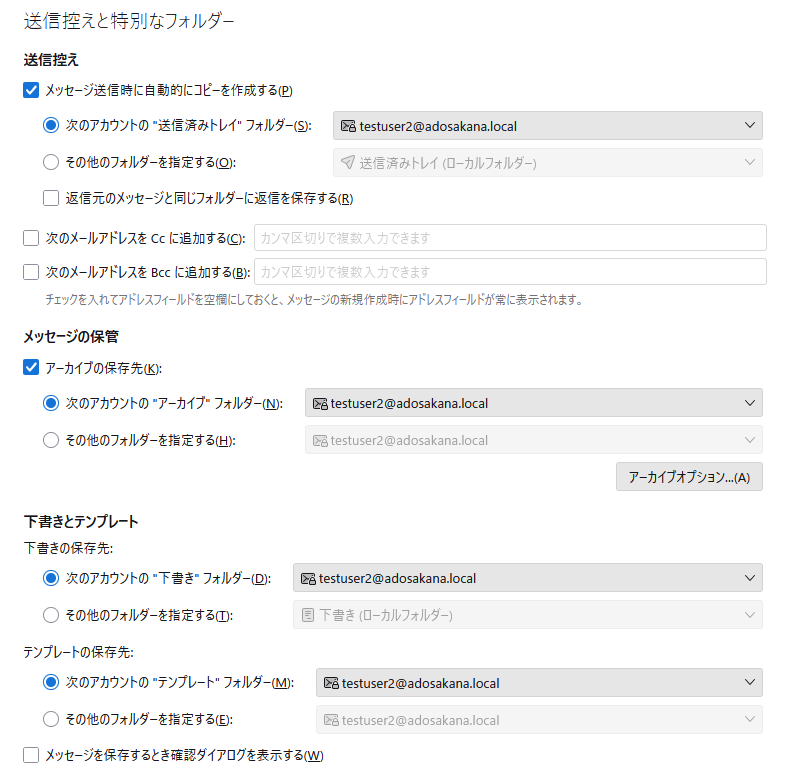
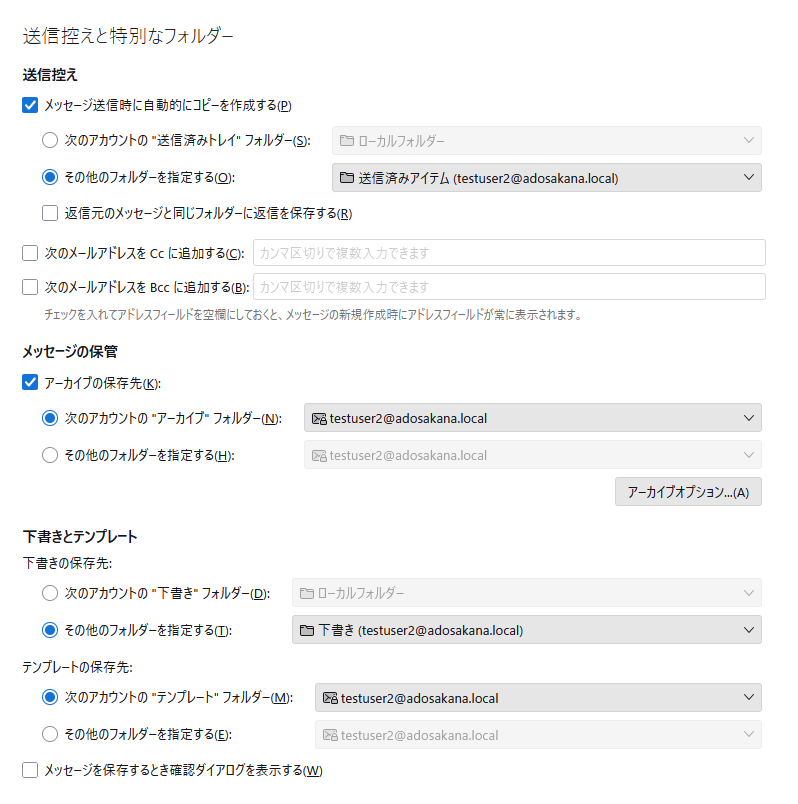
namespace inbox {
  # These mailboxes are widely used and could perhaps be created automatically:
  mailbox Drafts {
    special_use = \Drafts
  }
  mailbox Junk {
    special_use = \Junk
  }
  mailbox Trash {
    special_use = \Trash
  }

  # For \Sent mailboxes there are two widely used names. We'll mark both of
  # them as \Sent. User typically deletes one of them if duplicates are created.
  mailbox Sent {
    special_use = \Sent
  }
  mailbox "Sent Messages" {
    special_use = \Sent
  }
##
## Mailbox definitions
##

# Each mailbox is specified in a separate mailbox section. The section name
# specifies the mailbox name. If it has spaces, you can put the name
# "in quotes". These sections can contain the following mailbox settings:
#
# auto:
#   Indicates whether the mailbox with this name is automatically created
#   implicitly when it is first accessed. The user can also be automatically
#   subscribed to the mailbox after creation. The following values are
#   defined for this setting:
#
#     no        - Never created automatically.
#     create    - Automatically created, but no automatic subscription.
#     subscribe - Automatically created and subscribed.
#
# special_use:
#   A space-separated list of SPECIAL-USE flags (RFC 6154) to use for the
#   mailbox. There are no validity checks, so you could specify anything
#   you want in here, but it's not a good idea to use flags other than the
#   standard ones specified in the RFC:
#
#     \All       - This (virtual) mailbox presents all messages in the
#                  user's message store.
#     \Archive   - This mailbox is used to archive messages.
#     \Drafts    - This mailbox is used to hold draft messages.
#     \Flagged   - This (virtual) mailbox presents all messages in the
#                  user's message store marked with the IMAP \Flagged flag.
#     \Important - This (virtual) mailbox presents all messages in the
#                  user's message store deemed important to user.
#     \Junk      - This mailbox is where messages deemed to be junk mail
#                  are held.
#     \Sent      - This mailbox is used to hold copies of messages that
#                  have been sent.
#     \Trash     - This mailbox is used to hold messages that have been
#                  deleted.
#
# comment:
#   Defines a default comment or note associated with the mailbox. This
#   value is accessible through the IMAP METADATA mailbox entries
#   "/shared/comment" and "/private/comment". Users with sufficient
#   privileges can override the default value for entries with a custom
#   value.

# NOTE: Assumes "namespace inbox" has been defined in 10-mail.conf.
namespace inbox {
  # These mailboxes are widely used and could perhaps be created automatically:
  mailbox Drafts {
    special_use = \Drafts
  }
  mailbox "下書き" {
    special_use = \Drafts
  }
  mailbox Junk {
    special_use = \Junk
  }
  mailbox "迷惑メール" {
    special_use = \Junk
  }
  mailbox "Junk Email" {
    special_use = \Junk
  }
  mailbox Trash {
    special_use = \Trash
  }
  mailbox "削除済みアイテム" {
    special_use = \Trash
  }
  mailbox "Deleted Items" {
    special_use = \Trash
  }

  # For \Sent mailboxes there are two widely used names. We'll mark both of
  # them as \Sent. User typically deletes one of them if duplicates are created.
  mailbox Sent {
    special_use = \Sent
  }
  mailbox "Sent Messages" {
    special_use = \Sent
  }
  mailbox "送信済みアイテム" {
    special_use = \Sent
  }
  mailbox "Sent Items" {
    special_use = \Sent
  }

  # If you have a virtual "All messages" mailbox:
  #mailbox virtual/All {
  #  special_use = \All
  #  comment = All my messages
  #}

  # If you have a virtual "Flagged" mailbox:
  #mailbox virtual/Flagged {
  #  special_use = \Flagged
  #  comment = All my flagged messages
  #}

  # If you have a virtual "Important" mailbox:
  #mailbox virtual/Important {
  #  special_use = \Important
  #  comment = All my important messages
  #}
}
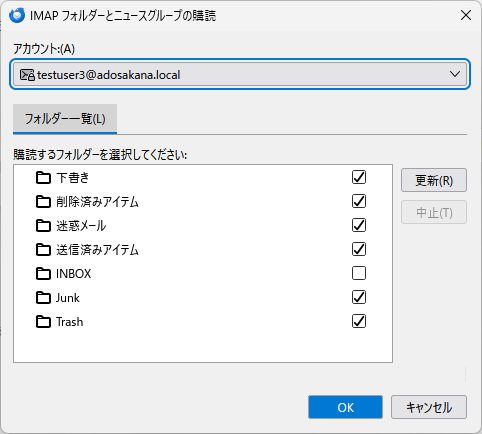
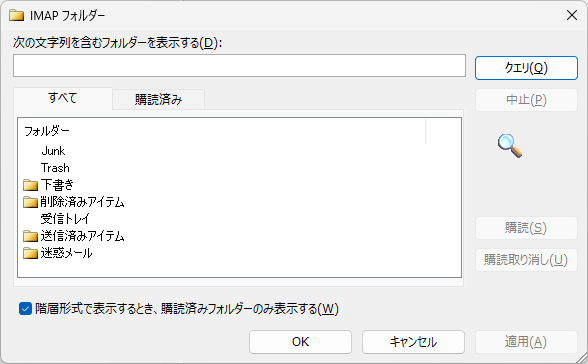
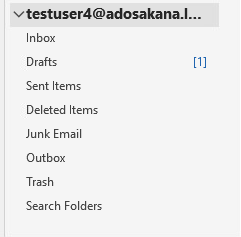
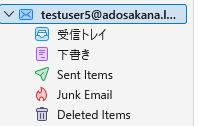
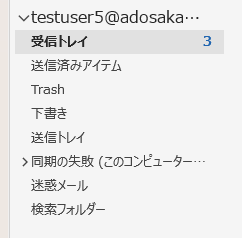
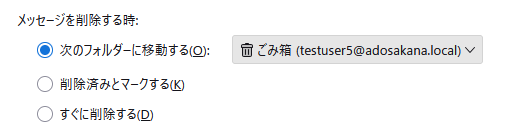
初期状態
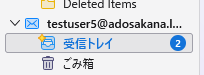
# doveadm mailbox list -u testuser5
INBOX
# ls -aF testuser5/Maildir/
./  ../  cur/  new/  tmp/
#