Windows10とLinuxの両方で動くPowerShellスクリプトの考慮点

https://github.com/osakanataro/showroom-live のPowerShellスクリプトを作っている際に問題となった点のメモ書きです。

その1:改行コード

改行コードはWindows10ならCR+LF、LinuxならLFにする必要がある。それぞれ逆だとエラーになった。

コードを共有するのであれば、git for Windowsを使って管理し、Windowsに持ってくる時に改行コードを変換するようにした方が良い。

github上でreleaseとしてzipを提供する場合は、github側の機能でzipを作ると改行コードがLFになるので、Windowsユーザ向けに改行コードをCR+LFにしたバージョンを追加でアップロードした方が良い。

その2:文字エンコーディング

Windows10上のVisual Studio Codeで日本語文字列を含んで保存したところ、UTF-8 BOMなしで保存され、それをLinuxに持って行ったところ問題無く動作した。

しかし、UTF-8 BOMなしのファイルをWindows10上のPowerShell ISEで開くと文字化けする。

PowerShell ISEではUTF-8 BOMありを想定しているということで、BOMありに変えてみたところ、Linux上では「#!/usr/bin/pwsh」の#!より前にBOMのコードが挿入されてしまうため問題が発生した。

Windows10標準notepadなどでの編集には全く問題なく、PowerShell ISEのみの問題であるため、PowerShell ISEでの編集を諦め、UTF-8 BOMなしとした。

その3:ファイル名の取り扱い

まず、WindowsとUNIXでパス名の「\」と「/」の違い問題がある。

また、日本語文字列を使いファイル名を作成しようとした場合、許可される文字列がどの範囲かという判定が必要になったりする。

クロスプラットフォームで確実に動作させることを考えた場合は、いわゆるASCII文字だけでファイル名を構成した方が無難である。

その4:ParsedHtmlは使えない

Invoke-WebRequestで取得したWebページをParsedHtmlで解析して使用する、ということが出来るのは、Windows上でInternetExplorerコンポーネントを使える場合のみで、PowerShell Core環境では使えない。

このため、地道にパース処理を実装する必要がある。

その5:他のコマンド実行処理

PowerShellスクリプト内から、他のコマンドを実行するための処理として「Start-Process」というのがある。

ただ、実験してみた限りでは、Windows環境でDOSコマンドを実行する場合、Start-ProcessではPowerShellを実行した画面と同じ場所にDOSコマンドの出力内容をそのまま出力させることができなかった。(-Wait -PassThru -NoNewWindowをつけてもダメだった)

Windows環境の場合、PowerShell内から「cmd /c」を利用してDOSコマンドを実行した場合はPowerShellを実行した画面と同じ場所にDOSコマンドの出力内容を表示させることができた。

それに対して、Linux環境ではStart-Processを「-Wait -PassThru -NoNewWindow」オプション付きで実行することで通常のコマンドの出力内容をそのまま表示させることはできた。

その6:機種依存処理の条件分け

その3、その5のような機種依存処理をどのように実行するかについては「[Environment]::OSVersion.Platform」を利用した。

どのような文字列が取得できるかという点については「PlatformID Enum」にあるように「MacOSX」「Unix」「Win32NT」の3種類(他にもあるけど過去のモノなので無視)

MacOSXとUnixの処理はだいたい似たようにできるので、「Win32NT」の場合を検出した方がよさそうだったので、下記の様な処理を書いた。

    if([Environment]::OSVersion.Platform -eq "Win32NT"){
        cmd /c $streamlinkcmd $streamtypes $liveurl $quolity $streamlinkoption $streamlinkfilename
    }else{
        Start-Process -FilePath $streamlinkcmd -ArgumentList $streamtypes,$liveurl,$quolity,$streamlinkoption,$streamlinkfilename -Wait -PassThru -NoNewWindow
    }

ブラウザを開かずにshowroomを視聴する

ブラウザを開かずにshowroom liveを視聴する方法はないかなぁ・・・と調べて見たら、livestreamを使い視聴するためのscriptを発見。fcicq/showroomlive.sh

ただ、これはそのままではshowroomの仕様変更に対応しておらず使えない。また、livestreamは現在メンテナンスされておらずstreamlinkを使え、と書いてある。

streamlinkはpythonインストールとか考えなくても使えるようなWindows用バイナリが用意されているため、簡単に実験ができそうだったので試してみた。

とりあえずstreamlinkをインストールして、showroom liveの配信やってるページに出てくる.m3u8ファイルを与えてみると・・・

C:\Program Files (x86)\Streamlink\bin>streamlink.exe https://edge-210-140-227-26.showroom-live.com/liveedge/52e66cae6b58a08641bd702e091c7f94fee147899da1a714c38312bab75ea7f0/chunklist_w791438536.m3u8
[cli][info] Found matching plugin hls for URL https://edge-210-140-227-26.showroom-live.com/liveedge/52e66cae6b58a08641bd702e091c7f94fee147899da1a714c38312bab75ea7f0/chunklist_w791438536.m3u8
Available streams: live (worst, best)

C:\Program Files (x86)\Streamlink\bin>

高画質(best)/低画質(worst)の選択を求められた。

C:\Program Files (x86)\Streamlink\bin>streamlink.exe https://edge-210-140-227-26.showroom-live.com/liveedge/52e66cae6b58a08641bd702e091c7f94fee147899da1a714c38312bab75ea7f0/chunklist_w791438536.m3u8 worst
[cli][info] Found matching plugin hls for URL https://edge-210-140-227-26.showroom-live.com/liveedge/52e66cae6b58a08641bd702e091c7f94fee147899da1a714c38312bab75ea7f0/chunklist_w791438536.m3u8
[cli][info] Available streams: live (worst, best)
[cli][info] Opening stream: live (hls)
error: The default player (VLC) does not seem to be installed. You must specify the path to a player executable with --player.
[cli][info] Closing currently open stream...

C:\Program Files (x86)\Streamlink\bin>

VLCを使って動画再生を開始しようとしたが、VLCがインストールされていないため失敗した。

そこでVLCをインストールしてから再度実行してみると、こんどはVLCアプリが起動して再生が始まった。

C:\Program Files (x86)\Streamlink\bin>streamlink.exe https://edge-210-140-227-26.showroom-live.com/liveedge/52e66cae6b58a08641bd702e091c7f94fee147899da1a714c38312bab75ea7f0/chunklist_w791438536.m3u8 worst
[cli][info] Found matching plugin hls for URL https://edge-210-140-227-26.showroom-live.com/liveedge/52e66cae6b58a08641bd702e091c7f94fee147899da1a714c38312bab75ea7f0/chunklist_w791438536.m3u8
[cli][info] Available streams: live (worst, best)
[cli][info] Opening stream: live (hls)
[cli][info] Starting player: "C:\Program Files\VideoLAN\VLC\vlc.exe"
[cli][info] Player closed
[cli][info] Stream ended
[cli][info] Closing currently open stream...

C:\Program Files (x86)\Streamlink\bin>

(上記のログはVLCの終了までを含む)

さらにいろいろ実験中、うっかりとstreamlinkに対してルームのURLそのものを渡してしまったところ、何事もないかの表示表示された。

C:\Program Files (x86)\Streamlink\bin>streamlink.exe https://www.showroom-live.com/sena-hiiragi
[cli][info] Found matching plugin showroom for URL https://www.showroom-live.com/sena-hiiragi
Available streams: 144p (worst), low, 360p, high (best)

C:\Program Files (x86)\Streamlink\bin>
C:\Program Files (x86)\Streamlink\bin>streamlink.exe https://www.showroom-live.com/sena-hiiragi best
[cli][info] Found matching plugin showroom for URL https://www.showroom-live.com/sena-hiiragi
[cli][info] Available streams: 144p (worst), low, 360p, high (best)
[cli][info] Opening stream: high (rtmp)
[cli][info] Starting player: "C:\Program Files\VideoLAN\VLC\vlc.exe"
[cli][info] Player closed
[cli][info] Stream ended
[cli][info] Closing currently open stream...

C:\Program Files (x86)\Streamlink\bin>

「Opening stream: high (rtmp)」となっているが、この形式はFlash Video形式となる。デフォルトでは「”rtmp,hls,hds,http,akamaihd,*”」という順序で優先順位を決めているので、MPEG4-TS形式で受信するには「–stream-types=hls」オプションをつけてhlsを指定する必要がある。

C:\Program Files (x86)\Streamlink\bin>streamlink.exe --stream-types=hls https://www.showroom-live.com/sena-hiiragi best
[cli][info] Found matching plugin showroom for URL https://www.showroom-live.com/sena-hiiragi
[cli][info] Available streams: 144p (worst), 360p (best)
[cli][info] Opening stream: 360p (hls)
[cli][info] Starting player: "C:\Program Files\VideoLAN\VLC\vlc.exe"
[cli][info] Player closed
[cli][info] Stream ended
[cli][info] Closing currently open stream...

C:\Program Files (x86)\Streamlink\bin>

よくみたら「streamlinkのpluginページ」にshowroomが対応していると掲載されていた。

他にabematv、 bilibili、 nhkworld、pixiv(sketch)が掲載されていて興味深い。

で・・・ここで調べたことを元に、showroom liveで目的とするルームの配信が始まったらVLCを起動して視聴開始するためのPowerShellスクリプトを実装してみた。

https://github.com/osakanataro/showroom-live

なぜPowerShellで組んだかといえば、WindowsとLinuxの両方で同じスクリプトを使いたかったからですね。

プラットフォームの違いを考慮しなければならない点がいくつかありましたが、まぁなんとかなりました。

Raspberry pi上のOSMCにstreamlinkをインストールする

streamlink」をOSMC環境に入れてみた

streamlinkからVLCを起動してHDMI経由の音声出力はできたのですが、HDMI映像出力がうまくいきませんでした。このため、VLCで受信したものをrtspサーバとして出力し、そのデータをkodi側で受け取るという実装にしました。

追加したもの

再生用にVLC

$ sudo apt install vlc vlc-plugin-sdl 

pythonでpipコマンドを使うために

$ sudo apt install python-pip python-setuptools

コンパイルをするために

$ sudo apt install build-essential python-dev

エラー解決のために

下記のエラー解決のために「sudo apt install libffi-dev」

    c/_cffi_backend.c:15:17: fatal error: ffi.h: No such file or directory
     #include <ffi.h>

「sudo apt install libssl-dev」

    build/temp.linux-armv7l-2.7/_openssl.c:498:30: fatal error: openssl/opensslv.h: No such file or directory
     #include <openssl/opensslv.h>

で・・・これでようやくstreamlinkインストールに成功しました。

「sudo pip install streamlink」

再生に至るまで

以下のような感じで、OSMCにログインした状態でコマンドを実行して、ポート8554にてrtspのストリーミングサーバを実行します。

$ streamlink https://www.showroom-live.com/ringo-005 best --player="cvlc --sout '#rtp{sdp=rtsp://:8554/}'"

ちなみに、streamlinkのマニュアルを見ると「–player-args」というオプションで引数を渡すことができるとありましたが、「streamlink https://www.showroom-live.com/ringo-005 best –player=cvlc –player-args=”–sout ‘#rtp{sdp=rtsp://:8554/}'”」を実行すると、以下のエラーになってしまって起動できませんでした。

osmc@osmc:~$ streamlink https://www.showroom-live.com/yui-010 worst --player=cvlc --player-args="--sout '#rtp{sdp=rtsp://:8554/}'"
/usr/local/lib/python2.7/dist-packages/requests/__init__.py:91: RequestsDependencyWarning: urllib3 (1.25.2) or chardet (3.0.4) doesn't match a supported version!
  RequestsDependencyWarning)
[cli][info] Found matching plugin showroom for URL https://www.showroom-live.com/yui-010
[cli][info] Available streams: 144p (worst), low, high, 1080p (best)
[cli][info] Opening stream: 144p (hls)
[cli][info] Starting player: cvlc
[cli][info] Closing currently open stream...
Traceback (most recent call last):
  File "/usr/local/bin/streamlink", line 11, in <module>
    sys.exit(main())
  File "/usr/local/lib/python2.7/dist-packages/streamlink_cli/main.py", line 1033, in main
    handle_url()
  File "/usr/local/lib/python2.7/dist-packages/streamlink_cli/main.py", line 594, in handle_url
    handle_stream(plugin, streams, stream_name)
  File "/usr/local/lib/python2.7/dist-packages/streamlink_cli/main.py", line 447, in handle_stream
    success = output_stream(plugin, stream)
  File "/usr/local/lib/python2.7/dist-packages/streamlink_cli/main.py", line 320, in output_stream
    output.open()
  File "/usr/local/lib/python2.7/dist-packages/streamlink_cli/output.py", line 24, in open
    self._open()
  File "/usr/local/lib/python2.7/dist-packages/streamlink_cli/output.py", line 221, in _open
    self._open_subprocess()
  File "/usr/local/lib/python2.7/dist-packages/streamlink_cli/output.py", line 242, in _open_subprocess
    args = self._create_arguments()
  File "/usr/local/lib/python2.7/dist-packages/streamlink_cli/output.py", line 203, in _create_arguments
    args = self.args.format(filename=filename)
KeyError: 'sdp=rtsp'
osmc@osmc:~$ streamlink https://www.showroom-live.com/yui-010 best --player="cvlc --sout '#rtp{sdp=rtsp://:8554/}'"
/usr/local/lib/python2.7/dist-packages/requests/__init__.py:91: RequestsDependencyWarning: urllib3 (1.25.2) or chardet (3.0.4) doesn't match a supported version!
  RequestsDependencyWarning)
[cli][info] Found matching plugin showroom for URL https://www.showroom-live.com/yui-010
[cli][info] Available streams: 144p (worst), low, high, 1080p (best)
[cli][info] Opening stream: 1080p (hls)
^CInterrupted! Exiting...
[cli][info] Closing currently open stream...
osmc@osmc:~$

続いて、拡張子が.m3uで、以下の内容をテキストエディタで作成します。

#EXTM3U
#EXTINF:-1 
rtsp://127.0.0.1:8554

このm3uファイルをkodiで開くとshowroom動画が再生されました。

双方向対応USB Type-C用電圧電流測定機RD TC66Cが届いた

USB Type-Cで充電していると、いったい何Vで充電されているのかが気になります。

でも、大抵のデバイスでは正確な値は教えてくれません。

そこでUSB Type-C用の電圧電流測定機を使います。

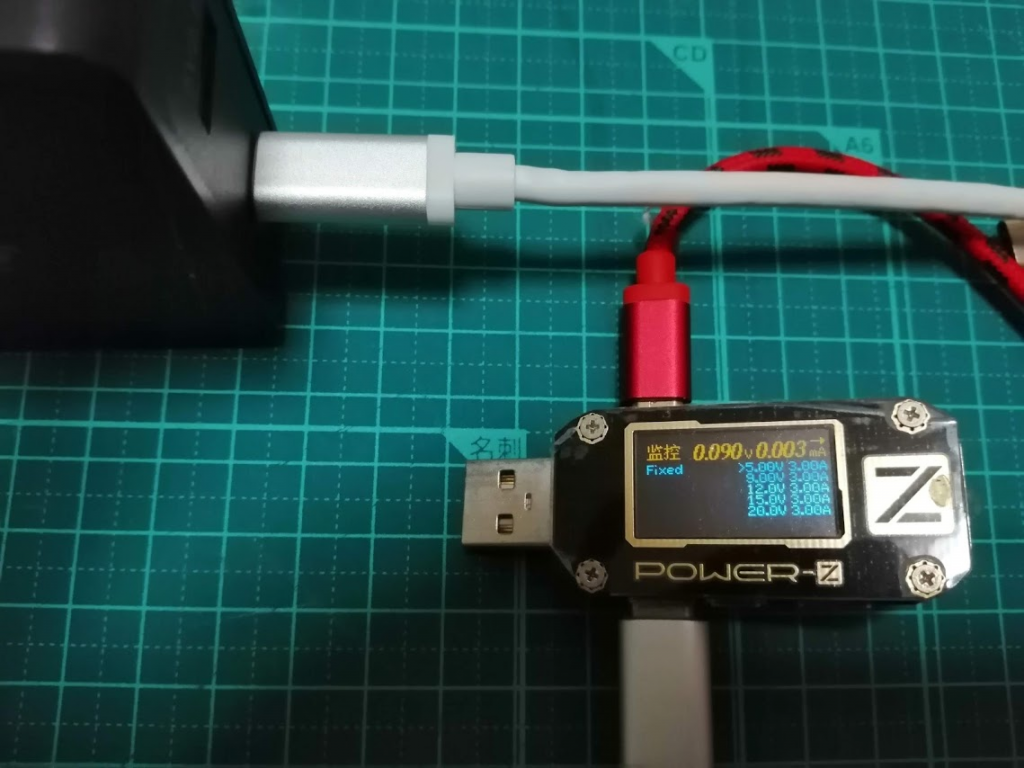
いろんなタイプがあり、うちでは2018年8月に買った「USB Type-C用の電圧電流計RD TC64」をメインで使っていました。(その他に「Power-Z KM-001」というのもありますが、これは機能は多いのですが大きいというのと測定時にType-Cケーブルを2本使う必要があるのであまり使っていません)

RD社の製品はいろいろ使っているのですが、この度発売されたRD TC66Cというのを「Aliexpressにある公式ショップで$24.50」買いました。なお、$19.50で販売している方はRD TC66というものでこちらは機能削減版です。

この製品のトピックは「双方向測定可能」と「microUSB接続でWindowsパソコンとつなぎ測定データ取得可能」「Bluetooth接続でAndroid/iOSとつなぎ測定データ取得可能(RD66Cのみ)」という点です。

「双方向測定」というのはUSB Type-C充電の測定で結構重要です。USB Type-Cの充電ではどちらが電源供給サイドになるかはコネクタを見ただけではわからず、実際に接続しコネクションが行われてから確定します。なので、どちらの方向に電流が流れているかを確認するためには「双方向測定」である必要があります。

「microUSB接続」でパソコンに繋ぐ場合は「https://pan.baidu.com/s/1sxlqFnTYEN2TcyLiTA5EQA#list/path=%2F」か「https://www.mediafire.com/folder/pqn0ybytqpy7n/TC66」から「RuiDengUSBMeter.rar」をダウンロードして使います。(2019/04/15 21:00時点ではmediafireにはアップロードされていません 4/18にアップロードしてもらいました)

「Bluetooth接続」は「Android用アプリTC66CAndroid用アプリTC66C/「iOS用アプリTC66C」で利用できます。上記のbaiduとmediafireにapkファイル単体もアップロードされています。

英語版のマニュアルは「https://pan.baidu.com/s/1sxlqFnTYEN2TcyLiTA5EQA#list/path=%2F」か「https://www.mediafire.com/folder/pqn0ybytqpy7n/TC66」 にpdfでアップロードされています。中国語版マニュアルはhttp://www.ruidengkeji.com/inst/TC66.pdfにあります。

さて、実際に使ってみます。

とりあえず、RD TC64(赤い方)と、RD TC66C(黒い方)を並べて見る。ちょっとTC66Cが大きい。

DELL Venue10 Pro 5056を繋いで測定。

黒いTC66Cの方は「→」と「←」で電流の方向を表しています。

表示内容自体はTC64とTC66Cはほぼ同じ感じですね。

RD TC66C/TC66の側面には押しボタンスイッチが2つ(AとB)、スライドスイッチ(CとD)、あとmicroUSBコネクタ(E)があります。

Aキーで表示の切り替えを行い、Bキーを長押ししてSETTINGメニューに入り、SETTINGメニュー内の項目移動はBキーの短い押しで行う。SETTINGの各項目値の変更はAキーの短い押しで行う。

標準設定ではUSB接続とBluetooth接続が有効になっていました。

前述のAndroid TC66CアプリをSoCにSnapdragon採用している端末にインストールして実験・・・MediaTek端末だとBLEがうまく動かないようでTC66Cデバイスを認識してくれませんでした。

アプリを起動・・・

「スキャン」をクリックして、スキャン開始

「TC66C」の横の「接続」をクリックすると接続されます。

こんな感じで測定時のグラフが表示されます。下にある「前のページ」「画面回転」「次のページ」はTC66Cの液晶画面操作です。

.この他にもいろいろ機能はありますが、面倒なので、とりあえずこの程度で

2019/04/20時点ではTC66 / TC66C のfirmwareアップデートが提供されています。

WindowsアプリのRuiDengUSBMeterをインストールして、TC66/TC66Cの一番左側のスイッチを押しながらmicroUSBを繋ぐとBOOTLOADERモードで起動するので、アップデートができるようになります。


RD TC66Cのfirmwareをアップデート」にてfirmwareアップデートについて詳細を記載しています。

NetBackupマスタサーバのホスト名を変える手順(非公式

NetBackupマスタサーバのホスト名は通常変更できない。

しかし、探すと、NetBackup 6.0時代の非公式手順なるものが発見出来る。


Change Name of Master Serve」消えそうなので下記に内容を転記しておく。

Renaming a Master Server under NetBackup 6.0 requires making some updates to the EMM database and
EMM configration files as well as the changes to configuration files and registry entries required for earlier
versions of NetBackup. The steps involved are:

1. Shut down NetBackup on the Master Server.
2. Change the various entries for the Master Server and EMM server in bp.conf and vm.conf (or the
registry on a Windows server).
3. Change the value of VXDBMS_NB_SERVER in the vxdbms.conf file (located in
/usr/openv/db/data on UNIX and <install path>\VERITAS\NetBackupDB\data on Windows) to
reflect the name of the new Master Server.
4. Change the corresponding value found the server.conf file (located in /usr/openv/var/global on
UNIX and <install path>\VERITAS\NetBackupDB\conf on Windows)
5. Rename the server and restart it.
6. Re-start NetBackup
7. Run nbemmcmd –renamehost –machinename <old master> -newmachinename <new master> –
machinetype master
8. Re-start NetBackup again
9. Run the command nbemmcmd –listhosts –verbose on the Master Server to confirm that the
entries for ‘server’ and ‘master’ reflect the new Master Server name.
10. Run nbemmcmd –setemmserver –emmserver <old master> -newemmserver <new master> on
each media server
11. Update the entries for the master server in bp.conf and vm.conf (or the registry on a Windows
server) on each media server
12. Update the entries for the master server in bp.conf (or the registry on a Windows server) on each
client server
Note: The process described here cannot be used to change a non-clustered Master Server to a
clustered Master Server. This change involves a separate procedure covered in the document
NBU_non-cluster-to-cluster guide which can be found in the data protection operational documents
area of the CoE web site.
Note: Due to limitations in the nbemmcmd –rename command this process cannot be used to
rename clusters on versions below 6.0 MP6, if the Master Server is clustered we recommend moving
to another cluster rather than renaming the existing cluster.


で、この手順は「NetBackup 6.0MP6」では動いたものの、現代はどうなのか試してみた。

結果・・・

・NetBackup 7.xは上記+1ファイル修正で変更可能だった
・NetBackup 8.0,8.1はSSL証明書に記載されたホスト名の変更手順がわからないので不可
・NetBackup 7.xでもRBACを利用しているとSSL証明書が含まれるため失敗した

という結果でした。

とりあえず、「NetBackup 7.6まで実験済みのマスタサーバホスト名変更手順」は以下です。
ちなみにホスト名変更後、NetBackup 8.1にアップデートを行っています。

2019/08/26追記 「/usr/openv/db/data/.odbc.ini.az」の書き換えを追加

(1) NetBackupサービスを停止する。

# /usr/openv/netbackup/bin/bp.kill_all -v -f
# /usr/openv/netbackup/bin/bpps -x

(2) /usr/openv/netbackup/bp.conf の書き換え

ホスト名記述を変更

(3) /usr/openv/volmgr/vm.conf の書き換え

ホスト名記述を変更

(4) /usr/openv/db/data/vxdbms.conf の書き換え

「NB_ホスト名」の記述を「NB_新ホスト名」に変更

(5) /usr/openv/var/global/server.conf の書き換え

「NB_ホスト名」の記述を「NB_新ホスト名」に変更

(6) /usr/openv/db/bin/servername の書き換え

「NB_ホスト名」の記述を「NB_新ホスト名」に変更

(追加) /usr/openv/db/data/.odbc.ini.az の書き換え

「ENG=~」となっている記述を書き換える

(7) /etc/hosts の編集

新しいホスト名と古いホスト名で同じサーバをさすよう修正

(8) OSホスト名変更

OSの変更手法を使ってホスト名変更

(9) NetBackup自動起動を停止

RHEL6だったら以下でオフ

# chkconfig netbackup off

(10) OS再起動

# reboot

(11) NetBackupが起動していないことを確認

# /usr/openv/netbackup/bin/bpps -x

(12) NetBackup起動

# /usr/openv/netbackup/bin/bp.start_all
# /usr/openv/netbackup/bin/bpps -x

(13) 現状のNetBackup EMMの登録確認

# /usr/openv/netbackup/bin/admincmd/nbemmcmd -listhosts -verbose

(14) EMMの登録修正と確認

# /usr/openv/netbackup/bin/admincmd/nbemmcmd -renamehost -machinename 古いホスト名 -newmachinename 新しいホスト名 -machinetype master
# /usr/openv/netbackup/bin/admincmd/nbemmcmd -listhosts -verbose

(15) NetBackupの再起動

# /usr/openv/netbackup/bin/bp.kill_all
# /usr/openv/netbackup/bin/bpps -x
# /usr/openv/netbackup/bin/bp.start_all
# /usr/openv/netbackup/bin/bpps -x

(16) NetBackupの自動起動設定を復旧させる

RHEL6だったら以下を実行

# chkconfig netbackup on

これは、NetBackupインストーラにより設定が変更されているが、その変更がchkconfig側に反映されていないため実行する必要がある。