NHK技研公開2017に行ってきました。
興味深かったものをいくつかご紹介
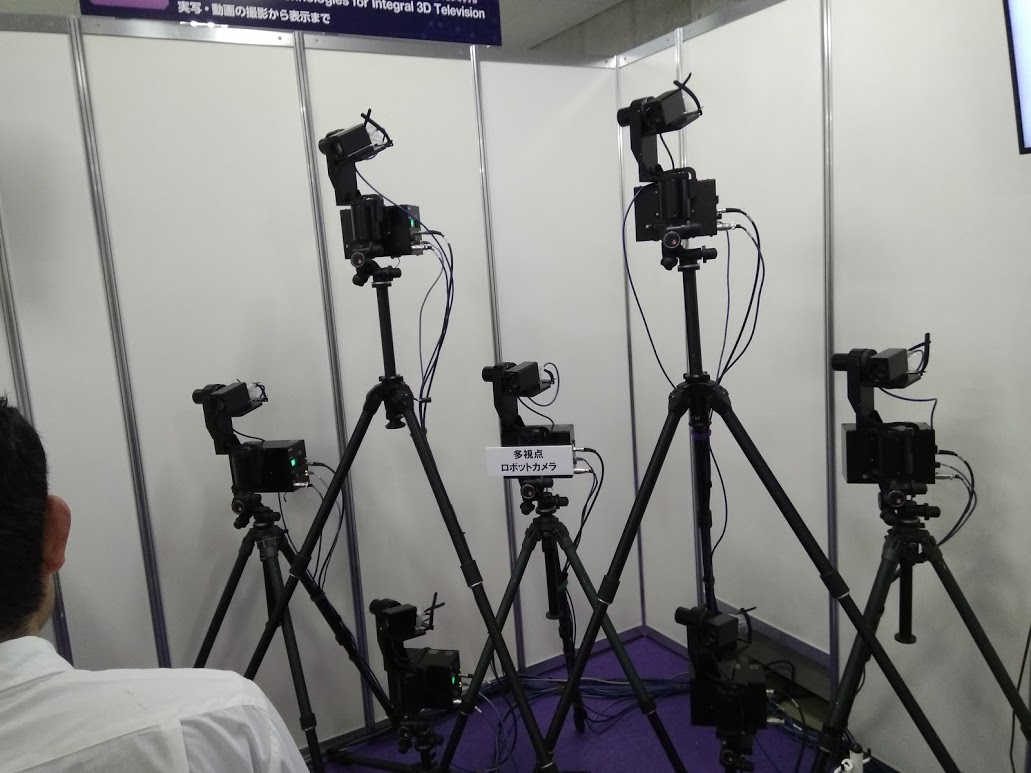
・三次元被写体追跡スポーツグラフィックスシステム
これまでの技研公開で結構出展率が高い多視点ロボットを活用した事例の1つ
技研公開2013の時はこんな感じのカメラでした。
今年のカメラはよりスマートになってました。

これを使って行われていたのは、複数の視点から撮影することで、ボールの位置の特定ができるようになり、それを撮影した映像に合成し、わかりやすく表示するというもの。

結構綺麗に合成されていました。
・フルスペック8K制作システム
まぁ、ただの放送制御卓をそのまま公開してるだけだろ、といえばそうなんですが、現状、8K 120Hzに対応した制御卓の実例はコレだけなんだそうです。
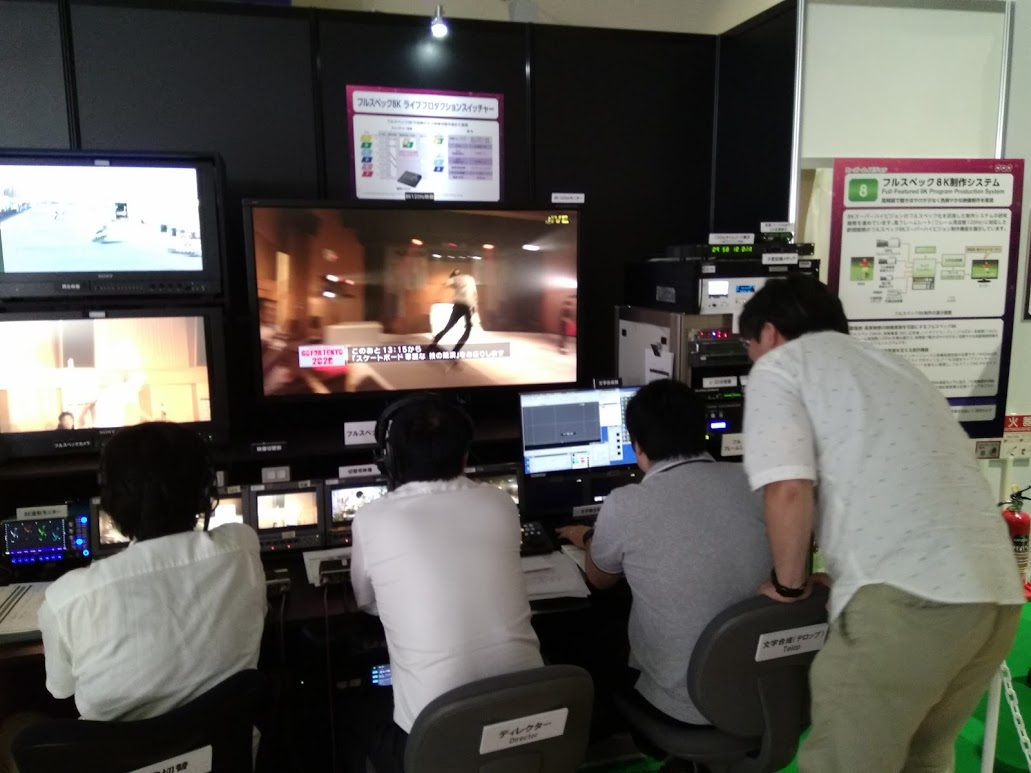
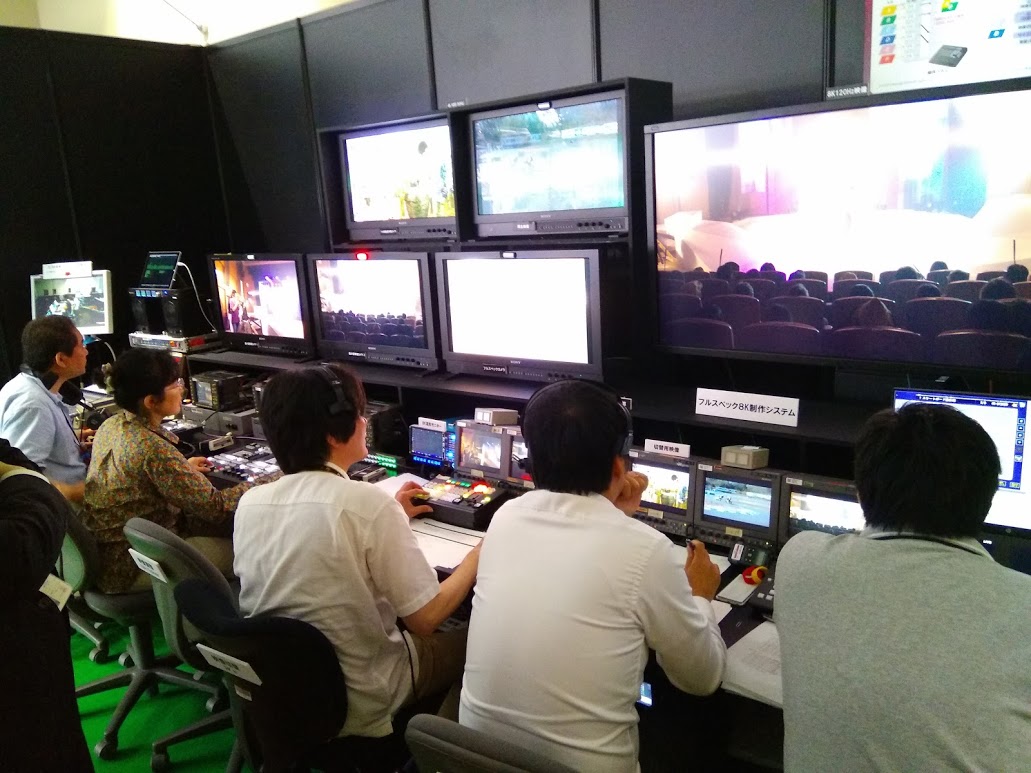
これの実演ということで、講堂で行われている模様を生放送する・・・というていで会場内のいろんなところにある8Kテレビに配信する映像の制御を行っていました。
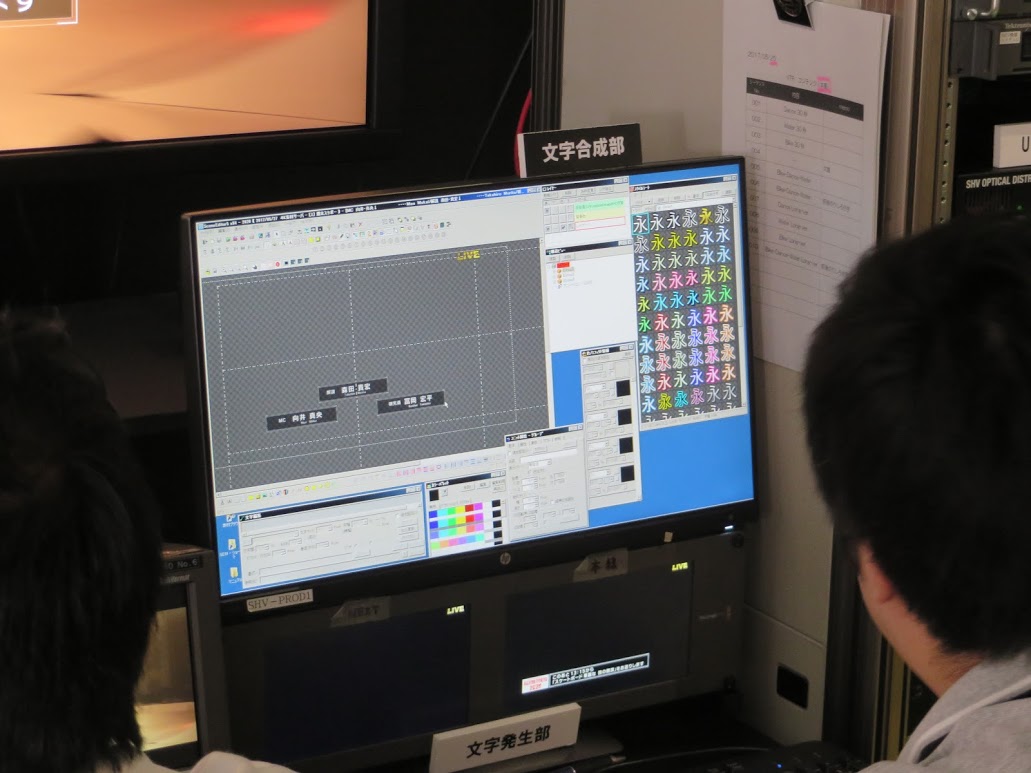

テロップも、この卓で作成して、使っていました。
実際の生放送の模様はこちらから・・・
・番組制作のための音声認識
取材映像の音声から自動認識で文字にしたものの、誤りが多いので、それを人が修正するためのシステムを展示していました。
もう、単純に、聞いて、間違っていれば止めて、修正、修正するちょっと前から再生を再開して、先に進めていく、というのをひたすら繰り返すのを、どこでもブラウザから出来るようにHTML5で実装している、というのがスゴイところだと思います。
・行動連携サービスとその基盤技術の中の車の展示
車が置いてあったので、何かと思ったら、放送の視聴履歴などをhybridcastでスマホに連携させておくと、そのスマホを車に持ちこんだ時に最近視聴した番組内で扱われた名所などを教えてくれ、その場所までの案内をしてくれる、という展示でした。
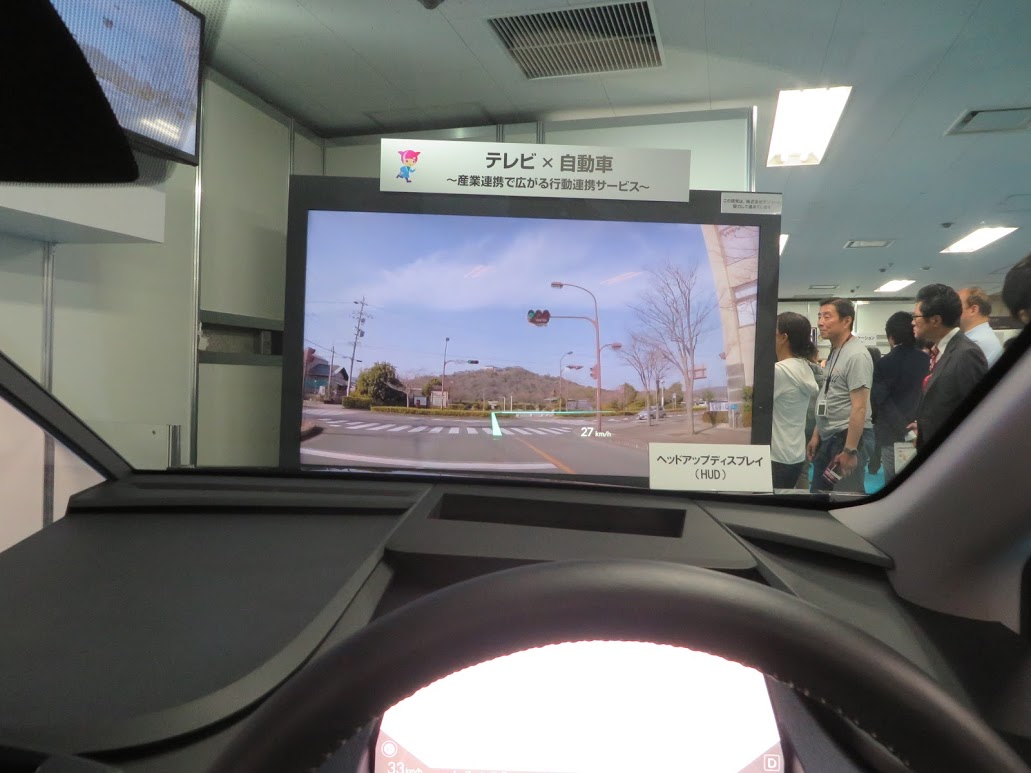
温泉紹介の番組を見てたなぁ・・・というのであれば、こんな感じで温泉が6分先の場所にあるよ、って感じです。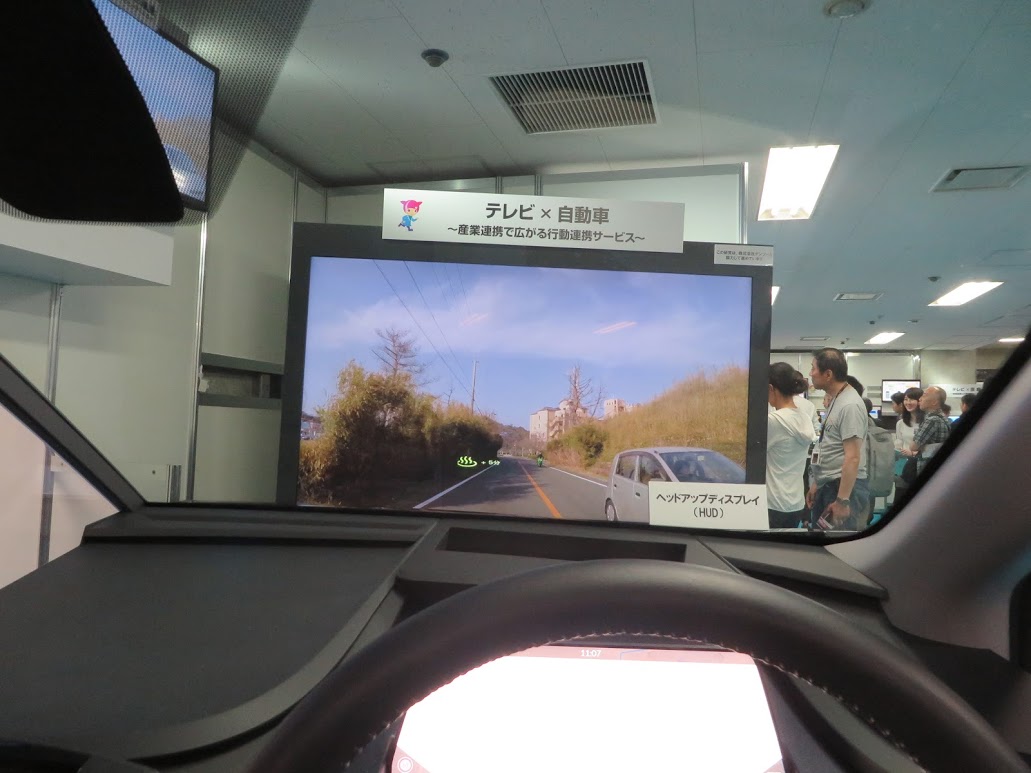
・進化する8K撮影・記録技術
最終的には持ち運び取材が可能な単体8Kビデオカメラの作成を目指すというもの。
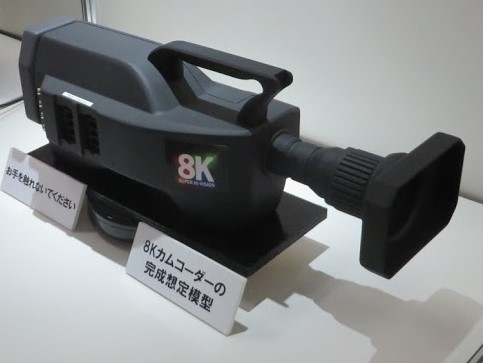
が・・・現実はコレ

SDHCカードを4枚並列に使うことで書き込み速度と容量を確保していました。
128GBのSDHCカードを4枚使うと100分録画できるそうです。

・3次元構造撮像デバイス
実演は↓
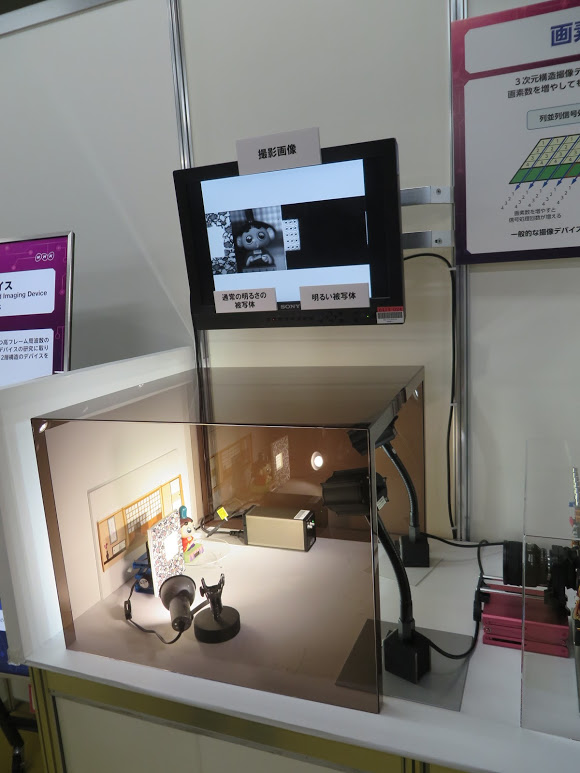
これだけだと意味がわかんないと思いますが、おじゃる丸の左側にあるパネルにはNHKのロゴマークが裏から光を当てた状態で表示されています。
人間の目だと、おじゃる丸も、その横のロゴマークも見えます。
しかし、カメラで普通に撮影すると、「通常の明るさの被写体」しか認識できません。
今回開発したデバイスを使うと、1画面で、両方を表示させることは不可能ですが、
「通常の明るさ」と「(より)明るい被写体」を1つのデバイスで認識させることができるというものです。
いままでのデバイスは、画素を一列単位で処理していました。
それを画素1つづつで、独立して処理を行うことで、「通常の明るさのところ」と「より明るいところ」と別扱いで処理を行うことができるようになった、というものだそうです。
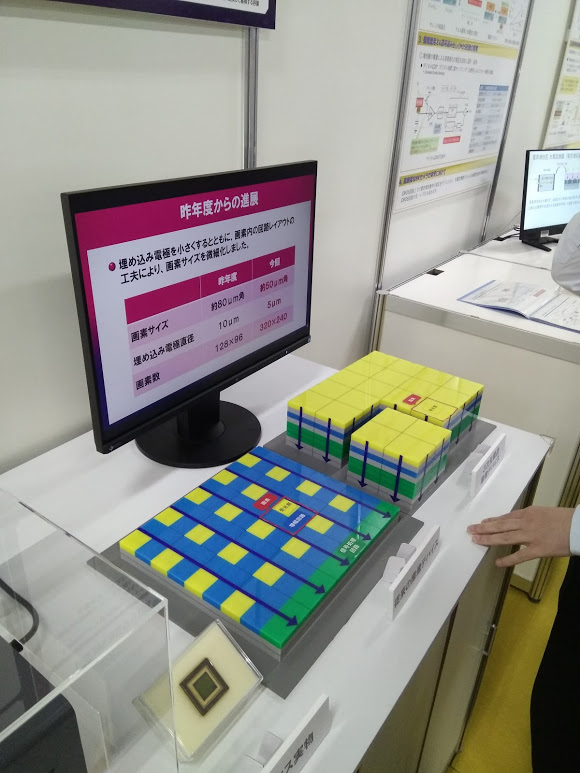
現状はモノクロ認識までのようですが、今後進歩していくことでしょう


