NetAppのperfstatデータ収集ツールで取得したファイルを分解する

現用のNetAppの状況確認をするために「perfstatデータ収集ツール」というのが配布されている。
注:ONTAP 9.5以降はperfstatは非対応とのこと

rsh/sshで対象のNetAppにログインして、いろんなコマンドを実行して、1つのテキストファイルとして出力をする。

この「1つのテキストファイル」というのがくせ者で、200MBぐらいのファイルができたりする。

これだとエディタで取り扱いづらいので細かく分割することにした。

中をみてみると「=-=-=-=-=-= CONFIG IPアドレス PRESTATS =-=-=-=-=-= aggr status -v」という感じで「 =-=-=-=-=-= 」区切りでファイルが出力されている。

それを元にファイルを分割したのが下記スクリプト。

$inputfile="x:\tmp\source\perfstat7_20191122_1400.txt"
$outdir="x:\tmp\output"

$filename=""

Get-Content $inputfile -Encoding UTF8 | ForEach-Object {
    $line=$_
    if( $line.Contains("=-=-=-=-=-=") ){
        $filename=$line
        $filename=$filename.Replace("=-=-=-=-=-= ","")
        $filename=$filename.Replace("/","-")
        $filename=$filename.Replace(":","")
        $filename=$outdir+"\"+$filename+".txt"
        New-Item $filename
    }
    if($filename -ne ""){
        $line | Add-Content $filename
    }
}

今回は1回しか実行しないので速度を気にする必要がないので簡単さを優先している。

もし、出力速度を気にするのであれば1行毎にAdd-Contentするのは非常に効率が悪いので工夫が必要となる。

参考例:「PowerShellで巨大なファイルをGet-Contentし、Export-Csvするのを省メモリで行う


2019/11/25 追記

上記のスクリプトだと遅すぎで、約200MBのファイル処理に5時間かかりました。

やはり改行のみ行が数万行ある、というのが悪かったようです。

また、同じヘッダ行が何回か登場するようで単純に「New-Item」としているとファイル名が重複しているというエラーがでてしまっていました。

さすがに5時間はないなーということで、高速化処理をしたのが下記となります。

実行にかかる時間は2分と大幅短縮となりました。

$inputfile="x:\tmp\source\perfstat7_20191122_1400.txt"
$outdir="x:\tmp\output2"

$filename=""

$results=@()
$linecount=0

Get-Content $inputfile -Encoding UTF8 | ForEach-Object {
    $line=$_
    if( $line.Contains("=-=-=-=-=-=") ){
        if($filename -ne ""){
            $results | Add-Content $filename
            $results=@()
            $linecount=0
        }
        $filename=$line
        $filename=$filename.Replace("=-=-=-=-=-= ","")
        $filename=$filename.Replace("/","-")
        $filename=$filename.Replace(":","")
        $filename=$outdir+"\"+$filename+".txt"
        if ( !(Test-Path $filename) ){
            New-Item $filename
        }
    }

    if($filename -ne ""){
        $results += $line
        $linecount++
        if(($linecount % 1000) -eq 0 ){
            $results | Add-Content $filename
            $results=@()
        }
    }
}

ユーザバックエンドがSQLのiredmailのSOGoでユーザがログインできない

2020/09/10追記

iRedMail内のパスワード文字列取り扱いについて「Password hashes」というドキュメントが公開された。

それによればmd5-cryptを使いたい場合は「{CRYPT}$1$5ulpxxxx$VS0xHxxKxMPBSIPQlXDXC/」という風に「{CRYPT}」という前置詞を追加すれば良いらしい。


qmail+vpopmailからパスワード暗号化文字列ごと移植したpostfix+dovecotベースの統合環境iredmail環境がある。

iredmailにはExchange互換サーバのSOGoもあるので、そちらでログインしようとしたらエラーになる。

roundcubeからだとログインができるし、dovecotを使うPOP3/IMAPアクセスでも問題無い。

/var/log/sogo/sogo.log へのエラーは下記の様になっていた。

Jul 04 13:15:04 sogod [9257]: SOGoRootPage Login from 'クライアントIPアドレス' for user 'ユーザ名@ドメイン名' might not have worked - password policy: 65535  grace: -1  expire: -1  bound: 0

iredmailのフォーラムに「Can’t configure password policy when using SOGo」といのがあり、sogo.confに「passwordPolicy = YES;」を追加すればいいじゃん?とあったのでやってみたが、変化はなし。

SOGo側のbug tracking system「 0003899: SQL authentication 」にてヒントを発見。

暗号化文字列の指定の問題のようだ。

今回、sogo.confは下記の様に「userPasswordAlgorithm = ssha512」となっており、パスワード暗号化文字列がssha512フォーマットである、ということになっている。

    SOGoUserSources = (
        {
            type = sql;
            id = users;
            viewURL = "mysql://sogo:~@127.0.0.1:3306/sogo/users";
            canAuthenticate = YES;

            // The algorithm used for password encryption when changing
            // passwords without Password Policies enabled.
            // Possible values are: plain, crypt, md5-crypt, ssha, ssha512.
            userPasswordAlgorithm = ssha512;
            prependPasswordScheme = YES;

            // Use `vmail.mailbox` as per-domain address book.
            isAddressBook = YES;
            displayName = "Domain Address Book";
            SOGoEnableDomainBasedUID = YES;
            DomainFieldName = "domain";
        },

しかし、今回、vpopmail時代の文字列「$1$5ulpxxxx$VS0xHxxKxMPBSIPQlXDXC/」という書式、つまりはmd5-cryptフォーマットを流用しているので認証できなかった、ということになる。

メインとなるiredmail側は新しくパスワードを設定した場合はssha512、移植したものはmd5-cryptという運用にしている。

ただ、postfix,dovecot,roundcubeの運用に関しては、ssha512でもmd5-cryptでも問題無くログインできている。

それに対してSOGo側は「SOGO Installation and Configuration Guide」を見ると userPasswordAlgorithm には1つの値しか指定はできないようだ。

セキュリティを考えると全体をmd5-cryptに下げる、という選択肢はとれないので、SOGoを使いたい場合は、パスワードを再設定する、ということになる。

パスワードを再設定すると以下のログとなる。

Jul 04 13:50:43 sogod [1094]: SOGoRootPage successful login from 'クライアントIPアドレス' for user 'ユーザ名@ドメイン名' - expire = -1  grace = -1

Arduino/ESP32/TTGO T-WatchのシステムクロックとRTC周りのメモ 2019/07/02

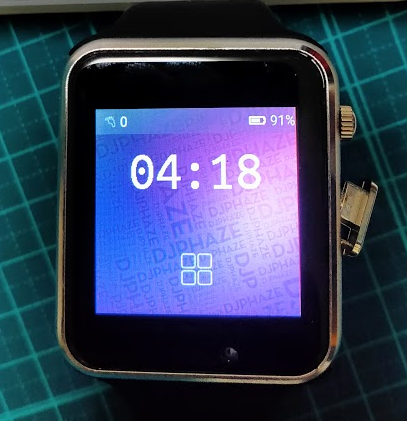
TTGO T-watchの腕時計の時刻表示がおかしいので調べていったことのメモ

・T-Watchでは画面オフ時にシステムクロックが止まる

T-watchでは左側の端っこボタンを押すと画面がオフになる。

この処理は、power_handle関数内の「LVGL_POWER_IRQ」イベントの「axp.isPEKShortPressIRQ()」( 左側の端っこボタン =PEKキー)で行われている。

オフ時に「rtc_clk_cpu_freq_set(RTC_CPU_FREQ_2M)」を実行して、CPU周波数を落としている(240M→2M)

これによりOS内のシステムクロックの進みも劇的に遅くなって、ほぼ止まっているように見える。

このことがあるので、T-Watchのソフトウェアでは、システムクロックからではなく、RTC上の時計から時刻を取得しているようだった。

・システムクロックの設定方法はsettimeofday(UNIX)

Arduino/ESP32環境でシステムクロックを簡単に設定する手法はNTPからの時刻を取得して、システムクロックを適用する、というもの。

    struct tm timeinfo;
    bool ret = false;
    int retry = 0;
    configTzTime("JST-9", "pool.ntp.org");
    do {
        ret = getLocalTime(&timeinfo);
        if (!ret) {
            Serial.printf("get ntp fail,retry : %d \n", retry++);
        }
    } while (!ret && retry < 3);

また、システムクロックをRTCに反映するのも簡単。(以下は、RTCモジュールがPCF8563の場合に使うPCF8563_Libraryの場合)

        rtc.setDateTime(timeinfo.tm_year, timeinfo.tm_mon + 1, timeinfo.tm_mday, timeinfo.tm_hour, timeinfo.tm_min, timeinfo.tm_sec);

しかし、逆にRTCからシステムクロックに対して時刻を反映させる手法がよく分からない。

RTCモジュールがDS1307RTCの場合の事例があるので Michael MargolisさんによるTimeモジュールを使ってみたが、時刻設定はできなかった。

void syncSystemTimeByRtc()
{
    Serial.print("Read RTC :");
    Serial.println(rtc.formatDateTime(PCF_TIMEFORMAT_YYYY_MM_DD_H_M_S));
    struct tm dt;
    getLocalTime(&dt);
    Serial.printf("getLocalTime is %d:%d:%d\n",dt.tm_hour,dt.tm_min,dt.tm_sec);
    RTC_Date d = rtc.getDateTime();
    Serial.printf("  %d,%d,%d,%d,%d,%d\n",d.hour,d.minute,d.second,d.day,d.month,d.year);
    setTime(d.hour,d.minute,d.second,d.day,d.month,d.year);
    Serial.println(timeStatus());
    getLocalTime(&dt);
    Serial.printf("getLocalTime override RTC clock, %d:%d:%d\n",dt.tm_hour,dt.tm_min,dt.tm_sec);
   
}

上記のデバグコードをいれて、画面オフ→オンイベントを起こしてみると、

10:16:18.034 -> LVGL_POWER_IRQ event
10:16:18.034 -> 
10:16:18.034 -> PEKShortPressIRQ to off
10:31:15.803 -> PEKShortPressIRQ to on
10:31:15.803 -> bma423_disable:0
10:31:15.803 -> Read RTC :2019-7-2/10:31:15
10:31:15.835 -> getLocalTime is 10:16:9
10:31:15.835 ->   10,31,15,2,7,2019
10:31:15.835 -> 2
10:31:15.835 -> getLocalTime override RTC clock, 10:16:9
10:31:24.715 -> RTC time is 2019-7-2/10:31:24
10:31:24.715 -> getLocalTime is 10:16:17

時刻が設定されていない・・・

UNIXだとどうやってシステムクロック設定できたかな?と調べて見たらsettimeofdayでunixtimeを指定する、ということが判明

#include <time.h>    // requried for settimeofday 
#include <sys/time.h>// requried for timeval

上記を冒頭に追加した上で、以下を書いた。

void syncSystemTimeByRtc()
{
    Serial.print("Read RTC :");
    Serial.println(rtc.formatDateTime(PCF_TIMEFORMAT_YYYY_MM_DD_H_M_S));
    struct tm dt;
    getLocalTime(&dt);
    Serial.printf("getLocalTime is %d:%d:%d\n",dt.tm_hour,dt.tm_min,dt.tm_sec);
    RTC_Date d = rtc.getDateTime();
    Serial.printf("  %d,%d,%d,%d,%d,%d\n",d.hour,d.minute,d.second,d.day,d.month,d.year);
    dt.tm_hour = d.hour;
    dt.tm_min  = d.minute;
    dt.tm_sec  = d.second;
    dt.tm_mday  = d.day;
    dt.tm_mon = d.month-1;
    dt.tm_year = d.year-1900; 
    time_t timertc = mktime(&dt);
    Serial.print("RTC unixtime is ");
    Serial.print(timertc);
    Serial.print(" ,system unixtime is ");
    time_t timesys = time(NULL);
    Serial.println(timesys);
    struct timeval tv ={
      .tv_sec = timertc
    };
    settimeofday(&tv,NULL);
    
    getLocalTime(&dt);
    Serial.printf("getLocalTime override RTC clock, %d:%d:%d\n",dt.tm_hour,dt.tm_min,dt.tm_sec);
   
}

これで期待通りにRTCの時刻をシステムクロックに反映することができるようになった。

13:23:48.103 -> PEKShortPressIRQ to on
13:23:48.103 -> bma423_disable:0
13:23:48.103 -> Read RTC :2019-7-2/13:23:47
13:23:48.103 -> getLocalTime is 13:17:30
13:23:48.103 ->   13,23,47,2,7,2019
13:23:48.103 -> RTC unixtime is 1562041427 ,system unixtime is 1562041050
13:23:48.103 -> getLocalTime override RTC clock, 13:23:47
13:23:57.121 -> RTC time is 2019-7-2/13:23:56
13:23:57.121 -> getLocalTime is 13:23:56

・rtc_cpu_freq_setは非推奨

コンパイル中に以下の警告が・・・

C:\Users\osakanataro\Documents\Arduino\TTGO-T-Watch-mod\TTGO-T-Watch-mod.ino:328:17: warning: 'void rtc_clk_cpu_freq_set(rtc_cpu_freq_t)' is deprecated [-Wdeprecated-declarations]

                 rtc_clk_cpu_freq_set(RTC_CPU_FREQ_240M);

https://github.com/espressif/arduino-esp32/blob/master/tools/sdk/include/soc/soc/rtc.h 」を確認したところ、「 rtc_clk_cpu_freq_config_set 」に置き換わった、とある。

・・・あるんだけど、 rtc_clk_cpu_freq_config_set に関する資料がでてこないってどういうこと???

grepしても定義無いし、試しに置き換えてみても定義されてない、というエラーになった。

ESP32腕時計TTGO T-Watchが届いた

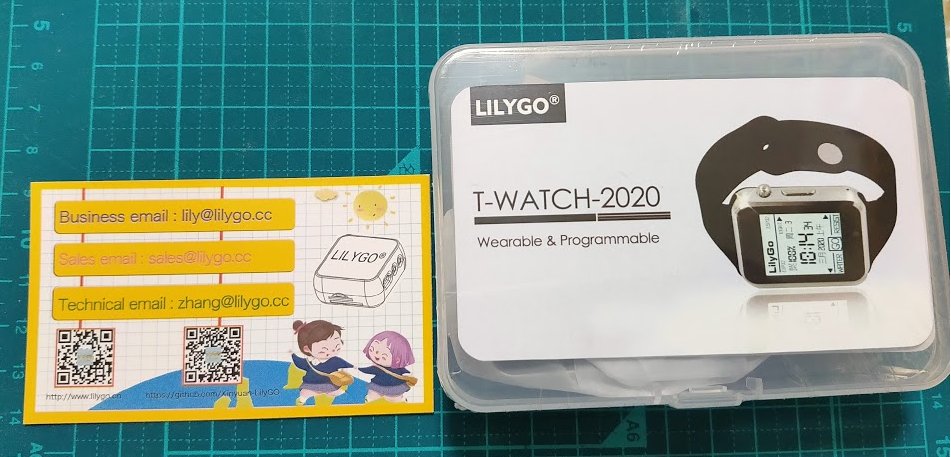
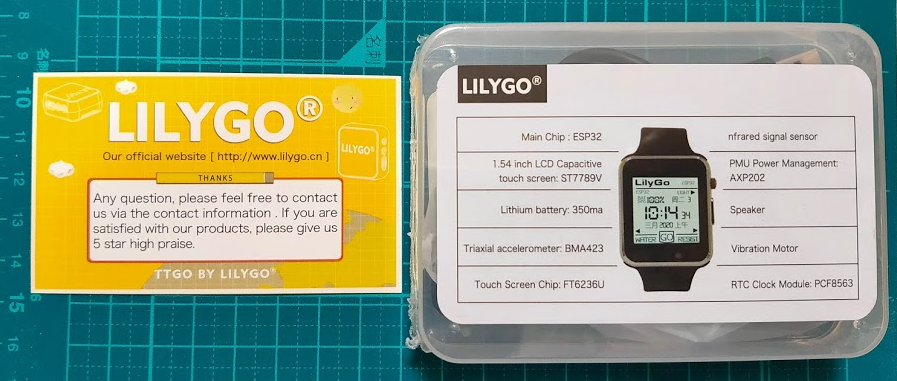
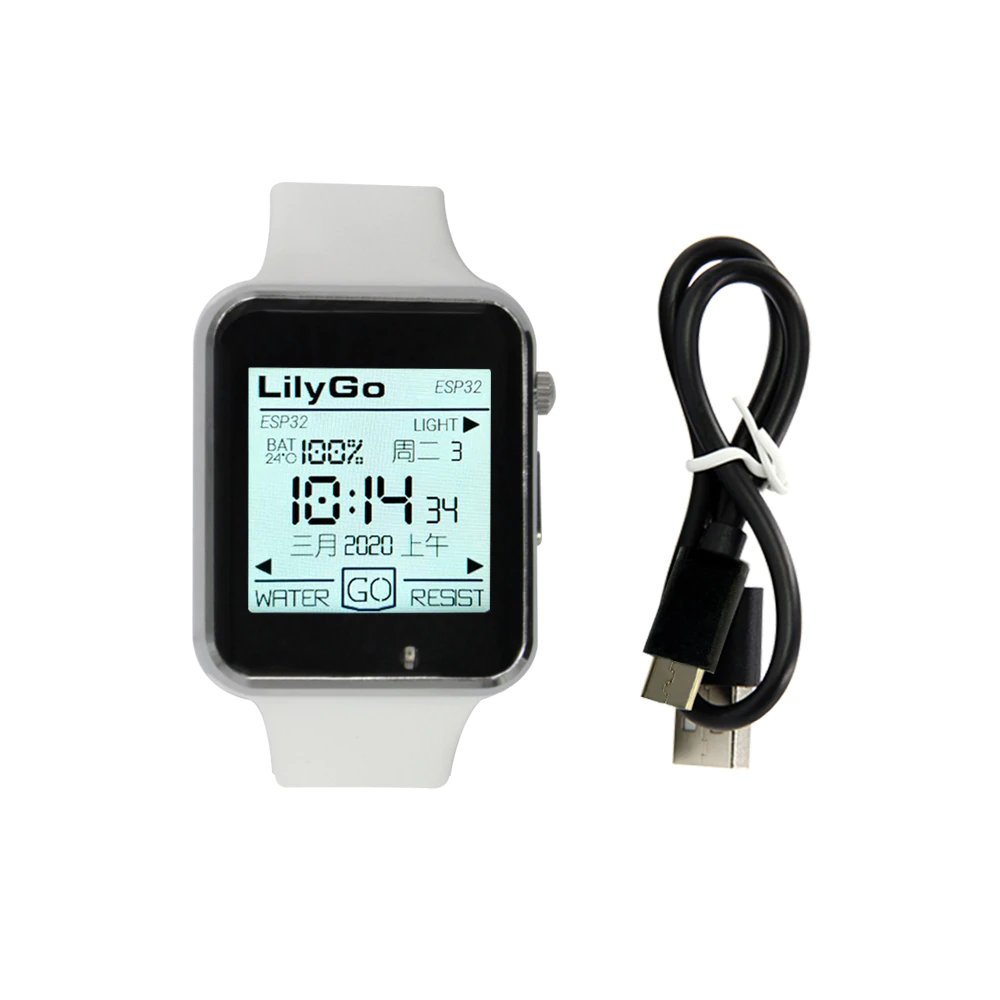
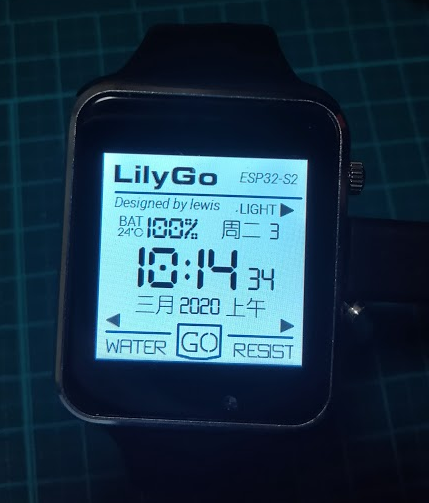
ESP32を搭載した腕時計風のTTGO T-Watchを約49ドルで購入しました。

約2週間で届いたので早速遊んでみました。

資料系

メーカページ(LILYGO)
公式英語マニュアル
公式中国語マニュアル
サンプルソフトウェア

開梱

かわいらしい感じの梱包ですね。

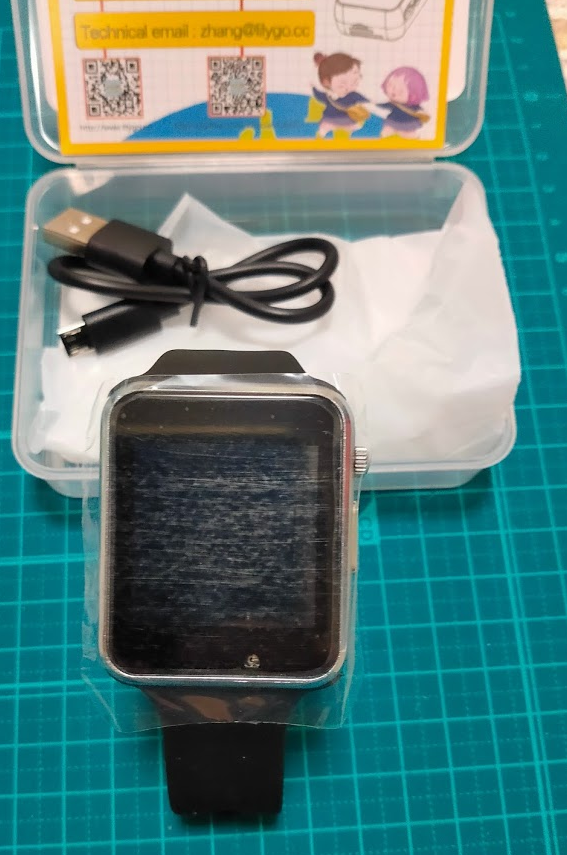
内容物はこちら

T-Watch本体と、予備のボード?、T-Watchの横にあるコネクタから拡張するためのケーブル、Type-Cケーブル、腕時計用バンド、裏蓋取り外し用ネジ回しと予備のネジ

説明書には中を開けた時にどういう感じになっているのか書かれています。

とりあえずこちらも開けてみました。

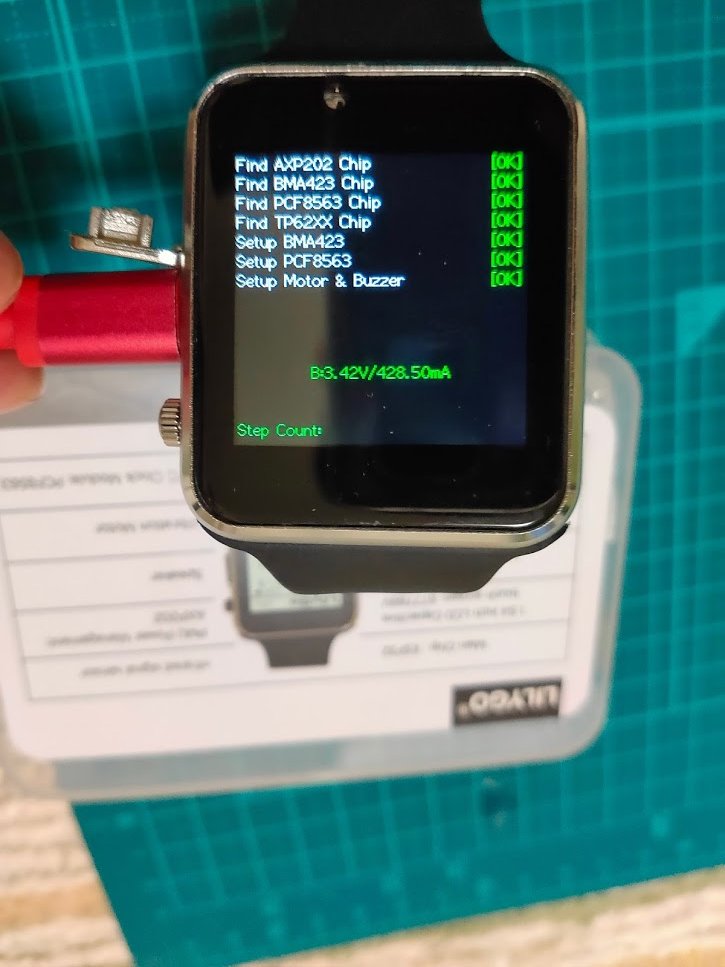
元に戻して電源ON

最初はタッチパネルの検査プログラムが起動しタッチした座標を報告します、Type-Cコネクタの隣のボタンを押すと、今度は衝撃検知プログラムが起動しstepCountとして振り回した回数を表示します。

とりあえず、パソコンにつなげるとドライバがあれば「Silicon Labs CP210x USB to UART Bridge (COM?)」として認識します。

ドライバがインストールされていない場合は下記の様に「CP2104 USB to UART Bridge Controller」として認識されます。ドライバのインストールについては後述します。

デモ用のプログラムがgithubで公開されていますのでArduio IDEをセットアップします。

ただし、普通にインストールしただけでは認識せず、追加手順が必要となります。

必要なもの

Arduino IDE
git for Windows

T-watch ソフトウェア書き込み手順

TTGO公式の設定手順を参照しながらやりました。

その1:git for Windowsをインストール

以前に別の件でインストールしていたのでそのまま使っています。

その2:Arduino IDEをインストール

今回はArduino IDE ver 1.8.9をインストールしました。

その3: Arduino IDEのインストール先のhardwareディレクトリ内にespressifディレクトリを作る

標準インストールだとC:\Program Files (x86)\Arduino\hardware ディレクトリ内にespressifディレクトリを作る。

その4:作成したespressifディレクトリ内でコマンドプロンプトを開く

作成したC:\Program Files (x86)\Arduino\hardware\espressifディレクトリででコマンドプロンプトを開きます。

その5:gitでespressifのarduino-esp32レポジトリを取得する

espressifディレクトリで「git clone –recursive https://github.com/espressif/arduino-esp32.git esp32」(wordpress編集画面だと「-」が2個なのに1個だけになる・・・)を実行します。

そうすると、 C:\Program Files (x86)\Arduino\hardware\espressif\esp32 ディレクトリが作成されファイルが置かれていきます。

その6:esp32\toolsディレクトリにあるgetコマンドを実行し追加ファイルを取得

C:\Program Files (x86)\Arduino\hardware\espressif\esp32\tools\ ディレクトリ内にある「get.exe」を実行し、追加ファイルを取得します。

その7:Silicon Labs CP210xをインストール/アップデート

手順には明記されていないのですが、古いドライバ Ver6.7.4.261で書き込もうとするとエラーになりました。「T-WatchマニュアルのGetting started」に掲載されているCP2104-Win10(Ver10.1.8.2466)だと正常に動きますので、アップデートします。
(CP2104の製造メーカ公式ドライバダウンロードページ)

なお、書き込み時のエラーは下記の「A fatal error occurred: Failed to connect to ESP32: Timed out waiting for packet header」です。

その8:T-Watchをパソコンに接続

その9:Arduino IDEを起動し、TTGO T-Watchを選択

Arduino IDEを起動し、「ツール」-「ボード」の一覧から「TTGO T-Watch」を選択します。

その10:T-Watchサンプルソフトを取得

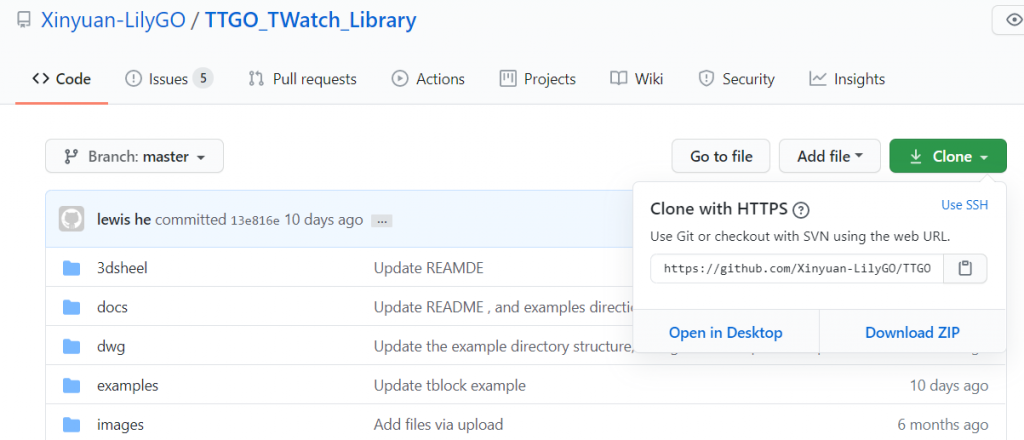
git for Windowsを使って、 https://github.com/Xinyuan-LilyGO/TTGO-T-Watch で公開されているサンプルソフトウェアを取得します。

「git clone –recursive https://github.com/Xinyuan-LilyGO/TTGO-T-Watch」

取得完了後、「library」にあるディレクトリを、マイドキュメントの中にある「Arduino\library」内にコピーします。

その11:書き込み

Arduino IDEからサンプルソフトウェアを書き込みます。


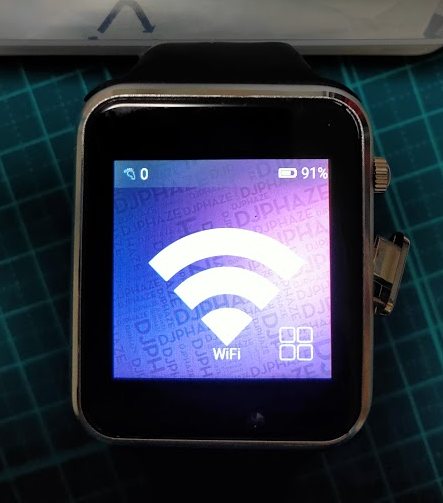
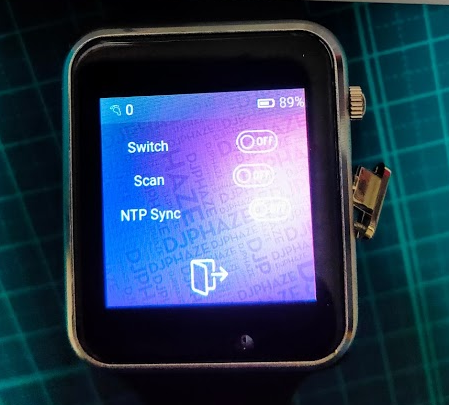
サンプルソフトウェアを書き込んだのですが、うまいこと自宅のWiFiに接続できず、時計合わせに失敗しています。

また、タッチパネルの動作が若干微妙な感じもあります・・・

コマンド(python)でyoutube動画をアップロードする手法

YouTube Data API(v3)の「Videos: insert」に記載されているJava/.Net/PHP/Python/Rubyのサンプルから、とりあえずPythonを選択。

ちょっと前のWeb記述を見ると、10分以上の動画がアップロードできない、的なことを書いているものもあるけれど、このWebの冒頭に「最大ファイルサイズ: 64 GB」とのことなので、大丈夫だろうと判断。

とりあえずそのままコピー(2021/04/07に確認したところ、”Developer Console”が”API Console”に名称変更してたり、エラー処理手法が若干追加された程度の差異がありましたが根本は同じでした)

#!/usr/bin/python

import httplib
import httplib2
import os
import random
import sys
import time

from apiclient.discovery import build
from apiclient.errors import HttpError
from apiclient.http import MediaFileUpload
from oauth2client.client import flow_from_clientsecrets
from oauth2client.file import Storage
from oauth2client.tools import argparser, run_flow


# Explicitly tell the underlying HTTP transport library not to retry, since
# we are handling retry logic ourselves.
httplib2.RETRIES = 1

# Maximum number of times to retry before giving up.
MAX_RETRIES = 10

# Always retry when these exceptions are raised.
RETRIABLE_EXCEPTIONS = (httplib2.HttpLib2Error, IOError, httplib.NotConnected,
  httplib.IncompleteRead, httplib.ImproperConnectionState,
  httplib.CannotSendRequest, httplib.CannotSendHeader,
  httplib.ResponseNotReady, httplib.BadStatusLine)

# Always retry when an apiclient.errors.HttpError with one of these status
# codes is raised.
RETRIABLE_STATUS_CODES = [500, 502, 503, 504]

# The CLIENT_SECRETS_FILE variable specifies the name of a file that contains
# the OAuth 2.0 information for this application, including its client_id and
# client_secret. You can acquire an OAuth 2.0 client ID and client secret from
# the Google Developers Console at
# https://console.developers.google.com/.
# Please ensure that you have enabled the YouTube Data API for your project.
# For more information about using OAuth2 to access the YouTube Data API, see:
#   https://developers.google.com/youtube/v3/guides/authentication
# For more information about the client_secrets.json file format, see:
#   https://developers.google.com/api-client-library/python/guide/aaa_client_secrets
CLIENT_SECRETS_FILE = "client_secrets.json"

# This OAuth 2.0 access scope allows an application to upload files to the
# authenticated user's YouTube channel, but doesn't allow other types of access.
YOUTUBE_UPLOAD_SCOPE = "https://www.googleapis.com/auth/youtube.upload"
YOUTUBE_API_SERVICE_NAME = "youtube"
YOUTUBE_API_VERSION = "v3"

# This variable defines a message to display if the CLIENT_SECRETS_FILE is
# missing.
MISSING_CLIENT_SECRETS_MESSAGE = """
WARNING: Please configure OAuth 2.0

To make this sample run you will need to populate the client_secrets.json file
found at:

   %s

with information from the Developers Console
https://console.developers.google.com/

For more information about the client_secrets.json file format, please visit:
https://developers.google.com/api-client-library/python/guide/aaa_client_secrets
""" % os.path.abspath(os.path.join(os.path.dirname(__file__),
                                   CLIENT_SECRETS_FILE))

VALID_PRIVACY_STATUSES = ("public", "private", "unlisted")


def get_authenticated_service(args):
  flow = flow_from_clientsecrets(CLIENT_SECRETS_FILE,
    scope=YOUTUBE_UPLOAD_SCOPE,
    message=MISSING_CLIENT_SECRETS_MESSAGE)

  storage = Storage("%s-oauth2.json" % sys.argv[0])
  credentials = storage.get()

  if credentials is None or credentials.invalid:
    credentials = run_flow(flow, storage, args)

  return build(YOUTUBE_API_SERVICE_NAME, YOUTUBE_API_VERSION,
    http=credentials.authorize(httplib2.Http()))

def initialize_upload(youtube, options):
  tags = None
  if options.keywords:
    tags = options.keywords.split(",")

  body=dict(
    snippet=dict(
      title=options.title,
      description=options.description,
      tags=tags,
      categoryId=options.category
    ),
    status=dict(
      privacyStatus=options.privacyStatus
    )
  )

  # Call the API's videos.insert method to create and upload the video.
  insert_request = youtube.videos().insert(
    part=",".join(body.keys()),
    body=body,
    # The chunksize parameter specifies the size of each chunk of data, in
    # bytes, that will be uploaded at a time. Set a higher value for
    # reliable connections as fewer chunks lead to faster uploads. Set a lower
    # value for better recovery on less reliable connections.
    #
    # Setting "chunksize" equal to -1 in the code below means that the entire
    # file will be uploaded in a single HTTP request. (If the upload fails,
    # it will still be retried where it left off.) This is usually a best
    # practice, but if you're using Python older than 2.6 or if you're
    # running on App Engine, you should set the chunksize to something like
    # 1024 * 1024 (1 megabyte).
    media_body=MediaFileUpload(options.file, chunksize=-1, resumable=True)
  )

  resumable_upload(insert_request)

# This method implements an exponential backoff strategy to resume a
# failed upload.
def resumable_upload(insert_request):
  response = None
  error = None
  retry = 0
  while response is None:
    try:
      print "Uploading file..."
      status, response = insert_request.next_chunk()
      if 'id' in response:
        print "Video id '%s' was successfully uploaded." % response['id']
      else:
        exit("The upload failed with an unexpected response: %s" % response)
    except HttpError, e:
      if e.resp.status in RETRIABLE_STATUS_CODES:
        error = "A retriable HTTP error %d occurred:\n%s" % (e.resp.status,
                                                             e.content)
      else:
        raise
    except RETRIABLE_EXCEPTIONS, e:
      error = "A retriable error occurred: %s" % e

    if error is not None:
      print error
      retry += 1
      if retry > MAX_RETRIES:
        exit("No longer attempting to retry.")

      max_sleep = 2 ** retry
      sleep_seconds = random.random() * max_sleep
      print "Sleeping %f seconds and then retrying..." % sleep_seconds
      time.sleep(sleep_seconds)

if __name__ == '__main__':
  argparser.add_argument("--file", required=True, help="Video file to upload")
  argparser.add_argument("--title", help="Video title", default="Test Title")
  argparser.add_argument("--description", help="Video description",
    default="Test Description")
  argparser.add_argument("--category", default="22",
    help="Numeric video category. " +
      "See https://developers.google.com/youtube/v3/docs/videoCategories/list")
  argparser.add_argument("--keywords", help="Video keywords, comma separated",
    default="")
  argparser.add_argument("--privacyStatus", choices=VALID_PRIVACY_STATUSES,
    default=VALID_PRIVACY_STATUSES[0], help="Video privacy status.")
  args = argparser.parse_args()

  if not os.path.exists(args.file):
    exit("Please specify a valid file using the --file= parameter.")

  youtube = get_authenticated_service(args)
  try:
    initialize_upload(youtube, args)
  except HttpError, e:
    print "An HTTP error %d occurred:\n%s" % (e.resp.status, e.content)

そして実行!

-bash-4.2$ ./youtube-upload
Traceback (most recent call last):
  File "./youtube-upload", line 4, in <module>
    import httplib2
ImportError: No module named httplib2
-bash-4.2$

CentOS7に必要なPythonモジュールが入っていませんでした。もう1つエラーになったoauth2clientとともに「yum install python-httplib2 python2-oauth2client」でインストールして再実行。

-bash-4.2$ ./youtube-upload
Traceback (most recent call last):
  File "./youtube-upload", line 10, in <module>
    from apiclient.discovery import build
ImportError: No module named apiclient.discovery
-bash-4.2$

今度のエラーのapiclientは「YouTube API: Client Libraries」に含まれるもの。

Python用は「https://github.com/googleapis/google-api-python-client」にある手順に従いインストールする。

ドキュメントには「pip install –upgrade google-api-python-client」とあるけど、「pip install google-api-python-client」で実行した。

[root@server ~]# pip install google-api-python-client
Collecting google-api-python-client
  Downloading https://files.pythonhosted.org/packages/5b/ba/c4e47e2fdd945145ddb10db06dd29af19b01f6e6d7452348b9bf10375ee9/google-api-python-client-1.7.9.tar.gz (142kB)
Installing collected packages: pyasn1, pyasn1-modules, cachetools, rsa, google-auth, google-auth-httplib2, uritemplate, google-api-python-client
  Running setup.py install for google-api-python-client ... done
Successfully installed cachetools-3.1.1 google-api-python-client-1.7.9 google-auth-1.6.3 google-auth-httplib2-0.0.3 pyasn1-0.4.5 pyasn1-modules-0.2.5 rsa-4.0 uritemplate-3.0.0
You are using pip version 8.1.2, however version 19.1.1 is available.
You should consider upgrading via the 'pip install --upgrade pip' command.
[root@server ~]#

で、改めてスクリプトを実行してみる。

-bash-4.2$ ./youtube-upload --file /mnt/work/fuuka/223779_20190618-0013_best.mpg
The client secrets were invalid:
('Error opening file', 'client_secrets.json', 'No such file or directory', 2)

WARNING: Please configure OAuth 2.0

To make this sample run you will need to populate the client_secrets.json file
found at:

   /mnt/work/youtube/client_secrets.json

with information from the Developers Console
https://console.developers.google.com/

For more information about the client_secrets.json file format, please visit:
https://developers.google.com/api-client-library/python/guide/aaa_client_secrets

-bash-4.2$

当然のエラー。

client_secrets.json というファイルに認証情報を記載しなければならないようだ。

Google API Console」にアクセスして、新規プロジェクトを作成。
認証情報タブから「OauthクライアントIDの作成」を選び、「アプリケーションの種類:その他」で作成します。
作成すると、jsonファイルがダウンロードできようになりますので、それをダウンロードし、client_secrets.json という名前で保存します。

「./youtube-upload –file ファイル名 –noauth_local_webserver」と実行すると、URLが表示されます。このURLをブラウザに入力すると、Googleの認証が要求されますので、パスワードを入力します。( –noauth_local_webserver を指定しない場合、そのLinux上でブラウザが開かれます。Oauth認証にはJavaScript対応ブラウザを使う必要があるため、CLIだと無理です。)


認証が完了するとVerification codeがブラウザ上に表示されますので、それをコピーし、コマンドに入力します。

また、下記の様なメールがGoogleアカウントのメールに届きます。(「youtube upload by osakanataro」という文字列は、Google API Consoleで設定したものです)

これで認証が終わると、ファイルアップロードが出来るようになります。

-bash-4.2$ ./youtube-upload --file /mnt/work/fuuka/223779_20190618-0013_best.mpg  --noauth_local_webserver
Uploading file...
Video id 'IAHhZlSXoDk' was successfully uploaded.
-bash-4.2$

Youtube studioにアクセスして状態を確認。

何も設定してなかったので「Test Title」「Test Description」となっていますね。

続いて指定した場合

-bash: ./youtube-upload --file: そのようなファイルやディレクトリはありません
-bash-4.2$ ./youtube-upload --file /mnt/work/fuuka/223779_20190617-1738_best.mpg --title "紫吹ふうか 2019年06月17日 17:38開始配信" --description "紫吹ふうか さ んによる 2019年06月17日 17:38 に開始された配信の転載です。" --keywords "AVATAR2.0","紫吹ふうか"
Uploading file...
Video id '5-Z0YDv5YCk' was successfully uploaded.
-bash-4.2$

Youtube Studioを確認すると、指定したタイトル、説明、タグ(Keywords)が設定されていることがわかります。

あとはサムネ調整とかが必要という感じですね。

つまりは、これで、配信終わったら即座にyoutubeにアップロードするスクリプトが組めたわけでして・・・


2019/06/20追記

まとめて動画をいくつかアップロードしてみたところ、Youtube側のエラーとなりました。

$ ./youtube-upload --file /mnt/work/ramyon/223697_20190614-2028_best.mpg --title 'とみじroooom!!!!!! 2019年06月14日 20:28開始配信' --description "都三代らみょん さんによる showroomにて 2019年06月14日 20:28 に開始された配信の転載です。" --keywords "AVATAR2.0","都三代らみょん"
Uploading file...
An HTTP error 403 occurred:
{
 "error": {
  "errors": [
   {
    "domain": "youtube.quota",
    "reason": "quotaExceeded",
    "message": "The request cannot be completed because you have exceeded your \u003ca href=\"/youtube/v3/getting-started#quota\"\u003equota\u003c/a\u003e."
   }
  ],
  "code": 403,
  "message": "The request cannot be completed because you have exceeded your \u003ca href=\"/youtube/v3/getting-started#quota\"\u003equota\u003c/a\u003e."
 }
}

$ echo $?
0
$

YouTube DATA APIのquota」を見てみると、Developer Consoleで確認する必要があるようです・・・

スクリプト的には5回実行して、合計で4時間半ぐらいの動画をアップロードしただけなのですが、1回あたり結構な数のAPIが発行されているようです。

1日あたり10000回以上に増やすには申請する必要があるようです。