クラウドファンディングでStarFive VisionFive 2 Liteを入手した
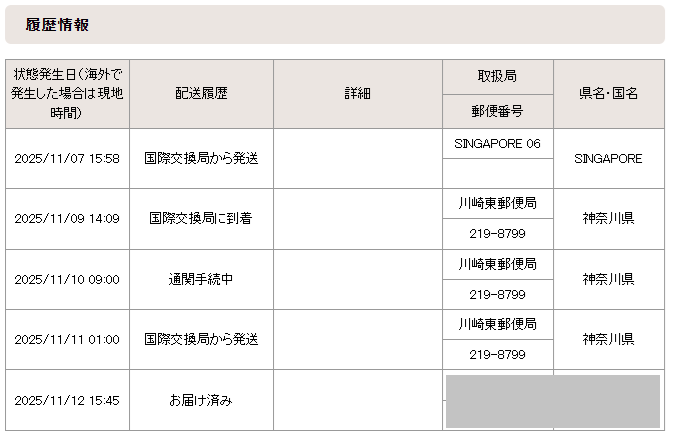
発送連絡が 11月5日にきてからちょうど1週間で届きました

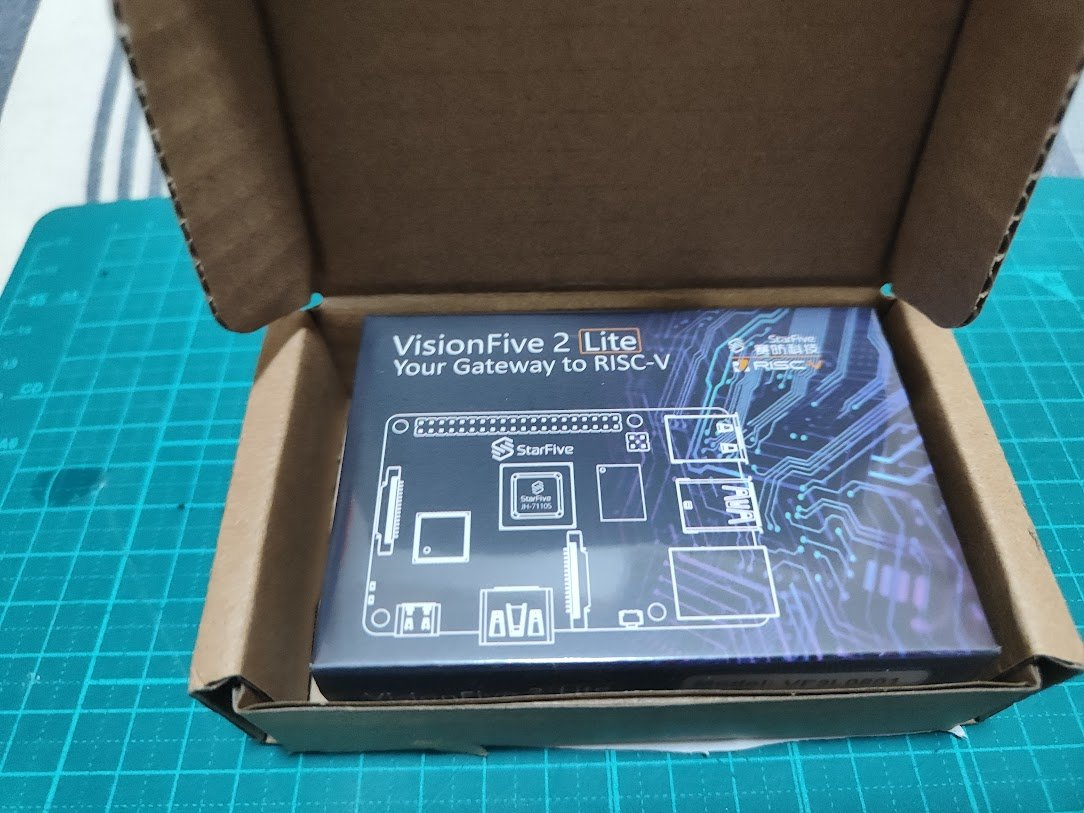
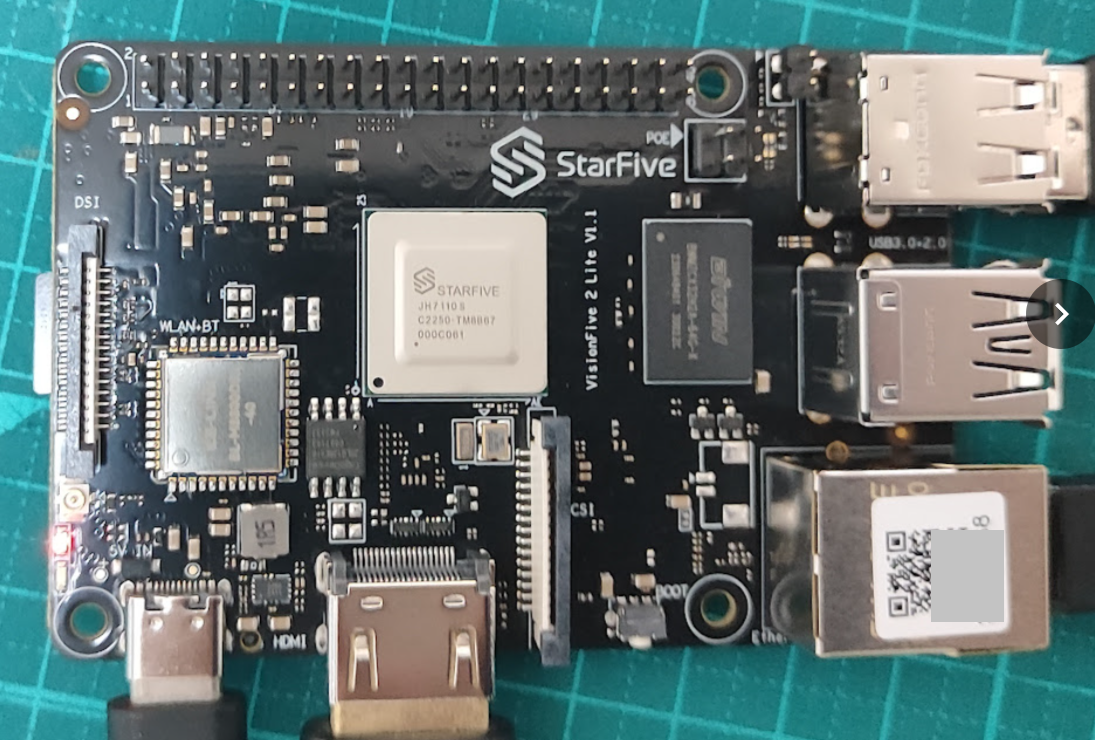

基板はV1.1でした
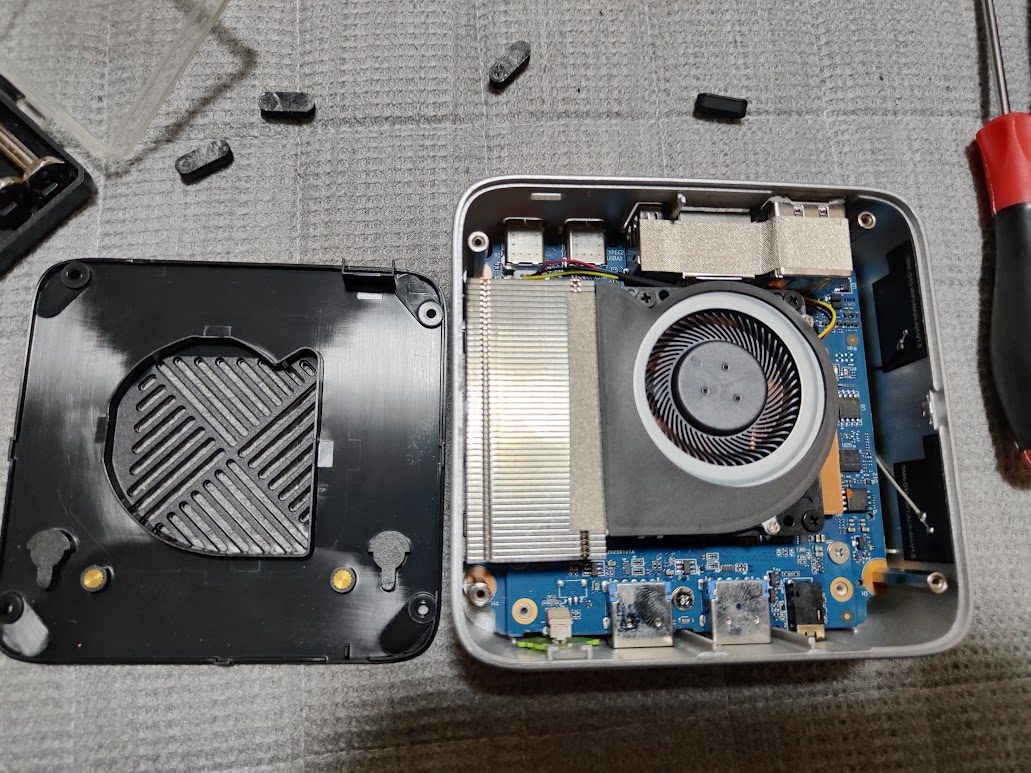
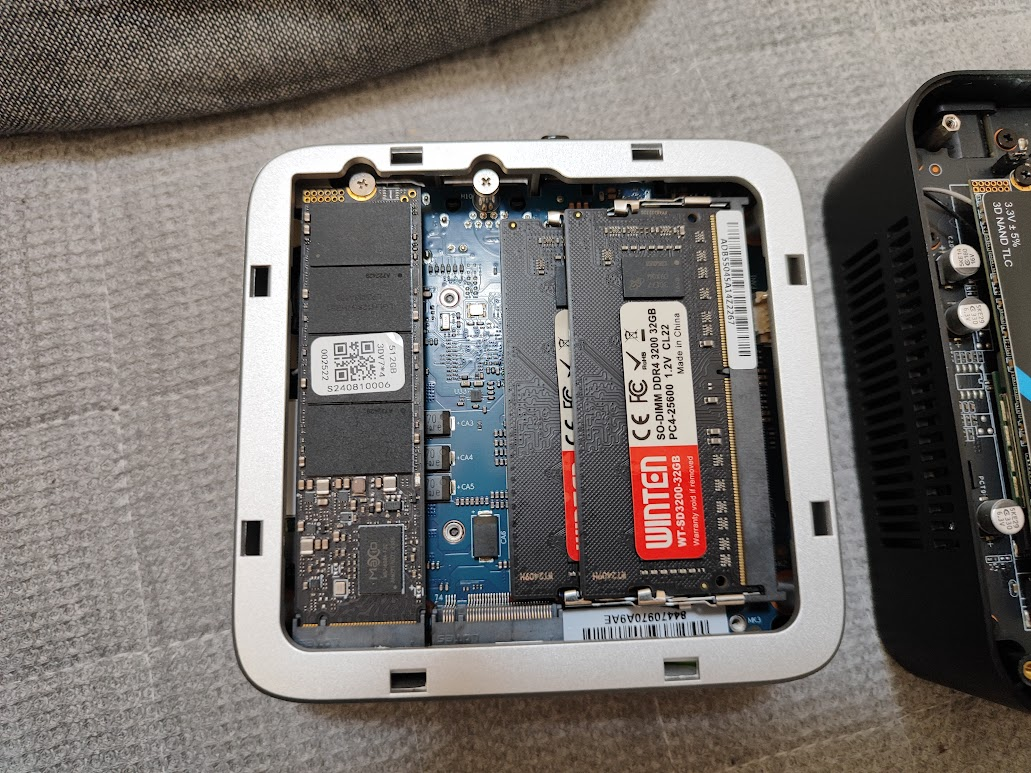
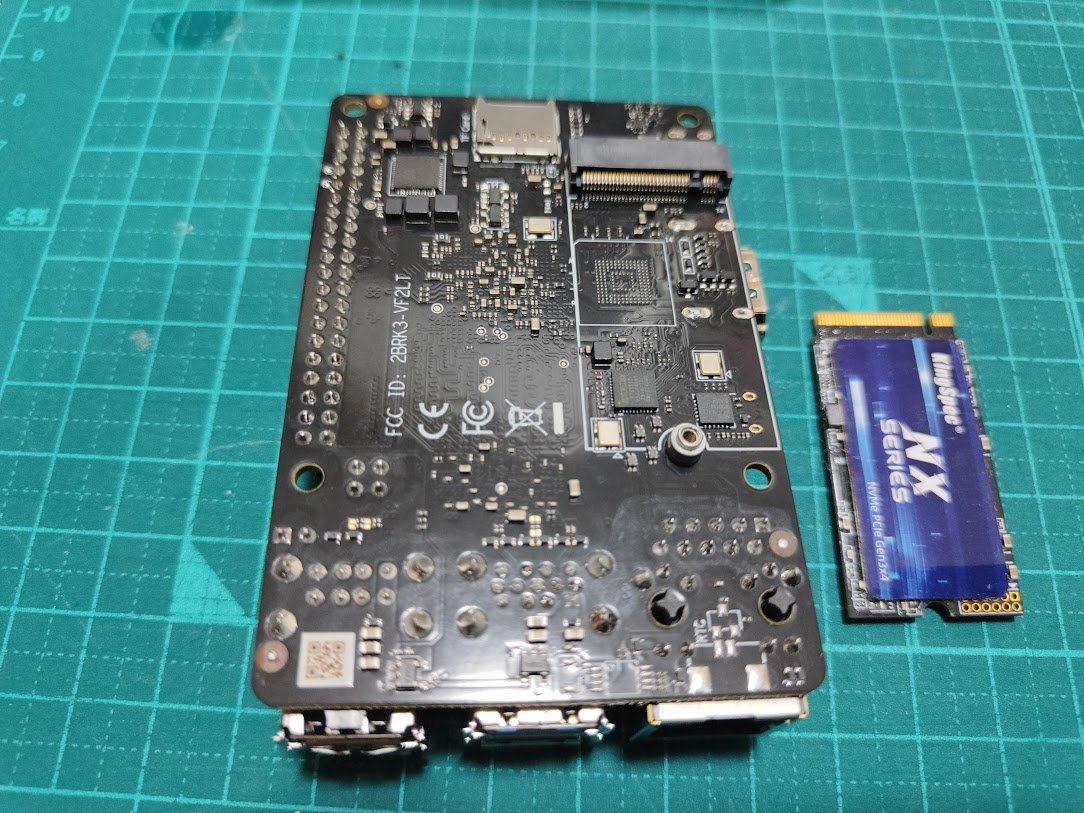
Orange Pi 5の時に買ったM.2 NVMe 2242サイズのものを取り付け・・・ネジがついてなかったので手持ちのものを使用
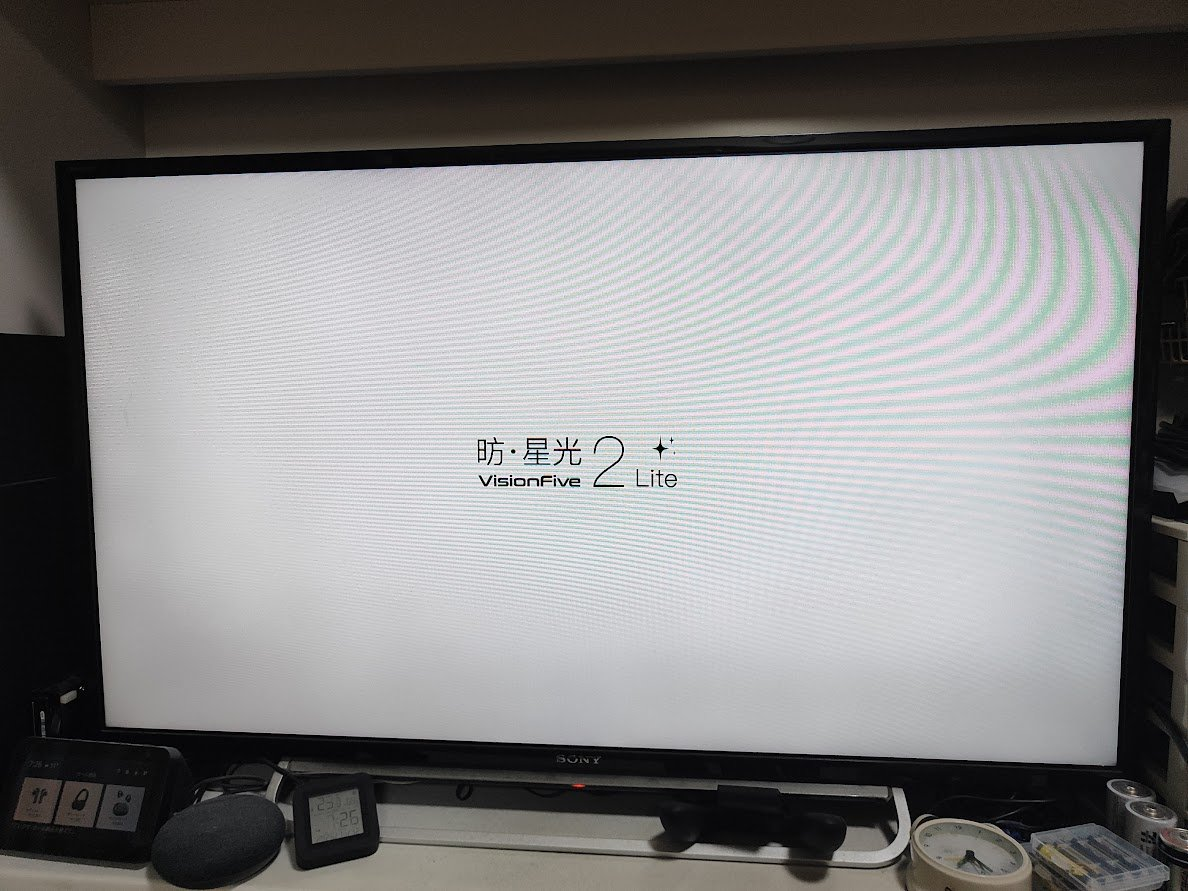
microSDに https://github.com/starfive-tech/VisionFive2/releases にある ubuntu-24.04.3-preinstalled-desktop-riscv64+vf2-lite.img を書き込んで起動
まずは製品ロゴが表示され、Linux kernelが起動していきます
途中で黒画面になったまましばらく待つとログイン画面になります
ユーザ名: user、パスワード:starfive でログイン
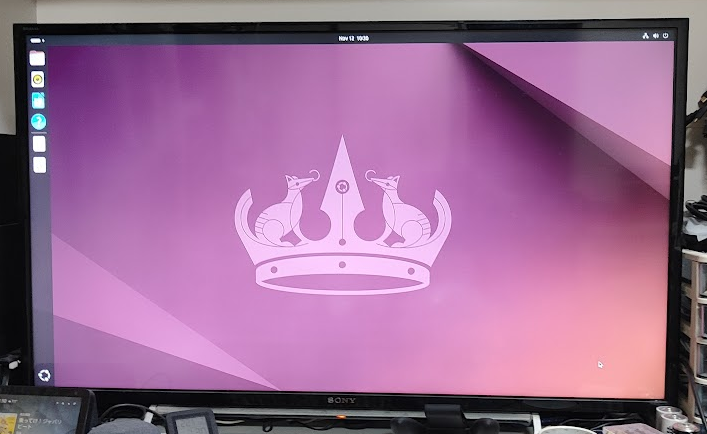
まあ、普通のUbuntuっぽいですね
kernel は 6.12.5 でした。
user@starfive:~$ uname -a
Linux starfive 6.12.5-starfive #70SF SMP Sun Sep 28 11:33:07 UTC 2025 riscv64 riscv64 riscv64 GNU/Linux
user@starfive:~$
なお、後述しますが、/opt/install_full.sh を実行する前に「sudo apt upgrade」を実行してしまうと面倒くさいことになるのでやめましょう。
あと、これはmicroSD上で起動してる状態です
user@starfive:~$ df -h
Filesystem      Size  Used Avail Use% Mounted on
tmpfs           790M  3.6M  786M   1% /run
/dev/mmcblk0p4   13G   11G  1.9G  85% /
tmpfs           3.9G     0  3.9G   0% /dev/shm
tmpfs           5.0M     0  5.0M   0% /run/lock
/dev/mmcblk0p3   99M   49M   51M  50% /boot
tmpfs           790M  132K  789M   1% /run/user/1000
user@starfive:~$
ユーザ事例の「StarFive VisionFive 2 Official Debian SSD Boot Guide」ではmicroSDにブートローダはおいたままにして、/などをNVMeに移動させる形の手順となっている。
公式手順の「Flashing OS to Onboard eMMC (eMMC Version)」でいけないかなぁ?と感じるものの、とりあえずいまはおいておくことにした。
時刻設定は「Asia/Tokyo」で行った(Japan指定はエラー)
user@starfive:~$ date
Wed Nov 12 12:58:48 UTC 2025
user@starfive:~$ sudo timedatectl
               Local time: Wed 2025-11-12 12:58:52 UTC
           Universal time: Wed 2025-11-12 12:58:52 UTC
                 RTC time: Wed 2025-11-12 12:58:53
                Time zone: Etc/UTC (UTC, +0000)
System clock synchronized: yes
              NTP service: active
          RTC in local TZ: no
user@starfive:~$ sudo timedatectl set-timezone Japan
Failed to set time zone: Invalid or not installed time zone 'Japan'
user@starfive:~$ sudo timedatectl set-timezone Asia/Tokyo
user@starfive:~$ sudo timedatectl
               Local time: Wed 2025-11-12 21:59:05 JST
           Universal time: Wed 2025-11-12 12:59:05 UTC
                 RTC time: Wed 2025-11-12 12:59:06
                Time zone: Asia/Tokyo (JST, +0900)
System clock synchronized: yes
              NTP service: active
          RTC in local TZ: no
user@starfive:~$
メモリとCPU情報
user@starfive:~$ cat /proc/cpuinfo
processor       : 0
hart            : 1
isa             : rv64imafdc_zicntr_zicsr_zifencei_zihpm_zca_zcd_zba_zbb
mmu             : sv39
uarch           : sifive,u74-mc
mvendorid       : 0x489
marchid         : 0x8000000000000007
mimpid          : 0x4210427
hart isa        : rv64imafdc_zicntr_zicsr_zifencei_zihpm_zca_zcd_zba_zbb

processor       : 1
hart            : 2
isa             : rv64imafdc_zicntr_zicsr_zifencei_zihpm_zca_zcd_zba_zbb
mmu             : sv39
uarch           : sifive,u74-mc
mvendorid       : 0x489
marchid         : 0x8000000000000007
mimpid          : 0x4210427
hart isa        : rv64imafdc_zicntr_zicsr_zifencei_zihpm_zca_zcd_zba_zbb

processor       : 2
hart            : 3
isa             : rv64imafdc_zicntr_zicsr_zifencei_zihpm_zca_zcd_zba_zbb
mmu             : sv39
uarch           : sifive,u74-mc
mvendorid       : 0x489
marchid         : 0x8000000000000007
mimpid          : 0x4210427
hart isa        : rv64imafdc_zicntr_zicsr_zifencei_zihpm_zca_zcd_zba_zbb

processor       : 3
hart            : 4
isa             : rv64imafdc_zicntr_zicsr_zifencei_zihpm_zca_zcd_zba_zbb
mmu             : sv39
uarch           : sifive,u74-mc
mvendorid       : 0x489
marchid         : 0x8000000000000007
mimpid          : 0x4210427
hart isa        : rv64imafdc_zicntr_zicsr_zifencei_zihpm_zca_zcd_zba_zbb

user@starfive:~$ cat /proc/meminfo
MemTotal:        8079820 kB
MemFree:          515108 kB
MemAvailable:    6902732 kB
Buffers:          126800 kB
Cached:          6015584 kB
SwapCached:            0 kB
Active:           987216 kB
Inactive:        5824404 kB
Active(anon):       4288 kB
Inactive(anon):   704560 kB
Active(file):     982928 kB
Inactive(file):  5119844 kB
Unevictable:          16 kB
Mlocked:              16 kB
SwapTotal:             0 kB
SwapFree:              0 kB
Dirty:                44 kB
Writeback:             0 kB
AnonPages:        669276 kB
Mapped:           420468 kB
Shmem:             39612 kB
KReclaimable:     371300 kB
Slab:             452172 kB
SReclaimable:     371300 kB
SUnreclaim:        80872 kB
KernelStack:        9472 kB
PageTables:        13844 kB
SecPageTables:         0 kB
NFS_Unstable:          0 kB
Bounce:                0 kB
WritebackTmp:          0 kB
CommitLimit:     4039908 kB
Committed_AS:    4831208 kB
VmallocTotal:   67108864 kB
VmallocUsed:       26348 kB
VmallocChunk:          0 kB
Percpu:             1872 kB
CmaTotal:        1572864 kB
CmaFree:           29056 kB
HugePages_Total:       0
HugePages_Free:        0
HugePages_Rsvd:        0
HugePages_Surp:        0
Hugepagesize:       2048 kB
Hugetlb:               0 kB
user@starfive:~$
Firmwareバージョンアップ
Firmwareのバージョン確認
届いたやつのFirmwareがいくつなのか確認しようと思ったのだが手順がよくわからない
とりあえず、/proc/mtd による領域レイアウトを確認
user@starfive:~$ cat /proc/mtd
dev:    size   erasesize  name
mtd0: 000f0000 00001000 "spl"
mtd1: 00010000 00001000 "uboot-env"
mtd2: 00f00000 00001000 "uboot"
user@starfive:~$
Updating SPL and U-Boot of Flash に書いてあるレイアウトと同じことを確認
フォーラムの「How to check the firmware version that my QSPI has?」のコメントに「sudo cat /dev/mtd[012] | strings | grep -E “U-Boot SPL|buildroot”」を実行する、とあるので試してみる
user@starfive:~$ sudo cat /dev/mtd[012] | strings | grep -E "U-Boot SPL|buildroot"
[sudo] password for user:
U-Boot SPL 2021.10 (Sep 15 2025 - 16:03:04 +0800)
riscv64-buildroot-linux-gnu-gcc.br_real (Buildroot JH7110_VF2_6.12_v5.14.10) 12.2.0
user@starfive:~$
2025/11/12 19:45時点の https://github.com/starfive-tech/VisionFive2/releases にある VisionFive2 Software v6.0.0 は build JH7110_VF2_6.12_v6.0.0 とあるので、新しいものとなっている模様
バージョンアップ実施
mtd-utils コマンドをインストールしてから手順に従って実施
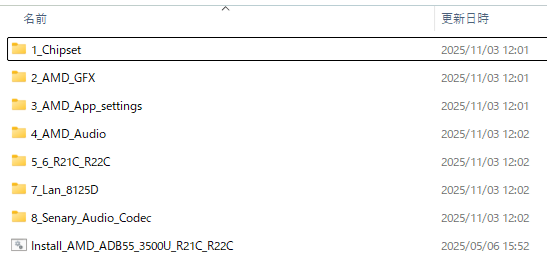
ダウンロードしたJH7110_VF2_6.12_v6.0.0-github-2025-10-10.zip を展開するとファイルがいろいろ出てきて面食らいますが、今回使うのは「u-boot-spl.bin.normal.out」と「visionfive2_fw_payload.img」だけ
user@starfive:~/JH7110_VF2_6.12_v6.0.0-github-2025-10-10$ ls
Image.gz                                          jh7110s-starfive-visionfive-2-lite-amp.dtb.asc
Image.gz.asc                                      jh7110s-starfive-visionfive-2-lite-emmc.dtb
build_JH7110_VF2_6.12_v6.0.0.log                  jh7110s-starfive-visionfive-2-lite-emmc.dtb.asc
image.fit                                         jh7110s-starfive-visionfive-2-lite-tdm.dtb
image.fit.asc                                     jh7110s-starfive-visionfive-2-lite-tdm.dtb.asc
initramfs.cpio.gz                                 jh7110s-starfive-visionfive-2-lite-usbdevice.dtb
jh7110-starfive-visionfive-2-ac108.dtb            jh7110s-starfive-visionfive-2-lite-usbdevice.dtb.asc
jh7110-starfive-visionfive-2-ac108.dtb.asc        jh7110s-starfive-visionfive-2-lite-wm8960.dtb
jh7110-starfive-visionfive-2-amp.dtb              jh7110s-starfive-visionfive-2-lite-wm8960.dtb.asc
jh7110-starfive-visionfive-2-amp.dtb.asc          jh7110s-starfive-visionfive-2-lite.dtb
jh7110-starfive-visionfive-2-tdm.dtb              jh7110s-starfive-visionfive-2-lite.dtb.asc
jh7110-starfive-visionfive-2-tdm.dtb.asc          sdcard.img
jh7110-starfive-visionfive-2-v1.2a.dtb            sdcard.img.asc
jh7110-starfive-visionfive-2-v1.2a.dtb.asc        sha256sum.txt
jh7110-starfive-visionfive-2-v1.3b.dtb            u-boot-spl.bin.normal.out
jh7110-starfive-visionfive-2-v1.3b.dtb.asc        u-boot-spl.bin.normal.out.asc
jh7110-starfive-visionfive-2-wm8960.dtb           vf2-overlay-can.dtbo
jh7110-starfive-visionfive-2-wm8960.dtb.asc       vf2-overlay-can.dtbo.asc
jh7110s-starfive-visionfive-2-cm.dtb              vf2-overlay-uart3-i2c.dtbo
jh7110s-starfive-visionfive-2-cm.dtb.asc          vf2-overlay-uart3-i2c.dtbo.asc
jh7110s-starfive-visionfive-2-lite-ac108.dtb      visionfive2_fw_payload.img
jh7110s-starfive-visionfive-2-lite-ac108.dtb.asc  visionfive2_fw_payload.img.asc
jh7110s-starfive-visionfive-2-lite-amp.dtb
user@starfive:~/JH7110_VF2_6.12_v6.0.0-github-2025-10-10$
アップデートを実施
user@starfive:~/JH7110_VF2_6.12_v6.0.0-github-2025-10-10$ sudo flashcp -v u-boot-spl.bin.normal.out /dev/mtd0
Erasing blocks: 39/39 (100%)
Writing data: 153k/153k (100%)
Verifying data: 153k/153k (100%)
user@starfive:~/JH7110_VF2_6.12_v6.0.0-github-2025-10-10$ sudo flashcp -v visionfive2_fw_payload.img  /dev/mtd2
Erasing blocks: 787/787 (100%)
Writing data: 3145k/3145k (100%)
Verifying data: 3145k/3145k (100%)
user@starfive:~/JH7110_VF2_6.12_v6.0.0-github-2025-10-10$
書き換えたあと確認すると、U-Boot SPLの方は前と同じようですね
user@starfive:~/JH7110_VF2_6.12_v6.0.0-github-2025-10-10$ sudo cat /dev/mtd[012] | strings | grep -E "U-Boot SPL|buildroot"
U-Boot SPL 2021.10 (Oct 10 2025 - 11:25:33 +0800)
riscv64-buildroot-linux-gnu-gcc.br_real (Buildroot JH7110_VF2_6.12_v6.0.0) 12.2.0
user@starfive:~/JH7110_VF2_6.12_v6.0.0-github-2025-10-10$
デフォルトUbuntu 24.04について
まずは、ドキュメントに「Install Packages」とあるのでインストール
(/opt/install_full.sh を実行する前に「sudo apt upgrade」を実行してはいけない)
ファイルの存在確認
user@starfive:~$ ls /opt
ISP  containerd  install_full.sh
user@starfive:~$
実行
user@starfive:~$ cd /opt
user@starfive:/opt$ sudo ./install_full.sh
Hit:1 http://ports.ubuntu.com/ubuntu-ports noble-updates InRelease
Hit:2 http://ports.ubuntu.com/ubuntu-ports noble-backports InRelease
Hit:3 http://ports.ubuntu.com/ubuntu-ports noble InRelease
Hit:4 https://debianrepo-t.starfivetech.com/ubuntu starfive-ubuntu InRelease
Hit:5 http://ports.ubuntu.com/ubuntu-ports noble-security InRelease
Hit:6 https://debianrepo-t.starfivetech.com/VF2-Lite VisionFive2 InRelease
Reading package lists... Done
Building dependency tree... Done
Reading state information... Done
110 packages can be upgraded. Run 'apt list --upgradable' to see them.
Reading package lists... Done
Building dependency tree... Done
Reading state information... Done
gstreamer1.0-libcamera is already the newest version (0.0.5-2).
gstreamer1.0-libcamera set to manually installed.
libcamera-ipa is already the newest version (0.0.5-2).
libcamera-tools is already the newest version (0.0.5-2).
libcamera-apps is already the newest version (1.0).
Suggested packages:
  apache2 | lighttpd | httpd
The following NEW packages will be installed:
<略>
Setting up libminizip-dev:riscv64 (1:1.3.dfsg-3.1ubuntu2.1) ...
Processing triggers for libc-bin (2.39-0ubuntu8.5) ...
Scanning processes...
Scanning processor microcode...
Scanning linux images...

Running kernel seems to be up-to-date.

The processor microcode seems to be up-to-date.

No services need to be restarted.

No containers need to be restarted.

No user sessions are running outdated binaries.

No VM guests are running outdated hypervisor (qemu) binaries on this host.
Install Success
user@starfive:/opt$
これで問題無くapt upgradeが成功するようになりました
user@starfive:/opt$ sudo apt upgrade
Reading package lists... Done
Building dependency tree... Done
Reading state information... Done
Calculating upgrade... Done
The following packages will be upgraded:
  bind9-dnsutils bind9-host bind9-libs binutils binutils-common binutils-riscv64-linux-gnu bluez bluez-cups bluez-obexd
  cloud-init containerd coreutils cups cups-bsd cups-client cups-common cups-core-drivers cups-daemon cups-ipp-utils cups-ppdc
  cups-server-common dconf-cli dconf-gsettings-backend dconf-service distro-info-data docker.io dpkg ghostscript gir1.2-gtop-2.0
  gir1.2-javascriptcoregtk-4.1 gir1.2-javascriptcoregtk-6.0 gir1.2-nm-1.0 gir1.2-webkit-6.0 gir1.2-webkit2-4.1 landscape-common
  libbinutils libbluetooth3 libc-bin libc6 libctf-nobfd0 libctf0 libcups2t64 libcupsimage2t64 libdconf1 libgs-common libgs10
  libgs10-common libgtop-2.0-11 libgtop2-common libjavascriptcoregtk-4.1-0 libjavascriptcoregtk-6.0-1 libldb2 libnm0
  libnss-systemd libopenjp2-7 libpam-modules libpam-modules-bin libpam-runtime libpam-systemd libpam0g libpoppler-cpp0t64
  libpoppler-glib8t64 libpoppler134 libsframe1 libsmbclient0 libsqlite3-0 libssh-4 libssh-gcrypt-4 libssl3t64 libsystemd-shared
  libsystemd0 libtiff6 libudev1 libwbclient0 libwebkit2gtk-4.1-0 libwebkitgtk-6.0-4 libxml2 locales network-manager
  network-manager-config-connectivity-ubuntu openssh-client openssh-server openssh-sftp-server openssl openvpn poppler-utils runc
  samba-libs snapd sosreport systemd systemd-dev systemd-hwe-hwdb systemd-oomd systemd-resolved systemd-sysv systemd-timesyncd
  ubuntu-drivers-common udev vim vim-common vim-runtime vim-tiny wpasupplicant xserver-common xserver-xephyr xserver-xorg-core
  xserver-xorg-legacy xwayland xxd
The following packages will be DOWNGRADED:
  gnome-shell gnome-shell-extension-prefs
110 upgraded, 0 newly installed, 2 downgraded, 0 to remove and 0 not upgraded.
68 standard LTS security updates
Need to get 229 MB of archives.
After this operation, 11.9 MB of additional disk space will be used.
Do you want to continue? [Y/n] y
Get:1 http://ports.ubuntu.com/ubuntu-ports noble-updates/main riscv64 coreutils riscv64 9.4-3ubuntu6.1 [1461 kB]
Get:2 https://debianrepo-t.starfivetech.com/ubuntu starfive-ubuntu/noble riscv64 gnome-shell-extension-prefs riscv64 46.0-0ubuntu6~24.04.9 [41.0 kB]
<略>
資料編
install_full.sh ログ全体
user@starfive:~$ ls /opt
ISP  containerd  install_full.sh
user@starfive:~$ cd /opt
user@starfive:/opt$ sudo ./install_full.sh
Hit:1 http://ports.ubuntu.com/ubuntu-ports noble-updates InRelease
Hit:2 http://ports.ubuntu.com/ubuntu-ports noble-backports InRelease
Hit:3 http://ports.ubuntu.com/ubuntu-ports noble InRelease
Hit:4 https://debianrepo-t.starfivetech.com/ubuntu starfive-ubuntu InRelease
Hit:5 http://ports.ubuntu.com/ubuntu-ports noble-security InRelease
Hit:6 https://debianrepo-t.starfivetech.com/VF2-Lite VisionFive2 InRelease
Reading package lists... Done
Building dependency tree... Done
Reading state information... Done
110 packages can be upgraded. Run 'apt list --upgradable' to see them.
Reading package lists... Done
Building dependency tree... Done
Reading state information... Done
gstreamer1.0-libcamera is already the newest version (0.0.5-2).
gstreamer1.0-libcamera set to manually installed.
libcamera-ipa is already the newest version (0.0.5-2).
libcamera-tools is already the newest version (0.0.5-2).
libcamera-apps is already the newest version (1.0).
Suggested packages:
  apache2 | lighttpd | httpd
The following NEW packages will be installed:
  javascript-common libcamera-doc libcamera-v4l2 libjs-jquery libjs-sphinxdoc libjs-underscore
0 upgraded, 6 newly installed, 0 to remove and 110 not upgraded.
Need to get 664 kB of archives.
After this operation, 1539 kB of additional disk space will be used.
Get:1 http://ports.ubuntu.com/ubuntu-ports noble/main riscv64 javascript-common all 11+nmu1 [5936 B]
Get:2 http://ports.ubuntu.com/ubuntu-ports noble/main riscv64 libjs-jquery all 3.6.1+dfsg+~3.5.14-1 [328 kB]
Get:3 https://debianrepo-t.starfivetech.com/ubuntu starfive-ubuntu/noble riscv64 libcamera-doc all 0.0.5-2 [14.0 kB]
Get:4 http://ports.ubuntu.com/ubuntu-ports noble/main riscv64 libjs-underscore all 1.13.4~dfsg+~1.11.4-3 [118 kB]
Get:5 https://debianrepo-t.starfivetech.com/ubuntu starfive-ubuntu/noble riscv64 libcamera-v4l2 riscv64 0.0.5-2 [49.3 kB]
Get:6 http://ports.ubuntu.com/ubuntu-ports noble/main riscv64 libjs-sphinxdoc all 7.2.6-6 [149 kB]
Fetched 664 kB in 3s (245 kB/s)
Selecting previously unselected package javascript-common.
(Reading database ... 123932 files and directories currently installed.)
Preparing to unpack .../0-javascript-common_11+nmu1_all.deb ...
Unpacking javascript-common (11+nmu1) ...
Selecting previously unselected package libjs-jquery.
Preparing to unpack .../1-libjs-jquery_3.6.1+dfsg+~3.5.14-1_all.deb ...
Unpacking libjs-jquery (3.6.1+dfsg+~3.5.14-1) ...
Selecting previously unselected package libjs-underscore.
Preparing to unpack .../2-libjs-underscore_1.13.4~dfsg+~1.11.4-3_all.deb ...
Unpacking libjs-underscore (1.13.4~dfsg+~1.11.4-3) ...
Selecting previously unselected package libjs-sphinxdoc.
Preparing to unpack .../3-libjs-sphinxdoc_7.2.6-6_all.deb ...
Unpacking libjs-sphinxdoc (7.2.6-6) ...
Selecting previously unselected package libcamera-doc.
Preparing to unpack .../4-libcamera-doc_0.0.5-2_all.deb ...
Unpacking libcamera-doc (0.0.5-2) ...
Selecting previously unselected package libcamera-v4l2:riscv64.
Preparing to unpack .../5-libcamera-v4l2_0.0.5-2_riscv64.deb ...
Unpacking libcamera-v4l2:riscv64 (0.0.5-2) ...
Setting up javascript-common (11+nmu1) ...
Setting up libcamera-v4l2:riscv64 (0.0.5-2) ...
Setting up libjs-jquery (3.6.1+dfsg+~3.5.14-1) ...
Setting up libjs-underscore (1.13.4~dfsg+~1.11.4-3) ...
Setting up libjs-sphinxdoc (7.2.6-6) ...
Setting up libcamera-doc (0.0.5-2) ...
Scanning processes...
Scanning processor microcode...
Scanning linux images...

Running kernel seems to be up-to-date.

The processor microcode seems to be up-to-date.

No services need to be restarted.

No containers need to be restarted.

No user sessions are running outdated binaries.

No VM guests are running outdated hypervisor (qemu) binaries on this host.
Reading package lists... Done
Building dependency tree... Done
Reading state information... Done
libreoffice-gnome is already the newest version (4:24.2.7-0ubuntu0.24.04.4).
libreoffice-gnome set to manually installed.
The following additional packages will be installed:
  ca-certificates-java default-jre default-jre-headless firebird3.0-common firebird3.0-common-doc firebird3.0-server-core
  firebird3.0-utils fonts-crosextra-caladea fonts-crosextra-carlito fonts-dejavu fonts-dejavu-extra fonts-linuxlibertine
  fonts-noto-extra fonts-noto-ui-core fonts-sil-gentium fonts-sil-gentium-basic java-common libatk-wrapper-java
  libatk-wrapper-java-jni libbsh-java libel-api-java libfbclient2 libhsqldb1.8.0-java libib-util libjsp-api-java
  liblibreoffice-java libmysqlclient21 libpq5 libreoffice-base libreoffice-base-drivers libreoffice-java-common
  libreoffice-nlpsolver libreoffice-report-builder libreoffice-report-builder-bin libreoffice-script-provider-bsh
  libreoffice-script-provider-js libreoffice-script-provider-python libreoffice-sdbc-firebird libreoffice-sdbc-hsqldb
  libreoffice-sdbc-mysql libreoffice-sdbc-postgresql libreoffice-uiconfig-base libreoffice-uiconfig-report-builder
  libreoffice-wiki-publisher libservlet-api-java libservlet3.1-java libtommath1 libunoloader-java libwebsocket-api-java
  mysql-common openjdk-21-jre openjdk-21-jre-headless ure-java
Suggested packages:
  firebird3.0-server firebird3.0-doc java-virtual-machine libhsqldb1.8.0-java-gcj gpa hyphen-hyphenation-patterns imagemagick
  | graphicsmagick-imagemagick-compat libreoffice-grammarcheck libreoffice-help libreoffice-l10n libreoffice-librelogo
  myspell-dictionary mythes-thesaurus openclipart-libreoffice pstoedit unixodbc gstreamer1.0-plugins-ugly
  gstreamer1.0-plugins-bad gstreamer1.0-libav libofficebean-java python3-access2base libjtds-java libsqliteodbc | tdsodbc
  | odbc-mdbtools libreoffice-help-common default-mysql-server | virtual-mysql-server postgresql mediawiki fonts-ipafont-gothic
  fonts-ipafont-mincho fonts-wqy-microhei | fonts-wqy-zenhei fonts-indic
The following NEW packages will be installed:
  ca-certificates-java default-jre default-jre-headless firebird3.0-common firebird3.0-common-doc firebird3.0-server-core
  firebird3.0-utils fonts-crosextra-caladea fonts-crosextra-carlito fonts-dejavu fonts-dejavu-extra fonts-linuxlibertine
  fonts-noto-extra fonts-noto-ui-core fonts-sil-gentium fonts-sil-gentium-basic java-common libatk-wrapper-java
  libatk-wrapper-java-jni libbsh-java libel-api-java libfbclient2 libhsqldb1.8.0-java libib-util libjsp-api-java
  liblibreoffice-java libmysqlclient21 libpq5 libreoffice libreoffice-base libreoffice-base-drivers libreoffice-java-common
  libreoffice-nlpsolver libreoffice-report-builder libreoffice-report-builder-bin libreoffice-script-provider-bsh
  libreoffice-script-provider-js libreoffice-script-provider-python libreoffice-sdbc-firebird libreoffice-sdbc-hsqldb
  libreoffice-sdbc-mysql libreoffice-sdbc-postgresql libreoffice-uiconfig-base libreoffice-uiconfig-report-builder
  libreoffice-wiki-publisher libservlet-api-java libservlet3.1-java libtommath1 libunoloader-java libwebsocket-api-java
  mysql-common openjdk-21-jre openjdk-21-jre-headless ure-java
0 upgraded, 54 newly installed, 0 to remove and 110 not upgraded.
Need to get 152 MB of archives.
After this operation, 626 MB of additional disk space will be used.
Get:1 http://ports.ubuntu.com/ubuntu-ports noble/main riscv64 ca-certificates-java all 20240118 [11.6 kB]
Get:2 http://ports.ubuntu.com/ubuntu-ports noble/main riscv64 java-common all 0.75+exp1 [6798 B]
Get:3 http://ports.ubuntu.com/ubuntu-ports noble-updates/main riscv64 openjdk-21-jre-headless riscv64 21.0.8+9~us1-0ubuntu1~24.04.1 [46.0 MB]
Get:4 http://ports.ubuntu.com/ubuntu-ports noble/main riscv64 default-jre-headless riscv64 2:1.21-75+exp1 [3102 B]
Get:5 http://ports.ubuntu.com/ubuntu-ports noble-updates/main riscv64 openjdk-21-jre riscv64 21.0.8+9~us1-0ubuntu1~24.04.1 [231 kB]
Get:6 http://ports.ubuntu.com/ubuntu-ports noble/main riscv64 default-jre riscv64 2:1.21-75+exp1 [922 B]
Get:7 http://ports.ubuntu.com/ubuntu-ports noble/universe riscv64 firebird3.0-common-doc all 3.0.11.33703.ds4-2ubuntu2 [28.5 kB]
Get:8 http://ports.ubuntu.com/ubuntu-ports noble/universe riscv64 firebird3.0-common all 3.0.11.33703.ds4-2ubuntu2 [15.5 kB]
Get:9 http://ports.ubuntu.com/ubuntu-ports noble/main riscv64 libtommath1 riscv64 1.2.1-2build1 [65.1 kB]
Get:10 http://ports.ubuntu.com/ubuntu-ports noble/universe riscv64 libfbclient2 riscv64 3.0.11.33703.ds4-2ubuntu2 [668 kB]
Get:11 http://ports.ubuntu.com/ubuntu-ports noble/universe riscv64 libib-util riscv64 3.0.11.33703.ds4-2ubuntu2 [3234 B]
Get:12 http://ports.ubuntu.com/ubuntu-ports noble/universe riscv64 firebird3.0-server-core riscv64 3.0.11.33703.ds4-2ubuntu2 [3149 kB]
Get:13 http://ports.ubuntu.com/ubuntu-ports noble/universe riscv64 firebird3.0-utils riscv64 3.0.11.33703.ds4-2ubuntu2 [1028 kB]
Get:14 http://ports.ubuntu.com/ubuntu-ports noble/universe riscv64 fonts-crosextra-caladea all 20200211-2 [127 kB]
Get:15 http://ports.ubuntu.com/ubuntu-ports noble/universe riscv64 fonts-crosextra-carlito all 20230309-2 [811 kB]
Get:16 http://ports.ubuntu.com/ubuntu-ports noble/main riscv64 fonts-dejavu-extra all 2.37-8 [1947 kB]
Get:17 http://ports.ubuntu.com/ubuntu-ports noble/universe riscv64 fonts-dejavu all 2.37-8 [3020 B]
Get:18 http://ports.ubuntu.com/ubuntu-ports noble/universe riscv64 fonts-linuxlibertine all 5.3.0-6 [1627 kB]
Get:19 http://ports.ubuntu.com/ubuntu-ports noble/universe riscv64 fonts-noto-extra all 20201225-2 [78.5 MB]
Get:20 http://ports.ubuntu.com/ubuntu-ports noble/main riscv64 fonts-noto-ui-core all 20201225-2 [1552 kB]
Get:21 http://ports.ubuntu.com/ubuntu-ports noble/universe riscv64 fonts-sil-gentium all 20081126:1.03-4 [245 kB]
Get:22 http://ports.ubuntu.com/ubuntu-ports noble/universe riscv64 fonts-sil-gentium-basic all 1.102-1.1 [384 kB]
Get:23 http://ports.ubuntu.com/ubuntu-ports noble/main riscv64 libatk-wrapper-java all 0.40.0-3build2 [54.3 kB]
Get:24 http://ports.ubuntu.com/ubuntu-ports noble/main riscv64 libatk-wrapper-java-jni riscv64 0.40.0-3build2 [49.3 kB]
Get:25 http://ports.ubuntu.com/ubuntu-ports noble/universe riscv64 libbsh-java all 2.0b4-20 [289 kB]
Get:26 http://ports.ubuntu.com/ubuntu-ports noble/universe riscv64 libel-api-java all 3.0.0-3 [64.9 kB]
Get:27 http://ports.ubuntu.com/ubuntu-ports noble/universe riscv64 libservlet-api-java all 4.0.1-2 [81.0 kB]
Get:28 http://ports.ubuntu.com/ubuntu-ports noble/universe riscv64 libjsp-api-java all 2.3.4-3 [53.7 kB]
Get:29 http://ports.ubuntu.com/ubuntu-ports noble/universe riscv64 libwebsocket-api-java all 1.1-2 [40.1 kB]
Get:30 http://ports.ubuntu.com/ubuntu-ports noble/universe riscv64 libservlet3.1-java all 1:4.0.1-2 [9276 B]
Get:31 http://ports.ubuntu.com/ubuntu-ports noble/universe riscv64 libhsqldb1.8.0-java all 1.8.0.10+dfsg-12 [776 kB]
Get:32 http://ports.ubuntu.com/ubuntu-ports noble-updates/main riscv64 libunoloader-java all 4:24.2.7-0ubuntu0.24.04.4 [49.5 kB]
Get:33 http://ports.ubuntu.com/ubuntu-ports noble-updates/main riscv64 ure-java riscv64 4:24.2.7-0ubuntu0.24.04.4 [236 kB]
Get:34 http://ports.ubuntu.com/ubuntu-ports noble-updates/main riscv64 liblibreoffice-java all 4:24.2.7-0ubuntu0.24.04.4 [1617 kB]
Get:35 http://ports.ubuntu.com/ubuntu-ports noble/main riscv64 mysql-common all 5.8+1.1.0build1 [6746 B]
Get:36 http://ports.ubuntu.com/ubuntu-ports noble-updates/main riscv64 libmysqlclient21 riscv64 8.0.43-0ubuntu0.24.04.2 [1319 kB]
Get:37 http://ports.ubuntu.com/ubuntu-ports noble-updates/main riscv64 libpq5 riscv64 16.10-0ubuntu0.24.04.1 [148 kB]
Get:38 http://ports.ubuntu.com/ubuntu-ports noble-updates/universe riscv64 libreoffice-base-drivers riscv64 4:24.2.7-0ubuntu0.24.04.4 [710 kB]
Get:39 http://ports.ubuntu.com/ubuntu-ports noble-updates/universe riscv64 libreoffice-uiconfig-base all 4:24.2.7-0ubuntu0.24.04.4 [84.0 kB]
Get:40 http://ports.ubuntu.com/ubuntu-ports noble-updates/universe riscv64 libreoffice-base riscv64 4:24.2.7-0ubuntu0.24.04.4 [1823 kB]
Get:41 http://ports.ubuntu.com/ubuntu-ports noble-updates/universe riscv64 libreoffice-report-builder-bin riscv64 4:24.2.7-0ubuntu0.24.04.4 [1044 kB]
Get:42 http://ports.ubuntu.com/ubuntu-ports noble-updates/universe riscv64 libreoffice riscv64 4:24.2.7-0ubuntu0.24.04.4 [51.0 kB]
Get:43 http://ports.ubuntu.com/ubuntu-ports noble-updates/main riscv64 libreoffice-java-common all 4:24.2.7-0ubuntu0.24.04.4 [631 kB]
Get:44 http://ports.ubuntu.com/ubuntu-ports noble-updates/universe riscv64 libreoffice-uiconfig-report-builder all 4:24.2.7-0ubuntu0.24.04.4 [54.3 kB]
Get:45 http://ports.ubuntu.com/ubuntu-ports noble-updates/universe riscv64 libreoffice-report-builder all 4:24.2.7-0ubuntu0.24.04.4 [2127 kB]
Get:46 http://ports.ubuntu.com/ubuntu-ports noble-updates/universe riscv64 libreoffice-script-provider-bsh all 4:24.2.7-0ubuntu0.24.04.4 [41.4 kB]
Get:47 http://ports.ubuntu.com/ubuntu-ports noble-updates/universe riscv64 libreoffice-script-provider-js all 4:24.2.7-0ubuntu0.24.04.4 [652 kB]
Get:48 http://ports.ubuntu.com/ubuntu-ports noble-updates/universe riscv64 libreoffice-script-provider-python all 4:24.2.7-0ubuntu0.24.04.4 [18.3 kB]
Get:49 http://ports.ubuntu.com/ubuntu-ports noble-updates/universe riscv64 libreoffice-sdbc-firebird riscv64 4:24.2.7-0ubuntu0.24.04.4 [231 kB]
Get:50 http://ports.ubuntu.com/ubuntu-ports noble-updates/universe riscv64 libreoffice-sdbc-hsqldb riscv64 4:24.2.7-0ubuntu0.24.04.4 [186 kB]
Get:51 http://ports.ubuntu.com/ubuntu-ports noble-updates/universe riscv64 libreoffice-sdbc-mysql riscv64 4:24.2.7-0ubuntu0.24.04.4 [215 kB]
Get:52 http://ports.ubuntu.com/ubuntu-ports noble-updates/universe riscv64 libreoffice-sdbc-postgresql riscv64 4:24.2.7-0ubuntu0.24.04.4 [336 kB]
Get:53 http://ports.ubuntu.com/ubuntu-ports noble-updates/universe riscv64 libreoffice-wiki-publisher all 4:1.2.0+LibO24.2.7-0ubuntu0.24.04.4 [1499 kB]
Get:54 http://ports.ubuntu.com/ubuntu-ports noble-updates/main riscv64 libreoffice-nlpsolver all 4:0.9+LibO24.2.7-0ubuntu0.24.04.4 [744 kB]
Fetched 152 MB in 1min 24s (1812 kB/s)
Extracting templates from packages: 100%
Selecting previously unselected package ca-certificates-java.
(Reading database ... 124003 files and directories currently installed.)
Preparing to unpack .../00-ca-certificates-java_20240118_all.deb ...
Unpacking ca-certificates-java (20240118) ...
Selecting previously unselected package java-common.
Preparing to unpack .../01-java-common_0.75+exp1_all.deb ...
Unpacking java-common (0.75+exp1) ...
Selecting previously unselected package openjdk-21-jre-headless:riscv64.
Preparing to unpack .../02-openjdk-21-jre-headless_21.0.8+9~us1-0ubuntu1~24.04.1_riscv64.deb ...
Unpacking openjdk-21-jre-headless:riscv64 (21.0.8+9~us1-0ubuntu1~24.04.1) ...
Selecting previously unselected package default-jre-headless.
Preparing to unpack .../03-default-jre-headless_2%3a1.21-75+exp1_riscv64.deb ...
Unpacking default-jre-headless (2:1.21-75+exp1) ...
Selecting previously unselected package openjdk-21-jre:riscv64.
Preparing to unpack .../04-openjdk-21-jre_21.0.8+9~us1-0ubuntu1~24.04.1_riscv64.deb ...
Unpacking openjdk-21-jre:riscv64 (21.0.8+9~us1-0ubuntu1~24.04.1) ...
Selecting previously unselected package default-jre.
Preparing to unpack .../05-default-jre_2%3a1.21-75+exp1_riscv64.deb ...
Unpacking default-jre (2:1.21-75+exp1) ...
Selecting previously unselected package firebird3.0-common-doc.
Preparing to unpack .../06-firebird3.0-common-doc_3.0.11.33703.ds4-2ubuntu2_all.deb ...
Unpacking firebird3.0-common-doc (3.0.11.33703.ds4-2ubuntu2) ...
Selecting previously unselected package firebird3.0-common.
Preparing to unpack .../07-firebird3.0-common_3.0.11.33703.ds4-2ubuntu2_all.deb ...
Unpacking firebird3.0-common (3.0.11.33703.ds4-2ubuntu2) ...
Selecting previously unselected package libtommath1:riscv64.
Preparing to unpack .../08-libtommath1_1.2.1-2build1_riscv64.deb ...
Unpacking libtommath1:riscv64 (1.2.1-2build1) ...
Selecting previously unselected package libfbclient2:riscv64.
Preparing to unpack .../09-libfbclient2_3.0.11.33703.ds4-2ubuntu2_riscv64.deb ...
Unpacking libfbclient2:riscv64 (3.0.11.33703.ds4-2ubuntu2) ...
Selecting previously unselected package libib-util:riscv64.
Preparing to unpack .../10-libib-util_3.0.11.33703.ds4-2ubuntu2_riscv64.deb ...
Unpacking libib-util:riscv64 (3.0.11.33703.ds4-2ubuntu2) ...
Selecting previously unselected package firebird3.0-server-core:riscv64.
Preparing to unpack .../11-firebird3.0-server-core_3.0.11.33703.ds4-2ubuntu2_riscv64.deb ...
Unpacking firebird3.0-server-core:riscv64 (3.0.11.33703.ds4-2ubuntu2) ...
Selecting previously unselected package firebird3.0-utils.
Preparing to unpack .../12-firebird3.0-utils_3.0.11.33703.ds4-2ubuntu2_riscv64.deb ...
Unpacking firebird3.0-utils (3.0.11.33703.ds4-2ubuntu2) ...
Selecting previously unselected package fonts-crosextra-caladea.
Preparing to unpack .../13-fonts-crosextra-caladea_20200211-2_all.deb ...
Unpacking fonts-crosextra-caladea (20200211-2) ...
Selecting previously unselected package fonts-crosextra-carlito.
Preparing to unpack .../14-fonts-crosextra-carlito_20230309-2_all.deb ...
Unpacking fonts-crosextra-carlito (20230309-2) ...
Selecting previously unselected package fonts-dejavu-extra.
Preparing to unpack .../15-fonts-dejavu-extra_2.37-8_all.deb ...
Unpacking fonts-dejavu-extra (2.37-8) ...
Selecting previously unselected package fonts-dejavu.
Preparing to unpack .../16-fonts-dejavu_2.37-8_all.deb ...
Unpacking fonts-dejavu (2.37-8) ...
Selecting previously unselected package fonts-linuxlibertine.
Preparing to unpack .../17-fonts-linuxlibertine_5.3.0-6_all.deb ...
Unpacking fonts-linuxlibertine (5.3.0-6) ...
Selecting previously unselected package fonts-noto-extra.
Preparing to unpack .../18-fonts-noto-extra_20201225-2_all.deb ...
Unpacking fonts-noto-extra (20201225-2) ...
Selecting previously unselected package fonts-noto-ui-core.
Preparing to unpack .../19-fonts-noto-ui-core_20201225-2_all.deb ...
Unpacking fonts-noto-ui-core (20201225-2) ...
Selecting previously unselected package fonts-sil-gentium.
Preparing to unpack .../20-fonts-sil-gentium_20081126%3a1.03-4_all.deb ...
Unpacking fonts-sil-gentium (20081126:1.03-4) ...
Selecting previously unselected package fonts-sil-gentium-basic.
Preparing to unpack .../21-fonts-sil-gentium-basic_1.102-1.1_all.deb ...
Unpacking fonts-sil-gentium-basic (1.102-1.1) ...
Selecting previously unselected package libatk-wrapper-java.
Preparing to unpack .../22-libatk-wrapper-java_0.40.0-3build2_all.deb ...
Unpacking libatk-wrapper-java (0.40.0-3build2) ...
Selecting previously unselected package libatk-wrapper-java-jni:riscv64.
Preparing to unpack .../23-libatk-wrapper-java-jni_0.40.0-3build2_riscv64.deb ...
Unpacking libatk-wrapper-java-jni:riscv64 (0.40.0-3build2) ...
Selecting previously unselected package libbsh-java.
Preparing to unpack .../24-libbsh-java_2.0b4-20_all.deb ...
Unpacking libbsh-java (2.0b4-20) ...
Selecting previously unselected package libel-api-java.
Preparing to unpack .../25-libel-api-java_3.0.0-3_all.deb ...
Unpacking libel-api-java (3.0.0-3) ...
Selecting previously unselected package libservlet-api-java.
Preparing to unpack .../26-libservlet-api-java_4.0.1-2_all.deb ...
Unpacking libservlet-api-java (4.0.1-2) ...
Selecting previously unselected package libjsp-api-java.
Preparing to unpack .../27-libjsp-api-java_2.3.4-3_all.deb ...
Unpacking libjsp-api-java (2.3.4-3) ...
Selecting previously unselected package libwebsocket-api-java.
Preparing to unpack .../28-libwebsocket-api-java_1.1-2_all.deb ...
Unpacking libwebsocket-api-java (1.1-2) ...
Selecting previously unselected package libservlet3.1-java.
Preparing to unpack .../29-libservlet3.1-java_1%3a4.0.1-2_all.deb ...
Unpacking libservlet3.1-java (1:4.0.1-2) ...
Selecting previously unselected package libhsqldb1.8.0-java.
Preparing to unpack .../30-libhsqldb1.8.0-java_1.8.0.10+dfsg-12_all.deb ...
Unpacking libhsqldb1.8.0-java (1.8.0.10+dfsg-12) ...
Selecting previously unselected package libunoloader-java.
Preparing to unpack .../31-libunoloader-java_4%3a24.2.7-0ubuntu0.24.04.4_all.deb ...
Unpacking libunoloader-java (4:24.2.7-0ubuntu0.24.04.4) ...
Selecting previously unselected package ure-java.
Preparing to unpack .../32-ure-java_4%3a24.2.7-0ubuntu0.24.04.4_riscv64.deb ...
Unpacking ure-java (4:24.2.7-0ubuntu0.24.04.4) ...
Selecting previously unselected package liblibreoffice-java.
Preparing to unpack .../33-liblibreoffice-java_4%3a24.2.7-0ubuntu0.24.04.4_all.deb ...
Unpacking liblibreoffice-java (4:24.2.7-0ubuntu0.24.04.4) ...
Selecting previously unselected package mysql-common.
Preparing to unpack .../34-mysql-common_5.8+1.1.0build1_all.deb ...
Unpacking mysql-common (5.8+1.1.0build1) ...
Selecting previously unselected package libmysqlclient21:riscv64.
Preparing to unpack .../35-libmysqlclient21_8.0.43-0ubuntu0.24.04.2_riscv64.deb ...
Unpacking libmysqlclient21:riscv64 (8.0.43-0ubuntu0.24.04.2) ...
Selecting previously unselected package libpq5:riscv64.
Preparing to unpack .../36-libpq5_16.10-0ubuntu0.24.04.1_riscv64.deb ...
Unpacking libpq5:riscv64 (16.10-0ubuntu0.24.04.1) ...
Selecting previously unselected package libreoffice-base-drivers.
Preparing to unpack .../37-libreoffice-base-drivers_4%3a24.2.7-0ubuntu0.24.04.4_riscv64.deb ...
Unpacking libreoffice-base-drivers (4:24.2.7-0ubuntu0.24.04.4) ...
Selecting previously unselected package libreoffice-uiconfig-base.
Preparing to unpack .../38-libreoffice-uiconfig-base_4%3a24.2.7-0ubuntu0.24.04.4_all.deb ...
Unpacking libreoffice-uiconfig-base (4:24.2.7-0ubuntu0.24.04.4) ...
Selecting previously unselected package libreoffice-base.
Preparing to unpack .../39-libreoffice-base_4%3a24.2.7-0ubuntu0.24.04.4_riscv64.deb ...
No diversion 'diversion of /usr/lib/libreoffice/share/basic/dialog.xlc to /usr/lib/libreoffice/share/basic/dialog.xlc.noaccess by libreoffice-base', none removed.
No diversion 'diversion of /usr/lib/libreoffice/share/basic/script.xlc to /usr/lib/libreoffice/share/basic/script.xlc.noaccess by libreoffice-base', none removed.
Unpacking libreoffice-base (4:24.2.7-0ubuntu0.24.04.4) ...
Selecting previously unselected package libreoffice-report-builder-bin.
Preparing to unpack .../40-libreoffice-report-builder-bin_4%3a24.2.7-0ubuntu0.24.04.4_riscv64.deb ...
Unpacking libreoffice-report-builder-bin (4:24.2.7-0ubuntu0.24.04.4) ...
Selecting previously unselected package libreoffice.
Preparing to unpack .../41-libreoffice_4%3a24.2.7-0ubuntu0.24.04.4_riscv64.deb ...
Unpacking libreoffice (4:24.2.7-0ubuntu0.24.04.4) ...
Selecting previously unselected package libreoffice-java-common.
Preparing to unpack .../42-libreoffice-java-common_4%3a24.2.7-0ubuntu0.24.04.4_all.deb ...
Unpacking libreoffice-java-common (4:24.2.7-0ubuntu0.24.04.4) ...
Selecting previously unselected package libreoffice-uiconfig-report-builder.
Preparing to unpack .../43-libreoffice-uiconfig-report-builder_4%3a24.2.7-0ubuntu0.24.04.4_all.deb ...
Unpacking libreoffice-uiconfig-report-builder (4:24.2.7-0ubuntu0.24.04.4) ...
Selecting previously unselected package libreoffice-report-builder.
Preparing to unpack .../44-libreoffice-report-builder_4%3a24.2.7-0ubuntu0.24.04.4_all.deb ...
Unpacking libreoffice-report-builder (4:24.2.7-0ubuntu0.24.04.4) ...
Selecting previously unselected package libreoffice-script-provider-bsh.
Preparing to unpack .../45-libreoffice-script-provider-bsh_4%3a24.2.7-0ubuntu0.24.04.4_all.deb ...
Unpacking libreoffice-script-provider-bsh (4:24.2.7-0ubuntu0.24.04.4) ...
Selecting previously unselected package libreoffice-script-provider-js.
Preparing to unpack .../46-libreoffice-script-provider-js_4%3a24.2.7-0ubuntu0.24.04.4_all.deb ...
Unpacking libreoffice-script-provider-js (4:24.2.7-0ubuntu0.24.04.4) ...
Selecting previously unselected package libreoffice-script-provider-python.
Preparing to unpack .../47-libreoffice-script-provider-python_4%3a24.2.7-0ubuntu0.24.04.4_all.deb ...
Unpacking libreoffice-script-provider-python (4:24.2.7-0ubuntu0.24.04.4) ...
Selecting previously unselected package libreoffice-sdbc-firebird.
Preparing to unpack .../48-libreoffice-sdbc-firebird_4%3a24.2.7-0ubuntu0.24.04.4_riscv64.deb ...
Unpacking libreoffice-sdbc-firebird (4:24.2.7-0ubuntu0.24.04.4) ...
Selecting previously unselected package libreoffice-sdbc-hsqldb.
Preparing to unpack .../49-libreoffice-sdbc-hsqldb_4%3a24.2.7-0ubuntu0.24.04.4_riscv64.deb ...
Unpacking libreoffice-sdbc-hsqldb (4:24.2.7-0ubuntu0.24.04.4) ...
Selecting previously unselected package libreoffice-sdbc-mysql.
Preparing to unpack .../50-libreoffice-sdbc-mysql_4%3a24.2.7-0ubuntu0.24.04.4_riscv64.deb ...
Unpacking libreoffice-sdbc-mysql (4:24.2.7-0ubuntu0.24.04.4) ...
Selecting previously unselected package libreoffice-sdbc-postgresql.
Preparing to unpack .../51-libreoffice-sdbc-postgresql_4%3a24.2.7-0ubuntu0.24.04.4_riscv64.deb ...
Unpacking libreoffice-sdbc-postgresql (4:24.2.7-0ubuntu0.24.04.4) ...
Selecting previously unselected package libreoffice-wiki-publisher.
Preparing to unpack .../52-libreoffice-wiki-publisher_4%3a1.2.0+LibO24.2.7-0ubuntu0.24.04.4_all.deb ...
Unpacking libreoffice-wiki-publisher (4:1.2.0+LibO24.2.7-0ubuntu0.24.04.4) ...
Selecting previously unselected package libreoffice-nlpsolver.
Preparing to unpack .../53-libreoffice-nlpsolver_4%3a0.9+LibO24.2.7-0ubuntu0.24.04.4_all.deb ...
Unpacking libreoffice-nlpsolver (4:0.9+LibO24.2.7-0ubuntu0.24.04.4) ...
Setting up fonts-sil-gentium-basic (1.102-1.1) ...
Setting up mysql-common (5.8+1.1.0build1) ...
update-alternatives: using /etc/mysql/my.cnf.fallback to provide /etc/mysql/my.cnf (my.cnf) in auto mode
Setting up libmysqlclient21:riscv64 (8.0.43-0ubuntu0.24.04.2) ...
Setting up java-common (0.75+exp1) ...
Setting up libtommath1:riscv64 (1.2.1-2build1) ...
Setting up fonts-noto-extra (20201225-2) ...
Setting up libreoffice-base-drivers (4:24.2.7-0ubuntu0.24.04.4) ...
Setting up libpq5:riscv64 (16.10-0ubuntu0.24.04.1) ...
Setting up libreoffice-script-provider-python (4:24.2.7-0ubuntu0.24.04.4) ...
Setting up libel-api-java (3.0.0-3) ...
Setting up firebird3.0-common-doc (3.0.11.33703.ds4-2ubuntu2) ...
Setting up fonts-crosextra-carlito (20230309-2) ...
Setting up firebird3.0-common (3.0.11.33703.ds4-2ubuntu2) ...
Setting up fonts-sil-gentium (20081126:1.03-4) ...
Setting up libreoffice-sdbc-mysql (4:24.2.7-0ubuntu0.24.04.4) ...

Creating config file /etc/libreoffice/registry/mysqlc.xcd with new version
Setting up libwebsocket-api-java (1.1-2) ...
Setting up fonts-linuxlibertine (5.3.0-6) ...
Setting up libbsh-java (2.0b4-20) ...
Setting up libjsp-api-java (2.3.4-3) ...
Setting up fonts-dejavu-extra (2.37-8) ...
Setting up libreoffice-uiconfig-base (4:24.2.7-0ubuntu0.24.04.4) ...
Setting up libservlet-api-java (4.0.1-2) ...
Setting up fonts-crosextra-caladea (20200211-2) ...
Setting up libatk-wrapper-java (0.40.0-3build2) ...
Setting up libib-util:riscv64 (3.0.11.33703.ds4-2ubuntu2) ...
Setting up ca-certificates-java (20240118) ...
No JRE found. Skipping Java certificates setup.
Setting up libunoloader-java (4:24.2.7-0ubuntu0.24.04.4) ...
Setting up fonts-noto-ui-core (20201225-2) ...
Setting up libreoffice-uiconfig-report-builder (4:24.2.7-0ubuntu0.24.04.4) ...
Setting up libservlet3.1-java (1:4.0.1-2) ...
Setting up libreoffice-base (4:24.2.7-0ubuntu0.24.04.4) ...

Creating config file /etc/libreoffice/registry/base.xcd with new version
Setting up fonts-dejavu (2.37-8) ...
Setting up libreoffice-sdbc-postgresql (4:24.2.7-0ubuntu0.24.04.4) ...

Creating config file /etc/libreoffice/registry/postgresql.xcd with new version
Setting up openjdk-21-jre-headless:riscv64 (21.0.8+9~us1-0ubuntu1~24.04.1) ...
update-alternatives: using /usr/lib/jvm/java-21-openjdk-riscv64/bin/java to provide /usr/bin/java (java) in auto mode
update-alternatives: using /usr/lib/jvm/java-21-openjdk-riscv64/bin/jpackage to provide /usr/bin/jpackage (jpackage) in auto mode
update-alternatives: using /usr/lib/jvm/java-21-openjdk-riscv64/bin/keytool to provide /usr/bin/keytool (keytool) in auto mode
update-alternatives: using /usr/lib/jvm/java-21-openjdk-riscv64/bin/rmiregistry to provide /usr/bin/rmiregistry (rmiregistry) in auto mode
update-alternatives: using /usr/lib/jvm/java-21-openjdk-riscv64/lib/jexec to provide /usr/bin/jexec (jexec) in auto mode
Setting up libreoffice-report-builder-bin (4:24.2.7-0ubuntu0.24.04.4) ...
Setting up libfbclient2:riscv64 (3.0.11.33703.ds4-2ubuntu2) ...
Setting up libatk-wrapper-java-jni:riscv64 (0.40.0-3build2) ...
Setting up firebird3.0-utils (3.0.11.33703.ds4-2ubuntu2) ...
Setting up libhsqldb1.8.0-java (1.8.0.10+dfsg-12) ...
Setting up ure-java (4:24.2.7-0ubuntu0.24.04.4) ...
Setting up libreoffice (4:24.2.7-0ubuntu0.24.04.4) ...
Setting up liblibreoffice-java (4:24.2.7-0ubuntu0.24.04.4) ...
Setting up libreoffice-java-common (4:24.2.7-0ubuntu0.24.04.4) ...
Setting up firebird3.0-server-core:riscv64 (3.0.11.33703.ds4-2ubuntu2) ...
Setting up libreoffice-sdbc-firebird (4:24.2.7-0ubuntu0.24.04.4) ...

Creating config file /etc/libreoffice/registry/firebird_sdbc.xcd with new version
Setting up libreoffice-report-builder (4:24.2.7-0ubuntu0.24.04.4) ...

Creating config file /etc/libreoffice/registry/reportbuilder.xcd with new version
Processing triggers for man-db (2.12.0-4build2) ...
Processing triggers for libreoffice-common (4:24.2.7-0ubuntu0.24.04.4) ...
Processing triggers for fontconfig (2.15.0-1.1ubuntu2) ...
Processing triggers for desktop-file-utils (0.27-2build1) ...
Processing triggers for hicolor-icon-theme (0.17-2) ...
Processing triggers for gnome-menus (3.36.0-1.1ubuntu3) ...
Processing triggers for libc-bin (2.39-0ubuntu8.5) ...
Processing triggers for ca-certificates-java (20240118) ...
Adding debian:ACCVRAIZ1.pem
Adding debian:AC_RAIZ_FNMT-RCM.pem
Adding debian:AC_RAIZ_FNMT-RCM_SERVIDORES_SEGUROS.pem
Adding debian:ANF_Secure_Server_Root_CA.pem
Adding debian:Actalis_Authentication_Root_CA.pem
Adding debian:AffirmTrust_Commercial.pem
Adding debian:AffirmTrust_Networking.pem
Adding debian:AffirmTrust_Premium.pem
Adding debian:AffirmTrust_Premium_ECC.pem
Adding debian:Amazon_Root_CA_1.pem
Adding debian:Amazon_Root_CA_2.pem
Adding debian:Amazon_Root_CA_3.pem
Adding debian:Amazon_Root_CA_4.pem
Adding debian:Atos_TrustedRoot_2011.pem
Adding debian:Atos_TrustedRoot_Root_CA_ECC_TLS_2021.pem
Adding debian:Atos_TrustedRoot_Root_CA_RSA_TLS_2021.pem
Adding debian:Autoridad_de_Certificacion_Firmaprofesional_CIF_A62634068.pem
Adding debian:BJCA_Global_Root_CA1.pem
Adding debian:BJCA_Global_Root_CA2.pem
Adding debian:Baltimore_CyberTrust_Root.pem
Adding debian:Buypass_Class_2_Root_CA.pem
Adding debian:Buypass_Class_3_Root_CA.pem
Adding debian:CA_Disig_Root_R2.pem
Adding debian:CFCA_EV_ROOT.pem
Adding debian:COMODO_Certification_Authority.pem
Adding debian:COMODO_ECC_Certification_Authority.pem
Adding debian:COMODO_RSA_Certification_Authority.pem
Adding debian:Certainly_Root_E1.pem
Adding debian:Certainly_Root_R1.pem
Adding debian:Certigna.pem
Adding debian:Certigna_Root_CA.pem
Adding debian:Certum_EC-384_CA.pem
Adding debian:Certum_Trusted_Network_CA.pem
Adding debian:Certum_Trusted_Network_CA_2.pem
Adding debian:Certum_Trusted_Root_CA.pem
Adding debian:CommScope_Public_Trust_ECC_Root-01.pem
Adding debian:CommScope_Public_Trust_ECC_Root-02.pem
Adding debian:CommScope_Public_Trust_RSA_Root-01.pem
Adding debian:CommScope_Public_Trust_RSA_Root-02.pem
Adding debian:Comodo_AAA_Services_root.pem
Adding debian:D-TRUST_BR_Root_CA_1_2020.pem
Adding debian:D-TRUST_EV_Root_CA_1_2020.pem
Adding debian:D-TRUST_Root_Class_3_CA_2_2009.pem
Adding debian:D-TRUST_Root_Class_3_CA_2_EV_2009.pem
Adding debian:DigiCert_Assured_ID_Root_CA.pem
Adding debian:DigiCert_Assured_ID_Root_G2.pem
Adding debian:DigiCert_Assured_ID_Root_G3.pem
Adding debian:DigiCert_Global_Root_CA.pem
Adding debian:DigiCert_Global_Root_G2.pem
Adding debian:DigiCert_Global_Root_G3.pem
Adding debian:DigiCert_High_Assurance_EV_Root_CA.pem
Adding debian:DigiCert_TLS_ECC_P384_Root_G5.pem
Adding debian:DigiCert_TLS_RSA4096_Root_G5.pem
Adding debian:DigiCert_Trusted_Root_G4.pem
Adding debian:Entrust.net_Premium_2048_Secure_Server_CA.pem
Adding debian:Entrust_Root_Certification_Authority.pem
Adding debian:Entrust_Root_Certification_Authority_-_EC1.pem
Adding debian:Entrust_Root_Certification_Authority_-_G2.pem
Adding debian:Entrust_Root_Certification_Authority_-_G4.pem
Adding debian:GDCA_TrustAUTH_R5_ROOT.pem
Adding debian:GLOBALTRUST_2020.pem
Adding debian:GTS_Root_R1.pem
Adding debian:GTS_Root_R2.pem
Adding debian:GTS_Root_R3.pem
Adding debian:GTS_Root_R4.pem
Adding debian:GlobalSign_ECC_Root_CA_-_R4.pem
Adding debian:GlobalSign_ECC_Root_CA_-_R5.pem
Adding debian:GlobalSign_Root_CA.pem
Adding debian:GlobalSign_Root_CA_-_R3.pem
Adding debian:GlobalSign_Root_CA_-_R6.pem
Adding debian:GlobalSign_Root_E46.pem
Adding debian:GlobalSign_Root_R46.pem
Adding debian:Go_Daddy_Class_2_CA.pem
Adding debian:Go_Daddy_Root_Certificate_Authority_-_G2.pem
Adding debian:HARICA_TLS_ECC_Root_CA_2021.pem
Adding debian:HARICA_TLS_RSA_Root_CA_2021.pem
Adding debian:Hellenic_Academic_and_Research_Institutions_ECC_RootCA_2015.pem
Adding debian:Hellenic_Academic_and_Research_Institutions_RootCA_2015.pem
Adding debian:HiPKI_Root_CA_-_G1.pem
Adding debian:Hongkong_Post_Root_CA_3.pem
Adding debian:ISRG_Root_X1.pem
Adding debian:ISRG_Root_X2.pem
Adding debian:IdenTrust_Commercial_Root_CA_1.pem
Adding debian:IdenTrust_Public_Sector_Root_CA_1.pem
Adding debian:Izenpe.com.pem
Adding debian:Microsec_e-Szigno_Root_CA_2009.pem
Adding debian:Microsoft_ECC_Root_Certificate_Authority_2017.pem
Adding debian:Microsoft_RSA_Root_Certificate_Authority_2017.pem
Adding debian:NAVER_Global_Root_Certification_Authority.pem
Adding debian:NetLock_Arany_=Class_Gold=_F?tanusitvany.pem
Adding debian:OISTE_WISeKey_Global_Root_GB_CA.pem
Adding debian:OISTE_WISeKey_Global_Root_GC_CA.pem
Adding debian:QuoVadis_Root_CA_1_G3.pem
Adding debian:QuoVadis_Root_CA_2.pem
Adding debian:QuoVadis_Root_CA_2_G3.pem
Adding debian:QuoVadis_Root_CA_3.pem
Adding debian:QuoVadis_Root_CA_3_G3.pem
Adding debian:SSL.com_EV_Root_Certification_Authority_ECC.pem
Adding debian:SSL.com_EV_Root_Certification_Authority_RSA_R2.pem
Adding debian:SSL.com_Root_Certification_Authority_ECC.pem
Adding debian:SSL.com_Root_Certification_Authority_RSA.pem
Adding debian:SSL.com_TLS_ECC_Root_CA_2022.pem
Adding debian:SSL.com_TLS_RSA_Root_CA_2022.pem
Adding debian:SZAFIR_ROOT_CA2.pem
Adding debian:Sectigo_Public_Server_Authentication_Root_E46.pem
Adding debian:Sectigo_Public_Server_Authentication_Root_R46.pem
Adding debian:SecureSign_RootCA11.pem
Adding debian:SecureTrust_CA.pem
Adding debian:Secure_Global_CA.pem
Adding debian:Security_Communication_ECC_RootCA1.pem
Adding debian:Security_Communication_RootCA2.pem
Adding debian:Security_Communication_RootCA3.pem
Adding debian:Security_Communication_Root_CA.pem
Adding debian:Starfield_Class_2_CA.pem
Adding debian:Starfield_Root_Certificate_Authority_-_G2.pem
Adding debian:Starfield_Services_Root_Certificate_Authority_-_G2.pem
Adding debian:SwissSign_Gold_CA_-_G2.pem
Adding debian:SwissSign_Silver_CA_-_G2.pem
Adding debian:T-TeleSec_GlobalRoot_Class_2.pem
Adding debian:T-TeleSec_GlobalRoot_Class_3.pem
Adding debian:TUBITAK_Kamu_SM_SSL_Kok_Sertifikasi_-_Surum_1.pem
Adding debian:TWCA_Global_Root_CA.pem
Adding debian:TWCA_Root_Certification_Authority.pem
Adding debian:TeliaSonera_Root_CA_v1.pem
Adding debian:Telia_Root_CA_v2.pem
Adding debian:TrustAsia_Global_Root_CA_G3.pem
Adding debian:TrustAsia_Global_Root_CA_G4.pem
Adding debian:Trustwave_Global_Certification_Authority.pem
Adding debian:Trustwave_Global_ECC_P256_Certification_Authority.pem
Adding debian:Trustwave_Global_ECC_P384_Certification_Authority.pem
Adding debian:TunTrust_Root_CA.pem
Adding debian:UCA_Extended_Validation_Root.pem
Adding debian:UCA_Global_G2_Root.pem
Adding debian:USERTrust_ECC_Certification_Authority.pem
Adding debian:USERTrust_RSA_Certification_Authority.pem
Adding debian:XRamp_Global_CA_Root.pem
Adding debian:certSIGN_ROOT_CA.pem
Adding debian:certSIGN_Root_CA_G2.pem
Adding debian:e-Szigno_Root_CA_2017.pem
Adding debian:ePKI_Root_Certification_Authority.pem
Adding debian:emSign_ECC_Root_CA_-_C3.pem
Adding debian:emSign_ECC_Root_CA_-_G3.pem
Adding debian:emSign_Root_CA_-_C1.pem
Adding debian:emSign_Root_CA_-_G1.pem
Adding debian:vTrus_ECC_Root_CA.pem
Adding debian:vTrus_Root_CA.pem
done.
Setting up openjdk-21-jre:riscv64 (21.0.8+9~us1-0ubuntu1~24.04.1) ...
Setting up libreoffice-script-provider-bsh (4:24.2.7-0ubuntu0.24.04.4) ...
Setting up libreoffice-script-provider-js (4:24.2.7-0ubuntu0.24.04.4) ...
Setting up libreoffice-sdbc-hsqldb (4:24.2.7-0ubuntu0.24.04.4) ...
Setting up default-jre-headless (2:1.21-75+exp1) ...
Setting up libreoffice-wiki-publisher (4:1.2.0+LibO24.2.7-0ubuntu0.24.04.4) ...
Setting up libreoffice-nlpsolver (4:0.9+LibO24.2.7-0ubuntu0.24.04.4) ...
Setting up default-jre (2:1.21-75+exp1) ...
Scanning processes...
Scanning processor microcode...
Scanning linux images...

Running kernel seems to be up-to-date.

The processor microcode seems to be up-to-date.

No services need to be restarted.

No containers need to be restarted.

No user sessions are running outdated binaries.

No VM guests are running outdated hypervisor (qemu) binaries on this host.
Reading package lists... Done
Building dependency tree... Done
Reading state information... Done
v4l2test is already the newest version (1.1-OK5).
0 upgraded, 0 newly installed, 0 to remove and 110 not upgraded.
Reading package lists... Done
Building dependency tree... Done
Reading state information... Done
Note, selecting 'libopencv-superres406t64' instead of 'libopencv-superres406'
Note, selecting 'libopencv-videostab406t64' instead of 'libopencv-videostab406'
The following additional packages will be installed:
  fonts-mathjax libjs-mathjax libopencv406-jni python3-numpy
Suggested packages:
  fonts-mathjax-extras fonts-stix libjs-mathjax-doc gcc gfortran python3-dev python3-pytest
The following NEW packages will be installed:
  fonts-mathjax libjs-mathjax libopencv-java libopencv-superres406t64 libopencv-videostab406t64 libopencv406-jni opencv-data
  opencv-doc python3-numpy python3-opencv
0 upgraded, 10 newly installed, 0 to remove and 110 not upgraded.
Need to get 183 MB of archives.
After this operation, 451 MB of additional disk space will be used.
Get:1 http://ports.ubuntu.com/ubuntu-ports noble/main riscv64 fonts-mathjax all 2.7.9+dfsg-1 [2208 kB]
Get:2 https://debianrepo-t.starfivetech.com/ubuntu starfive-ubuntu/noble riscv64 libopencv406-jni riscv64 4.6.0+dfsg-13.1ubuntu1 [459 kB]
Get:3 https://debianrepo-t.starfivetech.com/ubuntu starfive-ubuntu/noble riscv64 libopencv-java riscv64 4.6.0+dfsg-13.1ubuntu1 [1008 kB]
Get:4 http://ports.ubuntu.com/ubuntu-ports noble/main riscv64 libjs-mathjax all 2.7.9+dfsg-1 [5665 kB]
Get:5 http://ports.ubuntu.com/ubuntu-ports noble/main riscv64 python3-numpy riscv64 1:1.26.4+ds-6ubuntu1 [3669 kB]
Get:6 https://debianrepo-t.starfivetech.com/ubuntu starfive-ubuntu/noble riscv64 libopencv-superres406t64 riscv64 4.6.0+dfsg-13.1ubuntu1 [51.7 kB]
Get:7 https://debianrepo-t.starfivetech.com/ubuntu starfive-ubuntu/noble riscv64 libopencv-videostab406t64 riscv64 4.6.0+dfsg-13.1ubuntu1 [86.1 kB]
Get:8 https://debianrepo-t.starfivetech.com/ubuntu starfive-ubuntu/noble riscv64 opencv-data all 4.6.0+dfsg-13.1ubuntu1 [72.2 MB]
Get:9 https://debianrepo-t.starfivetech.com/ubuntu starfive-ubuntu/noble riscv64 opencv-doc all 4.6.0+dfsg-13.1ubuntu1 [96.2 MB]
Get:10 https://debianrepo-t.starfivetech.com/ubuntu starfive-ubuntu/noble riscv64 python3-opencv riscv64 4.6.0+dfsg-13.1ubuntu1 [1738 kB]
Fetched 183 MB in 2min 52s (1063 kB/s)
Selecting previously unselected package fonts-mathjax.
(Reading database ... 129529 files and directories currently installed.)
Preparing to unpack .../0-fonts-mathjax_2.7.9+dfsg-1_all.deb ...
Unpacking fonts-mathjax (2.7.9+dfsg-1) ...
Selecting previously unselected package libopencv406-jni.
Preparing to unpack .../1-libopencv406-jni_4.6.0+dfsg-13.1ubuntu1_riscv64.deb ...
Unpacking libopencv406-jni (4.6.0+dfsg-13.1ubuntu1) ...
Selecting previously unselected package libopencv-java.
Preparing to unpack .../2-libopencv-java_4.6.0+dfsg-13.1ubuntu1_riscv64.deb ...
Unpacking libopencv-java (4.6.0+dfsg-13.1ubuntu1) ...
Selecting previously unselected package libopencv-superres406t64:riscv64.
Preparing to unpack .../3-libopencv-superres406t64_4.6.0+dfsg-13.1ubuntu1_riscv64.deb ...
Unpacking libopencv-superres406t64:riscv64 (4.6.0+dfsg-13.1ubuntu1) ...
Selecting previously unselected package libopencv-videostab406t64:riscv64.
Preparing to unpack .../4-libopencv-videostab406t64_4.6.0+dfsg-13.1ubuntu1_riscv64.deb ...
Unpacking libopencv-videostab406t64:riscv64 (4.6.0+dfsg-13.1ubuntu1) ...
Selecting previously unselected package opencv-data.
Preparing to unpack .../5-opencv-data_4.6.0+dfsg-13.1ubuntu1_all.deb ...
Unpacking opencv-data (4.6.0+dfsg-13.1ubuntu1) ...
Selecting previously unselected package libjs-mathjax.
Preparing to unpack .../6-libjs-mathjax_2.7.9+dfsg-1_all.deb ...
Unpacking libjs-mathjax (2.7.9+dfsg-1) ...
Selecting previously unselected package opencv-doc.
Preparing to unpack .../7-opencv-doc_4.6.0+dfsg-13.1ubuntu1_all.deb ...
Unpacking opencv-doc (4.6.0+dfsg-13.1ubuntu1) ...
Selecting previously unselected package python3-numpy.
Preparing to unpack .../8-python3-numpy_1%3a1.26.4+ds-6ubuntu1_riscv64.deb ...
Unpacking python3-numpy (1:1.26.4+ds-6ubuntu1) ...
Selecting previously unselected package python3-opencv:riscv64.
Preparing to unpack .../9-python3-opencv_4.6.0+dfsg-13.1ubuntu1_riscv64.deb ...
Unpacking python3-opencv:riscv64 (4.6.0+dfsg-13.1ubuntu1) ...
Setting up fonts-mathjax (2.7.9+dfsg-1) ...
Setting up libjs-mathjax (2.7.9+dfsg-1) ...
Setting up libopencv406-jni (4.6.0+dfsg-13.1ubuntu1) ...
Setting up opencv-doc (4.6.0+dfsg-13.1ubuntu1) ...
Setting up libopencv-superres406t64:riscv64 (4.6.0+dfsg-13.1ubuntu1) ...
Setting up libopencv-videostab406t64:riscv64 (4.6.0+dfsg-13.1ubuntu1) ...
Setting up libopencv-java (4.6.0+dfsg-13.1ubuntu1) ...
Setting up python3-numpy (1:1.26.4+ds-6ubuntu1) ...
Setting up opencv-data (4.6.0+dfsg-13.1ubuntu1) ...
Setting up python3-opencv:riscv64 (4.6.0+dfsg-13.1ubuntu1) ...
Processing triggers for libc-bin (2.39-0ubuntu8.5) ...
Processing triggers for man-db (2.12.0-4build2) ...
Processing triggers for fontconfig (2.15.0-1.1ubuntu2) ...
Scanning processes...
Scanning processor microcode...
Scanning linux images...

Running kernel seems to be up-to-date.

The processor microcode seems to be up-to-date.

No services need to be restarted.

No containers need to be restarted.

No user sessions are running outdated binaries.

No VM guests are running outdated hypervisor (qemu) binaries on this host.
Reading package lists... Done
Building dependency tree... Done
Reading state information... Done
gstreamer1.0-clutter-3.0 is already the newest version (3.0.27-4build2).
gstreamer1.0-clutter-3.0 set to manually installed.
The following additional packages will be installed:
  imagemagick-6-common liba52-0.7.4 libavtp0 libdca0 libdirectfb-1.7-7t64 libfluidsynth3 libgstreamer-plugins-bad1.0-0
  libgupnp-igd-1.6-0 libimath-3-1-29t64 libinstpatch-1.0-2 libjxr-tools libjxr0t64 liblqr-1-0 liblrdf0 libltc11
  libmagickcore-6.q16-7-extra libmagickcore-6.q16-7t64 libmagickwand-6.q16-7t64 libmjpegutils-2.1-0t64 libmodplug1 libmpeg2-4
  libmpeg2encpp-2.1-0t64 libmplex2-2.1-0t64 libneon27t64 libnice10 libopenexr-3-1-30 libopenh264-7 libopenni2-0 libqrencode4
  libsidplay1v5 libsoundtouch1 libspandsp2t64 libsrtp2-1 libvo-aacenc0 libvo-amrwbenc0 libwildmidi2 libzbar0t64 libzxing3
  timgm6mb-soundfont
Suggested packages:
  frei0r-plugins libdirectfb-extra liblrdf0-dev inkscape sidplay-base libwildmidi-config fluid-soundfont-gm
The following NEW packages will be installed:
  gstreamer1.0-plugins-bad gstreamer1.0-plugins-ugly imagemagick-6-common liba52-0.7.4 libavtp0 libdca0 libdirectfb-1.7-7t64
  libfluidsynth3 libgstreamer-plugins-bad1.0-0 libgupnp-igd-1.6-0 libimath-3-1-29t64 libinstpatch-1.0-2 libjxr-tools libjxr0t64
  liblqr-1-0 liblrdf0 libltc11 libmagickcore-6.q16-7-extra libmagickcore-6.q16-7t64 libmagickwand-6.q16-7t64
  libmjpegutils-2.1-0t64 libmodplug1 libmpeg2-4 libmpeg2encpp-2.1-0t64 libmplex2-2.1-0t64 libneon27t64 libnice10
  libopenexr-3-1-30 libopenh264-7 libopenni2-0 libqrencode4 libsidplay1v5 libsoundtouch1 libspandsp2t64 libsrtp2-1 libvo-aacenc0
  libvo-amrwbenc0 libwildmidi2 libzbar0t64 libzxing3 timgm6mb-soundfont
0 upgraded, 41 newly installed, 0 to remove and 110 not upgraded.
Need to get 18.0 MB of archives.
After this operation, 43.9 MB of additional disk space will be used.
Get:1 http://ports.ubuntu.com/ubuntu-ports noble/universe riscv64 liblqr-1-0 riscv64 0.4.2-2.1build2 [31.9 kB]
Get:2 http://ports.ubuntu.com/ubuntu-ports noble/universe riscv64 imagemagick-6-common all 8:6.9.12.98+dfsg1-5.2build2 [69.5 kB]
Get:3 http://ports.ubuntu.com/ubuntu-ports noble/universe riscv64 libmagickcore-6.q16-7t64 riscv64 8:6.9.12.98+dfsg1-5.2build2 [1877 kB]
Get:4 http://ports.ubuntu.com/ubuntu-ports noble/universe riscv64 libmagickwand-6.q16-7t64 riscv64 8:6.9.12.98+dfsg1-5.2build2 [345 kB]
Get:5 http://ports.ubuntu.com/ubuntu-ports noble/universe riscv64 liba52-0.7.4 riscv64 0.7.4-20build1 [30.7 kB]
Get:6 http://ports.ubuntu.com/ubuntu-ports noble/universe riscv64 libmpeg2-4 riscv64 0.5.1-9build1 [54.7 kB]
Get:7 http://ports.ubuntu.com/ubuntu-ports noble/universe riscv64 libsidplay1v5 riscv64 1.36.60-1build1 [68.7 kB]
Get:8 http://ports.ubuntu.com/ubuntu-ports noble/universe riscv64 gstreamer1.0-plugins-ugly riscv64 1.24.1-1build1 [191 kB]
Get:9 http://ports.ubuntu.com/ubuntu-ports noble/universe riscv64 libavtp0 riscv64 0.2.0-1build1 [8404 B]
Get:10 http://ports.ubuntu.com/ubuntu-ports noble/universe riscv64 libdirectfb-1.7-7t64 riscv64 1.7.7-11.1ubuntu2 [1081 kB]
Get:11 http://ports.ubuntu.com/ubuntu-ports noble/universe riscv64 libinstpatch-1.0-2 riscv64 1.1.6-1build2 [267 kB]
Get:12 http://ports.ubuntu.com/ubuntu-ports noble/universe riscv64 timgm6mb-soundfont all 1.3-5 [5427 kB]
Get:13 http://ports.ubuntu.com/ubuntu-ports noble/universe riscv64 libfluidsynth3 riscv64 2.3.4-1build3 [248 kB]
Get:14 http://ports.ubuntu.com/ubuntu-ports noble/universe riscv64 libgupnp-igd-1.6-0 riscv64 1.6.0-3build3 [16.7 kB]
Get:15 http://ports.ubuntu.com/ubuntu-ports noble/universe riscv64 libimath-3-1-29t64 riscv64 3.1.9-3.1ubuntu2 [69.2 kB]
Get:16 http://ports.ubuntu.com/ubuntu-ports noble/universe riscv64 libjxr0t64 riscv64 1.2~git20170615.f752187-5.1ubuntu2 [192 kB]
Get:17 http://ports.ubuntu.com/ubuntu-ports noble/universe riscv64 libjxr-tools riscv64 1.2~git20170615.f752187-5.1ubuntu2 [17.2 kB]
Get:18 http://ports.ubuntu.com/ubuntu-ports noble/universe riscv64 liblrdf0 riscv64 0.6.1-4build1 [20.3 kB]
Get:19 http://ports.ubuntu.com/ubuntu-ports noble/universe riscv64 libltc11 riscv64 1.3.2-1build1 [13.9 kB]
Get:20 http://ports.ubuntu.com/ubuntu-ports noble/universe riscv64 libopenexr-3-1-30 riscv64 3.1.5-5.1build3 [994 kB]
Get:21 http://ports.ubuntu.com/ubuntu-ports noble/universe riscv64 libmagickcore-6.q16-7-extra riscv64 8:6.9.12.98+dfsg1-5.2build2 [71.9 kB]
Get:22 http://ports.ubuntu.com/ubuntu-ports noble/universe riscv64 libmjpegutils-2.1-0t64 riscv64 1:2.1.0+debian-8.1build1 [26.9 kB]
Get:23 http://ports.ubuntu.com/ubuntu-ports noble/universe riscv64 libmodplug1 riscv64 1:0.8.9.0-3build1 [201 kB]
Get:24 http://ports.ubuntu.com/ubuntu-ports noble/universe riscv64 libmpeg2encpp-2.1-0t64 riscv64 1:2.1.0+debian-8.1build1 [78.1 kB]
Get:25 http://ports.ubuntu.com/ubuntu-ports noble/universe riscv64 libmplex2-2.1-0t64 riscv64 1:2.1.0+debian-8.1build1 [49.7 kB]
Get:26 http://ports.ubuntu.com/ubuntu-ports noble/universe riscv64 libneon27t64 riscv64 0.33.0-1.1build3 [105 kB]
Get:27 http://ports.ubuntu.com/ubuntu-ports noble/universe riscv64 libnice10 riscv64 0.1.21-2build3 [163 kB]
Get:28 http://ports.ubuntu.com/ubuntu-ports noble/universe riscv64 libopenh264-7 riscv64 2.4.1+dfsg-1 [401 kB]
Get:29 http://ports.ubuntu.com/ubuntu-ports noble/universe riscv64 libopenni2-0 riscv64 2.2.0.33+dfsg-18 [463 kB]
Get:30 http://ports.ubuntu.com/ubuntu-ports noble/universe riscv64 libqrencode4 riscv64 4.1.1-1build2 [26.8 kB]
Get:31 http://ports.ubuntu.com/ubuntu-ports noble/universe riscv64 libsoundtouch1 riscv64 2.3.2+ds1-1build1 [43.1 kB]
Get:32 http://ports.ubuntu.com/ubuntu-ports noble/universe riscv64 libspandsp2t64 riscv64 0.0.6+dfsg-2.1build1 [330 kB]
Get:33 http://ports.ubuntu.com/ubuntu-ports noble/universe riscv64 libsrtp2-1 riscv64 2.5.0-3build1 [44.6 kB]
Get:34 http://ports.ubuntu.com/ubuntu-ports noble/universe riscv64 libwildmidi2 riscv64 0.4.3-1build3 [65.7 kB]
Get:35 http://ports.ubuntu.com/ubuntu-ports noble/universe riscv64 libzbar0t64 riscv64 0.23.93-4build3 [131 kB]
Get:36 http://ports.ubuntu.com/ubuntu-ports noble/universe riscv64 libzxing3 riscv64 2.2.1-3 [635 kB]
Get:37 http://ports.ubuntu.com/ubuntu-ports noble/universe riscv64 libgstreamer-plugins-bad1.0-0 riscv64 1.24.2-1ubuntu4 [826 kB]
Get:38 http://ports.ubuntu.com/ubuntu-ports noble/universe riscv64 libdca0 riscv64 0.0.7-2build1 [92.2 kB]
Get:39 http://ports.ubuntu.com/ubuntu-ports noble/universe riscv64 libvo-aacenc0 riscv64 0.1.3-2build1 [75.1 kB]
Get:40 http://ports.ubuntu.com/ubuntu-ports noble/universe riscv64 libvo-amrwbenc0 riscv64 0.1.3-2build1 [82.7 kB]
Get:41 http://ports.ubuntu.com/ubuntu-ports noble/universe riscv64 gstreamer1.0-plugins-bad riscv64 1.24.2-1ubuntu4 [3077 kB]
Fetched 18.0 MB in 14s (1288 kB/s)
Extracting templates from packages: 100%
Selecting previously unselected package liblqr-1-0:riscv64.
(Reading database ... 148489 files and directories currently installed.)
Preparing to unpack .../00-liblqr-1-0_0.4.2-2.1build2_riscv64.deb ...
Unpacking liblqr-1-0:riscv64 (0.4.2-2.1build2) ...
Selecting previously unselected package imagemagick-6-common.
Preparing to unpack .../01-imagemagick-6-common_8%3a6.9.12.98+dfsg1-5.2build2_all.deb ...
Unpacking imagemagick-6-common (8:6.9.12.98+dfsg1-5.2build2) ...
Selecting previously unselected package libmagickcore-6.q16-7t64:riscv64.
Preparing to unpack .../02-libmagickcore-6.q16-7t64_8%3a6.9.12.98+dfsg1-5.2build2_riscv64.deb ...
Unpacking libmagickcore-6.q16-7t64:riscv64 (8:6.9.12.98+dfsg1-5.2build2) ...
Selecting previously unselected package libmagickwand-6.q16-7t64:riscv64.
Preparing to unpack .../03-libmagickwand-6.q16-7t64_8%3a6.9.12.98+dfsg1-5.2build2_riscv64.deb ...
Unpacking libmagickwand-6.q16-7t64:riscv64 (8:6.9.12.98+dfsg1-5.2build2) ...
Selecting previously unselected package liba52-0.7.4:riscv64.
Preparing to unpack .../04-liba52-0.7.4_0.7.4-20build1_riscv64.deb ...
Unpacking liba52-0.7.4:riscv64 (0.7.4-20build1) ...
Selecting previously unselected package libmpeg2-4:riscv64.
Preparing to unpack .../05-libmpeg2-4_0.5.1-9build1_riscv64.deb ...
Unpacking libmpeg2-4:riscv64 (0.5.1-9build1) ...
Selecting previously unselected package libsidplay1v5:riscv64.
Preparing to unpack .../06-libsidplay1v5_1.36.60-1build1_riscv64.deb ...
Unpacking libsidplay1v5:riscv64 (1.36.60-1build1) ...
Selecting previously unselected package gstreamer1.0-plugins-ugly:riscv64.
Preparing to unpack .../07-gstreamer1.0-plugins-ugly_1.24.1-1build1_riscv64.deb ...
Unpacking gstreamer1.0-plugins-ugly:riscv64 (1.24.1-1build1) ...
Selecting previously unselected package libavtp0:riscv64.
Preparing to unpack .../08-libavtp0_0.2.0-1build1_riscv64.deb ...
Unpacking libavtp0:riscv64 (0.2.0-1build1) ...
Selecting previously unselected package libdirectfb-1.7-7t64:riscv64.
Preparing to unpack .../09-libdirectfb-1.7-7t64_1.7.7-11.1ubuntu2_riscv64.deb ...
Unpacking libdirectfb-1.7-7t64:riscv64 (1.7.7-11.1ubuntu2) ...
Selecting previously unselected package libinstpatch-1.0-2:riscv64.
Preparing to unpack .../10-libinstpatch-1.0-2_1.1.6-1build2_riscv64.deb ...
Unpacking libinstpatch-1.0-2:riscv64 (1.1.6-1build2) ...
Selecting previously unselected package timgm6mb-soundfont.
Preparing to unpack .../11-timgm6mb-soundfont_1.3-5_all.deb ...
Unpacking timgm6mb-soundfont (1.3-5) ...
Selecting previously unselected package libfluidsynth3:riscv64.
Preparing to unpack .../12-libfluidsynth3_2.3.4-1build3_riscv64.deb ...
Unpacking libfluidsynth3:riscv64 (2.3.4-1build3) ...
Selecting previously unselected package libgupnp-igd-1.6-0:riscv64.
Preparing to unpack .../13-libgupnp-igd-1.6-0_1.6.0-3build3_riscv64.deb ...
Unpacking libgupnp-igd-1.6-0:riscv64 (1.6.0-3build3) ...
Selecting previously unselected package libimath-3-1-29t64:riscv64.
Preparing to unpack .../14-libimath-3-1-29t64_3.1.9-3.1ubuntu2_riscv64.deb ...
Unpacking libimath-3-1-29t64:riscv64 (3.1.9-3.1ubuntu2) ...
Selecting previously unselected package libjxr0t64:riscv64.
Preparing to unpack .../15-libjxr0t64_1.2~git20170615.f752187-5.1ubuntu2_riscv64.deb ...
Unpacking libjxr0t64:riscv64 (1.2~git20170615.f752187-5.1ubuntu2) ...
Selecting previously unselected package libjxr-tools.
Preparing to unpack .../16-libjxr-tools_1.2~git20170615.f752187-5.1ubuntu2_riscv64.deb ...
Unpacking libjxr-tools (1.2~git20170615.f752187-5.1ubuntu2) ...
Selecting previously unselected package liblrdf0:riscv64.
Preparing to unpack .../17-liblrdf0_0.6.1-4build1_riscv64.deb ...
Unpacking liblrdf0:riscv64 (0.6.1-4build1) ...
Selecting previously unselected package libltc11:riscv64.
Preparing to unpack .../18-libltc11_1.3.2-1build1_riscv64.deb ...
Unpacking libltc11:riscv64 (1.3.2-1build1) ...
Selecting previously unselected package libopenexr-3-1-30:riscv64.
Preparing to unpack .../19-libopenexr-3-1-30_3.1.5-5.1build3_riscv64.deb ...
Unpacking libopenexr-3-1-30:riscv64 (3.1.5-5.1build3) ...
Selecting previously unselected package libmagickcore-6.q16-7-extra:riscv64.
Preparing to unpack .../20-libmagickcore-6.q16-7-extra_8%3a6.9.12.98+dfsg1-5.2build2_riscv64.deb ...
Unpacking libmagickcore-6.q16-7-extra:riscv64 (8:6.9.12.98+dfsg1-5.2build2) ...
Selecting previously unselected package libmjpegutils-2.1-0t64:riscv64.
Preparing to unpack .../21-libmjpegutils-2.1-0t64_1%3a2.1.0+debian-8.1build1_riscv64.deb ...
Unpacking libmjpegutils-2.1-0t64:riscv64 (1:2.1.0+debian-8.1build1) ...
Selecting previously unselected package libmodplug1:riscv64.
Preparing to unpack .../22-libmodplug1_1%3a0.8.9.0-3build1_riscv64.deb ...
Unpacking libmodplug1:riscv64 (1:0.8.9.0-3build1) ...
Selecting previously unselected package libmpeg2encpp-2.1-0t64:riscv64.
Preparing to unpack .../23-libmpeg2encpp-2.1-0t64_1%3a2.1.0+debian-8.1build1_riscv64.deb ...
Unpacking libmpeg2encpp-2.1-0t64:riscv64 (1:2.1.0+debian-8.1build1) ...
Selecting previously unselected package libmplex2-2.1-0t64:riscv64.
Preparing to unpack .../24-libmplex2-2.1-0t64_1%3a2.1.0+debian-8.1build1_riscv64.deb ...
Unpacking libmplex2-2.1-0t64:riscv64 (1:2.1.0+debian-8.1build1) ...
Selecting previously unselected package libneon27t64:riscv64.
Preparing to unpack .../25-libneon27t64_0.33.0-1.1build3_riscv64.deb ...
Unpacking libneon27t64:riscv64 (0.33.0-1.1build3) ...
Selecting previously unselected package libnice10:riscv64.
Preparing to unpack .../26-libnice10_0.1.21-2build3_riscv64.deb ...
Unpacking libnice10:riscv64 (0.1.21-2build3) ...
Selecting previously unselected package libopenh264-7:riscv64.
Preparing to unpack .../27-libopenh264-7_2.4.1+dfsg-1_riscv64.deb ...
Unpacking libopenh264-7:riscv64 (2.4.1+dfsg-1) ...
Selecting previously unselected package libopenni2-0:riscv64.
Preparing to unpack .../28-libopenni2-0_2.2.0.33+dfsg-18_riscv64.deb ...
Unpacking libopenni2-0:riscv64 (2.2.0.33+dfsg-18) ...
Selecting previously unselected package libqrencode4:riscv64.
Preparing to unpack .../29-libqrencode4_4.1.1-1build2_riscv64.deb ...
Unpacking libqrencode4:riscv64 (4.1.1-1build2) ...
Selecting previously unselected package libsoundtouch1:riscv64.
Preparing to unpack .../30-libsoundtouch1_2.3.2+ds1-1build1_riscv64.deb ...
Unpacking libsoundtouch1:riscv64 (2.3.2+ds1-1build1) ...
Selecting previously unselected package libspandsp2t64:riscv64.
Preparing to unpack .../31-libspandsp2t64_0.0.6+dfsg-2.1build1_riscv64.deb ...
Unpacking libspandsp2t64:riscv64 (0.0.6+dfsg-2.1build1) ...
Selecting previously unselected package libsrtp2-1:riscv64.
Preparing to unpack .../32-libsrtp2-1_2.5.0-3build1_riscv64.deb ...
Unpacking libsrtp2-1:riscv64 (2.5.0-3build1) ...
Selecting previously unselected package libwildmidi2:riscv64.
Preparing to unpack .../33-libwildmidi2_0.4.3-1build3_riscv64.deb ...
Unpacking libwildmidi2:riscv64 (0.4.3-1build3) ...
Selecting previously unselected package libzbar0t64:riscv64.
Preparing to unpack .../34-libzbar0t64_0.23.93-4build3_riscv64.deb ...
Unpacking libzbar0t64:riscv64 (0.23.93-4build3) ...
Selecting previously unselected package libzxing3:riscv64.
Preparing to unpack .../35-libzxing3_2.2.1-3_riscv64.deb ...
Unpacking libzxing3:riscv64 (2.2.1-3) ...
Selecting previously unselected package libgstreamer-plugins-bad1.0-0:riscv64.
Preparing to unpack .../36-libgstreamer-plugins-bad1.0-0_1.24.2-1ubuntu4_riscv64.deb ...
Unpacking libgstreamer-plugins-bad1.0-0:riscv64 (1.24.2-1ubuntu4) ...
Selecting previously unselected package libdca0:riscv64.
Preparing to unpack .../37-libdca0_0.0.7-2build1_riscv64.deb ...
Unpacking libdca0:riscv64 (0.0.7-2build1) ...
Selecting previously unselected package libvo-aacenc0:riscv64.
Preparing to unpack .../38-libvo-aacenc0_0.1.3-2build1_riscv64.deb ...
Unpacking libvo-aacenc0:riscv64 (0.1.3-2build1) ...
Selecting previously unselected package libvo-amrwbenc0:riscv64.
Preparing to unpack .../39-libvo-amrwbenc0_0.1.3-2build1_riscv64.deb ...
Unpacking libvo-amrwbenc0:riscv64 (0.1.3-2build1) ...
Selecting previously unselected package gstreamer1.0-plugins-bad:riscv64.
Preparing to unpack .../40-gstreamer1.0-plugins-bad_1.24.2-1ubuntu4_riscv64.deb ...
Unpacking gstreamer1.0-plugins-bad:riscv64 (1.24.2-1ubuntu4) ...
Setting up libmodplug1:riscv64 (1:0.8.9.0-3build1) ...
Setting up libvo-amrwbenc0:riscv64 (0.1.3-2build1) ...
Setting up imagemagick-6-common (8:6.9.12.98+dfsg1-5.2build2) ...
Setting up libneon27t64:riscv64 (0.33.0-1.1build3) ...
Setting up libopenni2-0:riscv64 (2.2.0.33+dfsg-18) ...
Setting up libqrencode4:riscv64 (4.1.1-1build2) ...
Setting up liblrdf0:riscv64 (0.6.1-4build1) ...
Setting up libsidplay1v5:riscv64 (1.36.60-1build1) ...
Setting up libsrtp2-1:riscv64 (2.5.0-3build1) ...
Setting up libzbar0t64:riscv64 (0.23.93-4build3) ...
Setting up libmpeg2-4:riscv64 (0.5.1-9build1) ...
Setting up libmjpegutils-2.1-0t64:riscv64 (1:2.1.0+debian-8.1build1) ...
Setting up libvo-aacenc0:riscv64 (0.1.3-2build1) ...
Setting up liba52-0.7.4:riscv64 (0.7.4-20build1) ...
Setting up libsoundtouch1:riscv64 (2.3.2+ds1-1build1) ...
Setting up libjxr0t64:riscv64 (1.2~git20170615.f752187-5.1ubuntu2) ...
Setting up libzxing3:riscv64 (2.2.1-3) ...
Setting up libimath-3-1-29t64:riscv64 (3.1.9-3.1ubuntu2) ...
Setting up libgupnp-igd-1.6-0:riscv64 (1.6.0-3build3) ...
Setting up libopenh264-7:riscv64 (2.4.1+dfsg-1) ...
Setting up libltc11:riscv64 (1.3.2-1build1) ...
Setting up libavtp0:riscv64 (0.2.0-1build1) ...
Setting up libdirectfb-1.7-7t64:riscv64 (1.7.7-11.1ubuntu2) ...
Setting up libspandsp2t64:riscv64 (0.0.6+dfsg-2.1build1) ...
Setting up liblqr-1-0:riscv64 (0.4.2-2.1build2) ...
Setting up libwildmidi2:riscv64 (0.4.3-1build3) ...
Setting up libdca0:riscv64 (0.0.7-2build1) ...
Setting up gstreamer1.0-plugins-ugly:riscv64 (1.24.1-1build1) ...
Setting up libmpeg2encpp-2.1-0t64:riscv64 (1:2.1.0+debian-8.1build1) ...
Setting up timgm6mb-soundfont (1.3-5) ...
update-alternatives: using /usr/share/sounds/sf2/TimGM6mb.sf2 to provide /usr/share/sounds/sf2/default-GM.sf2 (default-GM.sf2) in auto mode
update-alternatives: using /usr/share/sounds/sf2/TimGM6mb.sf2 to provide /usr/share/sounds/sf3/default-GM.sf3 (default-GM.sf3) in auto mode
Setting up libmplex2-2.1-0t64:riscv64 (1:2.1.0+debian-8.1build1) ...
Setting up libinstpatch-1.0-2:riscv64 (1.1.6-1build2) ...
Setting up libfluidsynth3:riscv64 (2.3.4-1build3) ...
Setting up libjxr-tools (1.2~git20170615.f752187-5.1ubuntu2) ...
Setting up libmagickcore-6.q16-7t64:riscv64 (8:6.9.12.98+dfsg1-5.2build2) ...
Setting up libmagickwand-6.q16-7t64:riscv64 (8:6.9.12.98+dfsg1-5.2build2) ...
Setting up libnice10:riscv64 (0.1.21-2build3) ...
Setting up libopenexr-3-1-30:riscv64 (3.1.5-5.1build3) ...
Setting up libmagickcore-6.q16-7-extra:riscv64 (8:6.9.12.98+dfsg1-5.2build2) ...
Setting up libgstreamer-plugins-bad1.0-0:riscv64 (1.24.2-1ubuntu4) ...
Setting up gstreamer1.0-plugins-bad:riscv64 (1.24.2-1ubuntu4) ...
Processing triggers for man-db (2.12.0-4build2) ...
Processing triggers for libc-bin (2.39-0ubuntu8.5) ...
Scanning processes...
Scanning processor microcode...
Scanning linux images...

Running kernel seems to be up-to-date.

The processor microcode seems to be up-to-date.

No services need to be restarted.

No containers need to be restarted.

No user sessions are running outdated binaries.

No VM guests are running outdated hypervisor (qemu) binaries on this host.
Reading package lists... Done
Building dependency tree... Done
Reading state information... Done
The following additional packages will be installed:
  libnode109 node-acorn node-busboy node-cjs-module-lexer node-undici node-xtend nodejs-doc
Suggested packages:
  npm
The following NEW packages will be installed:
  libnode109 node-acorn node-busboy node-cjs-module-lexer node-undici node-xtend nodejs nodejs-doc nwjs
0 upgraded, 9 newly installed, 0 to remove and 110 not upgraded.
Need to get 287 MB of archives.
After this operation, 67.6 MB of additional disk space will be used.
Get:1 http://ports.ubuntu.com/ubuntu-ports noble/universe riscv64 node-xtend all 4.0.2-3 [3902 B]
Get:2 http://ports.ubuntu.com/ubuntu-ports noble/universe riscv64 nodejs riscv64 18.19.1+dfsg-6ubuntu5 [306 kB]
Get:3 https://debianrepo-t.starfivetech.com/ubuntu starfive-ubuntu/noble riscv64 nwjs riscv64 0.65.1 [271 MB]
Get:4 http://ports.ubuntu.com/ubuntu-ports noble/universe riscv64 node-acorn all 8.8.1+ds+~cs25.17.7-2 [115 kB]
Get:5 http://ports.ubuntu.com/ubuntu-ports noble/universe riscv64 node-cjs-module-lexer all 1.2.3+dfsg-1 [32.1 kB]
Get:6 http://ports.ubuntu.com/ubuntu-ports noble/universe riscv64 node-busboy all 1.6.0+~cs2.6.0-2 [17.3 kB]
Get:7 http://ports.ubuntu.com/ubuntu-ports noble/universe riscv64 node-undici all 5.26.3+dfsg1+~cs23.10.12-2 [325 kB]
Get:8 http://ports.ubuntu.com/ubuntu-ports noble/universe riscv64 libnode109 riscv64 18.19.1+dfsg-6ubuntu5 [12.5 MB]
Get:9 http://ports.ubuntu.com/ubuntu-ports noble/universe riscv64 nodejs-doc all 18.19.1+dfsg-6ubuntu5 [3552 kB]
Fetched 287 MB in 3min 0s (1596 kB/s)
Selecting previously unselected package node-xtend.
(Reading database ... 149399 files and directories currently installed.)
Preparing to unpack .../0-node-xtend_4.0.2-3_all.deb ...
Unpacking node-xtend (4.0.2-3) ...
Selecting previously unselected package nodejs.
Preparing to unpack .../1-nodejs_18.19.1+dfsg-6ubuntu5_riscv64.deb ...
Unpacking nodejs (18.19.1+dfsg-6ubuntu5) ...
Selecting previously unselected package node-acorn.
Preparing to unpack .../2-node-acorn_8.8.1+ds+~cs25.17.7-2_all.deb ...
Unpacking node-acorn (8.8.1+ds+~cs25.17.7-2) ...
Selecting previously unselected package node-cjs-module-lexer.
Preparing to unpack .../3-node-cjs-module-lexer_1.2.3+dfsg-1_all.deb ...
Unpacking node-cjs-module-lexer (1.2.3+dfsg-1) ...
Selecting previously unselected package node-busboy.
Preparing to unpack .../4-node-busboy_1.6.0+~cs2.6.0-2_all.deb ...
Unpacking node-busboy (1.6.0+~cs2.6.0-2) ...
Selecting previously unselected package node-undici.
Preparing to unpack .../5-node-undici_5.26.3+dfsg1+~cs23.10.12-2_all.deb ...
Unpacking node-undici (5.26.3+dfsg1+~cs23.10.12-2) ...
Selecting previously unselected package libnode109:riscv64.
Preparing to unpack .../6-libnode109_18.19.1+dfsg-6ubuntu5_riscv64.deb ...
Unpacking libnode109:riscv64 (18.19.1+dfsg-6ubuntu5) ...
Selecting previously unselected package nodejs-doc.
Preparing to unpack .../7-nodejs-doc_18.19.1+dfsg-6ubuntu5_all.deb ...
Unpacking nodejs-doc (18.19.1+dfsg-6ubuntu5) ...
Selecting previously unselected package nwjs.
Preparing to unpack .../8-nwjs_0.65.1_riscv64.deb ...
Unpacking nwjs (0.65.1) ...
Setting up nwjs (0.65.1) ...
Setting up node-cjs-module-lexer (1.2.3+dfsg-1) ...
Setting up nodejs-doc (18.19.1+dfsg-6ubuntu5) ...
Setting up node-xtend (4.0.2-3) ...
Setting up node-busboy (1.6.0+~cs2.6.0-2) ...
Setting up node-undici (5.26.3+dfsg1+~cs23.10.12-2) ...
Setting up node-acorn (8.8.1+ds+~cs25.17.7-2) ...
Setting up libnode109:riscv64 (18.19.1+dfsg-6ubuntu5) ...
Setting up nodejs (18.19.1+dfsg-6ubuntu5) ...
update-alternatives: using /usr/bin/nodejs to provide /usr/bin/js (js) in auto mode
Processing triggers for man-db (2.12.0-4build2) ...
Processing triggers for libc-bin (2.39-0ubuntu8.5) ...
Scanning processes...
Scanning processor microcode...
Scanning linux images...

Running kernel seems to be up-to-date.

The processor microcode seems to be up-to-date.

No services need to be restarted.

No containers need to be restarted.

No user sessions are running outdated binaries.

No VM guests are running outdated hypervisor (qemu) binaries on this host.
Reading package lists... Done
Building dependency tree... Done
Reading state information... Done
libjpeg62-turbo is already the newest version (1:2.1.5-3).
libjpeg62-turbo set to manually installed.
The following NEW packages will be installed:
  chromium libicu72 libminizip-dev libminizip1t64 libre2-9 v8
0 upgraded, 6 newly installed, 0 to remove and 110 not upgraded.
Need to get 143 MB of archives.
After this operation, 37.8 MB of additional disk space will be used.
Get:1 http://ports.ubuntu.com/ubuntu-ports noble-updates/universe riscv64 libminizip1t64 riscv64 1:1.3.dfsg-3.1ubuntu2.1 [25.3 kB]
Get:2 https://debianrepo-t.starfivetech.com/ubuntu starfive-ubuntu/noble riscv64 chromium riscv64 103.0.5060.114 [121 MB]
Get:3 http://ports.ubuntu.com/ubuntu-ports noble-updates/universe riscv64 libminizip-dev riscv64 1:1.3.dfsg-3.1ubuntu2.1 [71.3 kB]
Get:4 https://debianrepo-t.starfivetech.com/ubuntu starfive-ubuntu/noble riscv64 libicu72 riscv64 72.1-3ubuntu2 [10.8 MB]
Get:5 https://debianrepo-t.starfivetech.com/ubuntu starfive-ubuntu/noble riscv64 libre2-9 riscv64 20220601+dfsg-1 [201 kB]
Get:6 https://debianrepo-t.starfivetech.com/ubuntu starfive-ubuntu/noble riscv64 v8 riscv64 10.2.154.13 [9997 kB]
Fetched 143 MB in 1min 46s (1348 kB/s)
Selecting previously unselected package chromium.
(Reading database ... 150302 files and directories currently installed.)
Preparing to unpack .../0-chromium_103.0.5060.114_riscv64.deb ...
Unpacking chromium (103.0.5060.114) ...
Selecting previously unselected package libicu72:riscv64.
Preparing to unpack .../1-libicu72_72.1-3ubuntu2_riscv64.deb ...
Unpacking libicu72:riscv64 (72.1-3ubuntu2) ...
Selecting previously unselected package libminizip1t64:riscv64.
Preparing to unpack .../2-libminizip1t64_1%3a1.3.dfsg-3.1ubuntu2.1_riscv64.deb ...
Unpacking libminizip1t64:riscv64 (1:1.3.dfsg-3.1ubuntu2.1) ...
Selecting previously unselected package libminizip-dev:riscv64.
Preparing to unpack .../3-libminizip-dev_1%3a1.3.dfsg-3.1ubuntu2.1_riscv64.deb ...
Unpacking libminizip-dev:riscv64 (1:1.3.dfsg-3.1ubuntu2.1) ...
Selecting previously unselected package libre2-9:riscv64.
Preparing to unpack .../4-libre2-9_20220601+dfsg-1_riscv64.deb ...
Unpacking libre2-9:riscv64 (20220601+dfsg-1) ...
Selecting previously unselected package v8.
Preparing to unpack .../5-v8_10.2.154.13_riscv64.deb ...
Unpacking v8 (10.2.154.13) ...
Setting up libre2-9:riscv64 (20220601+dfsg-1) ...
Setting up libicu72:riscv64 (72.1-3ubuntu2) ...
Setting up v8 (10.2.154.13) ...
Setting up libminizip1t64:riscv64 (1:1.3.dfsg-3.1ubuntu2.1) ...
Setting up chromium (103.0.5060.114) ...
Setting up libminizip-dev:riscv64 (1:1.3.dfsg-3.1ubuntu2.1) ...
Processing triggers for libc-bin (2.39-0ubuntu8.5) ...
Scanning processes...
Scanning processor microcode...
Scanning linux images...

Running kernel seems to be up-to-date.

The processor microcode seems to be up-to-date.

No services need to be restarted.

No containers need to be restarted.

No user sessions are running outdated binaries.

No VM guests are running outdated hypervisor (qemu) binaries on this host.
Install Success
user@starfive:/opt$