設定検証が落ち着いたら最終結果のみの記事を別に作成する予定です
Windows Server 2025のActice Directoryサーバと連携したメールサーバを作って、dovecotでimap/pop3、postfixでsmtpを提供する、という設定を行うこととした。
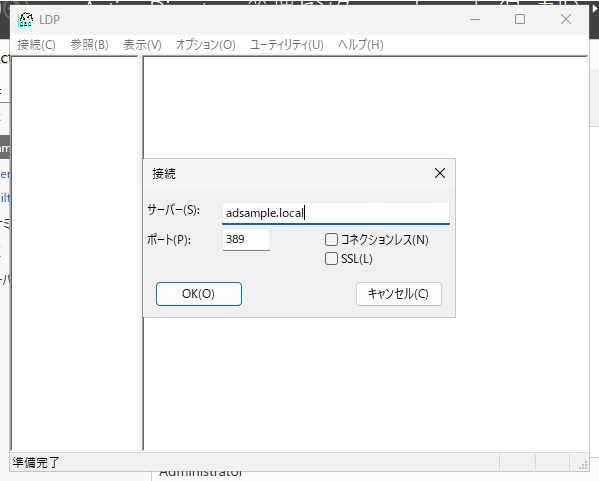
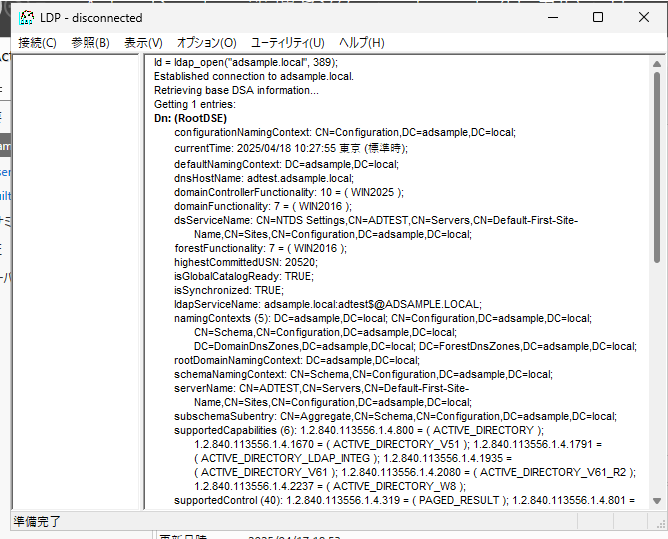
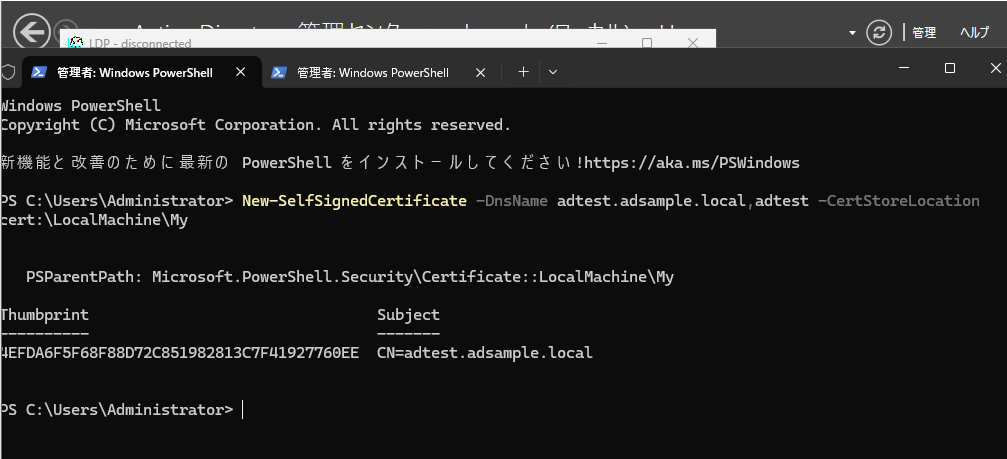
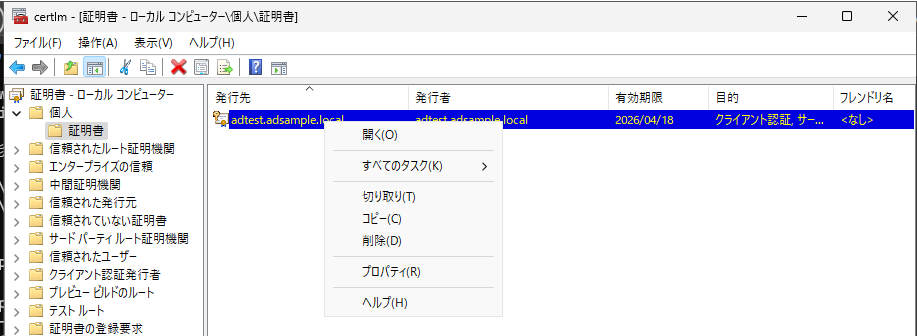
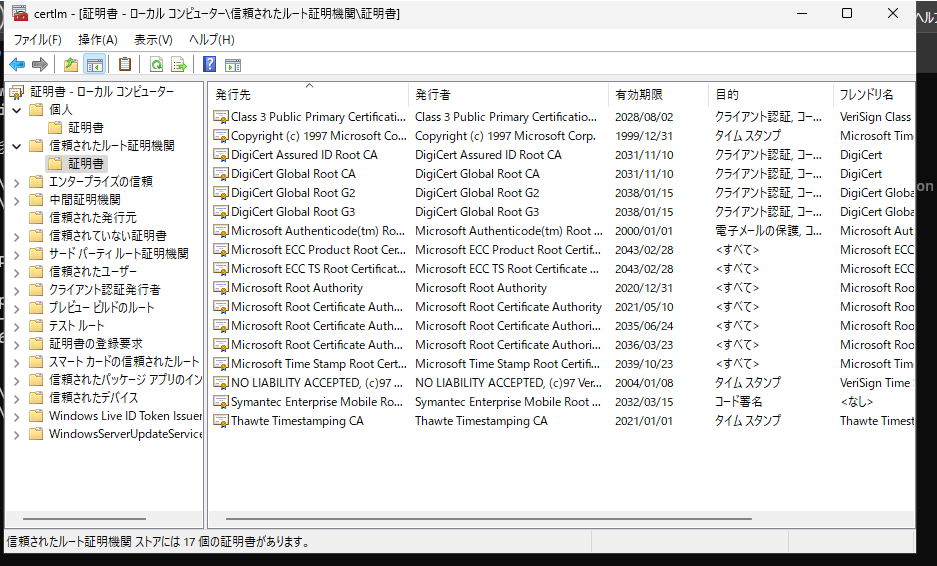
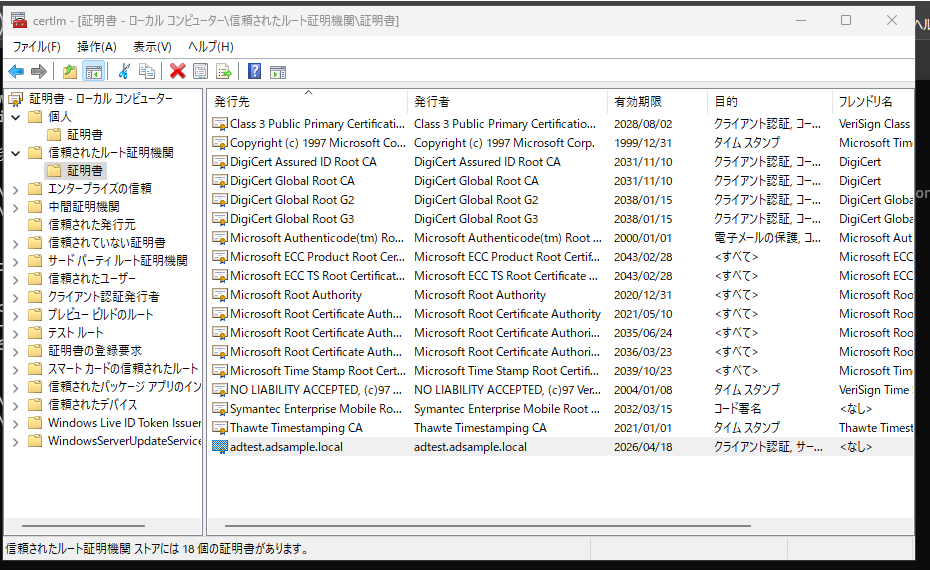
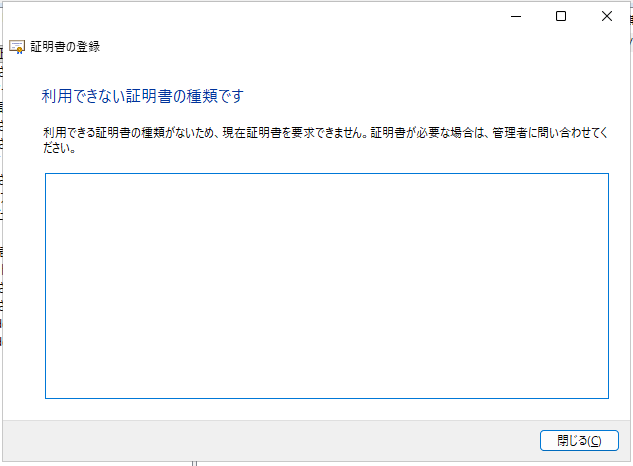
まずは「Windows Server 2025で作ったActive Directory環境でldapsを使えるようにする」にあるようにActive Directoryサーバをldapsで使えるように設定した。
ただ、調べると、純正Windows ServeverのActice Directoryサーバとldapを使って連携させた場合、userPassword, unixUserPassword, msSFU30Password などのパスワード情報が配布されていないので連携が取れない、的なことが書いてある記事などがあった。
実際 ldapsearchを使って確認してみると取得できたもののなかに含まれていない。これはまずいのでは?といろいろ調べる羽目になった。(なお、最終的には ldapsearchでは取得できないけど dovecotの認証としてActive Directoryで設定したパスワードがそのまま利用できることを確認できました)
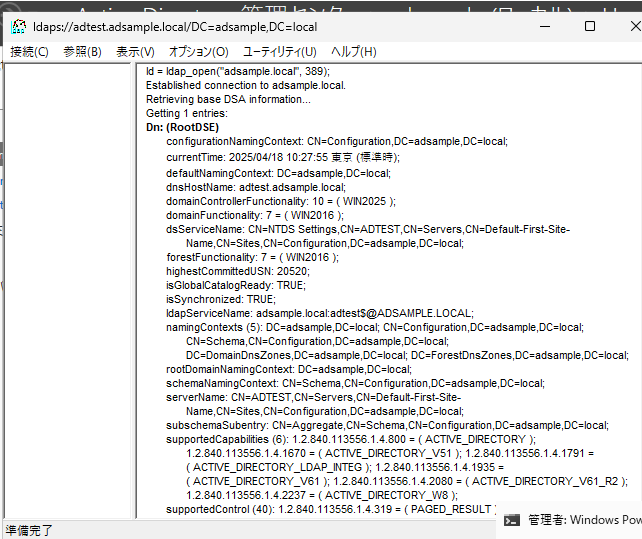
# ldapsearch -x -H ldaps://192.168.122.10 -D "cn=vmail,cn=Users,dc=adsample,dc=local" -w "パスワード" -b "cn=Users,dc=adsample,dc=local" samAccountName=testuser1
# extended LDIF
#
# LDAPv3
# base <cn=Users,dc=adsample,dc=local> with scope subtree
# filter: samAccountName=testuser1
# requesting: ALL
#

# testuser1, Users, adsample.local
dn: CN=testuser1,CN=Users,DC=adsample,DC=local
objectClass: top
objectClass: person
objectClass: organizationalPerson
objectClass: user
cn: testuser1
givenName: testuser1
distinguishedName: CN=testuser1,CN=Users,DC=adsample,DC=local
instanceType: 4
whenCreated: 20250417094618.0Z
whenChanged: 20250425001141.0Z
displayName: testuser1
uSNCreated: 12609
uSNChanged: 36883
name: testuser1
objectGUID:: H4j5I6UhEEaDahAIt64JeA==
userAccountControl: 66048
badPwdCount: 0
codePage: 0
countryCode: 0
badPasswordTime: 133900185974014530
lastLogoff: 0
lastLogon: 133900186129696391
pwdLastSet: 133893567784742554
primaryGroupID: 513
objectSid:: AQUAAAAAAAUVAAAArlEnuz4EHgKbAhGoTwQAAA==
accountExpires: 9223372036854775807
logonCount: 0
sAMAccountName: testuser1
sAMAccountType: 805306368
userPrincipalName: testuser1@adsample.local
objectCategory: CN=Person,CN=Schema,CN=Configuration,DC=adsample,DC=local
dSCorePropagationData: 20250418015428.0Z
dSCorePropagationData: 16010101000000.0Z
lastLogonTimestamp: 133900135017739905
mail: testuser1@example.com

# search result
search: 2
result: 0 Success

# numResponses: 2
# numEntries: 1
#
じゃあ、と回避策を探すと sssd を使ってLinux OSごとActive Directoryに参加させて、pam+sssdで認証を行う、という手法がある。この場合、Linux OS上に各アカウントのUIDがsssd経由で自動発行されディレクトリが作られていくことになる。
vmailアカウントで1つにまとめるvirtual boxタイプでやりようがないのかなぁ、と、とりあえず試してみることにした。
まずはRedHatのドキュメント「メールサーバーサービスの設定および維持」にある「1.2. LDAP 認証を使用した Dovecot サーバーのセットアップ」を参考に設定を実施
dovecotインストール
まず、dovecotをインストール
[root@mail ~]# dnf install dovecot
Last metadata expiration check: 0:15:03 ago on Fri Apr 25 02:14:57 2025.
Dependencies resolved.
================================================================================
 Package        Arch    Version                                Repository  Size
================================================================================
Installing:
 dovecot        x86_64  1:2.3.16-14.el9                        appstream  4.7 M
Installing dependencies:
 clucene-core   x86_64  2.3.3.4-42.20130812.e8e3d20git.el9     appstream  585 k
 libexttextcat  x86_64  3.4.5-11.el9                           appstream  209 k
 libicu         x86_64  67.1-9.el9                             baseos     9.6 M
 libstemmer     x86_64  0-18.585svn.el9                        appstream   82 k

Transaction Summary
================================================================================
Install  5 Packages

Total download size: 15 M
Installed size: 53 M
Is this ok [y/N]: y
Downloading Packages:
(1/5): clucene-core-2.3.3.4-42.20130812.e8e3d20 582 kB/s | 585 kB     00:01    A
(2/5): libexttextcat-3.4.5-11.el9.x86_64.rpm    207 kB/s | 209 kB     00:01
(3/5): libstemmer-0-18.585svn.el9.x86_64.rpm    995 kB/s |  82 kB     00:00
(4/5): dovecot-2.3.16-14.el9.x86_64.rpm         1.3 MB/s | 4.7 MB     00:03
(5/5): libicu-67.1-9.el9.x86_64.rpm             1.2 MB/s | 9.6 MB     00:07
--------------------------------------------------------------------------------
Total                                           1.3 MB/s |  15 MB     00:11
Running transaction check
Transaction check succeeded.
Running transaction test
Transaction test succeeded.
Running transaction
  Preparing        :                                                        1/1
  Installing       : libicu-67.1-9.el9.x86_64                               1/5
  Installing       : libstemmer-0-18.585svn.el9.x86_64                      2/5
  Installing       : libexttextcat-3.4.5-11.el9.x86_64                      3/5
  Installing       : clucene-core-2.3.3.4-42.20130812.e8e3d20git.el9.x86_   4/5
  Running scriptlet: dovecot-1:2.3.16-14.el9.x86_64                         5/5
  Installing       : dovecot-1:2.3.16-14.el9.x86_64                         5/5
  Running scriptlet: dovecot-1:2.3.16-14.el9.x86_64                         5/5
  Verifying        : clucene-core-2.3.3.4-42.20130812.e8e3d20git.el9.x86_   1/5
  Verifying        : dovecot-1:2.3.16-14.el9.x86_64                         2/5
  Verifying        : libexttextcat-3.4.5-11.el9.x86_64                      3/5
  Verifying        : libstemmer-0-18.585svn.el9.x86_64                      4/5
  Verifying        : libicu-67.1-9.el9.x86_64                               5/5

Installed:
  clucene-core-2.3.3.4-42.20130812.e8e3d20git.el9.x86_64
  dovecot-1:2.3.16-14.el9.x86_64
  libexttextcat-3.4.5-11.el9.x86_64
  libicu-67.1-9.el9.x86_64
  libstemmer-0-18.585svn.el9.x86_64

Complete!
[root@mail ~]#
dovecot用自己証明書作成
dovecot用に自己証明書を作成するけど、標準だと有効期限1年なので変更して作成する
まずは/etc/pki/dovecot/dovecot-openssl.cnf に適切なホスト名と管理者メールアドレスを記載する
[root@mail ~]# cat /etc/pki/dovecot/dovecot-openssl.cnf
[ req ]
default_bits = 3072
encrypt_key = yes
distinguished_name = req_dn
x509_extensions = cert_type
prompt = no

[ req_dn ]
# country (2 letter code)
#C=FI

# State or Province Name (full name)
#ST=

# Locality Name (eg. city)
#L=Helsinki

# Organization (eg. company)
#O=Dovecot

# Organizational Unit Name (eg. section)
OU=IMAP server

# Common Name (*.example.com is also possible)
CN=mail.adsample.local

# E-mail contact
emailAddress=postmaster@adsample.local

[ cert_type ]
nsCertType = server
[root@mail ~]#
次に通常はdovecot初回起動時に /usr/share/doc/dovecot/mkcert.sh を実行して自己証明書を作成しているのだが、このスクリプト内で「-days 365」と書かれているから有効期限が1年になっているので、コピーして「-days 3650」などに修正する
[root@mail ~]# cp /usr/share/doc/dovecot/mkcert.sh .
[root@mail ~]# vi mkcert.sh
[root@mail ~]# diff -u /usr/share/doc/dovecot/mkcert.sh mkcert.sh
--- /usr/share/doc/dovecot/mkcert.sh    2024-10-03 05:08:31.000000000 +0900
+++ mkcert.sh   2025-04-25 02:55:09.510440927 +0900
@@ -34,7 +34,7 @@
   exit 1
 fi

-$OPENSSL req -new -x509 -nodes -config $OPENSSLCONFIG -out $CERTFILE -keyout $KEYFILE -days 365 || exit 2
+$OPENSSL req -new -x509 -nodes -config $OPENSSLCONFIG -out $CERTFILE -keyout $KEYFILE -days 3650 || exit 2
 chown root:root $CERTFILE $KEYFILE
 chmod 0600 $CERTFILE $KEYFILE
 echo
[root@mail ~]#
で、修正したmkcert.shを実行して証明書を作成
[root@mail ~]# bash mkcert.sh
/etc/pki/dovecot/certs/dovecot.pem already exists, won't overwrite
[root@mail ~]# rm /etc/pki/dovecot/certs/dovecot.pem
rm: remove regular file '/etc/pki/dovecot/certs/dovecot.pem'? y
[root@mail ~]# rm /etc/pki/dovecot/private/dovecot.pem
rm: remove regular file '/etc/pki/dovecot/private/dovecot.pem'? y
[root@mail ~]# bash mkcert.sh
..+...+......+.....+....+..............+.+.....+.........++++++++++++++++++++++++++++++++++++++++++*..+....+......+........+......+....+............++++++++++++++++++++++++++++++++++++++++++*....+......+.+...+.....+......+...................+......+...+...+.....+...+.+...+.....................+............+.........+.....+.....................+.............+.........+...........+....+.....+.+..............+.......+........+.............+.....+..........+............+.....+..........+...+..+.+.....+.......+..+.+.....+.........+...+.......+..+.+..+..................+.......+..+...+.+....................+.+.........+.....+....+...+...+............+.....+.......+..+......+.......+...+...............+..+...+....+...........+....+........+.+......+........+...............+.......+........................+.........+..+....+......+.........+..+..................+....+......+............+.....+....+........+.......+.....+.+.....+...+......+..........+.........+++++
.........+.+..+....+...+...+...++++++++++++++++++++++++++++++++++++++++++*..........+...+.................+...+...++++++++++++++++++++++++++++++++++++++++++*.......+.....+....+..............+......+.........+.......+...+..+................+.....+.......+..+.........+....+......+..+..................+.........+......+............+.............+..+...+....+...............+...........+..........+.........+...+...+++++
-----

subject=OU=IMAP server, CN=mail.adsample.local, emailAddress=postmaster@adsample.local
SHA1 Fingerprint=DD:2E:9B:1A:6A:84:07:03:EF:6E:7F:D4:7A:03:39:F0:24:FC:0E:2A
[root@mail ~]#
ファイルが作成され、「openssl x509 -noout -dates -in ファイル名」を実行し有効期限が約10年であることを確認
[root@mail ~]# ls -ltR /etc/pki/dovecot/
/etc/pki/dovecot/:
total 8
drwxr-xr-x. 2 root root  25 Apr 25 02:56 certs
drwxr-xr-x. 2 root root  25 Apr 25 02:56 private
-rw-r--r--. 1 root root 502 Apr 25 02:45 dovecot-openssl.cnf
-rw-r--r--. 1 root root 496 Apr 25 02:45 dovecot-openssl.cnf.org

/etc/pki/dovecot/certs:
total 4
-rw-------. 1 root root 1619 Apr 25 02:56 dovecot.pem

/etc/pki/dovecot/private:
total 4
-rw-------. 1 root root 2484 Apr 25 02:56 dovecot.pem
[root@mail ~]# openssl x509 -noout -dates -in /etc/pki/dovecot/certs/dovecot.pem
notBefore=Apr 24 17:56:04 2025 GMT
notAfter=Apr 22 17:56:04 2035 GMT
[root@mail ~]#
続いてRedHatのページにも記載されているDiffie-Hellmanパラメータファイル作成
[root@mail ~]# openssl dhparam -out /etc/dovecot/dh.pem 4096
Generating DH parameters, 4096 bit long safe prime
.....................................................+........................................................+.........................................................+......................................................................................................................................................................................................................................................................................................................................................................................................................................................................................................................+.................................................................................................................+.....................................................................................................................+..........................................+.......................................................+...................................................................................+....................................................................................................................................................................................................................................................................+......................................................+......+..........................................+........................................+..............................................................................................................................................................................+......................................................................................................................................................................................................................................................................................................................................................................................................................................................+.............................................................................................................................................................................................................................................................................+...........................................................................................................................................................+............................................................................................................................................................................................................................................................................................................................................................................................................................................................................................................................................................................................................................................................................................................................+.......................................................................................................................................................................................................................................................................................................................................................................................................................................................................................................................................................................................................................................................................................................................................................................................................................................................+........................+...............................................+.....................................................................................................................+......................................................................................................................................................................................................................................................................................................................................................................+........................................................................................................................................................................................................................................................+......................................................................................................+.........................................................................................................................................................................................................................................................................................................................................................................................................................................................................................................................+.......................................................................................................................................................................................................................+.......................................................................................................................................+...................................................................................................................................................................................................................................+....................................................................................................................................................................................................................................................................+...+....................................................................................................................................................................................................................................................+........+........+..................................................................................................................................................................................................................................................................................................................+......................................................+...........................................................................................................................................................................+..............................................................................................................................................................................................................................................................................................................................................................................................................................................................................................................................................................................................................................................................................................................+....................................................................+...........+.....................................................................................................................................................................................................................................................................................................................................................................................................................................................................................................................................................................................................................................................................................................................................................................................................................+.........................................................................................................................................................................................................................................................................................................................................................+....+........................................................................................................................................................................................................................................................................................................................................+......+...................................................................................................................................................................................................................................................................................................................................................+........................................................................................................................................................................................................................................+............................+...............................................................+.......................................................................................................................................................................................................................................+..............................................................................................................................................................................................................................................+..........................................................................................................................................................................................................+................................................................................+......................................................................................+.........................................................................................................................................+..............................................++*++*++*++*++*++*++*++*++*++*++*++*++*++*++*++*++*++*++*++*++*++*++*++*++*++*++*++*++*++*++*++*++*++*++*++*++*++*++*++*++*++*++*++*++*++*++*++*++*++*++*++*++*++*++*++*++*++*++*++*++*++*++*++*++*++*++*++*++*++*++*++*++*++*++*++*++*++*++*++*++*++*++*++*++*++*++*++*++*++*++*++*++*++*++*++*++*++*++*++*++*++*++*++*++*++*++*++*++*++*++*++*++*++*++*++*++*++*++*++*++*++*++*++*++*++*++*++*
[root@mail ~]# ls -l /etc/dovecot/dh.pem
-rw-r--r--. 1 root root 773 Apr 25 03:02 /etc/dovecot/dh.pem
[root@mail ~]#
/etc/dovecot/conf.d/10-ssl.conf に証明書ファイルとDiffie-Hellmanパラメータファイルの登録
ssl_certとssl_keyは標準値のまま
ssl_ca については登録せず
ssl_shのコメントを外す
[root@mail postfix]# cat /etc/dovecot/conf.d/10-ssl.conf
##
## SSL settings
##

# SSL/TLS support: yes, no, required. <doc/wiki/SSL.txt>
# disable plain pop3 and imap, allowed are only pop3+TLS, pop3s, imap+TLS and imaps
# plain imap and pop3 are still allowed for local connections
ssl = no

# PEM encoded X.509 SSL/TLS certificate and private key. They're opened before
# dropping root privileges, so keep the key file unreadable by anyone but
# root. Included doc/mkcert.sh can be used to easily generate self-signed
# certificate, just make sure to update the domains in dovecot-openssl.cnf
ssl_cert = </etc/pki/dovecot/certs/dovecot.pem
ssl_key = </etc/pki/dovecot/private/dovecot.pem

# If key file is password protected, give the password here. Alternatively
# give it when starting dovecot with -p parameter. Since this file is often
# world-readable, you may want to place this setting instead to a different
# root owned 0600 file by using ssl_key_password = <path.
#ssl_key_password =

# PEM encoded trusted certificate authority. Set this only if you intend to use
# ssl_verify_client_cert=yes. The file should contain the CA certificate(s)
# followed by the matching CRL(s). (e.g. ssl_ca = </etc/pki/dovecot/certs/ca.pem)
#ssl_ca =

# Require that CRL check succeeds for client certificates.
#ssl_require_crl = yes

# Directory and/or file for trusted SSL CA certificates. These are used only
# when Dovecot needs to act as an SSL client (e.g. imapc backend or
# submission service). The directory is usually /etc/pki/dovecot/certs in
# Debian-based systems and the file is /etc/pki/tls/cert.pem in
# RedHat-based systems. Note that ssl_client_ca_file isn't recommended with
# large CA bundles, because it leads to excessive memory usage.
#ssl_client_ca_dir =
#ssl_client_ca_file =

# Require valid cert when connecting to a remote server
#ssl_client_require_valid_cert = yes

# Request client to send a certificate. If you also want to require it, set
# auth_ssl_require_client_cert=yes in auth section.
#ssl_verify_client_cert = no

# Which field from certificate to use for username. commonName and
# x500UniqueIdentifier are the usual choices. You'll also need to set
# auth_ssl_username_from_cert=yes.
#ssl_cert_username_field = commonName

# SSL DH parameters
# Generate new params with `openssl dhparam -out /etc/dovecot/dh.pem 4096`
# Or migrate from old ssl-parameters.dat file with the command dovecot
# gives on startup when ssl_dh is unset.
ssl_dh = </etc/dovecot/dh.pem

# Minimum SSL protocol version to use. Potentially recognized values are SSLv3,
# TLSv1, TLSv1.1, TLSv1.2 and TLSv1.3, depending on the OpenSSL version used.
#
# Dovecot also recognizes values ANY and LATEST. ANY matches with any protocol
# version, and LATEST matches with the latest version supported by library.
#ssl_min_protocol = TLSv1.2

# SSL ciphers to use, the default is:
#ssl_cipher_list = ALL:!kRSA:!SRP:!kDHd:!DSS:!aNULL:!eNULL:!EXPORT:!DES:!3DES:!MD5:!PSK:!RC4:!ADH:!LOW@STRENGTH
# To disable non-EC DH, use:
#ssl_cipher_list = ALL:!DH:!kRSA:!SRP:!kDHd:!DSS:!aNULL:!eNULL:!EXPORT:!DES:!3DES:!MD5:!PSK:!RC4:!ADH:!LOW@STRENGTH
ssl_cipher_list = PROFILE=SYSTEM

# Colon separated list of elliptic curves to use. Empty value (the default)
# means use the defaults from the SSL library. P-521:P-384:P-256 would be an
# example of a valid value.
#ssl_curve_list =

# Prefer the server's order of ciphers over client's.
#ssl_prefer_server_ciphers = no

# SSL crypto device to use, for valid values run "openssl engine"
#ssl_crypto_device =

# SSL extra options. Currently supported options are:
#   compression - Enable compression.
#   no_ticket - Disable SSL session tickets.
#ssl_options =
[root@mail postfix]#
また、標準設定のままだとSSLが必須(ssl=required)になっているので、なくてもよい「ssl=yes」に変更します。
[root@mail ~]# vi /etc/dovecot/conf.d/10-ssl.conf
[root@mail ~]# diff -u /etc/dovecot/conf.d/10-ssl.conf.org /etc/dovecot/conf.d/10-ssl.conf
--- /etc/dovecot/conf.d/10-ssl.conf.org 2025-04-25 03:03:27.865411037 +0900
+++ /etc/dovecot/conf.d/10-ssl.conf     2025-04-25 03:28:09.900322146 +0900
@@ -5,7 +5,7 @@
 # SSL/TLS support: yes, no, required. <doc/wiki/SSL.txt>
 # disable plain pop3 and imap, allowed are only pop3+TLS, pop3s, imap+TLS and imaps
 # plain imap and pop3 are still allowed for local connections
-ssl = required
+ssl = yes

 # PEM encoded X.509 SSL/TLS certificate and private key. They're opened before
 # dropping root privileges, so keep the key file unreadable by anyone but
@@ -53,7 +53,7 @@
 # Generate new params with `openssl dhparam -out /etc/dovecot/dh.pem 4096`
 # Or migrate from old ssl-parameters.dat file with the command dovecot
 # gives on startup when ssl_dh is unset.
-#ssl_dh = </etc/dovecot/dh.pem
+ssl_dh = </etc/dovecot/dh.pem

 # Minimum SSL protocol version to use. Potentially recognized values are SSLv3,
 # TLSv1, TLSv1.1, TLSv1.2 and TLSv1.3, depending on the OpenSSL version used.
[root@mail ~]#
メール管理用ユーザ作成
メール管理ユーザとしてRHELドキュメントにあるように「vmail」ユーザを作成
[root@mail ~]# useradd --home-dir /var/mail --shell /usr/sbin/nologin vmail
useradd: warning: the home directory /var/mail already exists.
useradd: Not copying any file from skel directory into it.
[root@mail ~]#

[root@mail ~]# id vmail
uid=1000(vmail) gid=1000(vmail) groups=1000(vmail)
[root@mail ~]#
上記でホームディレクトリを /var/mail で指定しているが、すでに存在しているディレクトリであるため、現存する/var/mailの所有者を変更する。
[root@mail ~]# ls -ld /var/mail
lrwxrwxrwx. 1 root root 10 Oct  3  2024 /var/mail -> spool/mail
[root@mail ~]# ls -ld /var/spool/mail
drwxrwxr-x. 2 root mail 19 Apr 25 03:11 /var/spool/mail
[root@mail ~]#
[root@mail ~]# chown vmail:vmail /var/mail/
[root@mail ~]# chmod 700 /var/mail/
[root@mail ~]# ls -ld /var/mail
lrwxrwxrwx. 1 root root 10 Oct  3  2024 /var/mail -> spool/mail
[root@mail ~]# ls -ld /var/mail/
drwx------. 2 vmail vmail 19 Apr 25 03:11 /var/mail/
[root@mail ~]# ls -ld /var/spool/mail
drwx------. 2 vmail vmail 19 Apr 25 03:11 /var/spool/mail
[root@mail ~]# ls -ld /var/spool/mail/
drwx------. 2 vmail vmail 19 Apr 25 03:11 /var/spool/mail/
[root@mail ~]#
/etc/dovecot/conf.d/10-mail.conf にメール保存先のディレクトリ設定「mail_location = sdbox:/var/mail/%n/」を追加
(なお、sdboxという指定だと dbox Mailbox Formatのsingle-dbox形式、になっていて、maildir形式にしたい場合は maildir と書く必要がありました。あとで”mail_location = maildir:/var/mail/%n/Maildir”に修正しています )
[root@mail ~]# cp /etc/dovecot/conf.d/10-mail.conf /etc/dovecot/conf.d/10-mail.conf.org
[root@mail ~]# vi /etc/dovecot/conf.d/10-mail.conf
[root@mail ~]# diff -u /etc/dovecot/conf.d/10-mail.conf.org /etc/dovecot/conf.d/10-mail.conf
--- /etc/dovecot/conf.d/10-mail.conf.org        2025-04-25 03:13:54.044373479 +0900
+++ /etc/dovecot/conf.d/10-mail.conf    2025-04-25 03:14:17.970372044 +0900
@@ -27,7 +27,7 @@
 #
 # <doc/wiki/MailLocation.txt>
 #
-#mail_location =
+mail_location = sdbox:/var/mail/%n/

 # If you need to set multiple mailbox locations or want to change default
 # namespace settings, you can do it by defining namespace sections.
[root@mail ~]#
LDAPとの連携設定
まずは /etc/dovecot/conf.d/10-auth.conf で auth-system.conf.ext ファイルの読み込みをやめ、 auth-ldap.conf.ext ファイルを読み込む設定に修正
[root@mail ~]# cp /etc/dovecot/conf.d/10-auth.conf /etc/dovecot/conf.d/10-auth.conf.org
[root@mail ~]# vi /etc/dovecot/conf.d/10-auth.conf
[root@mail ~]# diff -u /etc/dovecot/conf.d/10-auth.conf.org /etc/dovecot/conf.d/10-auth.conf
--- /etc/dovecot/conf.d/10-auth.conf.org        2025-04-25 03:15:55.357366203 +0900
+++ /etc/dovecot/conf.d/10-auth.conf    2025-04-25 03:16:28.351364224 +0900
@@ -119,9 +119,9 @@
 #!include auth-deny.conf.ext
 #!include auth-master.conf.ext

-!include auth-system.conf.ext
+#!include auth-system.conf.ext
 #!include auth-sql.conf.ext
-#!include auth-ldap.conf.ext
+!include auth-ldap.conf.ext
 #!include auth-passwdfile.conf.ext
 #!include auth-checkpassword.conf.ext
 #!include auth-static.conf.ext
[root@mail ~]#
/etc/dovecot/conf.d/auth-ldap.conf.ext の userdb について override_fileds 設定を追加します
[root@mail ~]# cp /etc/dovecot/conf.d/auth-ldap.conf.ext /etc/dovecot/conf.d/auth-ldap.conf.ext.org
[root@mail ~]# vi /etc/dovecot/conf.d/auth-ldap.conf.ext
[root@mail ~]# diff -u /etc/dovecot/conf.d/auth-ldap.conf.ext.org /etc/dovecot/conf.d/auth-ldap.conf.ext
--- /etc/dovecot/conf.d/auth-ldap.conf.ext.org  2025-04-25 03:17:04.099362080 +0900
+++ /etc/dovecot/conf.d/auth-ldap.conf.ext      2025-04-25 03:17:39.663359947 +0900
@@ -7,6 +7,7 @@

   # Path for LDAP configuration file, see example-config/dovecot-ldap.conf.ext
   args = /etc/dovecot/dovecot-ldap.conf.ext
+  override_fields = uid=vmail gid=vmail home=/var/mail/%n/
 }

 # "prefetch" user database means that the passdb already provided the
[root@mail ~]#
uidとgidについて、vmailという文字列ではなく、実際のUID/GIDの数値を指定しなければならないかな?と思って両方試してみましたが、どちらでも動作しました。
(「override_fields = uid=1000 gid=1000 home=/var/mail/%n/」でも大丈夫だった)
次に、LDAP検索用ファイル/etc/dovecot/dovecot-ldap.conf.extを新規で作成….が、いろいろあったので、詳しいところは後回しにします。
firewall設定
標準だとポートが開けられていないので、必要に応じて開けます
まず初期状況確認
[root@mail ~]# firewall-cmd --list-all
public (active)
  target: default
  icmp-block-inversion: no
  interfaces: ens160
  sources:
  services: cockpit dhcpv6-client ssh
  ports:
  protocols:
  forward: yes
  masquerade: no
  forward-ports:
  source-ports:
  icmp-blocks:
  rich rules:
[root@mail ~]#
メール系ポートを開けていきます。この記事はdovecot(imapとpop3)についてなので、imapとpop3について追加します
[root@mail ~]# firewall-cmd --permanent --add-service imaps --add-service imap
success
[root@mail ~]# firewall-cmd --permanent --add-service pop3 --add-service pop3s
success
[root@mail ~]# firewall-cmd --reload
success
[root@mail ~]#  firewall-cmd --list-all
public (active)
  target: default
  icmp-block-inversion: no
  interfaces: ens160
  sources:
  services: cockpit dhcpv6-client imap imaps pop3 pop3s ssh
  ports:
  protocols:
  forward: yes
  masquerade: no
  forward-ports:
  source-ports:
  icmp-blocks:
  rich rules:
[root@mail ~]#
dovecotの起動登録
標準だと起動してこないdovecotを起動してくるように設定を入れます
[root@mail ~]# systemctl status dovecot
○ dovecot.service - Dovecot IMAP/POP3 email server
     Loaded: loaded (/usr/lib/systemd/system/dovecot.service; disabled; preset:>
     Active: inactive (dead)
       Docs: man:dovecot(1)
             https://doc.dovecot.org/
[root@mail ~]# systemctl enable --now dovecot
Created symlink /etc/systemd/system/multi-user.target.wants/dovecot.service → /usr/lib/systemd/system/dovecot.service.
[root@mail ~]# systemctl status dovecot
● dovecot.service - Dovecot IMAP/POP3 email server
     Loaded: loaded (/usr/lib/systemd/system/dovecot.service; enabled; preset: >
     Active: active (running) since Fri 2025-04-25 03:24:50 JST; 2s ago
       Docs: man:dovecot(1)
             https://doc.dovecot.org/
    Process: 2180 ExecStartPre=/usr/libexec/dovecot/prestartscript (code=exited>
   Main PID: 2186 (dovecot)
     Status: "v2.3.16 (7e2e900c1a) running"
      Tasks: 4 (limit: 10873)
     Memory: 5.3M
        CPU: 92ms
     CGroup: /system.slice/dovecot.service
             tq2186 /usr/sbin/dovecot -F
             tq2187 dovecot/anvil
             tq2188 dovecot/log
             mq2189 dovecot/config

Apr 25 03:24:50 mail.adsample.local systemd[1]: Starting Dovecot IMAP/POP3 emai>
Apr 25 03:24:50 mail.adsample.local dovecot[2186]: master: Dovecot v2.3.16 (7e2>
Apr 25 03:24:50 mail.adsample.local systemd[1]: Started Dovecot IMAP/POP3 email>
[root@mail ~]#
Active Directoryサーバを利用するのに必要なLDAP設定の調査
RHELのドキュメントに記載されているものは、OpenLDAPサーバを利用した場合の設定で、Windows Serverをベースとした場合、posixAccountに関する情報は標準では提供されていないため利用できません。
このため、Active DirectoryのLDAPで利用できる情報は何かをldapsearchコマンドを実行しながら確認していきます。
とりあえず先に調査した結果、これでいけるな、となったものは以下です
[root@mail ~]# cat /etc/dovecot/dovecot-ldap.conf.ext
# LDAPサーバへの接続に関する設定
uris=ldaps://192.168.122.10
auth_bind=yes
dn= cn=vmail,cn=Users,dc=adsample,dc=local
dnpass= パスワード

# LDAPの検索
base= cn=Users,dc=adsample,dc=local
scope=subtree

# 検索結果に対するフィルター
user_filter= (samAccountName=%u)
pass_filter= (samAccountName=%u)
[root@mail ~]#
各項に関して解説します
接続先のLDAPサーバの指定を「uris=ldaps://サーバ名」で行います
古い資料では「server_host=ホスト名」と「server_port=389」になっていたりしますが、現代は「uris=ldap://サーバ名」か「uris=ldaps://サーバ名」です
2025年現在のLDAPサーバではセキュリティ強化のためユーザ認証を行わないとLDAP上の情報を検索できないようになっています。このため「auth_bind=yes」で、認証を行うようにします。
「dn=」で指定しているのがユーザ検索に使用するActive Directory上のユーザ指定です。今回は「vmail」というユーザを作成していますので、それを指定しています。
続く「dnpass=」は上記ユーザに設定したActive Directoryでのパスワードです。平文でそのまま記載します。
次はLDAPから情報を引っ張ってくるのに使う設定です
Active Directoryでユーザに関する情報は「cn=Users,dc=adsample,dc=local」に入ってるので、それを使用します。
ldapsearchコマンドを使うことでどういった情報が取得できるかを確認することができます。
「-D」のオプションとしてdn=の後ろに入力したもの
「-b」のオプションとしてbase=の後ろに入力したもの
[root@mail ~]#  ldapsearch -x -H ldaps://192.168.122.10 -D "cn=vmail,cn=Users,dc=adsample,dc=local" -w "パスワード" -b "cn=Users,dc=adsample,dc=local" -s subtree
# extended LDIF
#
# LDAPv3
# base <cn=Users,dc=adsample,dc=local> with scope subtree
# filter: (objectclass=*)
# requesting: ALL
#

# Users, adsample.local
dn: CN=Users,DC=adsample,DC=local
objectClass: top
objectClass: container
cn: Users
description: Default container for upgraded user accounts
distinguishedName: CN=Users,DC=adsample,DC=local
instanceType: 4
whenCreated: 20250417093642.0Z
whenChanged: 20250417093642.0Z
uSNCreated: 5672
uSNChanged: 5672
showInAdvancedViewOnly: FALSE
name: Users
objectGUID:: 0+Pn0tolgUSaHrCO7ll4VQ==
systemFlags: -1946157056
objectCategory: CN=Container,CN=Schema,CN=Configuration,DC=adsample,DC=local
isCriticalSystemObject: TRUE
dSCorePropagationData: 20250417093820.0Z
dSCorePropagationData: 16010101000001.0Z

# testuser1, Users, adsample.local
dn: CN=testuser1,CN=Users,DC=adsample,DC=local
objectClass: top
objectClass: person
objectClass: organizationalPerson
objectClass: user
cn: testuser1
givenName: testuser1
distinguishedName: CN=testuser1,CN=Users,DC=adsample,DC=local
instanceType: 4
whenCreated: 20250417094618.0Z
whenChanged: 20250425001141.0Z
displayName: testuser1
uSNCreated: 12609
uSNChanged: 36883
name: testuser1
objectGUID:: H4j5I6UhEEaDahAIt64JeA==
userAccountControl: 66048
badPwdCount: 0
codePage: 0
countryCode: 0
badPasswordTime: 133900339076624909
lastLogoff: 0
lastLogon: 133900339256453379
pwdLastSet: 133893567784742554
primaryGroupID: 513
objectSid:: AQUAAAAAAAUVAAAArlEnuz4EHgKbAhGoTwQAAA==
accountExpires: 9223372036854775807
logonCount: 0
sAMAccountName: testuser1
sAMAccountType: 805306368
userPrincipalName: testuser1@adsample.local
objectCategory: CN=Person,CN=Schema,CN=Configuration,DC=adsample,DC=local
dSCorePropagationData: 20250418015428.0Z
dSCorePropagationData: 16010101000000.0Z
lastLogonTimestamp: 133900135017739905
mail: testuser1@example.com

# testuser2, Users, adsample.local
dn: CN=testuser2,CN=Users,DC=adsample,DC=local
objectClass: top
objectClass: person
objectClass: organizationalPerson
objectClass: user
cn: testuser2
givenName: testuser2
<略>

# search result
search: 2
result: 0 Success

# numResponses: 32
# numEntries: 31
[root@mail ~]#
まあ、たくさんの情報が出てきてしまいます。
これの範囲を狭くするための設定がfilterです
user_filter がユーザ名を検索するときに使うフィルターで、 pass_filter がそのユーザのパスワードを検索する際に使うフィルターです
注意点は、これは検索した結果を狭めるために設定するもので、ユーザ名やパスワードとしてみなす値が何なのかを指定するものではありません。
上の例では「user_filter= (samAccountName=%u)」「pass_filter= (samAccountName=%u)」としています。
%uが imap/pop3でアクセスしたときに入力したユーザ名に置き換えられますので、ユーザがtestuser1でログインしたときに使用されるフィルターは「samAccountName=testuser1」となります。
この時にどのような値が取得できるかをldapsearchで確認するには、以下のように最後にフィルター文字列を指定して実行します。
[root@mail ~]#  ldapsearch -x -H ldaps://192.168.122.10 -D "cn=vmail,cn=Users,dc=adsample,dc=local" -w "パスワード" -b "cn=Users,dc=adsample,dc=local" -s subtree samAccountName=testuser1
# extended LDIF
#
# LDAPv3
# base <cn=Users,dc=adsample,dc=local> with scope subtree
# filter: samAccountName=testuser1
# requesting: ALL
#

# testuser1, Users, adsample.local
dn: CN=testuser1,CN=Users,DC=adsample,DC=local
objectClass: top
objectClass: person
objectClass: organizationalPerson
objectClass: user
cn: testuser1
givenName: testuser1
distinguishedName: CN=testuser1,CN=Users,DC=adsample,DC=local
instanceType: 4
whenCreated: 20250417094618.0Z
whenChanged: 20250425001141.0Z
displayName: testuser1
uSNCreated: 12609
uSNChanged: 36883
name: testuser1
objectGUID:: H4j5I6UhEEaDahAIt64JeA==
userAccountControl: 66048
badPwdCount: 0
codePage: 0
countryCode: 0
badPasswordTime: 133900339076624909
lastLogoff: 0
lastLogon: 133900339256453379
pwdLastSet: 133893567784742554
primaryGroupID: 513
objectSid:: AQUAAAAAAAUVAAAArlEnuz4EHgKbAhGoTwQAAA==
accountExpires: 9223372036854775807
logonCount: 0
sAMAccountName: testuser1
sAMAccountType: 805306368
userPrincipalName: testuser1@adsample.local
objectCategory: CN=Person,CN=Schema,CN=Configuration,DC=adsample,DC=local
dSCorePropagationData: 20250418015428.0Z
dSCorePropagationData: 16010101000000.0Z
lastLogonTimestamp: 133900135017739905
mail: testuser1@example.com

# search result
search: 2
result: 0 Success

# numResponses: 2
# numEntries: 1
[root@mail ~]#
じゃあ、上記ででてきた値のうち、どれをユーザ名やパスワードとして認識させるんだ、という話なんですが、おそらく user_attrs と pass_attrs なんだと思われるのですが、いまいち動作が確認できませんでした。
上で示した設定では ユーザ名を使っていましたが「ユーザ名 @ドメイン名」でログインできるようにする場合は samAccountName ではなく userPrincipalNameを使うことでログインできるようになりました。
[root@mail ~]# cat /etc/dovecot/dovecot-ldap.conf.ext
# LDAPサーバへの接続に関する設定
uris=ldaps://192.168.122.10
auth_bind=yes
dn= cn=vmail,cn=Users,dc=adsample,dc=local
dnpass= パスワード

# LDAPの検索
base= cn=Users,dc=adsample,dc=local
scope=subtree

# 検索結果に対するフィルター
user_filter= (userPrincipalName=%u)
pass_filter= (userPrincipalName=%u)
[root@mail ~]#
で・・・パスワードとして使えるらしい userPassword, unixUserPassword, msSFU30Password は ldapsearchの出力結果に出てこないのですが、doveadmコマンドで確認してみると、ちゃんとActive Directoryに設定したパスワードで認証が通ることが確認できました。
dovecotの動作確認
dovecotのコマンド「doveadm auth login ユーザ名」で認証がちゃんと動くかという検証ができます。
最初のユーザ名だけでログインできる場合は以下
[root@mail ~]# doveadm auth login testuser1
Password:
passdb: testuser1 auth succeeded
extra fields:
  user=testuser1
userdb extra fields:
  testuser1@adsample.local
  uid=1000
  gid=1000
  home=/var/mail/testuser1/
  auth_mech=PLAIN
  auth_user=testuser1
[root@mail ~]#
ドメイン名付きで設定した場合は以下
[root@mail ~]# doveadm auth login testuser1@adsample.local
Password:
passdb: testuser1@adsample.local auth succeeded
extra fields:
  user=testuser1@adsample.local
userdb extra fields:
  testuser1@adsample.local
  uid=1000
  gid=1000
  home=/var/mail/testuser1/
  auth_mech=PLAIN
[root@mail ~]#
うまく動かなかった場合は、dovecotのログ出力を増やします。
設定のon/offがしやすいように /etc/dovecot/conf.d/99-debug.conf というファイルを新規作成しました。
[root@mail ~]# cat /etc/dovecot/conf.d/99-debug.conf
auth_debug=yes
auth_debug_passwords=yes
auth_verbose=yes
auth_verbose_passwords=yes
verbose_proctitle=yes
verbose_ssl=yes

[root@mail ~]#
この設定の注意点は「auth_debug_passwords=yes」と「auth_verbose_passwords=yes」です。エラー時にパスワードとして入力した文字列がログファイルに記録されてしまうので、取り扱いに注意してください。
例えば、ドメイン名ありでログインしなければならないのにユーザ名のみでログインしようとした場合のエラーとログは以下のようになりました。
[root@mail ~]# doveadm auth login testuser1
Password:
passdb: testuser1 auth failed
extra fields:
  user=testuser1
[root@mail ~]#
[root@mail ~]# tail -f /var/log/maillog
Apr 25 18:47:01 mail dovecot[3326]: auth: Debug: Loading modules from directory: /usr/lib64/dovecot/auth
Apr 25 18:47:01 mail dovecot[3326]: auth: Debug: Module loaded: /usr/lib64/dovecot/auth/lib20_auth_var_expand_crypt.so
Apr 25 18:47:01 mail dovecot[3326]: auth: Debug: Module loaded: /usr/lib64/dovecot/auth/libdriver_sqlite.so
Apr 25 18:47:01 mail dovecot[3326]: auth: Debug: Loading modules from directory: /usr/lib64/dovecot/auth
Apr 25 18:47:01 mail dovecot[3326]: auth: Debug: Module loaded: /usr/lib64/dovecot/auth/libauthdb_ldap.so
Apr 25 18:47:01 mail dovecot[3326]: auth: Debug: Read auth token secret from /run/dovecot/auth-token-secret.dat
Apr 25 18:47:01 mail dovecot[3326]: auth: Debug: ldap(/etc/dovecot/dovecot-ldap.conf.ext): LDAP initialization took 24 msecs
Apr 25 18:47:01 mail dovecot[3326]: auth: Debug: auth client connected (pid=3334)
Apr 25 18:47:01 mail dovecot[3326]: auth: Debug: client in: AUTH#0111#011PLAIN#011service=doveadm#011debug#011resp=dGVzdHVzZXIxAHRlc3R1c2VyMQBkaWdpdGFsMTIzQSM= (previous base64 data may contain sensitive data)
Apr 25 18:47:01 mail dovecot[3326]: auth: Debug: ldap(testuser1): Performing passdb lookup
Apr 25 18:47:01 mail dovecot[3326]: auth: Debug: ldap(testuser1): bind search: base=cn=Users,dc=adsample,dc=local filter=(userPrincipalName=testuser1)
Apr 25 18:47:01 mail dovecot[3326]: auth: Debug: ldap(testuser1): no fields returned by the server
Apr 25 18:47:01 mail dovecot[3326]: auth: ldap(testuser1): unknown user (given password: パスワード)
Apr 25 18:47:01 mail dovecot[3326]: auth: Debug: ldap(testuser1): Finished passdb lookup
Apr 25 18:47:01 mail dovecot[3326]: auth: Debug: auth(testuser1): Auth request finished
Apr 25 18:47:03 mail dovecot[3326]: auth: Debug: client passdb out: FAIL#0111#011user=testuser1
「auth_debug_passwords=yes」と「auth_verbose_passwords=yes」を設定しているのでパスワード文字列が出力されています。
正しくログインできた場合のログは下記のようになります。
[root@mail ~]# tail -f /var/log/maillog
Apr 25 18:49:05 mail dovecot[3326]: auth: Debug: Loading modules from directory: /usr/lib64/dovecot/auth
Apr 25 18:49:05 mail dovecot[3326]: auth: Debug: Module loaded: /usr/lib64/dovecot/auth/lib20_auth_var_expand_crypt.so
Apr 25 18:49:05 mail dovecot[3326]: auth: Debug: Module loaded: /usr/lib64/dovecot/auth/libdriver_sqlite.so
Apr 25 18:49:05 mail dovecot[3326]: auth: Debug: Loading modules from directory: /usr/lib64/dovecot/auth
Apr 25 18:49:05 mail dovecot[3326]: auth: Debug: Module loaded: /usr/lib64/dovecot/auth/libauthdb_ldap.so
Apr 25 18:49:05 mail dovecot[3326]: auth: Debug: Read auth token secret from /run/dovecot/auth-token-secret.dat
Apr 25 18:49:06 mail dovecot[3326]: auth: Debug: ldap(/etc/dovecot/dovecot-ldap.conf.ext): LDAP initialization took 20 msecs
Apr 25 18:49:06 mail dovecot[3326]: auth: Debug: auth client connected (pid=3337)
Apr 25 18:49:06 mail dovecot[3326]: auth: Debug: client in: AUTH#0111#011PLAIN#011service=doveadm#011debug#011resp=dGVzdHVzZXIxQGFkc2FtcGxlLmxvY2FsAHRlc3R1c2VyMUBhZHNhbXBsZS5sb2NhbABkaWdpdGFsMTIzQSM= (previous base64 data may contain sensitive data)
Apr 25 18:49:06 mail dovecot[3326]: auth: Debug: ldap(testuser1@adsample.local): Performing passdb lookup
Apr 25 18:49:06 mail dovecot[3326]: auth: Debug: ldap(testuser1@adsample.local): bind search: base=cn=Users,dc=adsample,dc=local filter=(userPrincipalName=testuser1@adsample.local)
Apr 25 18:49:06 mail dovecot[3326]: auth: Debug: ldap(testuser1@adsample.local): no fields returned by the server
Apr 25 18:49:06 mail dovecot[3326]: auth: Debug: ldap(testuser1@adsample.local): result:  uid missing
Apr 25 18:49:06 mail dovecot[3326]: auth: Debug: ldap(testuser1@adsample.local): Finished passdb lookup
Apr 25 18:49:06 mail dovecot[3326]: auth: Debug: auth(testuser1@adsample.local): Auth request finished
Apr 25 18:49:06 mail dovecot[3326]: auth: Debug: client passdb out: OK#0111#011user=testuser1@adsample.local
Apr 25 18:49:06 mail dovecot[3326]: auth: Debug: master in: REQUEST#0114040032257#0113337#0111#0119908c30ac4ecc1214e5ca9f458d737ff#011session_pid=3337
Apr 25 18:49:06 mail dovecot[3326]: auth: Debug: ldap(testuser1@adsample.local): Performing userdb lookup
Apr 25 18:49:06 mail dovecot[3326]: auth: Debug: ldap(testuser1@adsample.local): user search: base=cn=Users,dc=adsample,dc=local scope=subtree filter=(userPrincipalName=testuser1@adsample.local) fields=homeDirectory,uidNumber,gidNumber
Apr 25 18:49:06 mail dovecot[3326]: auth: Debug: ldap(testuser1@adsample.local): no fields returned by the server
Apr 25 18:49:06 mail dovecot[3326]: auth: Debug: ldap(testuser1@adsample.local): result:  homeDirectory missing; uidNumber missing; gidNumber missing
Apr 25 18:49:06 mail dovecot[3326]: auth: Debug: ldap(testuser1@adsample.local): Finished userdb lookup
Apr 25 18:49:06 mail dovecot[3326]: auth: Debug: master userdb out: USER#0114040032257#011testuser1@adsample.local#011uid=1000#011gid=1000#011home=/var/mail/testuser1/#011auth_mech=PLAIN
で、/var/mail がどのようになっているかを確認すると、まだ何もない
[root@mail ~]# ls -l /var/mail/
total 0
[root@mail ~]#
telnetコマンドでPOP3ログインを手動で実施してみる
[root@mail ~]# telnet localhost 110
Trying ::1...
Connected to localhost.
Escape character is '^]'.
+OK Dovecot ready.
user testuser1
+OK
pass パスワード
+OK Logged in.
quit
+OK Logging out.
Connection closed by foreign host.
[root@mail ~]#
/var/mail/にディレクトリが作成された
[root@mail ~]# ls -l /var/mail/
total 0
drwx------. 3 vmail vmail 116 Apr 25  2025 testuser1
[root@mail ~]#
ただ、mbox形式で作成されていた
[root@mail ~]# ls -ltR /var/mail/testuser1/
/var/mail/testuser1/:
total 8
-rw-------. 1 vmail vmail 452 Apr 25  2025 dovecot.list.index.log
-rw-------. 1 vmail vmail   8 Apr 25  2025 dovecot-uidvalidity
-r--r--r--. 1 vmail vmail   0 Apr 25  2025 dovecot-uidvalidity.680b65c4
drwx------. 3 vmail vmail  19 Apr 25  2025 mailboxes

/var/mail/testuser1/mailboxes:
total 0
drwx------. 3 vmail vmail 24 Apr 25  2025 INBOX

/var/mail/testuser1/mailboxes/INBOX:
total 0
drwx------. 2 vmail vmail 31 Apr 25  2025 dbox-Mails

/var/mail/testuser1/mailboxes/INBOX/dbox-Mails:
total 4
-rw-------. 1 vmail vmail 224 Apr 25  2025 dovecot.index.log
[root@mail ~]#
maildir形式への変更
設定をみなおしてみると、RedHat手順の中で /etc/dovecot/conf.d/10-mail.conf に mail_location パラメータで 「sdbox:~」としていたところが dbox Mailbox Formatのsingle-dbox形式での保存という設定という意味だった。
設定を「mail_location = maildir:/var/mail/%n/Maildir」に変更
[root@mail dovecot]# diff -u /etc/dovecot/conf.d/10-mail.conf.org /etc/dovecot/conf.d/10-mail.conf
--- /etc/dovecot/conf.d/10-mail.conf.org        2025-04-25 03:13:54.044373479 +0900
+++ /etc/dovecot/conf.d/10-mail.conf    2025-04-30 10:59:12.661404241 +0900
@@ -27,7 +27,7 @@
 #
 # <doc/wiki/MailLocation.txt>
 #
-#mail_location =
+mail_location = maildir:/var/mail/%n/Maildir

 # If you need to set multiple mailbox locations or want to change default
 # namespace settings, you can do it by defining namespace sections.
[root@mail dovecot]# systemctl restart dovecot
[root@mail dovecot]#
とりあえずsdbox設定で作られたメールディレクトリを削除
[root@mail dovecot]# ls /var/mail/testuser2/
dovecot-uidvalidity           dovecot.list.index.log
dovecot-uidvalidity.680b6784  mailboxes
[root@mail dovecot]# rm -rf /var/mail/testuser2/
[root@mail dovecot]# ls -l /var/mail/testuser2/
ls: cannot access '/var/mail/testuser2/': No such file or directory
[root@mail dovecot]#
認証テストとpop3ログインテストを実施
[root@mail dovecot]# doveadm auth login testuser2@adsample.local
Password: パスワード
passdb: testuser2@adsample.local auth succeeded
extra fields:
  user=testuser2@adsample.local
userdb extra fields:
  testuser2@adsample.local
  uid=1000
  gid=1000
  home=/var/mail/testuser2/
  auth_mech=PLAIN
[root@mail dovecot]# ls -l /var/mail/testuser2/
ls: cannot access '/var/mail/testuser2/': No such file or directory
[root@mail dovecot]# telnet localhost 110
Trying ::1...
Connected to localhost.
Escape character is '^]'.
+OK Dovecot ready.
user testuser2@adsample.local
+OK
pass パスワード
+OK Logged in.
quit
+OK Logging out.
Connection closed by foreign host.
[root@mail dovecot]#
pop3ログイン後に maildir形式で作成されていることを確認
[root@mail dovecot]# ls -l /var/mail/testuser2/
total 4
drwx------. 5 vmail vmail 4096 Apr 30 11:00 Maildir
[root@mail dovecot]# ls -l /var/mail/testuser2/Maildir/
total 16
drwx------. 2 vmail vmail   6 Apr 30 11:00 cur
-rw-------. 1 vmail vmail  51 Apr 30 11:00 dovecot-uidlist
-rw-------. 1 vmail vmail   8 Apr 30 11:00 dovecot-uidvalidity
-r--r--r--. 1 vmail vmail   0 Apr 30 11:00 dovecot-uidvalidity.68118427
-rw-------. 1 vmail vmail 320 Apr 30 11:00 dovecot.index.log
-rw-------. 1 vmail vmail 452 Apr 30 11:00 dovecot.list.index.log
-rw-------. 1 vmail vmail   0 Apr 30 11:00 maildirfolder
drwx------. 2 vmail vmail   6 Apr 30 11:00 new
drwx------. 2 vmail vmail   6 Apr 30 11:00 tmp
[root@mail dovecot]#
ちなみに testuser1のほうはmailboxesディレクトリなどを残したままmaildirでログインしなおしてみたところ両方のディレクトリが残った状態となりました。
[root@mail dovecot]# ls -l /var/mail/
total 0
drwx------. 3 vmail vmail 116 Apr 25 19:36 testuser1
drwx------. 3 vmail vmail  21 Apr 30 11:00 testuser2
[root@mail dovecot]# ls -l /var/mail/testuser1
total 8
-rw-------. 1 vmail vmail   8 Apr 25 19:36 dovecot-uidvalidity
-r--r--r--. 1 vmail vmail   0 Apr 25 19:36 dovecot-uidvalidity.680b65c4
-rw-------. 1 vmail vmail 452 Apr 25 19:36 dovecot.list.index.log
drwx------. 3 vmail vmail  19 Apr 25 19:36 mailboxes
[root@mail dovecot]# telnet localhost 110
Trying ::1...
Connected to localhost.
Escape character is '^]'.
+OK Dovecot ready.
user testuser1@adsample.local
+OK
pass パスワード
+OK Logged in.
quit
+OK Logging out.
Connection closed by foreign host.
[root@mail dovecot]# ls -l /var/mail/testuser1
total 12
drwx------. 5 vmail vmail 4096 Apr 30 11:05 Maildir
-rw-------. 1 vmail vmail    8 Apr 25 19:36 dovecot-uidvalidity
-r--r--r--. 1 vmail vmail    0 Apr 25 19:36 dovecot-uidvalidity.680b65c4
-rw-------. 1 vmail vmail  452 Apr 25 19:36 dovecot.list.index.log
drwx------. 3 vmail vmail   19 Apr 25 19:36 mailboxes
[root@mail dovecot]#