#!/usr/bin/python

import httplib
import httplib2
import os
import random
import sys
import time

from apiclient.discovery import build
from apiclient.errors import HttpError
from apiclient.http import MediaFileUpload
from oauth2client.client import flow_from_clientsecrets
from oauth2client.file import Storage
from oauth2client.tools import argparser, run_flow


# Explicitly tell the underlying HTTP transport library not to retry, since
# we are handling retry logic ourselves.
httplib2.RETRIES = 1

# Maximum number of times to retry before giving up.
MAX_RETRIES = 10

# Always retry when these exceptions are raised.
RETRIABLE_EXCEPTIONS = (httplib2.HttpLib2Error, IOError, httplib.NotConnected,
  httplib.IncompleteRead, httplib.ImproperConnectionState,
  httplib.CannotSendRequest, httplib.CannotSendHeader,
  httplib.ResponseNotReady, httplib.BadStatusLine)

# Always retry when an apiclient.errors.HttpError with one of these status
# codes is raised.
RETRIABLE_STATUS_CODES = [500, 502, 503, 504]

# The CLIENT_SECRETS_FILE variable specifies the name of a file that contains
# the OAuth 2.0 information for this application, including its client_id and
# client_secret. You can acquire an OAuth 2.0 client ID and client secret from
# the Google Developers Console at
# https://console.developers.google.com/.
# Please ensure that you have enabled the YouTube Data API for your project.
# For more information about using OAuth2 to access the YouTube Data API, see:
#   https://developers.google.com/youtube/v3/guides/authentication
# For more information about the client_secrets.json file format, see:
#   https://developers.google.com/api-client-library/python/guide/aaa_client_secrets
CLIENT_SECRETS_FILE = "client_secrets.json"

# This OAuth 2.0 access scope allows an application to upload files to the
# authenticated user's YouTube channel, but doesn't allow other types of access.
YOUTUBE_UPLOAD_SCOPE = "https://www.googleapis.com/auth/youtube.upload"
YOUTUBE_API_SERVICE_NAME = "youtube"
YOUTUBE_API_VERSION = "v3"

# This variable defines a message to display if the CLIENT_SECRETS_FILE is
# missing.
MISSING_CLIENT_SECRETS_MESSAGE = """
WARNING: Please configure OAuth 2.0

To make this sample run you will need to populate the client_secrets.json file
found at:

   %s

with information from the Developers Console
https://console.developers.google.com/

For more information about the client_secrets.json file format, please visit:
https://developers.google.com/api-client-library/python/guide/aaa_client_secrets
""" % os.path.abspath(os.path.join(os.path.dirname(__file__),
                                   CLIENT_SECRETS_FILE))

VALID_PRIVACY_STATUSES = ("public", "private", "unlisted")


def get_authenticated_service(args):
  flow = flow_from_clientsecrets(CLIENT_SECRETS_FILE,
    scope=YOUTUBE_UPLOAD_SCOPE,
    message=MISSING_CLIENT_SECRETS_MESSAGE)

  storage = Storage("%s-oauth2.json" % sys.argv[0])
  credentials = storage.get()

  if credentials is None or credentials.invalid:
    credentials = run_flow(flow, storage, args)

  return build(YOUTUBE_API_SERVICE_NAME, YOUTUBE_API_VERSION,
    http=credentials.authorize(httplib2.Http()))

def initialize_upload(youtube, options):
  tags = None
  if options.keywords:
    tags = options.keywords.split(",")

  body=dict(
    snippet=dict(
      title=options.title,
      description=options.description,
      tags=tags,
      categoryId=options.category
    ),
    status=dict(
      privacyStatus=options.privacyStatus
    )
  )

  # Call the API's videos.insert method to create and upload the video.
  insert_request = youtube.videos().insert(
    part=",".join(body.keys()),
    body=body,
    # The chunksize parameter specifies the size of each chunk of data, in
    # bytes, that will be uploaded at a time. Set a higher value for
    # reliable connections as fewer chunks lead to faster uploads. Set a lower
    # value for better recovery on less reliable connections.
    #
    # Setting "chunksize" equal to -1 in the code below means that the entire
    # file will be uploaded in a single HTTP request. (If the upload fails,
    # it will still be retried where it left off.) This is usually a best
    # practice, but if you're using Python older than 2.6 or if you're
    # running on App Engine, you should set the chunksize to something like
    # 1024 * 1024 (1 megabyte).
    media_body=MediaFileUpload(options.file, chunksize=-1, resumable=True)
  )

  resumable_upload(insert_request)

# This method implements an exponential backoff strategy to resume a
# failed upload.
def resumable_upload(insert_request):
  response = None
  error = None
  retry = 0
  while response is None:
    try:
      print "Uploading file..."
      status, response = insert_request.next_chunk()
      if 'id' in response:
        print "Video id '%s' was successfully uploaded." % response['id']
      else:
        exit("The upload failed with an unexpected response: %s" % response)
    except HttpError, e:
      if e.resp.status in RETRIABLE_STATUS_CODES:
        error = "A retriable HTTP error %d occurred:\n%s" % (e.resp.status,
                                                             e.content)
      else:
        raise
    except RETRIABLE_EXCEPTIONS, e:
      error = "A retriable error occurred: %s" % e

    if error is not None:
      print error
      retry += 1
      if retry > MAX_RETRIES:
        exit("No longer attempting to retry.")

      max_sleep = 2 ** retry
      sleep_seconds = random.random() * max_sleep
      print "Sleeping %f seconds and then retrying..." % sleep_seconds
      time.sleep(sleep_seconds)

if __name__ == '__main__':
  argparser.add_argument("--file", required=True, help="Video file to upload")
  argparser.add_argument("--title", help="Video title", default="Test Title")
  argparser.add_argument("--description", help="Video description",
    default="Test Description")
  argparser.add_argument("--category", default="22",
    help="Numeric video category. " +
      "See https://developers.google.com/youtube/v3/docs/videoCategories/list")
  argparser.add_argument("--keywords", help="Video keywords, comma separated",
    default="")
  argparser.add_argument("--privacyStatus", choices=VALID_PRIVACY_STATUSES,
    default=VALID_PRIVACY_STATUSES[0], help="Video privacy status.")
  args = argparser.parse_args()

  if not os.path.exists(args.file):
    exit("Please specify a valid file using the --file= parameter.")

  youtube = get_authenticated_service(args)
  try:
    initialize_upload(youtube, args)
  except HttpError, e:
    print "An HTTP error %d occurred:\n%s" % (e.resp.status, e.content)
そして実行!
-bash-4.2$ ./youtube-upload
Traceback (most recent call last):
  File "./youtube-upload", line 4, in <module>
    import httplib2
ImportError: No module named httplib2
-bash-4.2$
-bash-4.2$ ./youtube-upload
Traceback (most recent call last):
  File "./youtube-upload", line 10, in <module>
    from apiclient.discovery import build
ImportError: No module named apiclient.discovery
-bash-4.2$
[root@server ~]# pip install google-api-python-client
Collecting google-api-python-client
  Downloading https://files.pythonhosted.org/packages/5b/ba/c4e47e2fdd945145ddb10db06dd29af19b01f6e6d7452348b9bf10375ee9/google-api-python-client-1.7.9.tar.gz (142kB)
Installing collected packages: pyasn1, pyasn1-modules, cachetools, rsa, google-auth, google-auth-httplib2, uritemplate, google-api-python-client
  Running setup.py install for google-api-python-client ... done
Successfully installed cachetools-3.1.1 google-api-python-client-1.7.9 google-auth-1.6.3 google-auth-httplib2-0.0.3 pyasn1-0.4.5 pyasn1-modules-0.2.5 rsa-4.0 uritemplate-3.0.0
You are using pip version 8.1.2, however version 19.1.1 is available.
You should consider upgrading via the 'pip install --upgrade pip' command.
[root@server ~]#
で、改めてスクリプトを実行してみる。
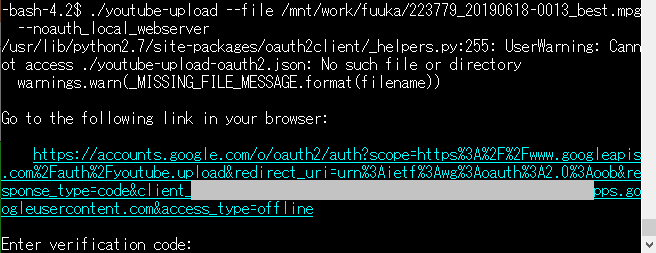
-bash-4.2$ ./youtube-upload --file /mnt/work/fuuka/223779_20190618-0013_best.mpg
The client secrets were invalid:
('Error opening file', 'client_secrets.json', 'No such file or directory', 2)

WARNING: Please configure OAuth 2.0

To make this sample run you will need to populate the client_secrets.json file
found at:

   /mnt/work/youtube/client_secrets.json

with information from the Developers Console
https://console.developers.google.com/

For more information about the client_secrets.json file format, please visit:
https://developers.google.com/api-client-library/python/guide/aaa_client_secrets

-bash-4.2$
当然のエラー。
client_secrets.json というファイルに認証情報を記載しなければならないようだ。
「Google API Console」にアクセスして、新規プロジェクトを作成。 認証情報タブから「OauthクライアントIDの作成」を選び、「アプリケーションの種類:その他」で作成します。 作成すると、jsonファイルがダウンロードできようになりますので、それをダウンロードし、client_secrets.json という名前で保存します。
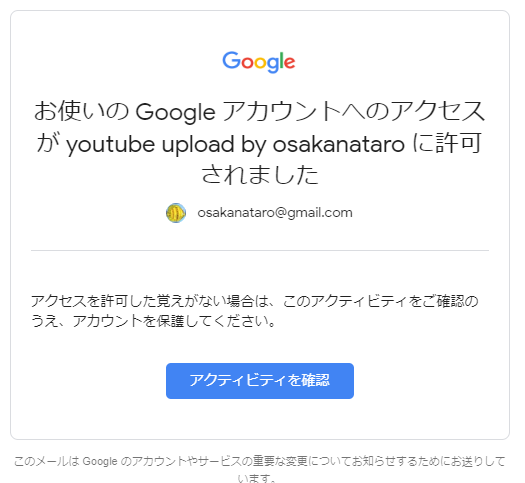
また、下記の様なメールがGoogleアカウントのメールに届きます。(「youtube upload by osakanataro」という文字列は、Google API Consoleで設定したものです)
これで認証が終わると、ファイルアップロードが出来るようになります。
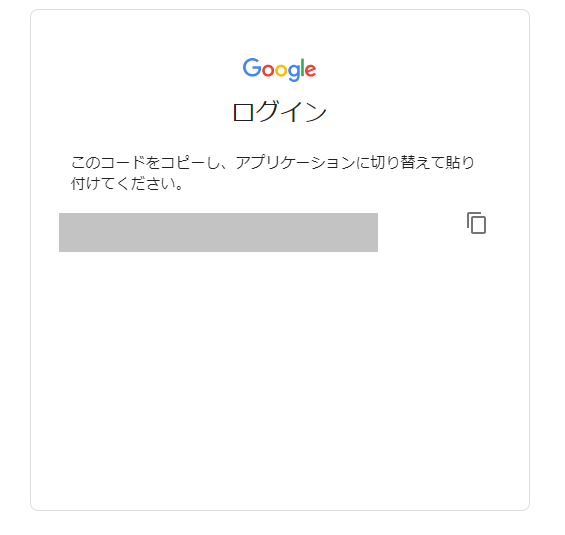
-bash-4.2$ ./youtube-upload --file /mnt/work/fuuka/223779_20190618-0013_best.mpg --noauth_local_webserver
Uploading file...
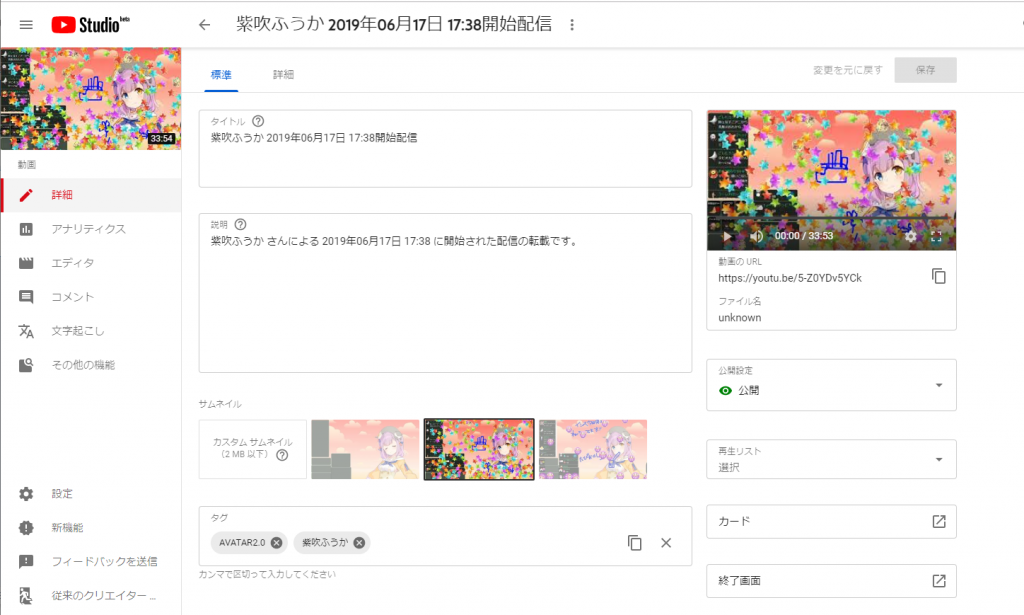
Video id 'IAHhZlSXoDk' was successfully uploaded.
-bash-4.2$
Param([string]$srv,$port=135,$timeout=3000,[switch]$verbose)

# Test-Port.ps1
# Does a TCP connection on specified port (135 by default)

$ErrorActionPreference = "SilentlyContinue"

# Create TCP Client
$tcpclient = new-Object system.Net.Sockets.TcpClient

# Tell TCP Client to connect to machine on Port
$iar = $tcpclient.BeginConnect($srv,$port,$null,$null)

# Set the wait time
$wait = $iar.AsyncWaitHandle.WaitOne($timeout,$false)

# Check to see if the connection is done
if(!$wait)
{
    # Close the connection and report timeout
    $tcpclient.Close()
    if($verbose){Write-Host "Connection Timeout"}
    Return $false
}
else
{
    # Close the connection and report the error if there is one
    $error.Clear()
    $tcpclient.EndConnect($iar) | out-Null
    if(!$?){if($verbose){write-host $error[0]};$failed = $true}
    $tcpclient.Close()
}

# Return $true if connection Establish else $False
if($failed){return $false}else{return $true}


![[商品価格に関しましては、リンクが作成された時点と現時点で情報が変更されている場合がございます。]](https://hbb.afl.rakuten.co.jp/hgb/18898f3b.d3b291d1.18898f3c.ffcf9d0f/?me_id=1265672&item_id=10001680&m=https%3A%2F%2Fthumbnail.image.rakuten.co.jp%2F%400_mall%2Fdirectplus%2Fcabinet%2Fnote%2Fhp15-db0000%2Fhp15-db0000-3w-p1.jpg%3F_ex%3D80x80&pc=https%3A%2F%2Fthumbnail.image.rakuten.co.jp%2F%400_mall%2Fdirectplus%2Fcabinet%2Fnote%2Fhp15-db0000%2Fhp15-db0000-3w-p1.jpg%3F_ex%3D240x240&s=240x240&t=picttext "[商品価格に関しましては、リンクが作成された時点と現時点で情報が変更されている場合がございます。]")