[root@openvz t]# yum search vzkernel
Last metadata expiration check: 0:19:37 ago on Mon 11 Oct 2021 04:24:09 PM JST.
No matches found.
[root@openvz t]#
登録されているレポジトリを確認
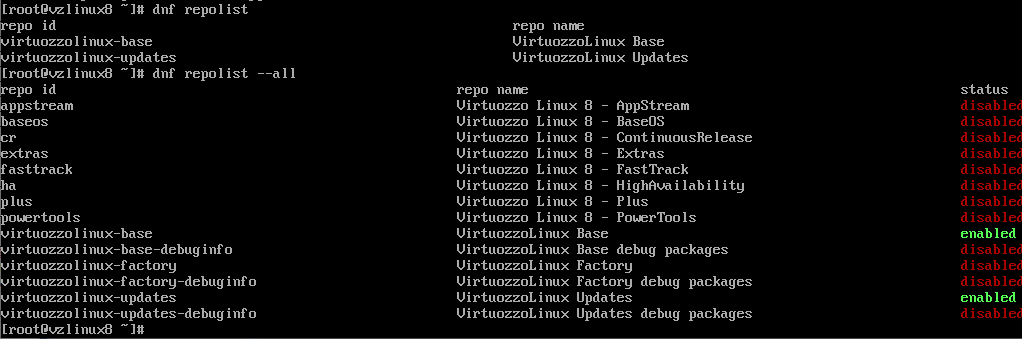
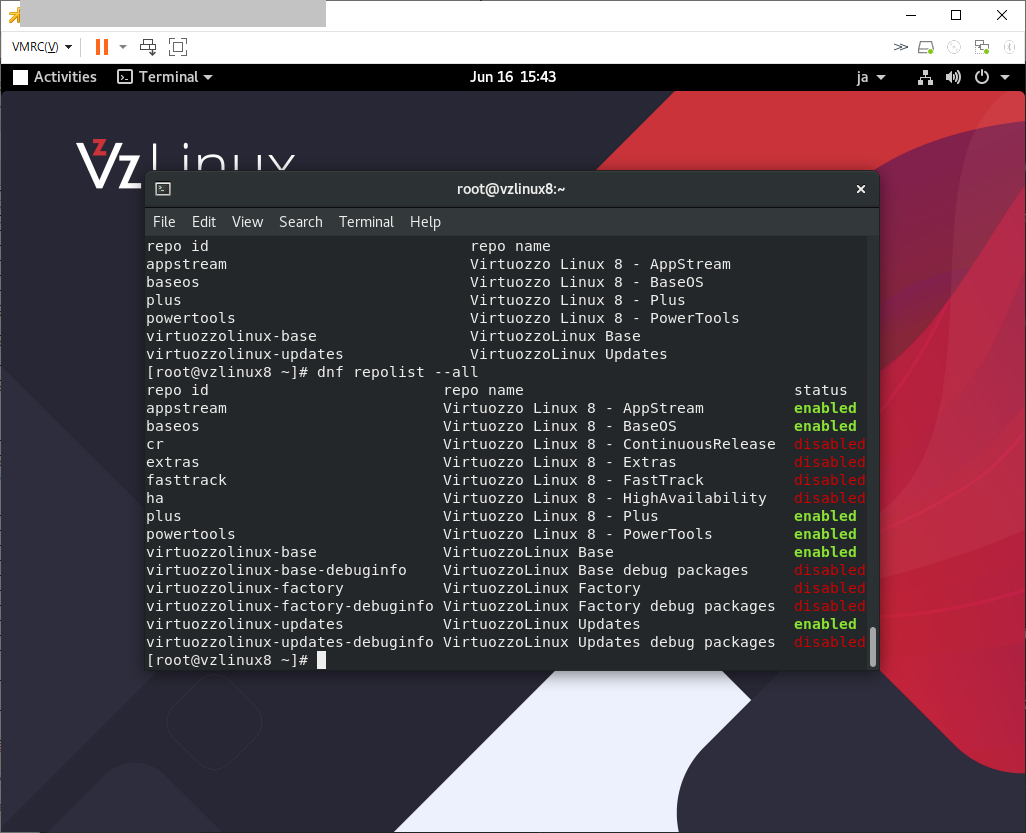
[root@openvz ~]# dnf repolist --all
repo id                                 repo name                       status
appstream                               Virtuozzo Linux 8 - AppStream   disabled
baseos                                  Virtuozzo Linux 8 - BaseOS      disabled
cr                                      Virtuozzo Linux 8 - ContinuousR disabled
extras                                  Virtuozzo Linux 8 - Extras      disabled
factory                                 Build Factory packages for Cont disabled
factory-debuginfo                       Debug packages for Containers f disabled
fasttrack                               Virtuozzo Linux 8 - FastTrack   disabled
ha                                      Virtuozzo Linux 8 - HighAvailab disabled
obsoleted_tmpls                         Virtuozzo obsoleted EZ-template disabled
openvz-os                               OpenVZ                          enabled
openvz-os-debuginfo                     OpenVZ os Debug packages        disabled
openvz-updates                          OpenVZ Updates                  enabled
openvz-updates-debuginfo                OpenVZ updates Debug packages   disabled
plus                                    Virtuozzo Linux 8 - Plus        disabled
powertools                              Virtuozzo Linux 8 - PowerTools  disabled
virtuozzolinux-base                     VirtuozzoLinux Base             enabled
virtuozzolinux-base-debuginfo           VirtuozzoLinux Base debug packa disabled
virtuozzolinux-factory                  VirtuozzoLinux Factory          disabled
virtuozzolinux-factory-debuginfo        VirtuozzoLinux Factory debug pa disabled
virtuozzolinux-openvz-factory           VirtuozzoLinux Factory          disabled
virtuozzolinux-openvz-factory-debuginfo VirtuozzoLinux Factory debug pa disabled
virtuozzolinux-updates                  VirtuozzoLinux Updates          enabled
virtuozzolinux-updates-debuginfo        VirtuozzoLinux Updates debug pa disabled
vz7-guest-tools                         Virtuozzo Guest Tools for VHS7  disabled
vz8-guest-tools                         Virtuozzo Guest Tools for VHS8  disabled
[root@openvz ~]#
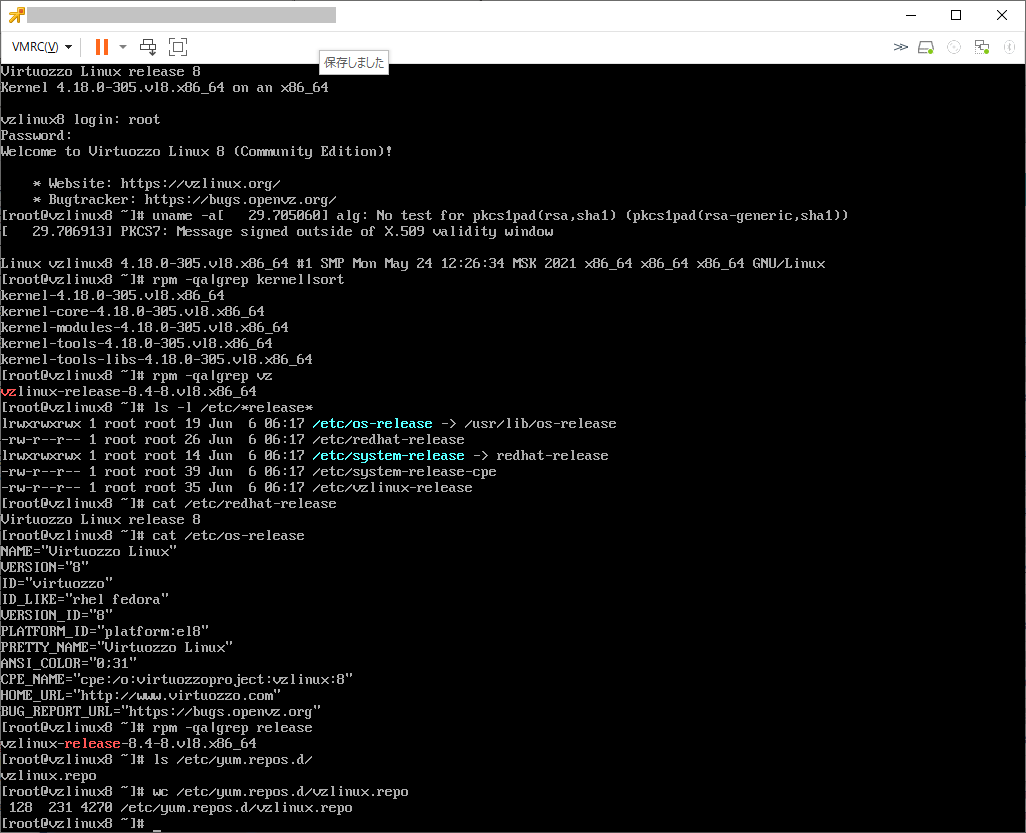
/etc/yum.repos.d/ には下記のファイルがあった
[root@openvz ~]# ls -l /etc/yum.repos.d/ total 24 -rw-r–r– 1 root root 1276 Aug 1 15:42 factory.repo -rw-r–r– 1 root root 300 Aug 1 15:42 obsoleted_tmpls.repo -rw-r–r– 1 root root 1208 Aug 1 15:42 openvz.repo -rw-r–r– 1 root root 297 Sep 29 19:35 vz-guest-tools.repo -rw-r–r– 1 root root 7770 Oct 11 16:19 vzlinux.repo [root@openvz ~]#
各ファイルを確認してみる
[root@openvz ~]# cat /etc/yum.repos.d/factory.repo
# These repositories are for internal use by developers only
# Enable them on your own risk!!!

[factory]
name=Build Factory packages for Containers
mirrorlist=http://download.openvz.org/virtuozzo/mirrorlists/8.0/factory-os.mirrorlist
#baseurl=http://download.openvz.org/virtuozzo/factory/x86_64/os/
enabled=0
gpgcheck=1
module_hotfixes=True
gpgkey=file:///etc/pki/rpm-gpg/RPM-GPG-KEY-Virtuozzo-8

[factory-debuginfo]
name=Debug packages for Containers from Build Factory
mirrorlist=http://download.openvz.org/virtuozzo/mirrorlists/8.0/factory-debug.mirrorlist
#baseurl=http://download.openvz.org/virtuozzo/factory/x86_64/debug/
enabled=0
gpgcheck=0
gpgkey=file:///etc/pki/rpm-gpg/RPM-GPG-KEY-Virtuozzo-8

[virtuozzolinux-openvz-factory]
name=VirtuozzoLinux Factory
mirrorlist=http://repo.virtuozzo.com/vzlinux/mirrorlist/mirrors-8-factory
#baseurl=http://repo.virtuozzo.com/vzlinux/8/$basearch/factory/
enabled=0
gpgcheck=1
gpgkey=file:///etc/pki/rpm-gpg/VZLINUX_GPG_KEY

[virtuozzolinux-openvz-factory-debuginfo]
name=VirtuozzoLinux Factory debug packages
mirrorlist=http://repo.virtuozzo.com/vzlinux/mirrorlist/mirrors-8-factory-debug
#baseurl=http://repo.virtuozzo.com/vzlinux/8/$basearch/factory-debug/
enabled=0
gpgcheck=1
gpgkey=file:///etc/pki/rpm-gpg/VZLINUX_GPG_KEY
[root@openvz ~]# cat /etc/yum.repos.d/obsoleted_tmpls.repo
[obsoleted_tmpls]
name=Virtuozzo obsoleted EZ-templates
mirrorlist=http://download.openvz.org/virtuozzo/mirrorlists/7.0/obsoleted_tmpls.mirrorlist
#baseurl=http://download.openvz.org/virtuozzo/obsoleted_tmpls/7.0/x86_64/os/
enabled=0
gpgcheck=1
gpgkey=file:///etc/pki/rpm-gpg/RPM-GPG-KEY-Virtuozzo-7
[root@openvz ~]# cat /etc/yum.repos.d/openvz.repo
[openvz-os]
name=OpenVZ
mirrorlist=http://download.openvz.org/virtuozzo/mirrorlists/8.0/releases-os.mirrorlist
#baseurl=http://download.openvz.org/virtuozzo/releases/8.0/x86_64/os/
enabled=1
gpgcheck=1
module_hotfixes=True
priority=50
gpgkey=file:///etc/pki/rpm-gpg/RPM-GPG-KEY-Virtuozzo-8

[openvz-updates]
name=OpenVZ Updates
mirrorlist=http://download.openvz.org/virtuozzo/mirrorlists/8.0/updates-os.mirrorlist
#baseurl=http://download.openvz.org/virtuozzo/updates/8.0/x86_64/os/
enabled=1
gpgcheck=1
module_hotfixes=True
priority=50
gpgkey=file:///etc/pki/rpm-gpg/RPM-GPG-KEY-Virtuozzo-8

[openvz-os-debuginfo]
name=OpenVZ os Debug packages
mirrorlist=http://download.openvz.org/virtuozzo/mirrorlists/8.0/releases-debug.mirrorlist
#baseurl=http://download.openvz.org/virtuozzo/releases/8.0/x86_64/debug/
enabled=0
gpgcheck=1
priority=50
gpgkey=file:///etc/pki/rpm-gpg/RPM-GPG-KEY-Virtuozzo-8

[openvz-updates-debuginfo]
name=OpenVZ updates Debug packages
mirrorlist=http://download.openvz.org/virtuozzo/mirrorlists/8.0/updates-debug.mirrorlist
#baseurl=http://download.openvz.org/virtuozzo/updates/8.0/x86_64/debug/
enabled=0
gpgcheck=1
priority=50
gpgkey=file:///etc/pki/rpm-gpg/RPM-GPG-KEY-Virtuozzo-8
[root@openvz ~]# cat /etc/yum.repos.d/vz-guest-tools.repo
[vz7-guest-tools]
name=Virtuozzo Guest Tools for VHS7
baseurl=http://repo.virtuozzo.com/vz-guest-tools-lin/vz7/latest/centos8/
gpgcheck=0
enabled=0

[vz8-guest-tools]
name=Virtuozzo Guest Tools for VHS8
baseurl=http://repo.virtuozzo.com/vz-guest-tools-lin/vz8/latest/centos8/
gpgcheck=0
enabled=0
[root@openvz ~]# cat /etc/yum.repos.d/vzlinux.repo
# virtuozzolinux.repo
#
# The mirror system uses the connecting IP address of the client and the
# update status of each mirror to pick mirrors that are updated to and
# geographically close to the client.  You should use this for VirtuozzoLinux updates
# unless you are manually picking other mirrors.
#
[virtuozzolinux-base]
name=VirtuozzoLinux Base
exclude=kernel,kernel-core,kernel-devel,kernel-debug,libvirt,seabios,libguestfs,libguestfs-appliance,python3-libvirt,OVMF,anaconda*,kdump-anaconda-addon,blivet-data,python3-blivet,criu,crit,libcompel,python-criu,python3-criu,disp-helper-scripts-vz
mirrorlist=https://repo.virtuozzo.com/vzlinux/mirrorlist/mirrors-8-os
#baseurl=https://repo.virtuozzo.com/vzlinux/8/$basearch/os/
enabled=1
gpgcheck=1
priority=90
gpgkey=file:///etc/pki/rpm-gpg/VZLINUX_GPG_KEY file:///etc/pki/rpm-gpg/RPM-GPG-KEY-Virtuozzo-8

#released updates
[virtuozzolinux-updates]
name=VirtuozzoLinux Updates
exclude=kernel,kernel-core,kernel-devel,kernel-debug,libvirt,seabios,libguestfs,libguestfs-appliance,python3-libvirt,OVMF,anaconda*,kdump-anaconda-addon,blivet-data,python3-blivet,criu,crit,libcompel,python-criu,python3-criu,disp-helper-scripts-vz
mirrorlist=https://repo.virtuozzo.com/vzlinux/mirrorlist/mirrors-8-updates
#baseurl=https://repo.virtuozzo.com/vzlinux/8/$basearch/updates/
enabled=1
gpgcheck=1
priority=90
gpgkey=file:///etc/pki/rpm-gpg/VZLINUX_GPG_KEY file:///etc/pki/rpm-gpg/RPM-GPG-KEY-Virtuozzo-8

[virtuozzolinux-base-debuginfo]
name=VirtuozzoLinux Base debug packages
exclude=kernel,kernel-core,kernel-devel,kernel-debug,libvirt,seabios,libguestfs,libguestfs-appliance,python3-libvirt,OVMF,anaconda*,kdump-anaconda-addon,blivet-data,python3-blivet,criu,crit,libcompel,python-criu,python3-criu,disp-helper-scripts-vz
mirrorlist=https://repo.virtuozzo.com/vzlinux/mirrorlist/mirrors-8-os-debug
#baseurl=https://repo.virtuozzo.com/vzlinux/8/$basearch/debug/
enabled=0
gpgcheck=1
gpgkey=file:///etc/pki/rpm-gpg/VZLINUX_GPG_KEY file:///etc/pki/rpm-gpg/RPM-GPG-KEY-Virtuozzo-8

[virtuozzolinux-updates-debuginfo]
name=VirtuozzoLinux Updates debug packages
exclude=kernel,kernel-core,kernel-devel,kernel-debug,libvirt,seabios,libguestfs,libguestfs-appliance,python3-libvirt,OVMF,anaconda*,kdump-anaconda-addon,blivet-data,python3-blivet,criu,crit,libcompel,python-criu,python3-criu,disp-helper-scripts-vz
mirrorlist=https://repo.virtuozzo.com/vzlinux/mirrorlist/mirrors-8-updates-debug
#baseurl=https://repo.virtuozzo.com/vzlinux/8/$basearch/updates-debug/
enabled=0
gpgcheck=1
gpgkey=file:///etc/pki/rpm-gpg/VZLINUX_GPG_KEY file:///etc/pki/rpm-gpg/RPM-GPG-KEY-Virtuozzo-8

# These -factory repositories are for internal use by developers only
# Enable them on your own risk!!!
[virtuozzolinux-factory]
name=VirtuozzoLinux Factory
exclude=kernel,kernel-core,kernel-devel,kernel-debug,libvirt,seabios,libguestfs,libguestfs-appliance,python3-libvirt,OVMF,anaconda*,kdump-anaconda-addon,blivet-data,python3-blivet,criu,crit,libcompel,python-criu,python3-criu,disp-helper-scripts-vz
mirrorlist=https://repo.virtuozzo.com/vzlinux/mirrorlist/mirrors-8-factory
#baseurl=https://repo.virtuozzo.com/vzlinux/8/$basearch/factory/
priority=90
enabled=0
gpgcheck=0

[virtuozzolinux-factory-debuginfo]
name=VirtuozzoLinux Factory debug packages
exclude=kernel,kernel-core,kernel-devel,kernel-debug,libvirt,seabios,libguestfs,libguestfs-appliance,python3-libvirt,OVMF,anaconda*,kdump-anaconda-addon,blivet-data,python3-blivet,criu,crit,libcompel,python-criu,python3-criu,disp-helper-scripts-vz
mirrorlist=https://repo.virtuozzo.com/vzlinux/mirrorlist/mirrors-8-factory-debug
#baseurl=https://repo.virtuozzo.com/vzlinux/8/$basearch/factory-debug/
priority=90
enabled=0
gpgcheck=0


#
# Mimic names & ids of CentOS repos
#

[appstream]
name=Virtuozzo Linux $releasever - AppStream
exclude=kernel,kernel-core,kernel-devel,kernel-debug,libvirt,seabios,libguestfs,libguestfs-appliance,python3-libvirt,OVMF,anaconda*,kdump-anaconda-addon,blivet-data,python3-blivet,criu,crit,libcompel,python-criu,python3-criu,disp-helper-scripts-vz
mirrorlist=https://repo.virtuozzo.com/vzlinux/mirrorlist/mirrors-8-os
#baseurl=https://repo.virtuozzo.com/vzlinux/8/$basearch/os/
gpgcheck=1
enabled=0
gpgkey=file:///etc/pki/rpm-gpg/VZLINUX_GPG_KEY

[baseos]
name=Virtuozzo Linux $releasever - BaseOS
exclude=kernel,kernel-core,kernel-devel,kernel-debug,libvirt,seabios,libguestfs,libguestfs-appliance,python3-libvirt,OVMF,anaconda*,kdump-anaconda-addon,blivet-data,python3-blivet,criu,crit,libcompel,python-criu,python3-criu,disp-helper-scripts-vz
mirrorlist=https://repo.virtuozzo.com/vzlinux/mirrorlist/mirrors-8-os
#baseurl=https://repo.virtuozzo.com/vzlinux/8/$basearch/os/
gpgcheck=1
enabled=0
gpgkey=file:///etc/pki/rpm-gpg/VZLINUX_GPG_KEY

[cr]
name=Virtuozzo Linux $releasever - ContinuousRelease
exclude=kernel,kernel-core,kernel-devel,kernel-debug,libvirt,seabios,libguestfs,libguestfs-appliance,python3-libvirt,OVMF,anaconda*,kdump-anaconda-addon,blivet-data,python3-blivet,criu,crit,libcompel,python-criu,python3-criu,disp-helper-scripts-vz
mirrorlist=https://repo.virtuozzo.com/vzlinux/mirrorlist/mirrors-8-os
#baseurl=https://repo.virtuozzo.com/vzlinux/8/$basearch/os/
gpgcheck=1
enabled=0
gpgkey=file:///etc/pki/rpm-gpg/VZLINUX_GPG_KEY

[extras]
name=Virtuozzo Linux $releasever - Extras
exclude=kernel,kernel-core,kernel-devel,kernel-debug,libvirt,seabios,libguestfs,libguestfs-appliance,python3-libvirt,OVMF,anaconda*,kdump-anaconda-addon,blivet-data,python3-blivet,criu,crit,libcompel,python-criu,python3-criu,disp-helper-scripts-vz
mirrorlist=https://repo.virtuozzo.com/vzlinux/mirrorlist/mirrors-8-os
#baseurl=https://repo.virtuozzo.com/vzlinux/8/$basearch/os/
gpgcheck=1
enabled=0
gpgkey=file:///etc/pki/rpm-gpg/VZLINUX_GPG_KEY

[fasttrack]
name=Virtuozzo Linux $releasever - FastTrack
exclude=kernel,kernel-core,kernel-devel,kernel-debug,libvirt,seabios,libguestfs,libguestfs-appliance,python3-libvirt,OVMF,anaconda*,kdump-anaconda-addon,blivet-data,python3-blivet,criu,crit,libcompel,python-criu,python3-criu,disp-helper-scripts-vz
mirrorlist=https://repo.virtuozzo.com/vzlinux/mirrorlist/mirrors-8-os
#baseurl=https://repo.virtuozzo.com/vzlinux/8/$basearch/os/
gpgcheck=1
enabled=0
gpgkey=file:///etc/pki/rpm-gpg/VZLINUX_GPG_KEY

[ha]
name=Virtuozzo Linux $releasever - HighAvailability
exclude=kernel,kernel-core,kernel-devel,kernel-debug,libvirt,seabios,libguestfs,libguestfs-appliance,python3-libvirt,OVMF,anaconda*,kdump-anaconda-addon,blivet-data,python3-blivet,criu,crit,libcompel,python-criu,python3-criu,disp-helper-scripts-vz
mirrorlist=https://repo.virtuozzo.com/vzlinux/mirrorlist/mirrors-8-os
#baseurl=https://repo.virtuozzo.com/vzlinux/8/$basearch/os/
gpgcheck=1
enabled=0
gpgkey=file:///etc/pki/rpm-gpg/VZLINUX_GPG_KEY

[plus]
name=Virtuozzo Linux $releasever - Plus
exclude=kernel,kernel-core,kernel-devel,kernel-debug,libvirt,seabios,libguestfs,libguestfs-appliance,python3-libvirt,OVMF,anaconda*,kdump-anaconda-addon,blivet-data,python3-blivet,criu,crit,libcompel,python-criu,python3-criu,disp-helper-scripts-vz
mirrorlist=https://repo.virtuozzo.com/vzlinux/mirrorlist/mirrors-8-os
#baseurl=https://repo.virtuozzo.com/vzlinux/8/$basearch/os/
gpgcheck=1
enabled=0
gpgkey=file:///etc/pki/rpm-gpg/VZLINUX_GPG_KEY

[powertools]
name=Virtuozzo Linux $releasever - PowerTools
exclude=kernel,kernel-core,kernel-devel,kernel-debug,libvirt,seabios,libguestfs,libguestfs-appliance,python3-libvirt,OVMF,anaconda*,kdump-anaconda-addon,blivet-data,python3-blivet,criu,crit,libcompel,python-criu,python3-criu,disp-helper-scripts-vz
mirrorlist=https://repo.virtuozzo.com/vzlinux/mirrorlist/mirrors-8-os
#baseurl=https://repo.virtuozzo.com/vzlinux/8/$basearch/os/
gpgcheck=1
enabled=0
gpgkey=file:///etc/pki/rpm-gpg/VZLINUX_GPG_KEY
[root@openvz ~]#
New Enterprise Repository
Proxmox Server Solutions – maintainer of the Proxmox VE repositories – introduces two new package repositories named “pve-enterprise” and “pve-no-subscription”. Beginning with Proxmox VE 3.1, the default repository is the Proxmox VE Enterprise repository. It allows secure access to stable updates, security patches and bug-fixes and is available to subscription users only. Proxmox VE users who do not want to use the subscription service can access the packages via the “pve-no-subscription” repository. These packages are not heavily tested, therefore the No-subscription repository is not recommended for production servers.
いままでは、サポートを買わなくても、ソフトウェア更新は普通にあるし、特に問題を感じなかったのですが、さすがにアレだったようで、「無償ユーザ向けソフトウェア更新(Proxmox VE No-Subscription Repository)」と「有償ユーザ向けソフトウェア更新(Proxmox VE Enterprise Repository)」に分割されました。