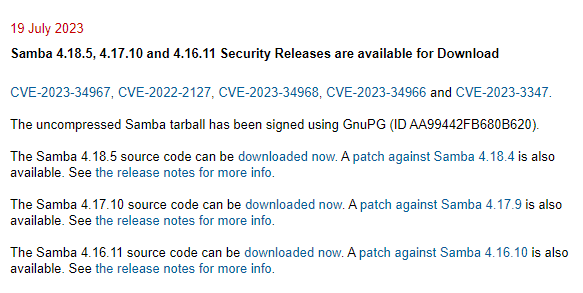
aliexpressでM.2 2242サイズのSATAとNVMeを買ってみた

KingSpec M.2 NVMe 2242サイズ編

Orange Pi 5にM.2 NVMeの2242サイズが搭載できる、というのでaliexpressで探してみた。

KingSpecというところでM-keyのNVMe 512GBが$34.54というお値段だったので買ってみた。

KingSpec M.2 SSD M2 NVME 128GB 256GB 512GB 1TB Ssd M.2 PCIe 3.0 Drive Solid SSD Disk NMVE Hard Drive 2242 for Notebook Desktop

2022/11/19に発注して、2022/12/04到着。

両面にシールが貼ってあるタイプだった

まだOrange Pi 5は届いてないので、外付けケースを使って全領域書き込み/読み込みテストを行い、容量偽装はないことは確認済

M.2 SATA 2242サイズ編

FUTRO MU937がM.2 SATA 2242サイズだったので、aliexpressで探してみた

KingSpec M.2 SATA 512GB $30.04
GUDGA M.2 SATA 512GB $28.20

2022年12月10日に別のセラーにそれぞれ発注入れたら、どちらもAliexpress Standard Shipping→クロネコ配送で12月17日に到着しました。

箱はNVMe/SATAと2280/2242共通でシールによってわけている感じですね。

中身は、てっきりどちらも同じ基板かと思ったのですが、異なる基板でびっくりしました。

どちらも容量偽装はなくきちんと書き込みが出来ています。

耐久度や速度については気にしていません・・・

書き込みテストの仕様について

さすがに容量偽装はないだろう、と思ったものの F3 – Fight Flash Fraud というのを使って全領域に対する書き込み/読み込みテストを実施しています。

ファイルシステムはLinuxからアクセスできればなんでも良いようで、NTFSとext4で動かしてみたことがあります。

今回は該当M.2をUSB接続の外付けケースに入れた上でWindows 11でパーテーションを切ってNTFSでフォーマットしてから、Ubuntu 20.04マシンにさして「./log-f3wr ログファイル名.txt /mnt/test/」 という感じで実行しています。

Ubuntu 20.04マシンの性能があまりよくないので、たぶん、そこで速度上限がかかってると思われます。

その結果・・・ついでに最近計測した他のSSDも掲載

メーカ製品書き込み速度読み込み速度
KingSpecM.2 NVMe 2242 512GB23.16 MB/s37.54 MB/s
KingSpecM.2 SATA 2242 512GB21.50 MB/s39.51 MB/s
GUDGAM.2 SATA 2242 512GB23.09 MB/s39.54 MB/s
WINTEN2.5インチ SATA WT200 1TB29.67 MB/s40.08 MB/s
WINTENM.2 SATA 2280 512GB21.98 MB/s39.53 MB/s
IntelM.2 NVMe 2280 760p 256GB25.16 MB/s38.67 MB/s

まあ、たぶん使用した機器の上限速度っぽいが出てる感じですね。

Windows ServerからNetAppに対してsshでコマンドを実行させる

Windows Server 2019からNetAppに対してsshを実行するにはTeraTermやputtyをインストールしないとダメなのかなぁ、と思いつつ、PowerShellで「ssh」と実行してみると、OpenSSH 7.7p1がインストールされていた。

PS C:\Users\Administrator> ssh
usage: ssh [-46AaCfGgKkMNnqsTtVvXxYy] [-B bind_interface]
           [-b bind_address] [-c cipher_spec] [-D [bind_address:]port]
           [-E log_file] [-e escape_char] [-F configfile] [-I pkcs11]
           [-i identity_file] [-J [user@]host[:port]] [-L address]
           [-l login_name] [-m mac_spec] [-O ctl_cmd] [-o option] [-p port]
           [-Q query_option] [-R address] [-S ctl_path] [-W host:port]
           [-w local_tun[:remote_tun]] destination [command]
PS C:\Users\Administrator> ssh -V
OpenSSH_for_Windows_7.7p1, LibreSSL 2.6.5
PS C:\Users\Administrator>

じゃあ、Windows ServerからNetAppに対してタスクスケジューラから何らかの処理を実行させることが可能なのか、ということで手法検討

Windowsサーバ上で鍵作成

まずは、ONTAPに公開鍵認証でログインするための設定を実施

「ssh-keygen」コマンドを実行して、鍵を作成

PS C:\Users\Administrator> ssh-keygen
Generating public/private rsa key pair.
Enter file in which to save the key (C:\Users\Administrator/.ssh/id_rsa):
Created directory 'C:\Users\Administrator/.ssh'.
Enter passphrase (empty for no passphrase):
Enter same passphrase again:
Your identification has been saved in C:\Users\Administrator/.ssh/id_rsa.
Your public key has been saved in C:\Users\Administrator/.ssh/id_rsa.pub.
The key fingerprint is:
SHA256:Eomw4OJ5tGv2Nx0HkGCeaRT5PxBU3krAixd96aCIkJU administrator@WindowsServer
The key's randomart image is:
+---[RSA 2048]----+
|. +..=*o+.  .    |
|.+ E+ooBoo.o     |
|..o.o=* *o+.     |
|o o.oo B....     |
| o o  o S..      |
|  . .  . + .     |
|   +    . +      |
|  o .  o .       |
|     .. .        |
+----[SHA256]-----+
PS C:\Users\Administrator>

実行したユーザのホームディレクトリに.sshディレクトリが作成され、id_rsaとid_rsa.pubが作成された。

このうち使うのはid_rsa.pub の中身

「notepad .ssh\id_rsa.pub」などを実行して内容を確認する。

NetApp上に公開鍵でログインできるユーザを設定

次にNetAppにログインして、現在のユーザ一覧を確認する。

「security login show -vserver クラスタ名」を実行する。

netapp::> security login show -vserver netapp

Vserver: netapp
                                                                 Second
User/Group                 Authentication                 Acct   Authentication
Name           Application Method        Role Name        Locked Method
-------------- ----------- ------------- ---------------- ------ --------------
admin          console     password      admin            no     none
admin          http        password      admin            no     none
admin          ontapi      password      admin            no     none
admin          service-processor
                           password      admin            no     none
admin          ssh         password      admin            no     none
autosupport    console     password      autosupport      no     none
6 entries were displayed.

netapp::>

現状は公開鍵認証(publickey)でログインできるユーザが設定されていません。

現状あるadminユーザに対して、公開鍵認証でもログインできるように設定するには「security login create -user admin -application ssh -authentication-method publickey -role admin」と実行します

netapp::> security login create -user admin -application ssh -authentication-method publickey -role admin
Warning: To use public-key authentication, you must create a public key for user "admin".

netapp::>

上記で警告が出ていますが、これは現状該当するユーザ用の公開鍵が登録されていないためのものです。

再度「security login show -vserver クラスタ名」を実行すると、publickeyの登録が増えていることが確認出来ます。

netapp::> security login show -vserver netapp

Vserver: netapp
                                                                 Second
User/Group                 Authentication                 Acct   Authentication
Name           Application Method        Role Name        Locked Method
-------------- ----------- ------------- ---------------- ------ --------------
admin          console     password      admin            no     none
admin          http        password      admin            no     none
admin          ontapi      password      admin            no     none
admin          service-processor
                           password      admin            no     none
admin          ssh         password      admin            no     none
admin          ssh         publickey     admin            -      none
autosupport    console     password      autosupport      no     none
7 entries were displayed.

netapp::>

次に公開鍵を登録するので、まずは現在の公開鍵登録状況を「security login publickey show」を実行して確認します。

netapp::> security login publickey show
This table is currently empty.

netapp::>

上記の場合はまだ何も登録されていません。

ここで先ほど作成したid_rsa.pubの中身を登録します。

「security login publickey create -username admin -index 0 -publickey “<id_rsa.pubの中身>”」

netapp::> security login publickey create -username admin -index 0 -publickey "ssh-rsa AAAAB3NzaC1yc2EAAAADAQABAAABAQCYShjYkl1hs/JlSSayuyAeL/5zlmGCQ15Z0c1BiJ8Hi3/fjEM0IjuJme19J1xM5M9UpdvdI2SA/Vtanidfwx231d2pXsveniT4H3OJApgKRTE7xtsjAtg1El2rNbm0C7qgMw4p0tsjp2ZSAY2QkQBoUzgBfTfOYWWR6V+D3PyU9N9AF9VIqB6d+yEDxg9GOe76ILzKB9Wo3F8t0p+OtGU9C1gAAPndvoV+7yepoS2DSu8ft8mRGL6aTFQDMbhqEYPKZx2Gx2XqfnZA1bFggntsWWtg3TGLmCOww8RLd0CIhMfl8aJJuTmjjDJh3tN9BZx9kNjj6yF8Irxjntih9ejH administrator@WindowsServer"

netapp::> security login publickey show

Vserver: netapp
UserName: admin            Index: 0
Public Key:
ssh-rsa AAAAB3NzaC1yc2EAAAADAQABAAABAQCYShjYkl1hs/JlSSayuyAeL/5zlmGCQ15Z0c1BiJ8Hi3/fjEM0IjuJme19J1xM5M9UpdvdI2SA/Vtanidfwx231d2pXsveniT4H3OJApgKRTE7xtsjAtg1El2rNbm0C7qgMw4p0tsjp2ZSAY2QkQBoUzgBfTfOYWWR6V+D3PyU9N9AF9VIqB6d+yEDxg9GOe76ILzKB9Wo3F8t0p+OtGU9C1gAAPndvoV+7yepoS2DSu8ft8mRGL6aTFQDMbhqEYPKZx2Gx2XqfnZA1bFggntsWWtg3TGLmCOww8RLd0CIhMfl8aJJuTmjjDJh3tN9BZx9kNjj6yF8Irxjntih9ejH administrator@WindowsServer
Fingerprint:
SHA256:Eomw4OJ5tGv2Nx0HkGCeaRT5PxBU3krAixd96aCIkJU
Bubblebabble fingerprint:
xobov-gyvaf-hokad-pukun-leper-henuc-tihyn-haban-pybom-defel-cyxyx
Comment:
-

netapp::>

登録されました

Windowsサーバからのsshアクセス試験

ではWindows Sevrer上から「ssh admin@IPアドレス “NetAppのコマンド”」を実行してみます。

PS C:\Users\Administrator> ssh admin@172.17.44.55 "system node show"
The authenticity of host '172.17.44.55 (172.17.44.55)' can't be established.
ECDSA key fingerprint is SHA256:Hx4oFf3c4GUnc/HxpK4X1U6Um7M2a+hG4JdUAtFi4Hc.
Are you sure you want to continue connecting (yes/no)? yes
Warning: Permanently added '172.17.44.55' (ECDSA) to the list of known hosts.

Last login time: 12/13/2022 18:31:20
Node      Health Eligibility Uptime        Model       Owner    Location
--------- ------ ----------- ------------- ----------- -------- ---------------
netapp-01 true true       1 days 07:30 SIMBOX

PS C:\Users\Administrator> ssh admin@172.17.44.55 "system node show"

Last login time: 12/13/2022 18:55:35
Node      Health Eligibility Uptime        Model       Owner    Location
--------- ------ ----------- ------------- ----------- -------- ---------------
netapp-01 true true       1 days 07:30 SIMBOX

PS C:\Users\Administrator>

初回ログイン時は、sshキーの登録について確認されますが、それ以降はコマンドがすぐに実行できました。

バッチファイル&タスクスケジューラ実行試験

タスクスケジューラからコマンドが実行できるかを確認してみます。

まずはNetApp内の時刻を確認し、それを保存するバッチファイルを作成します。

@echo off 
ssh admin@172.17.44.55 "date" >> c:\tmp\command.txt

これをタスクスケジューラに登録してログアウト。

指定時間経過後にファイルを確認してみます。

PS C:\Users\Administrator> type C:\tmp\command.txt

Last login time: 12/13/2022 19:00:13

Node      Date                     Time zone
--------- ------------------------ -------------------------
netapp-01
          Tue Dec 13 19:05:11 2022 Japan

PS C:\Users\Administrator> 

きちんと実行されて、ファイルが作成されていました。

NetAppのコマンドをadvanced権限で実行する時に確認を出さない

NetAppのコマンド操作は、通常はadmin権限で行われる。

コマンドによってはadvanced権限やdiag権限を要求される。

切り替えるには「set advanced」もしくは「set -privilege advanced」と実行する

netapp::> set -privilege advanced

Warning: These advanced commands are potentially dangerous; use them only when directed to do so by NetApp
         personnel.
Do you want to continue? {y|n}: y

netapp::*>

切り替える際、通常は「Do you want to continue? {y|n}: 」という確認プロンプトが出る。

これを出ないようにする方法がある

setコマンドをオプション無しで実行してみる

netapp::> set
User Name:             admin
Profile Name:          admin
Privilege Level:       admin
Confirmation Messages: on
Show All Fields:       false
Show Field Separator:
Data Units:            auto
Pagination Rows:       24
Default Vserver:
Default Node:
Stop On Error:         false
Prompt Timestamp:
netapp::>

ここにある「Confirmation Messages: on」というのが確認プロンプトに関する設定となる。

これをoffにすることで確認が行われず切り替えることができるようになる。

netapp::> set -privilege advanced -confirmations off

netapp::*> set
User Name:             admin
Profile Name:          admin
Privilege Level:       advanced
Confirmation Messages: off
Show All Fields:       false
Show Field Separator:
Data Units:            auto
Pagination Rows:       24
Default Vserver:
Default Node:
Stop On Error:         false
Prompt Timestamp:

netapp::*>

一度「Confirmation Messages: off」と設定したものは同じセッションの間、維持されます。

さて、一括処理をしている時に、advanced権限が必要なコマンドがある場合、「set advanced」で切り替えた後、目的とするコマンドを実行、という処理が面倒な場合があります。

その場合「set -privilege advanced -confirmations off -rows 0;vserver cifs option show;set -privilege admin -confirmations on」というように「;」でコマンドを区切ることで、そのコマンド実行時のみadvanced権限で実行する、といったことを行えるようになります。

netapp::> set -privilege advanced -confirmations off -rows 0;vserver cifs option show;set -privilege admin -confirmations on


Vserver: svm0

                            Client Session Timeout: 900
                              Copy Offload Enabled: true
                                Default Unix Group: -
                                 Default Unix User: pcuser
                                   Guest Unix User: -
               Are Administrators mapped to 'root': true
           Is Advanced Sparse File Support Enabled: true
                  Is Fsctl File Level Trim Enabled: true
                  Direct-Copy Copy Offload Enabled: true
                           Export Policies Enabled: false
            Grant Unix Group Permissions to Others: false
                          Is Advertise DFS Enabled: false
     Is Client Duplicate Session Detection Enabled: true
               Is Client Version Reporting Enabled: true
                                    Is DAC Enabled: false
                      Is Fake Open Support Enabled: true
                         Is Hide Dot Files Enabled: false
                              Is Large MTU Enabled: true
                             Is Local Auth Enabled: true
                 Is Local Users and Groups Enabled: true
                           Is Multichannel Enabled: false
            Is NetBIOS over TCP (port 139) Enabled: true
               Is NBNS over UDP (port 137) Enabled: false
                               Is Referral Enabled: false
             Is Search Short Names Support Enabled: false
  Is Trusted Domain Enumeration And Search Enabled: true
                        Is UNIX Extensions Enabled: false
          Is Use Junction as Reparse Point Enabled: true
                               Max Multiplex Count: 255
          Max Connections per Multichannel Session: 32
                 Max LIFs per Multichannel Session: 256
              Max Same User Session Per Connection: 2500
                 Max Same Tree Connect Per Session: 5000
                      Max Opens Same File Per Tree: 1000
                          Max Watches Set Per Tree: 500
                   Is Path Component Cache Enabled: true
    NT ACLs on UNIX Security Style Volumes Enabled: true
                                  Read Grants Exec: disabled
                                  Read Only Delete: disabled
                  Reported File System Sector Size: 4096
                                Restrict Anonymous: no-restriction
                              Shadowcopy Dir Depth: 5
                                Shadowcopy Enabled: true
                                      SMB1 Enabled: false
                  Max Buffer Size for SMB1 Message: 65535
                                      SMB2 Enabled: true
                                      SMB3 Enabled: true
                                    SMB3.1 Enabled: true
            Map Null User to Windows User or Group: -
                                      WINS Servers: -
         Report Widelink as Reparse Point Versions: SMB1
                              Max Credits to Grant: 128
Check Share Permission for NetShareEnumAll Request: false


netapp::>

ちなみに通常のadmin権限で「vserver cifs option show」を実行した場合は下記の様な結果となります。

netapp::> vserver cifs option show

Vserver: svm0

  Client Session Timeout : 900
  Default Unix Group     : -
  Default Unix User      : pcuser
  Guest Unix User        : -
  Read Grants Exec       : disabled
  Read Only Delete       : disabled
  WINS Servers           : -
netapp::>

NetAppの設定内容をcsvファイルに出力したい

NetAppで現在設定されているCIFS共有情報を取得するため、「vserver cifs share show」を実行。

netapp::> vserver cifs share show
Vserver        Share         Path              Properties Comment  ACL
-------------- ------------- ----------------- ---------- -------- -----------
svm0           c$            /                 oplocks    -        BUILTIN\Administrators / Full Control
                                               browsable
                                               changenotify
                                               show-previous-versions
svm0           ipc$          /                 browsable  -        -
svm0           shares        /shares_dr        oplocks    -        Everyone / Full Control
                                               browsable
                                               changenotify
                                               show-previous-versions
svm0           testqtee      /shares_dr/       oplocks    -        Everyone / Full Control
                             testqtree         browsable
                                               changenotify
                                               show-previous-versions
4 entries were displayed.

netapp::>

ちょっと再利用しにくい形式となっている

-fieldsオプションで上記で表示されている内容を列挙すればもうちょっと分かりやすくなるはず…

netapp::> vserver cifs share show -fields vserver,share-name,path,share-properties,acl
vserver share-name path share-properties                                      acl                               
------- ---------- ---- ----------------------------------------------------- ---------------------------------------
svm0    c$         /    oplocks,browsable,changenotify,show-previous-versions "BUILTIN\Administrators / Full Control"
svm0    ipc$       /    browsable                                             -                                 
svm0    shares     /shares_dr
                        oplocks,browsable,changenotify,show-previous-versions "Everyone / Full Control"         
svm0    testqtee   /shares_dr/testqtree
                        oplocks,browsable,changenotify,show-previous-versions "Everyone / Full Control"         
4 entries were displayed.
netapp::>

各要素の区切りが不定となっていてやはり使いにくい。

調べると「set」コマンドでいろいろ調整できることが分かった

netapp::> set
User Name:             admin
Profile Name:          admin
Privilege Level:       admin
Confirmation Messages: on
Show All Fields:       false
Show Field Separator:
Data Units:            auto
Pagination Rows:       24
Default Vserver:
Default Node:
Stop On Error:         false
Prompt Timestamp:
netapp::>

このオプション群の中でよく設定される項目は下記2個

・Pagination Rows: これを「0」と設定すると、出力が長い場合でも途中で止まらない
・Data Units:これがautoの場合、出力される単位がGB,TBで不定となる。「GB」と指定すると全てGB換算で表示されるようになる。

「Show Field Separator:」は標準では何も設定されていないので、ここに「,」を指定してみるため「set -showseparator “,”」と実行。

netapp::> set -showseparator ","

netapp::> set
User Name:             admin
Profile Name:          admin
Privilege Level:       admin
Confirmation Messages: on
Show All Fields:       false
Show Field Separator:  ,
Data Units:            auto
Pagination Rows:       24
Default Vserver:
Default Node:
Stop On Error:         false
Prompt Timestamp:

netapp::>

「vserver cifs share show」を実行してみると

netapp::> vserver cifs share show
Vserver        Share         Path              Properties Comment  ACL
-------------- ------------- ----------------- ---------- -------- -----------
svm0           c$            /                 oplocks    -        BUILTIN\Administrators / Full Control
                                               browsable
                                               changenotify
                                               show-previous-versions
svm0           ipc$          /                 browsable  -        -
svm0           shares        /shares_dr        oplocks    -        Everyone / Full Control
                                               browsable
                                               changenotify
                                               show-previous-versions
svm0           testqtee      /shares_dr/       oplocks    -        Everyone / Full Control
                             testqtree         browsable
                                               changenotify
                                               show-previous-versions
4 entries were displayed.

netapp::> vserver cifs share show -fields vserver,share-name,path,share-properties,acl
vserver,share-name,path,share-properties,acl,
Vserver,Share,Path,Share Properties,Share ACL,
svm0,c$,/,oplocks,browsable,changenotify,show-previous-versions,"BUILTIN\Administrators / Full Control",
svm0,ipc$,/,browsable,-,
svm0,shares,/shares_dr,oplocks,browsable,changenotify,show-previous-versions,"Everyone / Full Control",
svm0,testqtee,/shares_dr/testqtree,oplocks,browsable,changenotify,show-previous-versions,"Everyone / Full Control",

netapp::>

-fieldsオプションをつけている場合に、「,」区切りになっているように見える。

しかし・・・よく見てみるとおかしい

「Properties」の値は元々「oplocks,browsable,changenotify,show-previous-versions」だったのだが、showseparator設定後は、Properites内の「,」と、各値の区切りの「,」の見分けがつかない状態で出力されています。

果たしてどんな記号をseparatorとして設定すれば適切なのかぐぐってみるとNetApp communityの「Netapp cli output to csv or excel」に「!」を設定すれば?という記載を発見。

確かに!を設定内で使うことは少ないので、見分けはつきそうです。

netapp::> set -showseparator "!"

netapp::> set
User Name:             admin
Profile Name:          admin
Privilege Level:       admin
Confirmation Messages: on
Show All Fields:       false
Show Field Separator:  !
Data Units:            auto
Pagination Rows:       24
Default Vserver:
Default Node:
Stop On Error:         false
Prompt Timestamp:

netapp::>

「vserver cifs share show」の結果を確認してみます。

netapp::> vserver cifs share show -fields vserver,share-name,path,share-properties,acl
vserver!share-name!path!share-properties!acl!
Vserver!Share!Path!Share Properties!Share ACL!
svm0!c$!/!oplocks,browsable,changenotify,show-previous-versions!"BUILTIN\Administrators / Full Control"!
svm0!ipc$!/!browsable!-!
svm0!shares!/shares_dr!oplocks,browsable,changenotify,show-previous-versions!"Everyone / Full Control"!
svm0!testqtee!/shares_dr/testqtree!oplocks,browsable,changenotify,show-previous-versions!"Everyone / Full Control"!

netapp::>

これでなんとか見分けはつきそうです。

さて、setで表示される設定で「Show All Fields」という項目があります。

これをtrueと設定すると、filedsを指定しなくとも、全ての設定が表示されるようになります。

netapp::> set -showallfields true
::> vserver cifs share show
vserver!share-name!cifs-server!path!share-properties!symlink-properties!file-umask!dir-umask!comment!acl!attribute-cache-ttl!volume!offline-files!vscan-fileop-profile!max-connections-per-share!force-group-for-create!
Vserver!Share!CIFS Server NetBIOS Name!Path!Share Properties!Symlink Properties!File Mode Creation Mask!Directory Mode Creation Mask!Share Comment!Share ACL!File Attribute Cache Lifetime!Volume Name!Offline Files!Vscan File-Operations Profile!Maximum Tree Connections on Share!UNIX Group for File Create!
svm0!c$!SHARE56A!/!oplocks,browsable,changenotify,show-previous-versions!symlinks!-!-!-!"BUILTIN\Administrators / Full Control"!-!svm0_root!-!standard!4294967295!-!
svm0!ipc$!SHARE56A!/!browsable!-!-!-!-!-!-!svm0_root!-!standard!4294967295!-!
svm0!shares!SHARE56A!/shares_dr!oplocks,browsable,changenotify,show-previous-versions!symlinks!-!-!-!"Everyone / Full Control"!-!shares_dr!manual!standard!4294967295!-!
svm0!testqtee!SHARE56A!/shares_dr/testqtree!oplocks,browsable,changenotify,show-previous-versions!symlinks!-!-!-!"Everyone / Full Control"!-!shares_dr!manual!standard!4294967295!-!
netapp::>

ただ、これを常に設定してしまうとdfコマンドなどでも詳細表示となってしまうため、使用には注意が必要です。

netapp::> df
vserver!volume!aggregate!fs-type!filesys-name!total-space!total-hybrid-cache-size!used-space!percent-used-space!available-space!reserved-space!total-space-bin1!used-space-bin1!available-space-bin1!inodes-used!percent-inodes-used!inodes-free!total-saved!percent-total-saved!dedupe-saved!percent-dedupe-saved!compression-saved!percent-compression-saved!mounted-on!bin1-name!
Vserver Name!Volume Name!Aggregate Name!Snapshot or Active File System!Volume File System Name!Total Space!Total Size of SSD Tier of a Flash Pool!Used Space!Percentage of Used Space!Available Space!Reserved Space!Total Space in First Bin!Used Space in First Bin!Available Space in First Bin!Inodes Used!Percentage of Inodes Used!Inodes Available!Total Space Saved!Percentage Total Space Saved!Space Saved by Deduplication!Percentage Saved by Deduplication!Space Saved by Compression!Percentage Saved by Compression!Mount Path of the File System!Composite Aggr Name for First Bin!
svm0!shares_dr!""!active!/vol/shares_dr/!22072528!-!25512!0%!22047016!0!-!-!-!174!0%!655104!21716!46%!21716!46%!0!0%!/shares_dr!-!
svm0!shares_dr!""!snapshot!/vol/shares_dr/.snapshot!0!-!6876!0%!0!0!-!-!-!0!0%!0!0!0%!0!0%!0!0%!/shares_dr/.snapshot!-!
svm0!svm0_root!""!active!/vol/svm0_root/!19456!-!1828!9%!17628!0!-!-!-!102!18%!464!0!0%!0!0%!0!0%!/!-!
svm0!svm0_root!""!snapshot!/vol/svm0_root/.snapshot!1024!-!2348!229%!0!0!-!-!-!0!0%!0!0!0%!0!0%!0!0%!//.snapshot!-!
netapp-01!vol0!""!active!/vol/vol0/!7081552!-!2331900!32%!4749652!0!-!-!-!36502!16%!184784!0!0%!0!0%!0!0%!---!-!
netapp-01!vol0!""!snapshot!/vol/vol0/.snapshot!372712!-!0!0%!372712!0!-!-!-!0!0%!0!0!0%!0!0%!0!0%!---!-!

netapp::>

必要が無くなったら「set -showallfields false」を実行して解除します。

NetApp ONTAPのサポート期間とサポートバージョンの確認

NetApp ONTAPのサポート期間(End of support / EOS)を確認するときにどこを見ればいいか忘れてしまうのでメモ

基本的には 「Software Version Support 」でサポート期間を確認する

ただし、このページ、日本語表示だと情報が古くONTAP 9.9.1までしか掲載されていない(2022/11/02現在) 古い情報のままになっていることがある。

その場合は「English」に変更すると最新情報 ONTAP 9.11.1についても確認出来る。

また、別のページに「SU2: Minimum Recommended ONTAP releases on the NetApp Support Site」という形で各ONTAP OSバージョンでも、最低要求するパッチバージョンの指定、というのがされている。
詳細については→ Active Directoryサーバのセキュリティ強化アップデート(CVE-2022-38023)に伴うONTAPファイルサーバへの影響についてのメモ

2023/09/18付け更新ではONTAP 9.8~9.13.1について下記の様に定義されている。

  • For ONTAP 9.13x, the minimum recommended version is 9.13.1P1.
  • For ONTAP 9.12x, the minimum recommended version is 9.12.1P5.
  • For ONTAP 9.11x, the minimum recommended version is 9.11.1P11.
  • For ONTAP 9.10x, the minimum recommended version is 9.10.1P14.
  • For ONTAP 9.9x, the minimum recommended version is 9.9.1P15.
  • For ONTAP 9.8x, the minimum recommended version is 9.8P18.

なお、2023年7月のWindows UpdateによりActive Directoryサービスのセキュリティ強化が行われた影響で、これらのバージョンより低いとActive Directory連携が動かなくなっているので注意してください。

ちなみに、2022/10/24付け更新で、ONTAP 9.7~9.11.1については下記の様に定義されていた。

  • For ONTAP 9.11x, the minimum recommended version is 9.11.1P3.
  • For ONTAP 9.10x, the minimum recommended version is 9.10.1P8.
  • For ONTAP 9.9x, the minimum recommended version is 9.9.1P12.
  • For ONTAP 9.8x, the minimum recommended version is 9.8P14.
  • For ONTAP 9.7x, the minimum recommended version is 9.7P20.

実はこのページ、したの方が重要で、「Download」のリンク集からアクセスできない古いONTAP OSのパッチがダウンロードできるリンクがある。

Clustered Data ONTAP 8.3.2P12Clustered Data ONTAP 8.2.4P6がダウンロードできる。

7-modeのData ONTAP 8.2.5P5もダウンロードできる。


ONTAPと対象機種についてのメモ

・ONTAP 9.13.1 で追加
FAS2820, ASA A150, ASA A900

・ONTAP 9.12.1 で追加
AFF C250, AFF C400, AFF C800, AFF A150

・ONTAP 9.10.1 で追加
AFF A900

・ONTAP 9.9.1 で削除(非サポート)
FAS80xx, AFF80xx, FAS25xx

・ONTAP 9.8で追加
AFF A250, FAS500f, ASA AFF A800

・ONTAP 9.7で追加
FAS8300, FA8700, AFF A400, ASA AFF A220, ASA AFF A700

・ONTAP 9.6で追加
AFF C190, AFF A320
ディスクシェルフ NS224

・ONTAP 9.5で追加
AFF A300, FAS8200

・ONTAP 9.1で追加
FAS2720, FAS2750, AFF A220, AFF A800

・ONTAP 9.1でサポートしているハードウェア
FAS2600シリーズ, FAS8200, FAS9000, AFF A200, AFF A300, AFF A700, AFF A700s
ディスクシェルフ DS460C, DS224C, DS212C


ONTAPバージョンとsnapmirror互換性

以前はONTAPバージョンが3つ違いまでOK、というような感じだった

2023年9月時点での資料「Compatible ONTAP versions for SnapMirror relationships」(日本語ページは自動翻訳のためいらない場所まで翻訳することがあるため注意)

・Unified Replication(XDP)でのsnapmirrorの場合
ONTAP 9.13.1の対応範囲: ONTAP 9.14.0 ~ ONTAP 9.8
ONTAP 9.12.1の対応範囲: ONTAP 9.14.0 ~ ONTAP 9.7
ONTAP 9.11.1の対応範囲: ONTAP 9.14.0 ~ ONTAP 9.6
ONTAP 9.10.1の対応範囲: ONTAP 9.14.0 ~ ONTAP 9.5
ONTAP 9.9.1の対応範囲: ONTAP 9.14.0 ~ ONTAP 9.5
ONTAP 9.8の対応範囲: ONTAP 9.14.0 ~9.5, 9.3 (9.4は不可)
ONTAP 9.7の対応範囲: ONTAP 9.12.1 ~9.5, 9.3 (9.4は不可)

・SVM情報ごと同期を行うSVM-DRの場合
3バージョンしばりがある

・旧形式(DP)のsnapmirrorの場合
3バージョンしばりがある
また、DP形式は9.11.1までのサポートで、9.12.1では使えない