しばらく前から、Rockchip RK3588を積んだRock 5B上でWindows 11 on ARMを動かす、というものが公開されていた。
元々は2022年11月にRock 5の販売元であるradxaのフォーラムの「Windows / UEFI on Rock 5 (Mega thread)」(https://github.com/edk2-porting/edk2-rk35xx)で公開されていたものが、2023年3月にtwitterでMario BălănicăさんがROCK 5B向けで動かしているツイートをしてから開発が加速(https://github.com/mariobalanica/edk2-rk35xx)
そこにOrange Pi公式が乗っかったことでOrange Pi 5向け対応も行われるようになった形です。
しばらくは具体的な導入手法はなく、UEFIのみ提供されている状態でしたが、3月下旬にWoRプロジェクトのWebに「Preliminary installation guide for RK3588 boards」と手順が公開され試しやすくなりました。
2023/04/12現在でのOrange Pi 5での制限事項
全体的なもの
・M.2コネクタ利用不可
・HDMI出力のみ対応(Type-C出力は使用できない)
・オンボードNICが使えない
USBコネクタに関する制限事項
・USB 3.0(青コネクタ)の上側のポートはUSBストレージ用に使う
・USB 3.0(青コネクタ)の下側のポートはキーボードなどで使えると書いてあるのだがうまく動かず
・USB 2.0(縦配置のやつ)にUSBハブをつなげてキーボード/マウス/USB NICをつなげると良い
・Type-CコネクタもUSB 2.0扱いで使えるらしいのだがうまく動かず
Windowsのインストール先について
・microSDから起動することもできるっぽいのだが成功せず
・USB 3.0(青コネクタ)の上側ポートにつけたUSBストレージからの起動には成功
・速いストレージを使わないと起動がすごく遅い
セットアップ手法について
WoRの「Preliminary installation guide for RK3588 boards」のWindows手順ではメディア作成関連がいまいち分かりづらかったので、Ubuntu 20.04環境で設定を行った
用意するもの
・USB接続で速いディスク
・UbuntuマシンとOrange Pi 5を繋ぐUSB-A/Cケーブル(SPI書き込みの際に使用)
・USB NIC(Windows11標準で認識するもの)
・USB ハブ(キーボード/マウス/NICをつなぐにはポートが足らないので)
手順概要
1) Ubuntuに前提条件パッケージをインストール
以下のworkliが要求しているパッケージをインストール
# apt install gawk xmlstarlet jq wget wimtools ntfs-3g curl cabextract chntpw genisoimage zenity
rkdeveloptoolが要求するパッケージをインストール
# apt install libudev-dev libusb-1.0-0-dev dh-autoreconf
2) rkdeveloptool をコンパイルしてインストール
基本としてはrockchip wikiのRkdeveloptool に記載のやりかたで https://github.com/rockchip-linux/rkdeveloptool のレポジトリをcloneしてコンパイルするんだけど、実はwikiは記載が足らないので、githubの方に記載のコマンドでコンパイルして、 /usr/local 以下のインストールする。
$ git clone https://github.com/rockchip-linux/rkdeveloptool.git
$ cd rkdeveloptool
$ aclocal
$ autoreconf -i
$ autoheader
$ automake --add-missing
$ ./configure
$ make
$ make install
3) workli.sh を入手
githubの https://github.com/buddyjojo/workli のreleases から workli.sh をダウンロード
ver 1.0時点では、GUIダイアログで選択させる系のつくりになっているためX-Window環境が必要
4) workli.shを実行してSPI/SD選択まで進める
まず、日本語でメッセージが出力されていると、デバイスが識別できなかったので英語で動作させる
$ export LANG=C
$ sudo bash workli.sh
また、sudoを実行する必要があるので、環境によっては下記の様な実行が必要となる
$ export LANG=C
$ xhost +
$ sudo  XAUTHORITY=~/.Xauthority  bash workli.sh
ブートローダ/UEFIをSPIかSDのどちらかにするところまできたら、SPIを選択
5) Orange Pi 5をUbuntuマシンにつなげる
Orange Pi 5に電源ケーブルを繋がない状態で、HDMIコネクタの右側のType-CをUbuntuマシンにつなげ
Orange Pi 5の基盤上にあるMaskromボタンを押しながら、HDMI左側の電源用Type-Cコネクタに電源をつなげる
そうすることで、Ubuntuマシン上にOrange Pi 5がデバイスとして認識される
6) workli.shのプロセスを進める
windowsイメージのダウンロードも自働で行ってくれる
7) USBストレージをUbuntuマシンにつなげる
UbuntuマシンにつなげていたOrange Pi 5を外して、代わりにWindowsをインストールするUSBストレージをつなげる
8) workli.sh でUSBストレージにWindowsをインストールする
9) 書き込んだUSBストレージをOrange Pi 5につなげてOrange Pi 5を起動
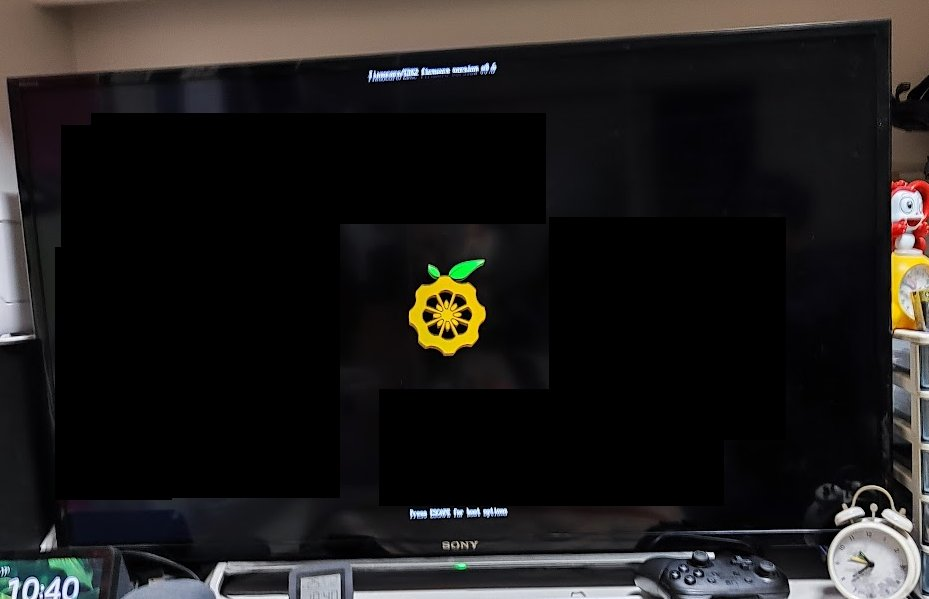
まずは下記のようなOrange PiのロゴのUEFIが表示される
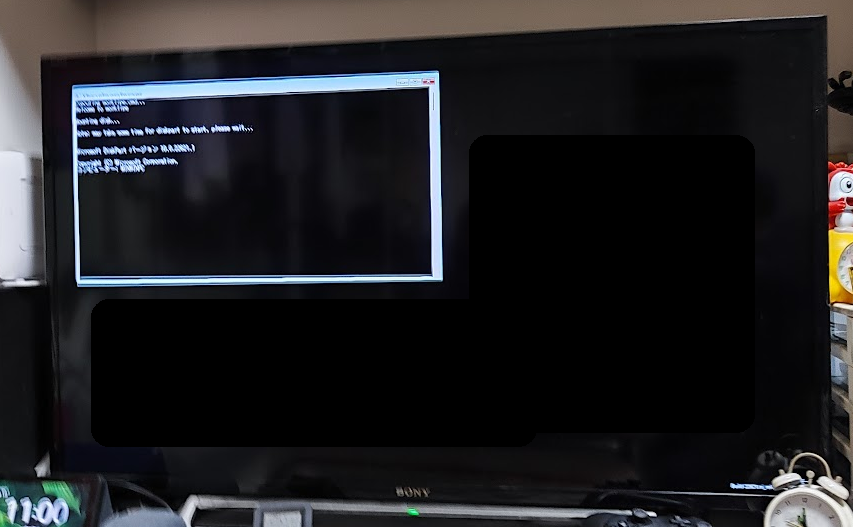
しばらくすると下記のようなコマンドプロンプトが表示されて再起動
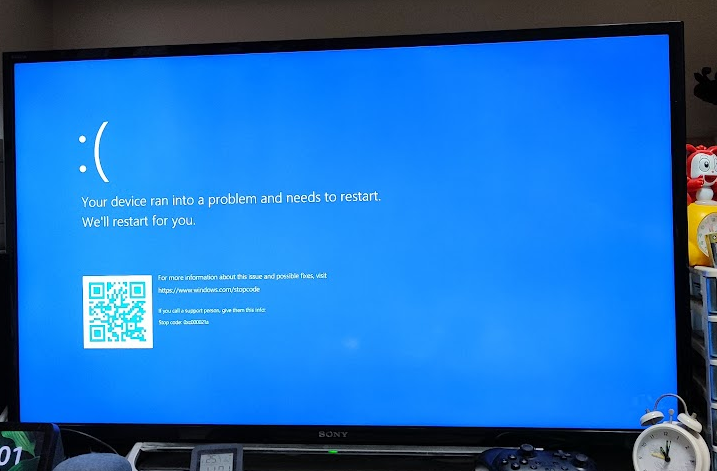
Orange Piのロゴが表示されたあと、下記の様なブルースクリーンが表示され、再起動する・・・というのを2回くらうと、先に進むのでしばらく放置する
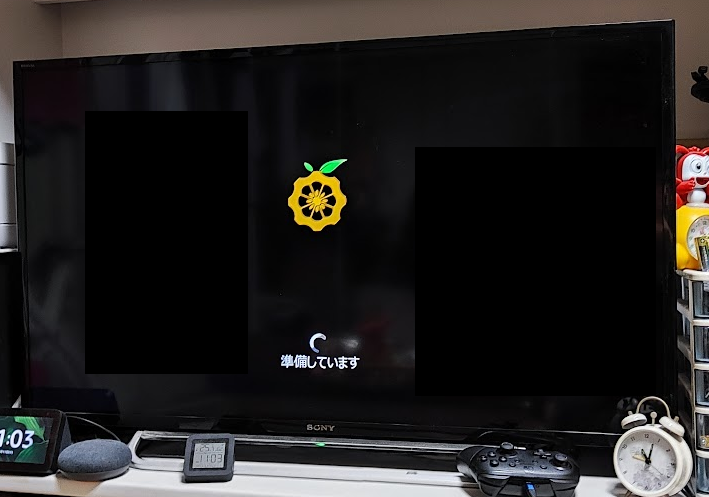
しばらく待つと下記の様な「準備しています」表示になる。
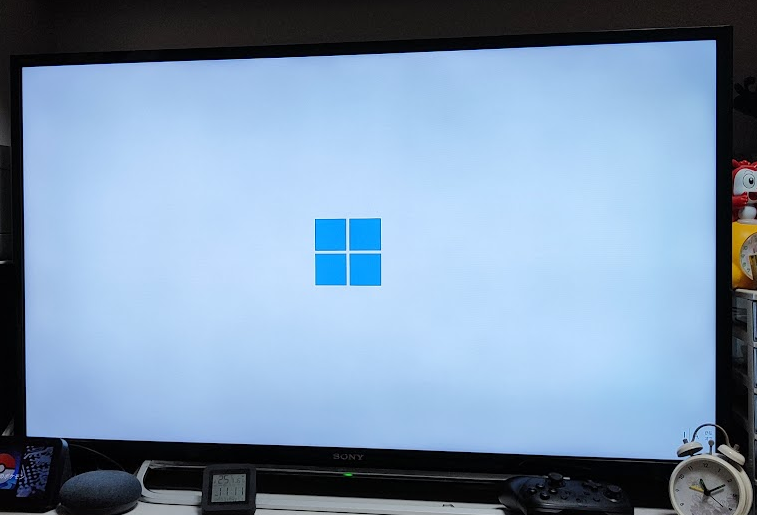
そのうち下記の様なWindows 11の初期セットアップ画面が表示される
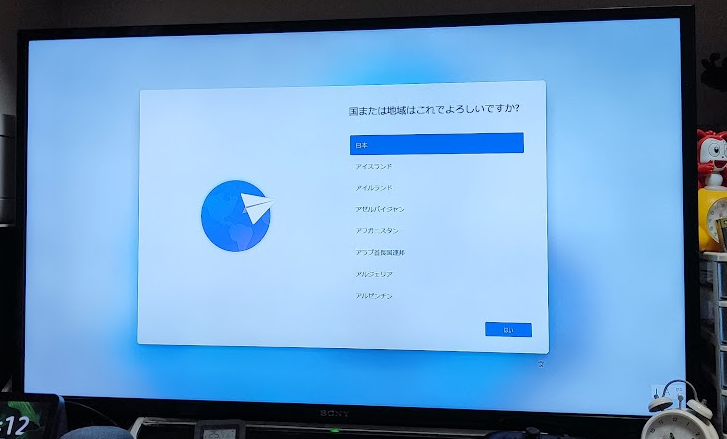
Windows 11の場合、Proであってもインターネット接続が必須とされているのを回避するため、Shiftキー+F10キーでコマンドプロンプトを開いて「oobe\bypassnro」を実行する。
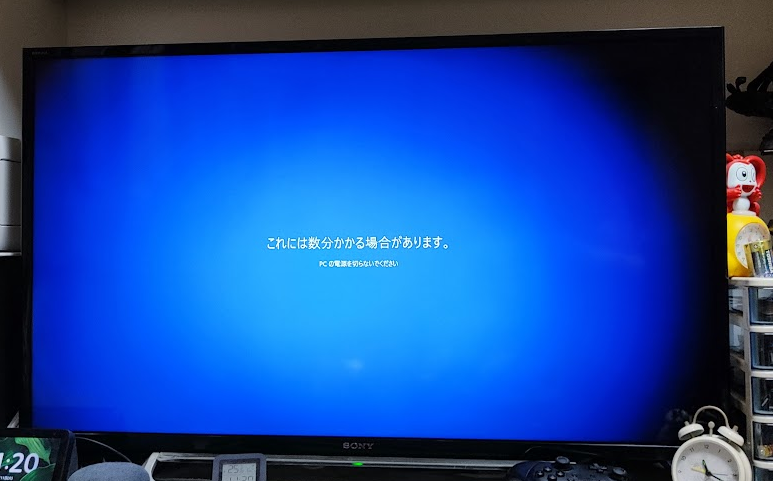
実行すると再起動がかかるので、しばらく待ってWindows 11の初期セットアップを進める
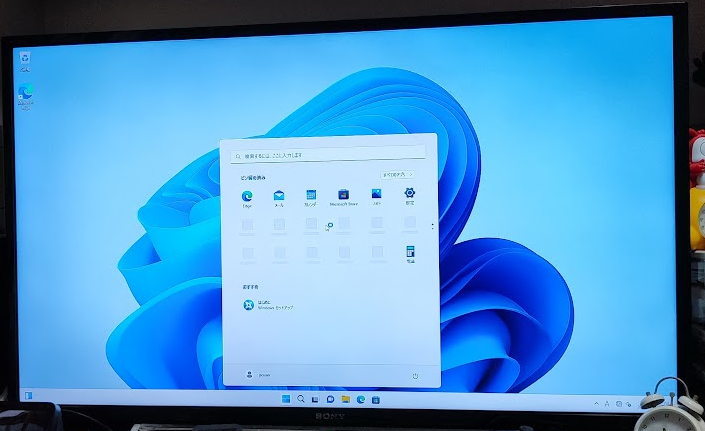
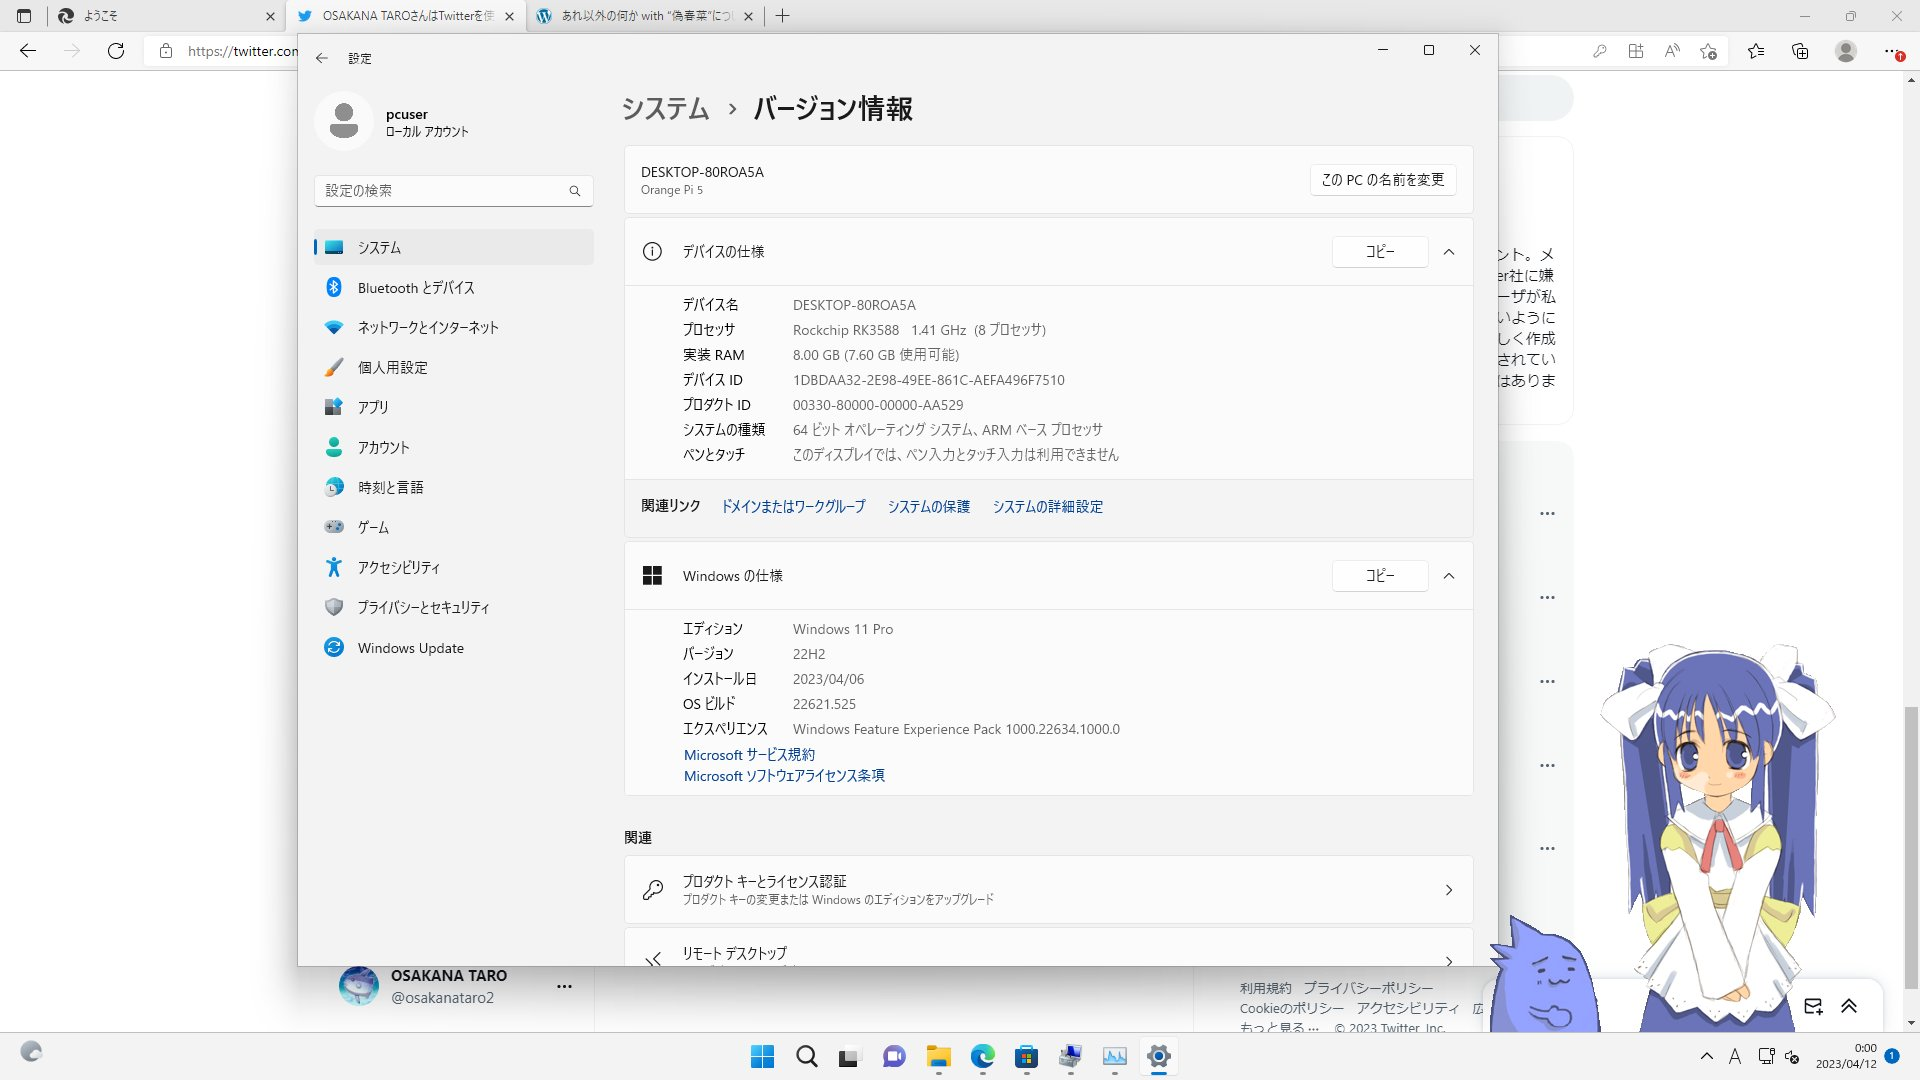
Windows 11が起動する
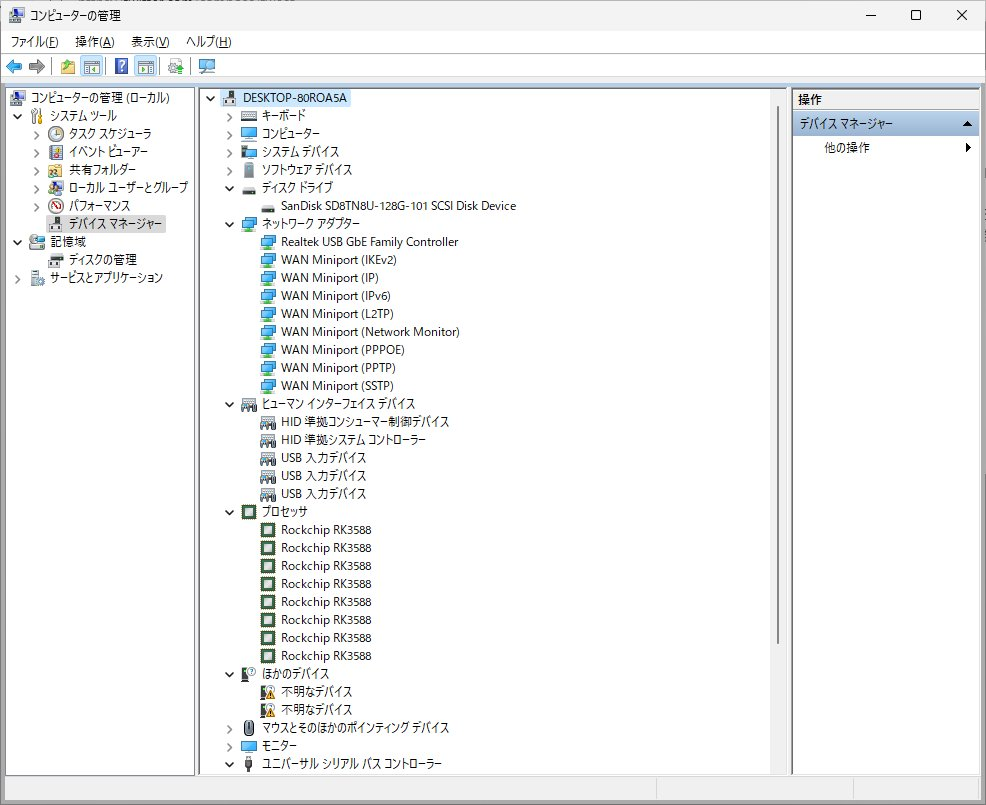
2023/04/12時点ではデバイスマネージャの認識は以下の様な形となっていた
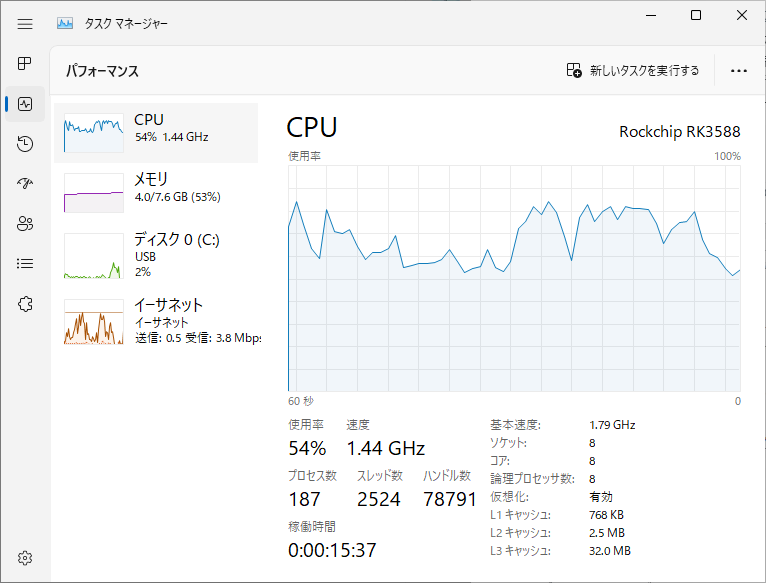
Windows のarm64ビットとして動作していることが確認できる。
また、ラズパイ4の時と同様に古い32ビットWindowsアプリも動作することが確認出来る。