Oracle CloudはこれまでIPv6が提供されてなかったのですが、4/15に「IPv6 on Oracle Cloud Infrastructure」でIPv6提供が全体に開始されたとのことなので試してみた。
既存のOracle CloudインスタンスをIPv6対応にするための設定を開始。
まずは「仮想クラウドネットワーク(VNC)」一覧を開く
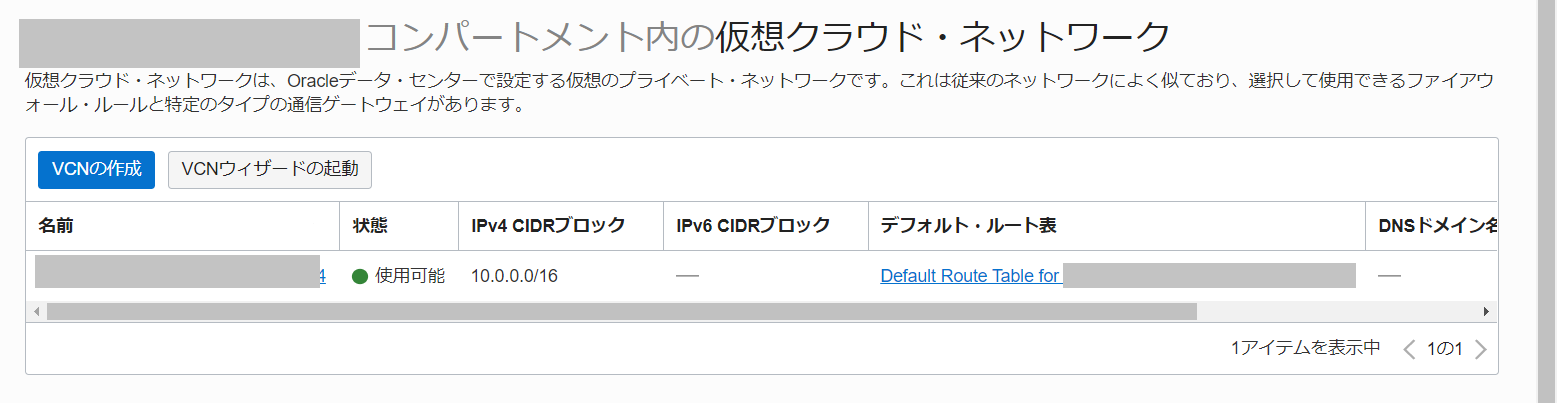
最初はIPv6 CIDRブロックが割り当てられていない。
「IPv6 CIDRブロックの追加」を選択
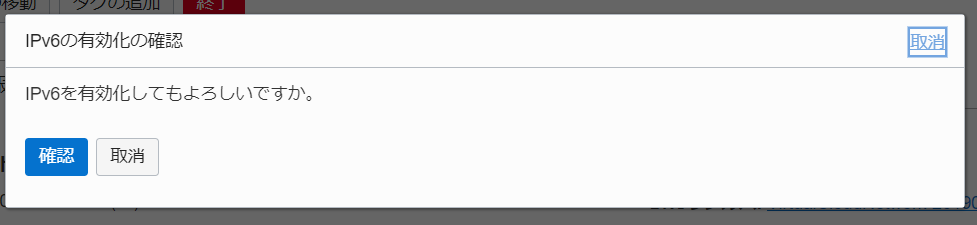
すると、IPv6アドレスが追加される

次に、VNC配下にあるサブネットに対してIPv6アドレスを割り当て・・・
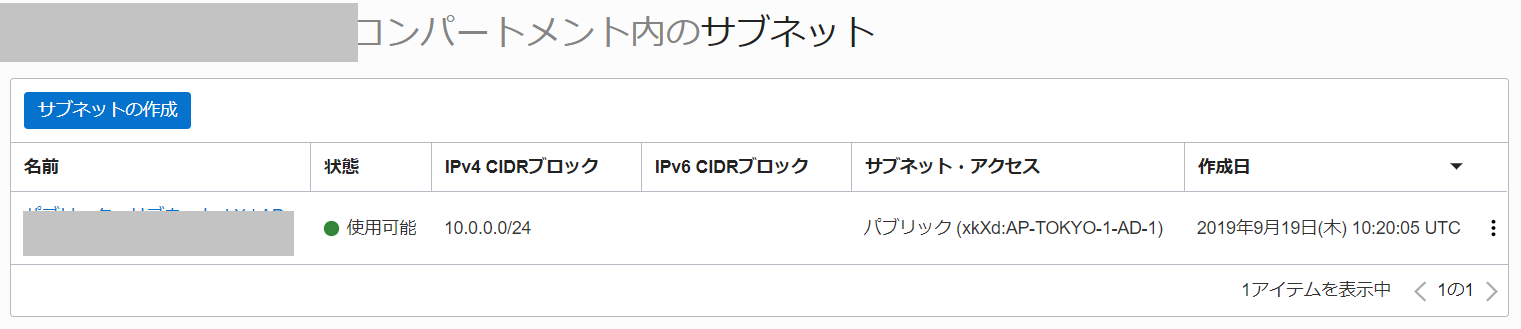

「NotAuthorizedOrNotFound」というエラーになる。
最初にためしたのは4/28に、PhoenixリージョンとTokyoリージョンで、どちらも同じエラーになっていた。
で・・・5/12になって検索すると、コマンドでなら成功するらしい、という情報を発見した。
Oracle Cloud 甲骨文云启用原生 IPv6 地址详细教程 – 简单、通用、免费、双栈更香
Oracle Cloud 支持 IPv6 了
これをTokyoリージョンで試してうまくいったので、Phoenixリージョンでも実施しようとしてみたところ、こちらでは、そのそも↑で失敗していたはずの操作が成功・・・
どうやら修正されつつあるようです。
というわけで、両方の手順をまとめました。
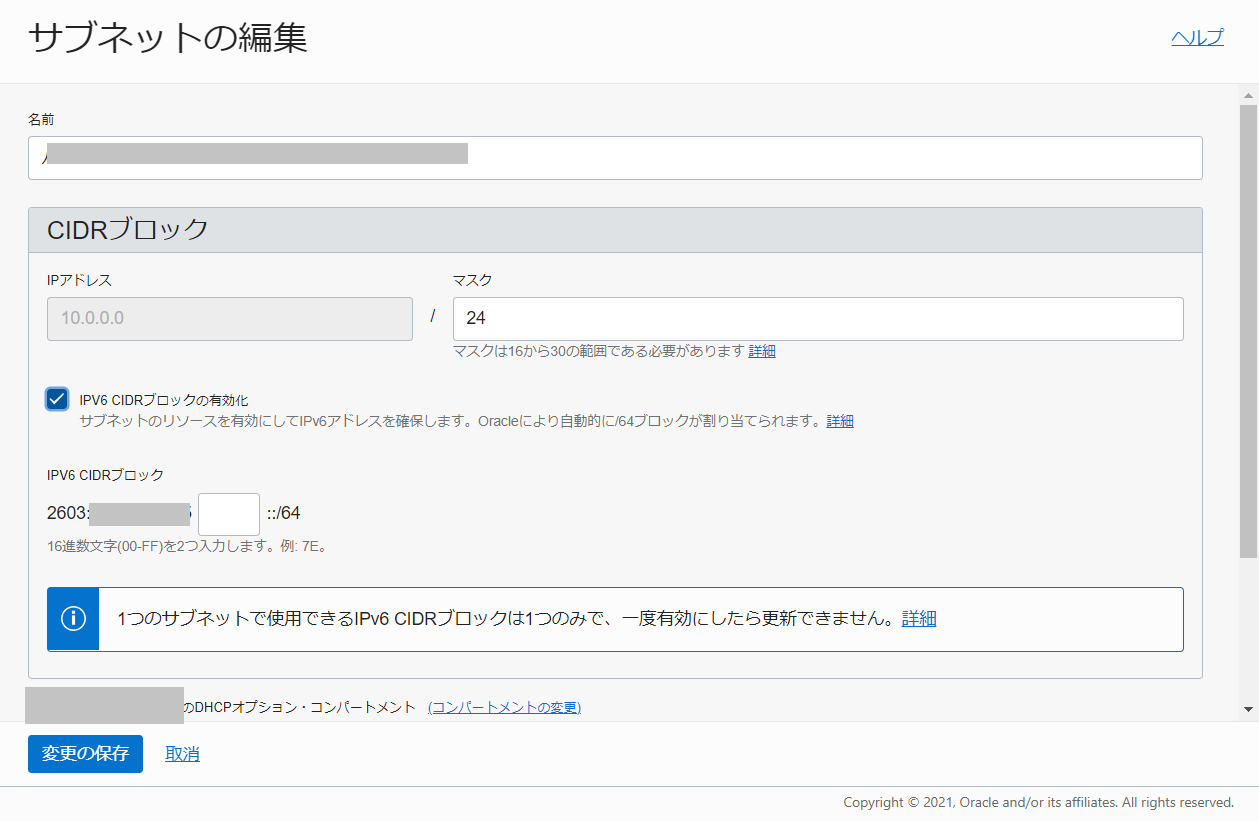
GUI操作が成功する場合
サブネットの編集でIPv6 CIDRブロックを行ってみて、成功するのであれば問題ありません。
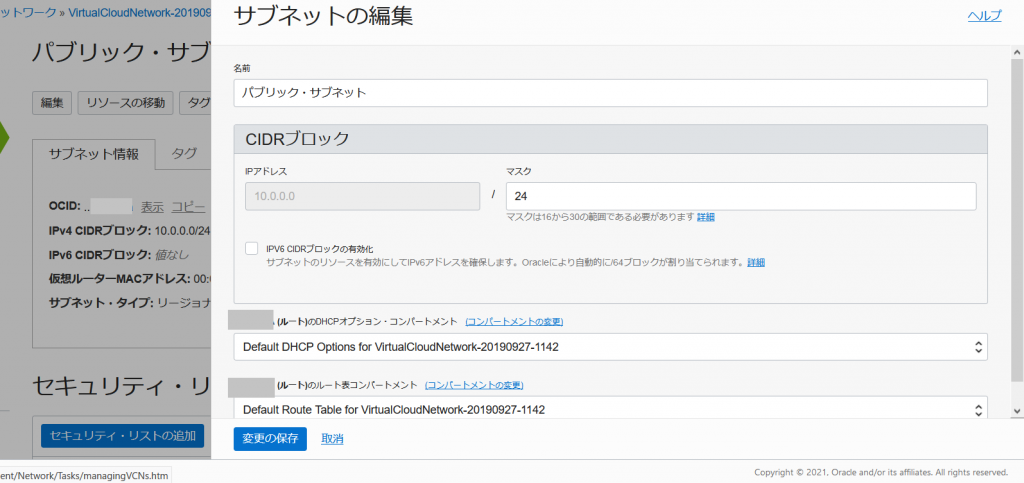
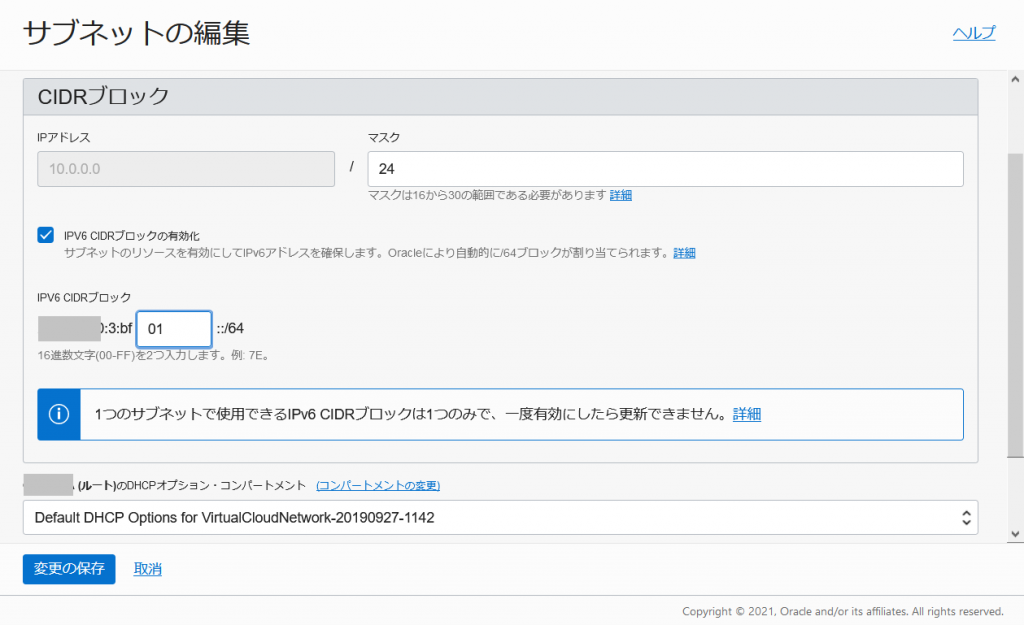
このあと、後半にある仮想マシンインスタンスに対する設定を行います。
サブネットへのIPv6アドレス設定が失敗する場合
GUI操作で失敗する場合は、コマンド操作を行います。
Oracle CloudのWeb UIにログインして、Cloud Shellを開いてコマンドを実行
まず、コンパートメントのIDを確認
username@cloudshell:~ (ap-tokyo-1)$ oci iam compartment list
{
  "data": [
    {
      "compartment-id": "ocid1.tenancy.oc1..<略>",
      "defined-tags": {},
      "description": "IPv6\u7528\u30cd\u30c3\u30c8\u30ef\u30fc\u30af",
      "freeform-tags": {},
      "id": "ocid1.compartment.oc1..<略>",
      "inactive-status": null,
      "is-accessible": null,
      "lifecycle-state": "ACTIVE",
      "name": "IPv6_network",
      "time-created": "2021-04-28T07:09:50.554000+00:00"
    },
    {
      "compartment-id": "ocid1.tenancy.oc1..<略>",
      "defined-tags": {},
      "description": "idcs-e97e3212f2c9483ca8b9d1f0efa22062|22560888|OSAKANA OSAKANA NET 504302",
      "freeform-tags": {},
      "id": "ocid1.compartment.oc1..<略>",
      "inactive-status": null,
      "is-accessible": null,
      "lifecycle-state": "ACTIVE",
      "name": "ManagedCompartmentForPaaS",
      "time-created": "2019-09-19T10:16:44.796000+00:00"
    }
  ]
}
username@cloudshell:~ (ap-tokyo-1)$
上記出力の「compartment-id」にある「ocid1.tenancy.oc1~」が必要な値です。
これで、サブネットにつけられているIDを確認します。
username@cloudshell:~ (ap-tokyo-1)$ oci network subnet list --compartment-id ocid1.tenancy.oc1..<略>
{
  "data": [
    {
      "availability-domain": null,
      "cidr-block": "10.0.1.0/24",
      "compartment-id": "ocid1.tenancy.oc1..<略>",
      "defined-tags": {},
      "dhcp-options-id": "ocid1.dhcpoptions.oc1.ap-tokyo-1.<略>",
      "display-name": "IPv6 \u30c6\u30b9\u30c8",
      "dns-label": null,
      "freeform-tags": {},
      "id": "ocid1.subnet.oc1.ap-tokyo-1.<略>",
      "ipv6-cidr-block": "xxxx:xxxx:8000:f501::/64",
      "ipv6-virtual-router-ip": "fe80::200:17ff:fec9:f071",
      "lifecycle-state": "AVAILABLE",
      "prohibit-internet-ingress": false,
      "prohibit-public-ip-on-vnic": false,
      "route-table-id": "ocid1.routetable.oc1.ap-tokyo-1.<略>",
      "security-list-ids": [
        "ocid1.securitylist.oc1.ap-tokyo-1.<略>"
      ],
      "subnet-domain-name": null,
      "time-created": "2021-04-28T04:44:55.872000+00:00",
      "vcn-id": "ocid1.vcn.oc1.ap-tokyo-1.<略>",
      "virtual-router-ip": "10.0.1.1",
      "virtual-router-mac": "00:00:17:C9:F0:71"
    },
    {
      "availability-domain": "xkXd:AP-TOKYO-1-AD-1",
      "cidr-block": "10.0.0.0/24",
      "compartment-id": "ocid1.tenancy.oc1..<略>",
      "defined-tags": {},
      "dhcp-options-id": "ocid1.dhcpoptions.oc1.ap-tokyo-1.<略>",
      "display-name": "\u30d1\u30d6\u30ea\u30c3\u30af\u30fb\u30b5\u30d6\u30cd\u30c3\u30c8xkXd:AP-TOKYO-1-AD-1",
      "dns-label": null,
      "freeform-tags": {},
      "id": "ocid1.subnet.oc1.ap-tokyo-1.<略>",
      "ipv6-cidr-block": null,
      "ipv6-virtual-router-ip": null,
      "lifecycle-state": "AVAILABLE",
      "prohibit-internet-ingress": false,
      "prohibit-public-ip-on-vnic": false,
      "route-table-id": "ocid1.routetable.oc1.ap-tokyo-1.<略>",
      "security-list-ids": [
        "ocid1.securitylist.oc1.ap-tokyo-1.<略>"
      ],
      "subnet-domain-name": null,
      "time-created": "2019-09-19T10:20:05.710000+00:00",
      "vcn-id": "ocid1.vcn.oc1.ap-tokyo-1.<略>",
      "virtual-router-ip": "10.0.0.1",
      "virtual-router-mac": "00:00:17:C9:F0:71"
    }
  ]
}
username@cloudshell:~ (ap-tokyo-1)$
最初のブロックは新規で作ったIPv6が有効になっているもので「IPv6 テスト」という名前になっています。コマンド出力上では日本語が有効になっていないようです。
後ろのブロックがデフォルトで作成された「パブリック・サブネットxkXd:AP-TOKYO-1-AD-1」です。これに対してIPv6アドレスを付与する設定を行います。
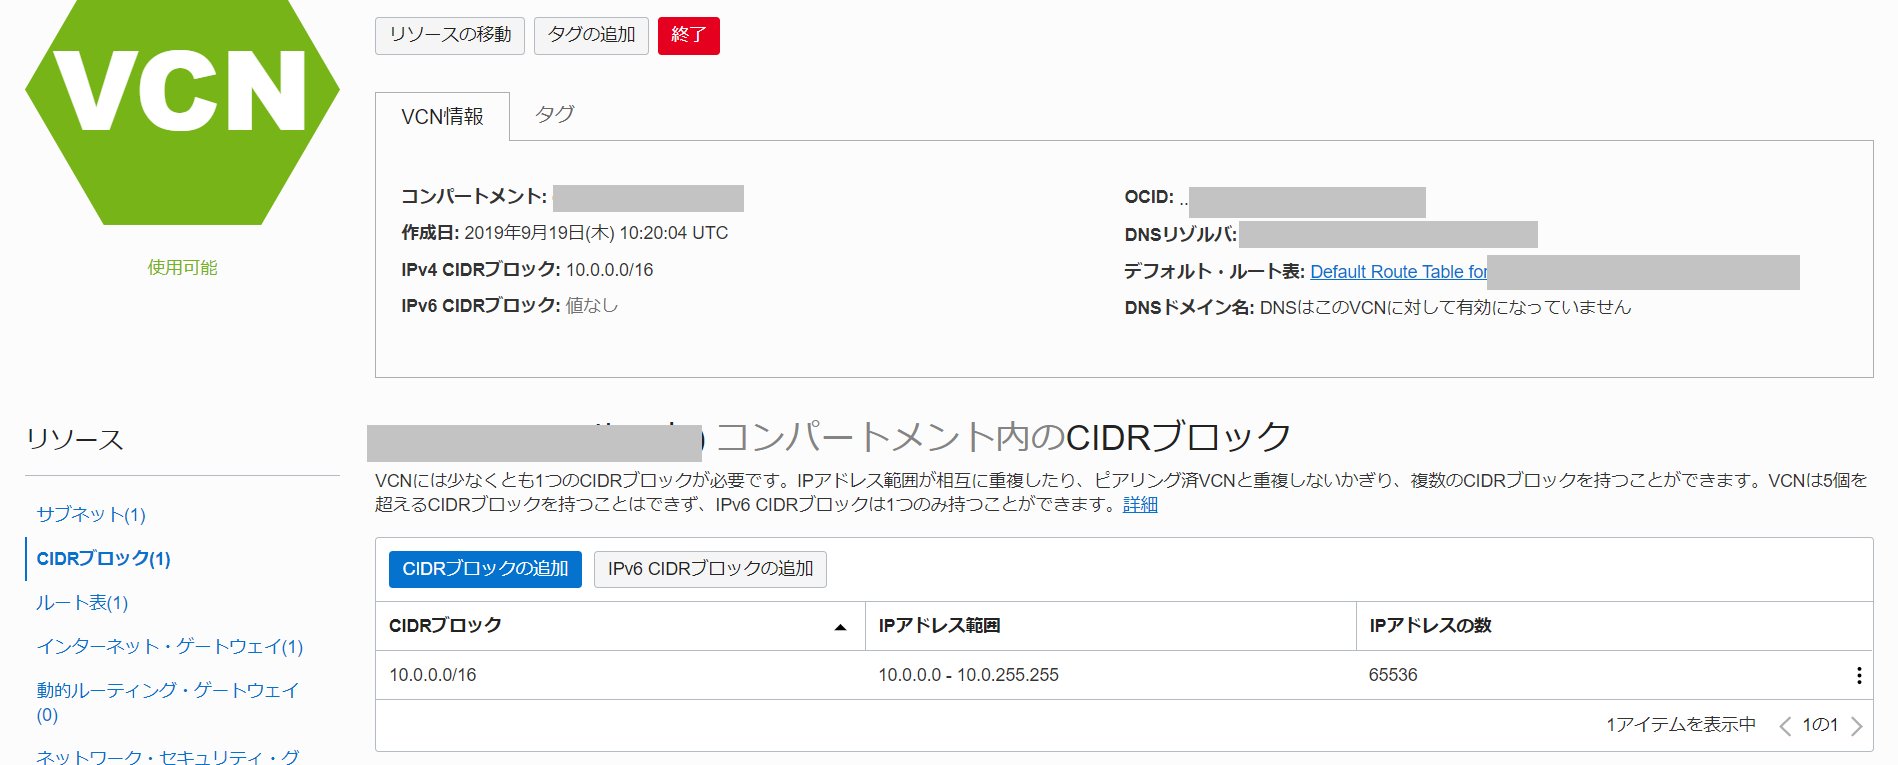
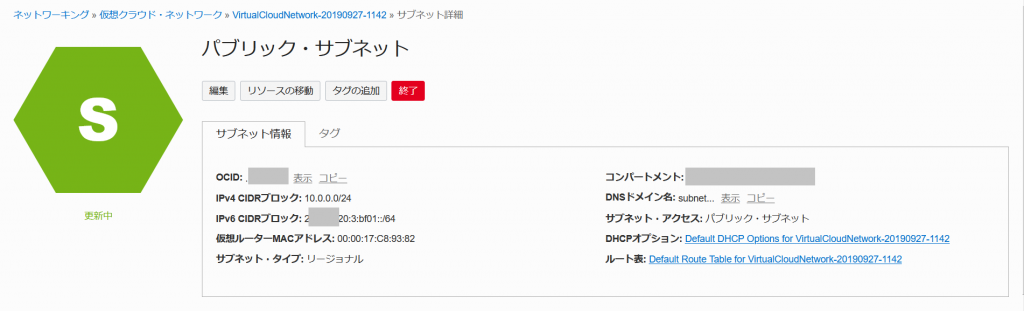
どんなIPv6アドレスがつけられるかは、サブネット/VNC設定画面の「IPv6 CIDRブロック」を参照します。
「xxxx:xxxx:8000:f500::/56」となっています。
Oracle Cloudでは各サブネットに対して「xxxx:xxxx:8000:f5??::/64」を割り当てることになっているため下記の様に実行します。
username@cloudshell:~ (ap-tokyo-1)$ oci network subnet update --subnet-id ocid1.subnet.oc1.ap-tokyo-1.<略> --ipv6-cidr-block xxxx:xxxx:8000:f502::/64
{
  "data": {
    "availability-domain": "xkXd:AP-TOKYO-1-AD-1",
    "cidr-block": "10.0.0.0/24",
    "compartment-id": "ocid1.tenancy.oc1..<略>",
    "defined-tags": {},
    "dhcp-options-id": "ocid1.dhcpoptions.oc1.ap-tokyo-1.<略>",
    "display-name": "\u30d1\u30d6\u30ea\u30c3\u30af\u30fb\u30b5\u30d6\u30cd\u30c3\u30c8xkXd:AP-TOKYO-1-AD-1",
    "dns-label": null,
    "freeform-tags": {},
    "id": "ocid1.subnet.oc1.ap-tokyo-1.<略>",
    "ipv6-cidr-block": "xxxx:xxxx:8000:f502::/64",
    "ipv6-virtual-router-ip": "fe80::200:17ff:fec9:f071",
    "lifecycle-state": "UPDATING",
    "prohibit-internet-ingress": false,
    "prohibit-public-ip-on-vnic": false,
    "route-table-id": "ocid1.routetable.oc1.ap-tokyo-1.<略>",
    "security-list-ids": [
      "ocid1.securitylist.oc1.ap-tokyo-1.<略>"
    ],
    "subnet-domain-name": null,
    "time-created": "2019-09-19T10:20:05.710000+00:00",
    "vcn-id": "ocid1.vcn.oc1.ap-tokyo-1.<略>",
    "virtual-router-ip": "10.0.0.1",
    "virtual-router-mac": "00:00:17:C9:F0:71"
  },
  "etag": "e457a894"
}
username@cloudshell:~ (ap-tokyo-1)$
設定が反映されたかを確認します。
username@cloudshell:~ (ap-tokyo-1)$ oci network subnet list --compartment-id ocid1.tenancy.oc1..<略>
{
  "data": [
    {
      "availability-domain": null,
      "cidr-block": "10.0.1.0/24",
      "compartment-id": "ocid1.tenancy.oc1..<略>",
      "defined-tags": {},
      "dhcp-options-id": "ocid1.dhcpoptions.oc1.ap-tokyo-1.<略>",
      "display-name": "IPv6 \u30c6\u30b9\u30c8",
      "dns-label": null,
      "freeform-tags": {},
      "id": "ocid1.subnet.oc1.ap-tokyo-1.<略>",
      "ipv6-cidr-block": "xxxx:xxxx:8000:f501::/64",
      "ipv6-virtual-router-ip": "fe80::200:17ff:fec9:f071",
      "lifecycle-state": "AVAILABLE",
      "prohibit-internet-ingress": false,
      "prohibit-public-ip-on-vnic": false,
      "route-table-id": "ocid1.routetable.oc1.ap-tokyo-1.<略>",
      "security-list-ids": [
        "ocid1.securitylist.oc1.ap-tokyo-1.<略>"
      ],
      "subnet-domain-name": null,
      "time-created": "2021-04-28T04:44:55.872000+00:00",
      "vcn-id": "ocid1.vcn.oc1.ap-tokyo-1.<略>",
      "virtual-router-ip": "10.0.1.1",
      "virtual-router-mac": "00:00:17:C9:F0:71"
    },
    {
      "availability-domain": "xkXd:AP-TOKYO-1-AD-1",
      "cidr-block": "10.0.0.0/24",
      "compartment-id": "ocid1.tenancy.oc1..<略>",
      "defined-tags": {},
      "dhcp-options-id": "ocid1.dhcpoptions.oc1.ap-tokyo-1.<略>",
      "display-name": "\u30d1\u30d6\u30ea\u30c3\u30af\u30fb\u30b5\u30d6\u30cd\u30c3\u30c8xkXd:AP-TOKYO-1-AD-1",
      "dns-label": null,
      "freeform-tags": {},
      "id": "ocid1.subnet.oc1.ap-tokyo-1.<略>",
      "ipv6-cidr-block": "xxxx:xxxx:8000:f502::/64",
      "ipv6-virtual-router-ip": "fe80::200:17ff:fec9:f071",
      "lifecycle-state": "AVAILABLE",
      "prohibit-internet-ingress": false,
      "prohibit-public-ip-on-vnic": false,
      "route-table-id": "ocid1.routetable.oc1.ap-tokyo-1.<略>",
      "security-list-ids": [
        "ocid1.securitylist.oc1.ap-tokyo-1.<略>"
      ],
      "subnet-domain-name": null,
      "time-created": "2019-09-19T10:20:05.710000+00:00",
      "vcn-id": "ocid1.vcn.oc1.ap-tokyo-1.<略>",
      "virtual-router-ip": "10.0.0.1",
      "virtual-router-mac": "00:00:17:C9:F0:71"
    }
  ]
}
username@cloudshell:~ (ap-tokyo-1)$
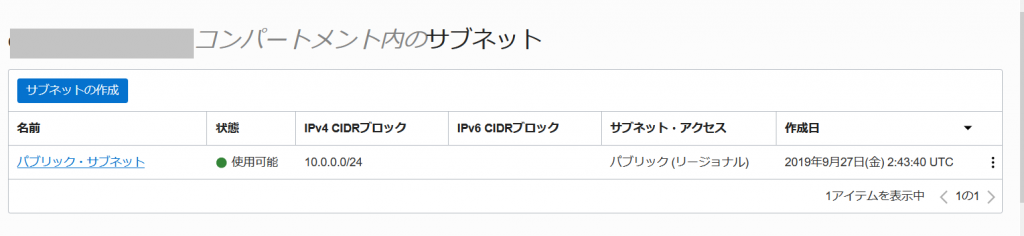
両方のサブネットにIPv6アドレスが入ったことがわかります。
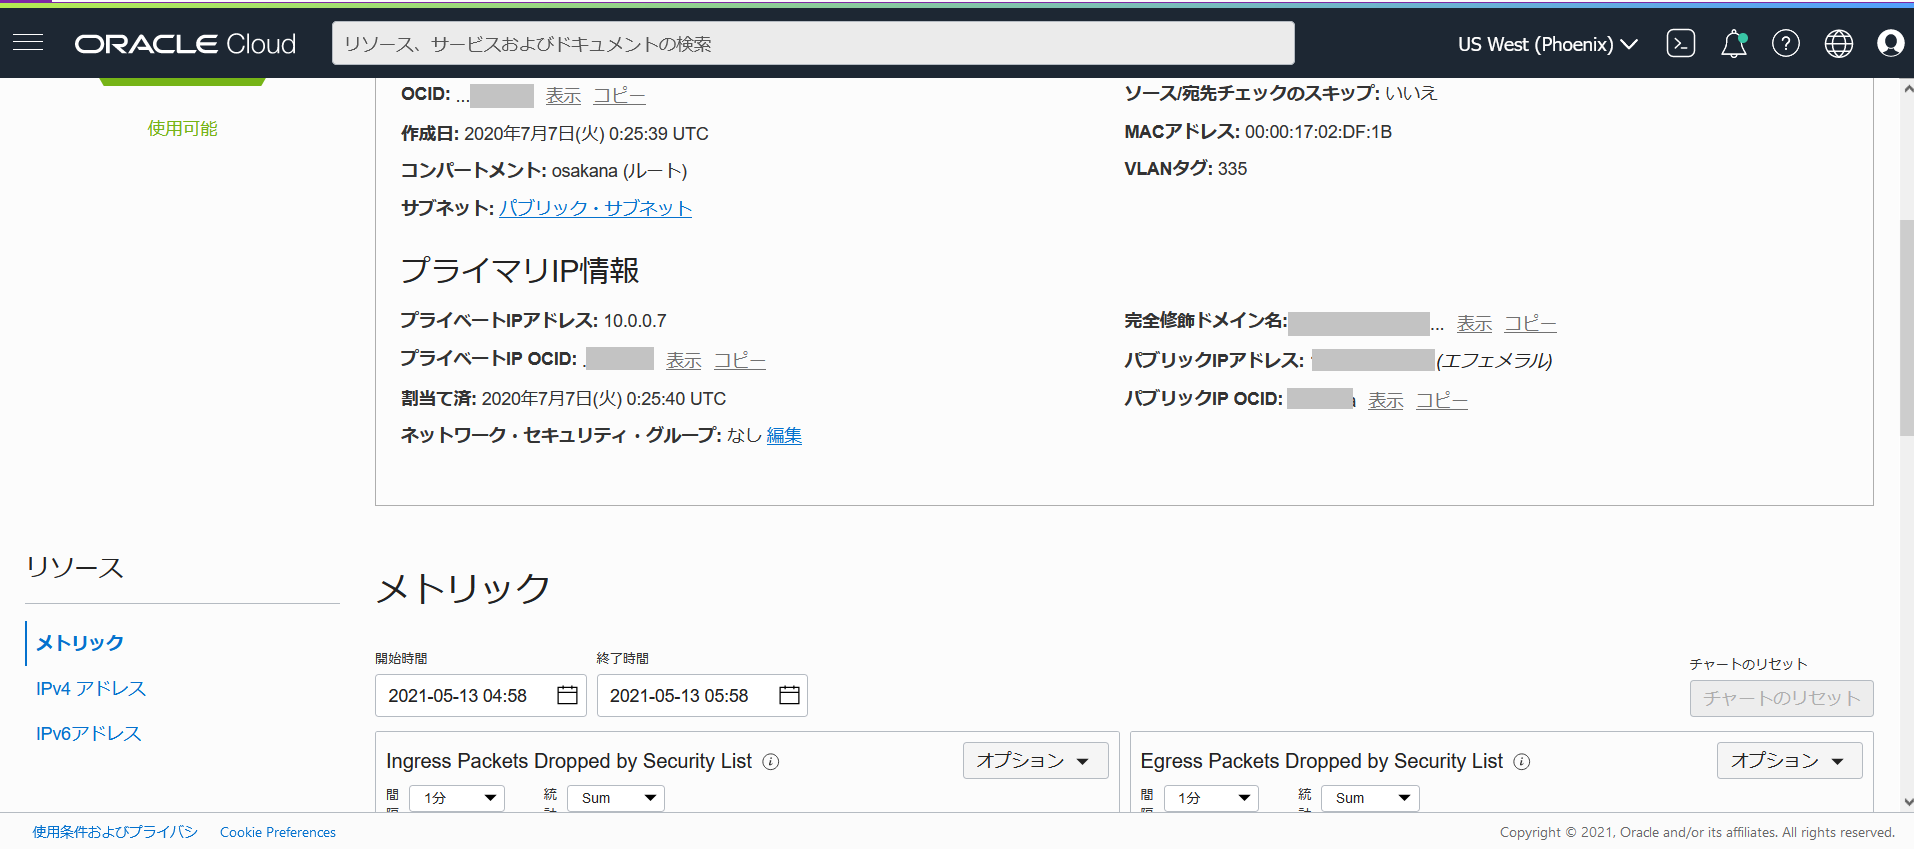
仮想マシンインスタンスに対する設定(管理側)
Oracle Cloudの管理GUI側で、仮想マシンインスタンスに対してIPv6アドレスを割り振る必要があります。
[インスタンスの詳細]-[アタッチされたVNIC]-[VNICの詳細]にて下のほうにある「リソース」の「IPv6アドレス」を選択します。

最初は下記の様に割り当てられていません

「IPv6アドレスの割当て」をクリック
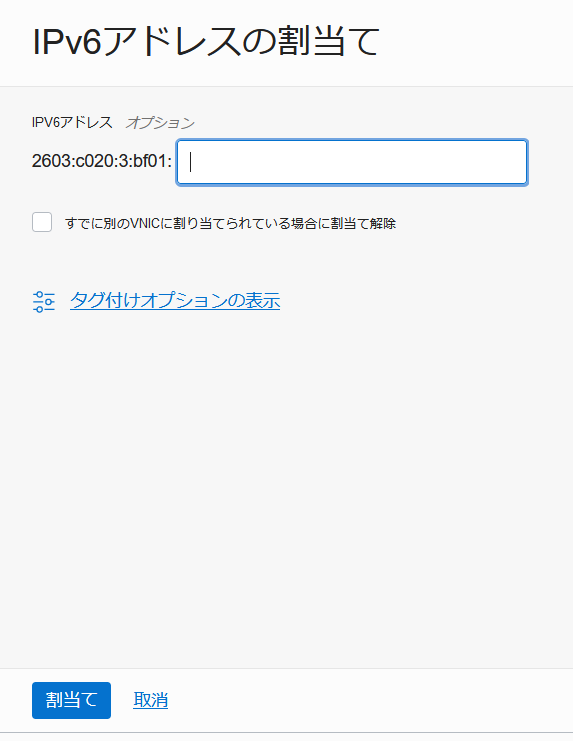
とくになにも数値入力する必要は無く、「割当て」をクリック

これで、IPv6アドレスが割り当てられました。
仮想マシン内のIPv6アドレス設定
Oracle Cloud上のインスタンスはcloud-initなどの影響化にあるため、一般的な設定手法でネットワーク設定を行っても再起動すると初期化されてしまいます。
今回の場合、IPv6未サポート時代に作られたインスタンスはIPv6が無効化されているため、有効にしなければならないのだが、正しいやりかたが不明。
公式ドキュメントの「IPv6 Addresses」には、コマンドで実行する場合のやり方が書かれていた。
しかし、これは仮想インスタンスの元となるイメージの作成時期によって動作が異なっている場合があった。
古いものではIPv6アドレス設定が無効化されており、ここ半年ぐらいのものはIPv6アドレスが有効化されていた。
有効化されている場合はドキュメント記載の「sudo dhclient -6」でIPv6アドレスが割り当てられた。
無効化されている場合は、下記の様に「sudo sysctl -w net.ipv6.conf.all.disable_ipv6=0」実行してIPv6有効化を行った後に、「sudo dhclient -6」でDHCPv6によりIPv6アドレスが割り当てられ、通信が正常に行えることを確認できた。
[root@oraclelinux7 ~]# ip a s
1: lo: <LOOPBACK,UP,LOWER_UP> mtu 65536 qdisc noqueue state UNKNOWN group default qlen 1000
    link/loopback 00:00:00:00:00:00 brd 00:00:00:00:00:00
    inet 127.0.0.1/8 scope host lo
       valid_lft forever preferred_lft forever
2: ens3: <BROADCAST,MULTICAST,UP,LOWER_UP> mtu 9000 qdisc pfifo_fast state UP group default qlen 1000
    link/ether xx:xx:xx:xx:xx:xx brd ff:ff:ff:ff:ff:ff
    inet 10.0.0.22/24 brd 10.0.0.255 scope global dynamic ens3
       valid_lft 86336sec preferred_lft 86336sec
[root@oraclelinux7 ~]#

[root@oraclelinux7 ~]# sysctl  -a|grep disable_ip
sysctl: reading key "net.ipv6.conf.all.stable_secret"
sysctl: reading key "net.ipv6.conf.default.stable_secret"
sysctl: reading key "net.ipv6.conf.ens3.stable_secret"
sysctl: reading key "net.ipv6.conf.lo.stable_secret"
net.ipv6.conf.all.disable_ipv6 = 1
net.ipv6.conf.default.disable_ipv6 = 1
net.ipv6.conf.ens3.disable_ipv6 = 1
net.ipv6.conf.lo.disable_ipv6 = 1
[root@oraclelinux7 ~]#

[root@oraclelinux7 ~]# sysctl  -w net.ipv6.conf.all.disable_ipv6=0
net.ipv6.conf.all.disable_ipv6 = 0
[root@oraclelinux7 ~]#

[root@oraclelinux7 ~]# sysctl  -a|grep disable_ip
sysctl: reading key "net.ipv6.conf.all.stable_secret"
sysctl: reading key "net.ipv6.conf.default.stable_secret"
sysctl: reading key "net.ipv6.conf.ens3.stable_secret"
sysctl: reading key "net.ipv6.conf.lo.stable_secret"
net.ipv6.conf.all.disable_ipv6 = 0
net.ipv6.conf.default.disable_ipv6 = 0
net.ipv6.conf.ens3.disable_ipv6 = 0
net.ipv6.conf.lo.disable_ipv6 = 0
[root@oraclelinux7 ~]#

[root@oraclelinux7 ~]# ip a s
1: lo: <LOOPBACK,UP,LOWER_UP> mtu 65536 qdisc noqueue state UNKNOWN group default qlen 1000
    link/loopback 00:00:00:00:00:00 brd 00:00:00:00:00:00
    inet 127.0.0.1/8 scope host lo
       valid_lft forever preferred_lft forever
    inet6 ::1/128 scope host
       valid_lft forever preferred_lft forever
2: ens3: <BROADCAST,MULTICAST,UP,LOWER_UP> mtu 9000 qdisc pfifo_fast state UP group default qlen 1000
    link/ether xx:xx:xx:xx:xx:xx brd ff:ff:ff:ff:ff:ff
    inet 10.0.0.22/24 brd 10.0.0.255 scope global dynamic ens3
       valid_lft 86257sec preferred_lft 86257sec
    inet6 fe80::17ff:fe00:a543/64 scope link
       valid_lft forever preferred_lft forever
[root@oraclelinux7 ~]#

[root@oraclelinux7 ~]# dhclient -6
[root@oraclelinux7 ~]# ip a s
1: lo: <LOOPBACK,UP,LOWER_UP> mtu 65536 qdisc noqueue state UNKNOWN group default qlen 1000
    link/loopback 00:00:00:00:00:00 brd 00:00:00:00:00:00
    inet 127.0.0.1/8 scope host lo
       valid_lft forever preferred_lft forever
    inet6 ::1/128 scope host
       valid_lft forever preferred_lft forever
2: ens3: <BROADCAST,MULTICAST,UP,LOWER_UP> mtu 9000 qdisc pfifo_fast state UP group default qlen 1000
    link/ether xx:xx:xx:xx:xx:xx brd ff:ff:ff:ff:ff:ff
    inet 10.0.0.22/24 brd 10.0.0.255 scope global dynamic ens3
       valid_lft 86240sec preferred_lft 86240sec
    inet6 xxxx:xxxx:8000:f502:7f3d:7046:6c88:13a1/128 scope global dynamic
       valid_lft 7495sec preferred_lft 7195sec
    inet6 fe80::17ff:fe00:a543/64 scope link
       valid_lft forever preferred_lft forever
[root@oraclelinux7 ~]#
問題は、これを起動時に自動的に行う設定である。
とりあえず公式ドキュメントは発見できなかった。
IPv6有効化設定の方法
まずIPv6無効化の「net.ipv6.conf.all.disable_ipv6=1」はどこで設定されているのかを調べたところ、/usr/lib/sysctl.d/disable-ipv6.conf で設定されていた。
このファイルはOSパッケージにより管理されているため書き換えてはいけない。ユーザが値を変更したい場合は /etc/sysctl.d/ ディレクトリに同じファイル名でファイルを置いて変更する必要がある。
今回の場合は /etc/sysctl.d/disable-ipv6.conf というファイルを作成して、以下の内容で配置した。
net.ipv6.conf.all.disable_ipv6 = 0
net.ipv6.conf.default.disable_ipv6 = 0
これにより、起動時にIPv6が有効化された状態とすることは可能になった。
DHCPv6によるIPアドレス取得の方法
/etc/sysconfig/network-scripts/ifcfg-ens3 に 「IPV6INIT=yes」とか追加してもIPv6アドレスを割り当ててくれない。それどころか、入れたIPV6INIT記述は削除されている。
動作を調べるとcloud-initにより、起動時に毎回 /etc/sysconfig/network-scripts/ifcfg-ens3 が生成されているので、このファイルを書きかえても意味がないことが分かった。
毎起動時に起動させる手法を探したところ、cloud-initの中でper-boot という設定があることがわかった。
「/var/lib/cloud/scripts/per-boot/01_ipv6」というファイルを作り、下記を書き、実行権限を与えたところ、とりあえず希望通りの動作にはなった。
とりあえず、これでOracle Cloud上に作ったインスタンスをIPv6環境に対応させることができた。
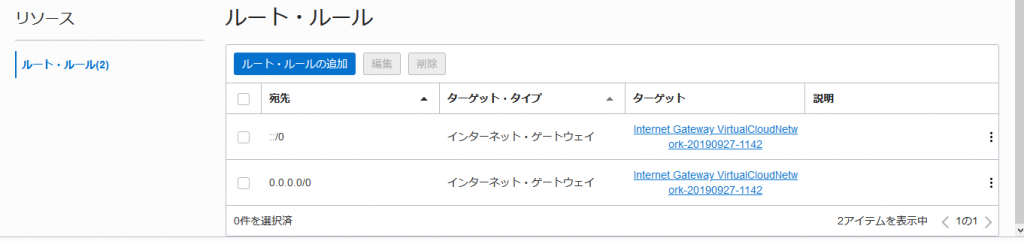
ルーティングの設定
上記だけではOracle Cloud内でのIPv6通信しかできない。
仮想クラウドネットワーク(VNC)の設定内にある「ルート・ルール」に「宛先」を「::/0」、ターゲットタイプ「インターネット・ゲートウェイ」でルールを1個追加する。
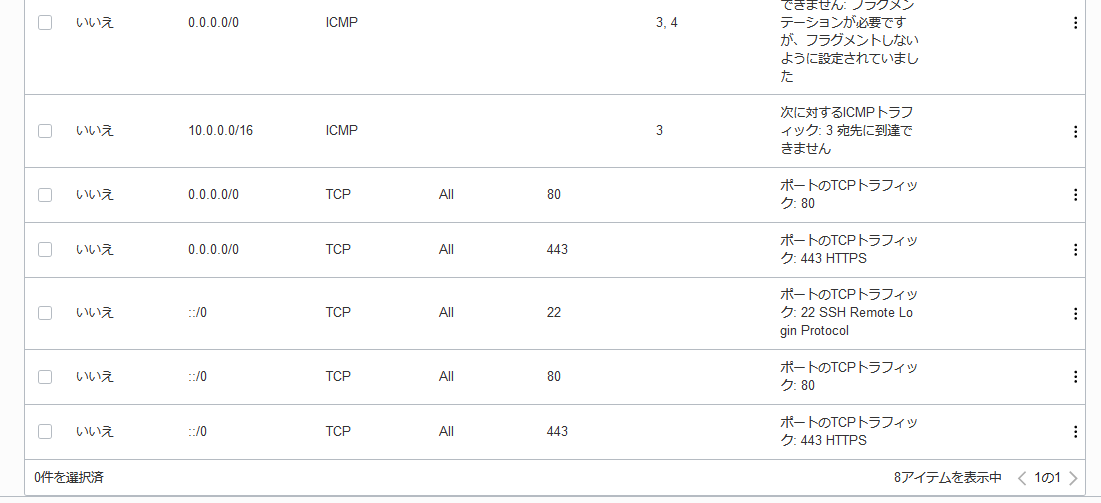
また、「セキュリティ・リスト」の「イングレス・ルール」に、ソース「::/0」、プロトコルTCP、宛先ポート範囲で「22,80,443」を追加してssh,http,httpsアクセスが可能な設定を行う。
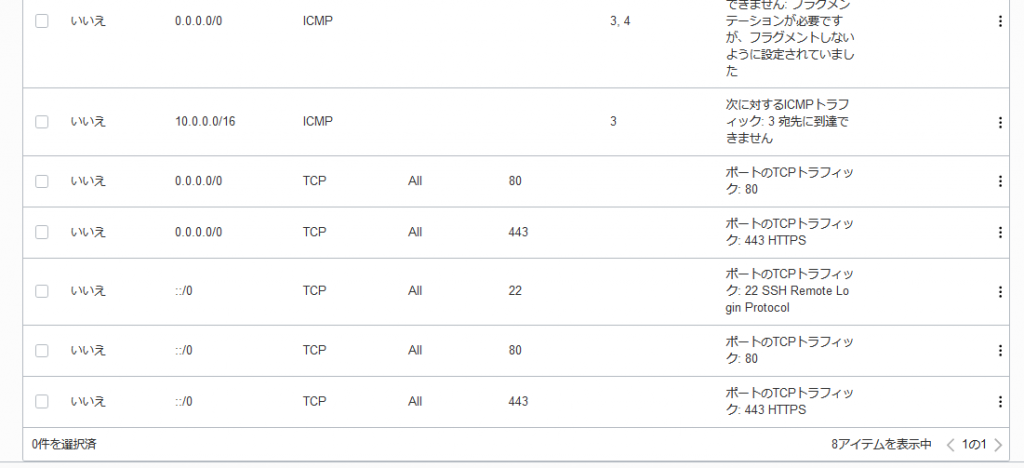
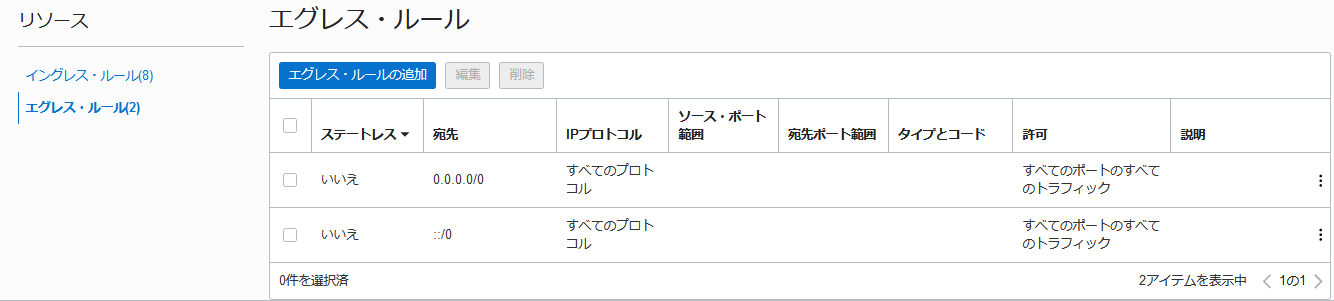
また、出ていくパケットについての「エグレス・ルール」の方に、宛先「::/0」で全てのプロトコルを設定。

これで、外部からのIPv6アクセスも可能になったはずである。