Intel N95搭載のミニPC TRIGKEY MINI PC Key N に32GBメモリを載せたので、仮想基盤にしてみるかと、VMware ESXi 8.0の無償ライセンス版をインストールしてようと思った。
標準状態ではオンボードNICを認識してくれず、インストール不可。
手持ちのUSB NICをさしたところNICとして認めてくれたようで、ESXiのインストールが出来た。
ただ、動作が少しおかしい
再起動するとネットワーク接続ができなくなる
ESXiのコンソールでみるとIPアドレスはきちんと割り当てられている
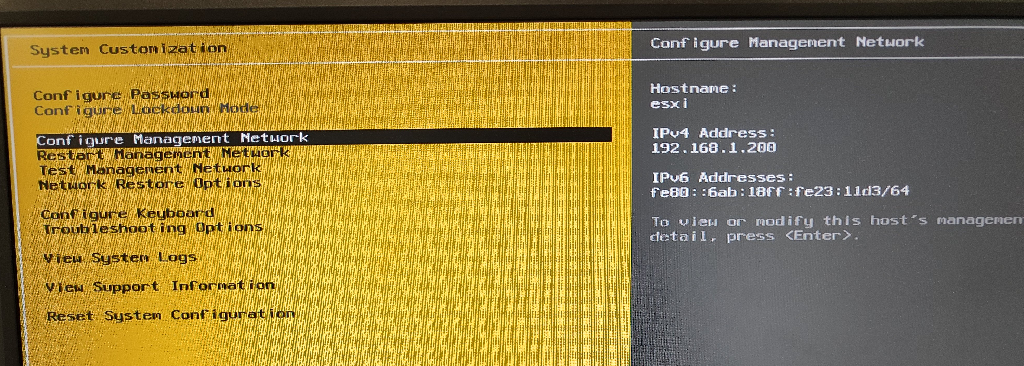
しかし[Configure Management Network]-[Network Adapters]を確認すると、アダプタの割り当てが外れている

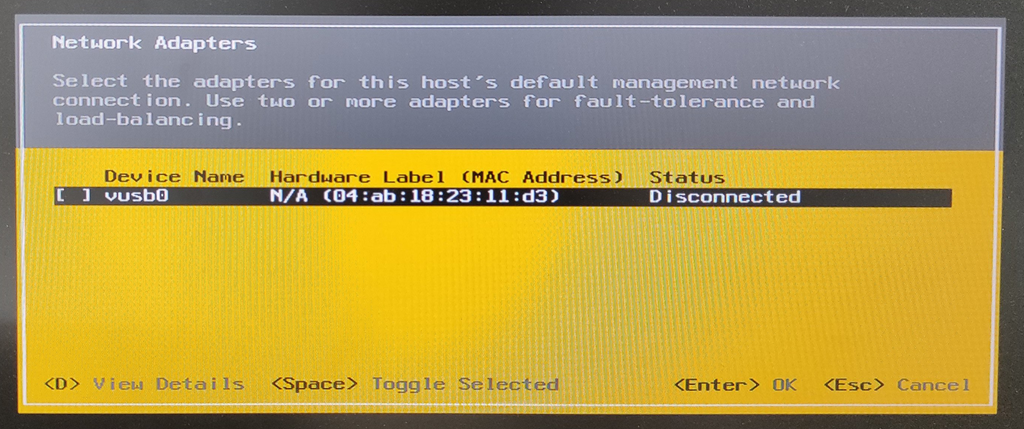
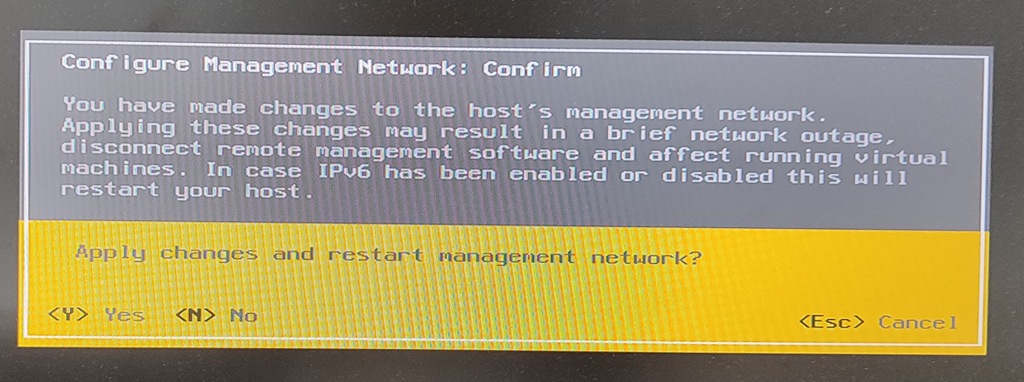
チェックを入れ直して設定保存するとESXi自体のネットワークが通るようになる

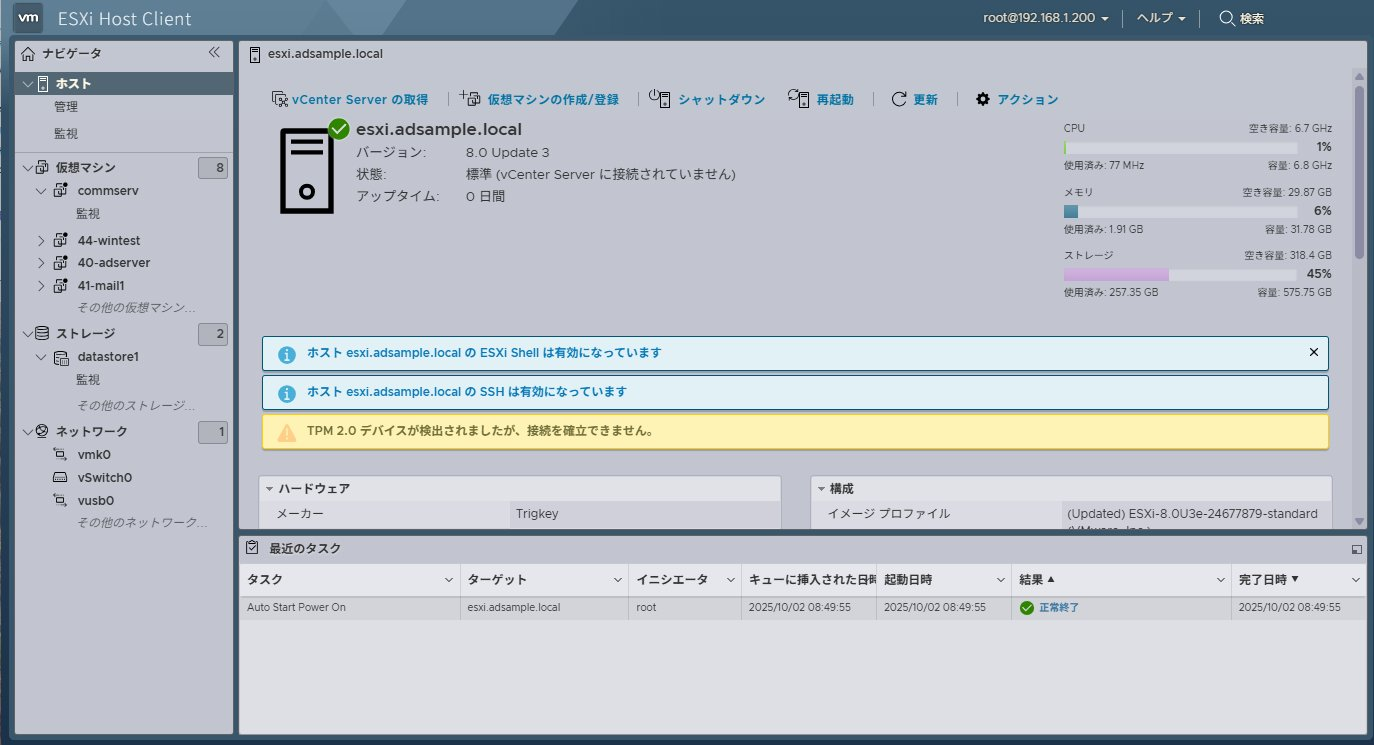
この設定を行うまでは、ESXiサーバから外部へのping/sshはできないし、外部からESXiのWebアクセスもできない
原因調査
Ctrl-Alt-F1でESXi shellを開いて「esxcli network vswitch standard list」で設定を取ると、再起動直後は下記で、UplinkにNICが登録されていない
[root@esxi:~] esxcli network vswitch standard list vSwitch0
   Name: vSwitch0
   Class: cswitch
   Num Ports: 2560
   Used Ports: 2
   Configured Ports: 128
   MTU: 1500
   CDP Status: listen
   Beacon Enabled: false
   Beacon Interval: 1
   Beacon Threshold: 3
   Beacon Required By:
   Uplinks:
   Portgroups: VM Network, Management Network
[root@esxi:~]
ESXiコンソールから設定修正を行ったあとは以下に変わる
[root@esxi:~] esxcli network vswitch standard list vSwitch0
   Name: vSwitch0
   Class: cswitch
   Num Ports: 2560
   Used Ports: 4
   Configured Ports: 128
   MTU: 1500
   CDP Status: listen
   Beacon Enabled: false
   Beacon Interval: 1
   Beacon Threshold: 3
   Beacon Required By:
   Uplinks: vusb0
   Portgroups: VM Network, Management Network
[root@esxi:~]
Uplinksが未割り当てとなったことが原因の様に見えるのでESXiコンソールからの操作の代わりに「esxcli network vswitch standard uplink add –vswitch-namevSwitch0 –uplink-name=vusb0」を実行してみたものの ネットワークがつながらず、ESXiコンソール操作を実行しなければならなかった。
ESXiコンソール操作の変更反映画面に「Configure Management Network」とあるのでvSwitchの設定だけではなくポートグループ設定周りも見直す必要があるのでは?と esxcli network vswitch standard のオプション類をいろいろ探していくと、esxcli network vswitch standard portgroup policy failover にて怪しい状況を発見
[root@esxi:~] esxcli network vswitch standard portgroup policy failover get --portgroup-name="Management Network"
   Load Balancing: srcport
   Network Failure Detection: link
   Notify Switches: true
   Failback: true
   Active Adapters:
   Standby Adapters:
   Unused Adapters: vusb0
   Override Vswitch Load Balancing: true
   Override Vswitch Network Failure Detection: true
   Override Vswitch Notify Switches: true
   Override Vswitch Failback: true
   Override Vswitch Uplinks: true
[root@esxi:~] esxcli network vswitch standard portgroup policy failover get --portgroup-name="VM Network"
   Load Balancing: srcport
   Network Failure Detection: link
   Notify Switches: true
   Failback: true
   Active Adapters:
   Standby Adapters:
   Unused Adapters: vusb0
   Override Vswitch Load Balancing: false
   Override Vswitch Network Failure Detection: false
   Override Vswitch Notify Switches: false
   Override Vswitch Failback: false
   Override Vswitch Uplinks: false
[root@esxi:~]
「Management Network」と「VM Network」のポートグループに割り当てられているはずのvusb0が「Unused Adapters」に割り当てられている
これらを 「Active Adapters」に割り当て直せばいいのか?とCLIで設定変更を行ってみる
[root@esxi:~] esxcli network vswitch standard portgroup policy failover set --portgroup-name="Management Network" --active-uplinks=vusb0
[root@esxi:~] esxcli network vswitch standard portgroup policy failover set --portgroup-name="Management Network"
   Load Balancing: srcport
   Network Failure Detection: link
   Notify Switches: true
   Failback: true
   Active Adapters: vusb0
   Standby Adapters:
   Unused Adapters:
   Override Vswitch Load Balancing: true
   Override Vswitch Network Failure Detection: true
   Override Vswitch Notify Switches: true
   Override Vswitch Failback: true
   Override Vswitch Uplinks: true
[root@esxi:~]
ポートグループManagement Networkについての設定変更でESXi上から外部ネットワークへ通信が可能となった
この状況では仮想マシンを起動しても、VM NetworkのActive Adaptersが設定されていないため外部ネットワークに接続できない。
続いてVM NetworkのUnsed Adapterについて設定変更を実施
[root@esxi:~] esxcli network vswitch standard portgroup policy failover set --portgroup-name="VM Network" --active-uplinks=vusb0
[root@esxi:~]
   Load Balancing: srcport
   Network Failure Detection: link
   Notify Switches: true
   Failback: true
   Active Adapters: vusb0
   Standby Adapters:
   Unused Adapters:
   Override Vswitch Load Balancing: false
   Override Vswitch Network Failure Detection: false
   Override Vswitch Notify Switches: false
   Override Vswitch Failback: false
   Override Vswitch Uplinks: true
[root@esxi:~]
この設定実行後、仮想マシンからの外部への通信も成功した
ESXi再起動後、再設定を行い、再現性があることも確認した。
ESXiのパラメータ設定で対応可能
最初は後述の「起動時にコマンドを自動実行させる方法」を使っていたのだが、unused adapterで調べ直すと usbBusFullScanOnBootEnabled パラメータを設定することで対処できる、という話を発見
「ESXi 7.0 Update 2 enhancement for USB NIC only installations」の後半に書かれている
ESXiの起動時、ESXiのvSwitch設定プロセスよりあとにUSB NICの認識が行われていることで登録できない、という状態であるため、最初にUSBデバイスの認識を行う、という順序に変える、というパラメータのようである。
設定の出典を調べると現存しない VMware Flings時代の「USB Network Native Driver for ESXi」の「Persisting USB NIC Bindings」に下記の様に記載されているものだった。
Persisting USB NIC Bindings
Option 1: Run the following ESXCLI command which will enable the driver parameter to perform a full USB bus scan during startup:
esxcli system module parameters set -p “usbBusFullScanOnBootEnabled=1” -m vmkusb_nic_fling
これらの記事は古いので、ESXi 8.0 Update 3eでも該当するモジュール vmkusb_nic_fling とパラメータ usbBusFullScanOnBootEnabled があるのかを確認してみる
[root@esxi:~] esxcli system module list|grep nic
vmkusb_nic_fling                     true        true
[root@esxi:~] esxcli system module list|grep usb
vmkusb_nic_fling                     true        true
[root@esxi:~]
モジュール vmkusb_nic_fling は、ESXi 8.0でも存在している。
モジュールに対して設定できるパラメータを確認。
[root@esxi:~] esxcli system module parameters list -m vmkusb_nic_fling
Name                         Type    Value  Description
---------------------------  ------  -----  -----------
usbBusFullScanOnBootEnabled  int            Enable USB Bus full scan on system boot: 0 No (Default), 1 Yes
usbCdromPassthroughEnabled   int            Enable USB CDROM device for USB passtrough: 0 No (Default), 1 Yes
usbStorageRegisterDelaySecs  int            Delay to register cached USB storage device: Min: 0 second, Max: 600 seconds, Default: 10 seconds
vusb0_mac                    string         Persist vusb0 MAC Address: xx:xx:xx:xx:xx:xx
vusb10_mac                   string         Persist vusb10 MAC Address: xx:xx:xx:xx:xx:xx
vusb11_mac                   string         Persist vusb11 MAC Address: xx:xx:xx:xx:xx:xx
vusb1_mac                    string         Persist vusb1 MAC Address: xx:xx:xx:xx:xx:xx
vusb2_mac                    string         Persist vusb2 MAC Address: xx:xx:xx:xx:xx:xx
vusb3_mac                    string         Persist vusb3 MAC Address: xx:xx:xx:xx:xx:xx
vusb4_mac                    string         Persist vusb4 MAC Address: xx:xx:xx:xx:xx:xx
vusb5_mac                    string         Persist vusb5 MAC Address: xx:xx:xx:xx:xx:xx
vusb6_mac                    string         Persist vusb6 MAC Address: xx:xx:xx:xx:xx:xx
vusb7_mac                    string         Persist vusb7 MAC Address: xx:xx:xx:xx:xx:xx
vusb8_mac                    string         Persist vusb8 MAC Address: xx:xx:xx:xx:xx:xx
vusb9_mac                    string         Persist vusb9 MAC Address: xx:xx:xx:xx:xx:xx
[root@esxi:~]
usbBusFullScanOnBootEnabled が初期値0で存在していることを確認
(“Persisting VMkernel to USB NIC mappings”に記載されている複数のUSB NICがある時に、指す場所を変えてもvusbの番号が変わらないようにするための設定も引き続きある)
現段階のesxcliでの正式オプションに修正して、「esxcli system module parameters set –module=vmkusb_nic_fling –parameter-string=”usbBusFullScanOnBootEnabled=1″」と実行する
[root@esxi:~] esxcli system module parameters set --module=vmkusb_nic_fling --parameter-string="usbBusFullScanOnBootEnabled=1"
[root@esxi:~] esxcli system module parameters list -m vmkusb_nic_fling
Name                         Type    Value  Description
---------------------------  ------  -----  -----------
usbBusFullScanOnBootEnabled  int     1      Enable USB Bus full scan on system boot: 0 No (Default), 1 Yes
usbCdromPassthroughEnabled   int            Enable USB CDROM device for USB passtrough: 0 No (Default), 1 Yes
usbStorageRegisterDelaySecs  int            Delay to register cached USB storage device: Min: 0 second, Max: 600 seconds, Default: 10 seconds
vusb0_mac                    string         Persist vusb0 MAC Address: xx:xx:xx:xx:xx:xx
vusb10_mac                   string         Persist vusb10 MAC Address: xx:xx:xx:xx:xx:xx
vusb11_mac                   string         Persist vusb11 MAC Address: xx:xx:xx:xx:xx:xx
vusb1_mac                    string         Persist vusb1 MAC Address: xx:xx:xx:xx:xx:xx
vusb2_mac                    string         Persist vusb2 MAC Address: xx:xx:xx:xx:xx:xx
vusb3_mac                    string         Persist vusb3 MAC Address: xx:xx:xx:xx:xx:xx
vusb4_mac                    string         Persist vusb4 MAC Address: xx:xx:xx:xx:xx:xx
vusb5_mac                    string         Persist vusb5 MAC Address: xx:xx:xx:xx:xx:xx
vusb6_mac                    string         Persist vusb6 MAC Address: xx:xx:xx:xx:xx:xx
vusb7_mac                    string         Persist vusb7 MAC Address: xx:xx:xx:xx:xx:xx
vusb8_mac                    string         Persist vusb8 MAC Address: xx:xx:xx:xx:xx:xx
vusb9_mac                    string         Persist vusb9 MAC Address: xx:xx:xx:xx:xx:xx
[root@esxi:~]
設定後、ESXiを再起動してもネットワーク接続に問題ないことを確認した。
起動時にコマンドを自動実行させる方法
usbBusFullScanOnBootEnabled パラメータの手法を発見する前は、起動時にこれらの設定を自動的に実行するように設定して対応していた。
ESXi 5.1時代にVMware HA有効時に仮想マシンの自動起動をしたい で使用した rc.local 設定 について調べると 2025年8月更新のKB「Modifying the rc.local or local.sh file in VMware vSphere ESXi to execute commands while booting」にて、vSphere 8でも使用可能とあるため、これを使う
初期状態の /etc/rc.local.d/local.sh の内容を確認
[root@esxi:~] ls -l /etc/rc.local.d
total 32
-r-xr-xr-x    1 root     root           378 Apr  3  2025 009.vsanwitness.sh
drwxr-xr-x    1 root     root           512 Oct  3 00:25 autodeploy
-r-xr-xr-x    1 root     root          2249 Apr  3  2025 backupPrevBootLogs.py
-r-xr-xr-x    1 root     root          2071 Apr  3  2025 cleanupStatefulHost.py
-r-xr-xr-x    1 root     root          2567 Apr  3  2025 kickstart.py
-rwxr-xr-t    1 root     root           506 Apr  3  2025 local.sh
-r-xr-xr-x    1 root     root           397 Apr  3  2025 psaScrub.sh
-r-xr-xr-x    1 root     root          1190 Apr  3  2025 raiseConfigStoreVob.py
[root@esxi:~] cat /etc/rc.local.d/local.sh
#!/bin/sh ++group=host/vim/vmvisor/boot

# local configuration options

# Note: modify at your own risk!  If you do/use anything in this
# script that is not part of a stable API (relying on files to be in
# specific places, specific tools, specific output, etc) there is a
# possibility you will end up with a broken system after patching or
# upgrading.  Changes are not supported unless under direction of
# VMware support.

# Note: This script will not be run when UEFI secure boot is enabled.

exit 0
[root@esxi:~]
今回実行したesxcliのコマンド群を追加
[root@esxi:~] vi /etc/rc.local.d/local.sh
[root@esxi:~] cat /etc/rc.local.d/local.sh
#!/bin/sh ++group=host/vim/vmvisor/boot

# local configuration options

# Note: modify at your own risk!  If you do/use anything in this
# script that is not part of a stable API (relying on files to be in
# specific places, specific tools, specific output, etc) there is a
# possibility you will end up with a broken system after patching or
# upgrading.  Changes are not supported unless under direction of
# VMware support.

# Note: This script will not be run when UEFI secure boot is enabled.

esxcli network vswitch standard uplink add --vswitch-name=vSwitch0 --uplink-name=vusb0
esxcli network vswitch standard portgroup policy failover set --portgroup-name="Management Network" --active-uplinks=vusb0
esxcli network vswitch standard portgroup policy failover set --portgroup-name="VM Network" --active-uplinks=vusb0

exit 0
[root@esxi:~]
以前は auto-backup.sh を手動で実行する必要があったけど、2025/10/03時点のKBには記載がないが、下記で行ったように現時点でもauto-backup.shを実行しないと設定が消えてしまうと思われる。
[root@esxi:~] date
Fri Oct  3 00:57:12 UTC 2025
[root@esxi:~] ls -ltr /bootbank/
total 261895
<略>
-rwx------    1 root     root          1797 Sep 17 16:34 boot.cfg
-rwx------    1 root     root           102 Oct  3 00:25 jumpstrt.gz
-rwx------    1 root     root        266977 Oct  3 00:31 state.tgz
[root@esxi:~]
/bootbank/state.tgz が更新されていない
[root@esxi:~] auto-backup.sh
ConfigStore has been modified since the last backup
Bootbank lock is /var/lock/bootbank/f43b0450-7e4d6762-c6be-52e6552cc1f8
INFO: Successfully claimed lock file for pid 526790
Saving current state in /bootbank
Ssh configuration synced to configstore
Creating ConfigStore Backup
Locking esx.conf
Creating archive
Unlocked esx.conf
Using key ID d27fa69c-5edc-424d-bc0f-61d7966bf4d4 to encrypt
Clock updated.
Time: 00:57:21   Date: 10/03/2025   UTC
[root@esxi:~]
auto-backup.shを実行後を確認
[root@esxi:~] ls -ltr /bootbank/
total 261895
<略>
-rwx------    1 root     root          1797 Sep 17 16:34 boot.cfg
-rwx------    1 root     root           102 Oct  3 00:25 jumpstrt.gz
-rwx------    1 root     root        266974 Oct  3 00:57 state.tgz
[root@esxi:~]
/bootbank/state.tgz が更新された
更新後、ESXiを再起動してみると、ちゃんとネットワークに接続できる状態でESXiが起動することを確認できた
2025/11/03 追記
VMware flingsで配布している「USB Network Native Driver for ESXi」からvmkusb_nic_fling ドライバをインストールすると、使えるUSB NICの種類が増える
[root@esxi:/vmfs/volumes/6908722d-a37ea8a3-525a-4d150daf152f/iso] esxcli software vib install -d /vmfs/volumes/datastore1/iso/ESXi8
03-VMKUSB-NIC-FLING-76444229-component-24179899.zip
Installation Result
   Message: The update completed successfully, but the system needs to be rebooted for the changes to be effective.
   VIBs Installed: VMW_bootbank_vmkusb-nic-fling_1.14-2vmw.803.0.0.76444229
   VIBs Removed:
   VIBs Skipped:
   Reboot Required: true
   DPU Results:
[root@esxi:/vmfs/volumes/6908722d-a37ea8a3-525a-4d150daf152f/iso]
インストール後、再起動は必須