2021/04/25追記: この手順はOracle Autonomouse Linuxが通常のOracle Linuxとは異なるレポジトリで運用されていた2020年12月以前のものです。
2020年12月にOracle Autonomous Linuxでレポジトリ仕様の変更があった がありましたので、現状は普通のOracle Linux環境として設定できますので「CentOS 7 / Oracle Linux 7でWordPressサーバを建てる」を参照ください。
WebサーバをApacheではなくnginxで構成したい、という場合はこの記事を参照してもいいかもしれません。
2023/09/07追記: 2022年ごろ以降のOracle CloudではFree TierでOracle Autonomouse Linuxを使う事ができなくなっています。
Oracle CloudのTOKYOリージョンでFree tierのOracle Autonomouse Linux 7.8環境の作成が出来た。
できたんだけど、標準で提供されているレポジトリの範囲が狭く、通常のOracle Linux 7.8の標準レポジトリにも足りていない。
このため、wordpressサーバを建ててみるかと思っても、要求されるphpおよびmariadbのバージョンに足りていない。
Oracle Autonomous Linuxとしてのマニュアルがなく、ソフトウェア追加に関する制限事項等が分からないが、他に使い道も無いので、通常のOracle Linux 7.8で設定されているレポジトリとかを追加してみることにした。
注意:普通のOracle Linux 7.8やCentOS7にWordpressをインストールする場合は「CentOS 7 / Oracle Linux 7でWordPressサーバを建てる」を参照してください。
php 7.4追加編
いろいろある中、Oracle自身が出していてOracle Linux 7.8でも追加できるPHP Packages for Oracle Linuxかな、と追加してみる。
Oracle Linuxのレポジトリ設定の中からphp7.4部分を抜き出して /etc/yum.repos.d/oracle-php.repo というファイルを作成。
[ol7_developer_php74]
name=Oracle Linux $releasever PHP 7.4 Packages for Development and test ($basearch)
baseurl=https://yum$ociregion.oracle.com/repo/OracleLinux/OL7/developer/php74/$basearch/
gpgkey=file:///etc/pki/rpm-gpg/RPM-GPG-KEY-oracle
gpgcheck=1
enabled=1
そしてphpをインストール
# yum install php
<略>
--> Finished Dependency Resolution

Dependencies Resolved

================================================================================
 Package         Arch       Version               Repository               Size
================================================================================
Installing:
 php             x86_64     7.4.7-1.0.1.el7       ol7_developer_php74     3.4 M
Installing for dependencies:
 apr             x86_64     1.4.8-5.el7           al7                     103 k
 apr-util        x86_64     1.5.2-6.0.1.el7       al7                      91 k
 httpd           x86_64     2.4.6-93.0.1.el7      al7                     1.2 M
 httpd-tools     x86_64     2.4.6-93.0.1.el7      al7                      92 k
 mailcap         noarch     2.1.41-2.el7          al7                      30 k
 php-cli         x86_64     7.4.7-1.0.1.el7       ol7_developer_php74     5.1 M
 php-common      x86_64     7.4.7-1.0.1.el7       ol7_developer_php74     1.1 M

Transaction Summary
================================================================================
Install  1 Package (+7 Dependent packages)

Total download size: 11 M
Installed size: 47 M
Is this ok [y/d/N]: y
<略>
Installed:
  php.x86_64 0:7.4.7-1.0.1.el7

Dependency Installed:
  apr.x86_64 0:1.4.8-5.el7              apr-util.x86_64 0:1.5.2-6.0.1.el7
  httpd.x86_64 0:2.4.6-93.0.1.el7       httpd-tools.x86_64 0:2.4.6-93.0.1.el7
  mailcap.noarch 0:2.1.41-2.el7         php-cli.x86_64 0:7.4.7-1.0.1.el7
  php-common.x86_64 0:7.4.7-1.0.1.el7

Complete!
#
httpdも一緒にインストールされました。
また、wp-cliで使うphp-jsonとサイトヘルスで表示されるエラー対応としてphp-bcmath を追加します。
# yum install php-json php-bcmath
<略>
--> Finished Dependency Resolution

Dependencies Resolved

================================================================================
 Package        Arch       Version                Repository               Size
================================================================================
Installing:
 php-bcmath     x86_64     7.4.7-1.0.1.el7        ol7_developer_php74      56 k
 php-json       x86_64     7.4.7-1.0.1.el7        ol7_developer_php74      58 k

Transaction Summary
================================================================================
Install  2 Packages

Total download size: 114 k
Installed size: 160 k
Is this ok [y/d/N]: y
<略>
#
しかし、AMP pluginで使うphp-pear-Net-Curlとサイトヘルスのphp-pecl-imagick はepel系パッケージ、サイトヘルスのphp-gd は依存パッケージのlibvpx(Oracle Linuxでは標準パッケージに含まれる)がなくインストールできなかった。
MariaDB追加編
SQLサーバのmariadb-serverパッケージについては、MariaDB Foundationからmariadb 10.5を導入することにした。
「/etc/yum.repos.d/mariadb.repo」というファイルを作り、以下の内容を入力
# MariaDB 10.5 RedHat repository list - created 2020-06-26 04:54 UTC
# http://downloads.mariadb.org/mariadb/repositories/
[mariadb]
name = MariaDB
baseurl = http://yum.mariadb.org/10.5/rhel7-amd64
gpgkey=https://yum.mariadb.org/RPM-GPG-KEY-MariaDB
gpgcheck=1
#
そののち「yum install MariaDB-server MariaDB-client」を実行してmariadb-serverをインストール
# yum install MariaDB-server MariaDB-client
<中略>
---> Package perl-Compress-Raw-Zlib.x86_64 1:2.061-4.el7 will be installed
--> Finished Dependency Resolution
Error: Package: MariaDB-client-10.5.4-1.el7.centos.x86_64 (mariadb)
           Requires: libpcre2-8.so.0()(64bit)
Error: Package: galera-4-26.4.5-1.el7.centos.x86_64 (mariadb)
           Requires: socat
Error: Package: MariaDB-server-10.5.4-1.el7.centos.x86_64 (mariadb)
           Requires: libpcre2-8.so.0()(64bit)
 You could try using --skip-broken to work around the problem
 You could try running: rpm -Va --nofiles --nodigest
#
どうやら「pcre2」と「socat」がOracle Autonomous Linuxでは提供されていないパッケージであるようだ。(標準のOralce Linux 7.8ではol7_latestレポジトリに含まれている)
先ほど指定したmariadbレポジトリはRedHat Enterprise Linux 7用だったので、CentOS7用(baseurl=http://yum.mariadb.org/10.5/centos7-amd64 )に変更しても状況は変わらず。
では、とバージョンを10.4に下げてみると成功。成功時のmariadb.repoは以下
# MariaDB 10.4 RedHat repository list - created 2020-06-26 06:01 UTC
# http://downloads.mariadb.org/mariadb/repositories/
[mariadb]
name = MariaDB
baseurl = http://yum.mariadb.org/10.4/rhel7-amd64
gpgkey=https://yum.mariadb.org/RPM-GPG-KEY-MariaDB
gpgcheck=1
# yum install MariaDB-server MariaDB-client
<略>
--> Finished Dependency Resolution

Dependencies Resolved

================================================================================
 Package                   Arch     Version                     Repository
                                                                           Size
================================================================================
Installing:
 MariaDB-client            x86_64   10.4.13-1.el7.centos        mariadb    12 M
 MariaDB-compat            x86_64   10.4.13-1.el7.centos        mariadb   2.2 M
     replacing  mariadb-libs.x86_64 1:5.5.65-1.el7
 MariaDB-server            x86_64   10.4.13-1.el7.centos        mariadb    26 M
Installing for dependencies:
 MariaDB-common            x86_64   10.4.13-1.el7.centos        mariadb    81 k
 boost-program-options     x86_64   1.53.0-28.el7               al7       156 k
 galera-4                  x86_64   26.4.4-1.rhel7.el7.centos   mariadb   9.5 M
 perl-Compress-Raw-Bzip2   x86_64   2.061-3.el7                 al7        32 k
 perl-Compress-Raw-Zlib    x86_64   1:2.061-4.el7               al7        57 k
 perl-DBI                  x86_64   1.627-4.el7                 al7       801 k
 perl-Data-Dumper          x86_64   2.145-3.el7                 al7        47 k
 perl-IO-Compress          noarch   2.061-2.el7                 al7       259 k
 perl-Net-Daemon           noarch   0.48-5.el7                  al7        50 k
 perl-PlRPC                noarch   0.2020-14.el7               al7        35 k

Transaction Summary
================================================================================
Install  3 Packages (+10 Dependent packages)

Total download size: 51 M
Is this ok [y/d/N]: y
<略>

Installed:
  MariaDB-client.x86_64 0:10.4.13-1.el7.centos
  MariaDB-compat.x86_64 0:10.4.13-1.el7.centos
  MariaDB-server.x86_64 0:10.4.13-1.el7.centos

Dependency Installed:
  MariaDB-common.x86_64 0:10.4.13-1.el7.centos
  boost-program-options.x86_64 0:1.53.0-28.el7
  galera-4.x86_64 0:26.4.4-1.rhel7.el7.centos
  perl-Compress-Raw-Bzip2.x86_64 0:2.061-3.el7
  perl-Compress-Raw-Zlib.x86_64 1:2.061-4.el7
  perl-DBI.x86_64 0:1.627-4.el7
  perl-Data-Dumper.x86_64 0:2.145-3.el7
  perl-IO-Compress.noarch 0:2.061-2.el7
  perl-Net-Daemon.noarch 0:0.48-5.el7
  perl-PlRPC.noarch 0:0.2020-14.el7

Replaced:
  mariadb-libs.x86_64 1:5.5.65-1.el7

Complete!
#
MariaDB設定編
まず、現在のMariaDBサーバの自動起動設定を確認。
# systemctl list-unit-files|grep mariadb
mariadb.service                               disabled
mariadb@.service                              disabled
#
自動起動しない設定になっているので、自動起動するように変更する
# systemctl enable mariadb.service
Created symlink from /etc/systemd/system/mysql.service to /usr/lib/systemd/system/mariadb.service.
Created symlink from /etc/systemd/system/mysqld.service to /usr/lib/systemd/system/mariadb.service.
Created symlink from /etc/systemd/system/multi-user.target.wants/mariadb.service to /usr/lib/systemd/system/mariadb.service.
#
続いてMariaDBの起動状況を確認
# systemctl status mariadb
● mariadb.service - MariaDB 10.4.13 database server
   Loaded: loaded (/usr/lib/systemd/system/mariadb.service; enabled; vendor preset: disabled)
  Drop-In: /etc/systemd/system/mariadb.service.d
           mqmigrated-from-my.cnf-settings.conf
   Active: inactive (dead)
     Docs: man:mysqld(8)
           https://mariadb.com/kb/en/library/systemd/
#
「Active: inactive (dead)」なので起動していないので「systemctl start mariadb」で起動する。
# systemctl start mariadb
# systemctl status mariadb -l
● mariadb.service - MariaDB 10.4.13 database server
   Loaded: loaded (/usr/lib/systemd/system/mariadb.service; enabled; vendor preset: disabled)
  Drop-In: /etc/systemd/system/mariadb.service.d
           mqmigrated-from-my.cnf-settings.conf
   Active: active (running) since Fri 2020-06-26 15:08:58 JST; 37s ago
     Docs: man:mysqld(8)
           https://mariadb.com/kb/en/library/systemd/
  Process: 9464 ExecStartPost=/bin/sh -c systemctl unset-environment _WSREP_START_POSITION (code=exited, status=0/SUCCESS)
  Process: 9419 ExecStartPre=/bin/sh -c [ ! -e /usr/bin/galera_recovery ] && VAR= ||   VAR=`cd /usr/bin/..; /usr/bin/galera_recovery`; [ $? -eq 0 ]   && systemctl set-environment _WSREP_START_POSITION=$VAR || exit 1 (code=exited, status=0/SUCCESS)
  Process: 9417 ExecStartPre=/bin/sh -c systemctl unset-environment _WSREP_START_POSITION (code=exited, status=0/SUCCESS)
 Main PID: 9430 (mysqld)
   Status: "Taking your SQL requests now..."
   CGroup: /system.slice/mariadb.service
           mq9430 /usr/sbin/mysqld

Jun 26 15:08:57 oci.adosakana.local mysqld[9430]: 2020-06-26 15:08:57 0 [Note] InnoDB: 10.4.13 started; log sequence number 60972; transaction id 21
Jun 26 15:08:57 oci.adosakana.local mysqld[9430]: 2020-06-26 15:08:57 0 [Note] InnoDB: Loading buffer pool(s) from /var/lib/mysql/ib_buffer_pool
Jun 26 15:08:57 oci.adosakana.local mysqld[9430]: 2020-06-26 15:08:57 0 [Note] InnoDB: Buffer pool(s) load completed at 200626 15:08:57
Jun 26 15:08:57 oci.adosakana.local mysqld[9430]: 2020-06-26 15:08:57 0 [Note] Plugin 'FEEDBACK' is disabled.
Jun 26 15:08:57 oci.adosakana.local mysqld[9430]: 2020-06-26 15:08:57 0 [Note] Server socket created on IP: '::'.
Jun 26 15:08:58 oci.adosakana.local mysqld[9430]: 2020-06-26 15:08:58 0 [Note] Reading of all Master_info entries succeeded
Jun 26 15:08:58 oci.adosakana.local mysqld[9430]: 2020-06-26 15:08:58 0 [Note] Added new Master_info '' to hash table
Jun 26 15:08:58 oci.adosakana.local mysqld[9430]: 2020-06-26 15:08:58 0 [Note] /usr/sbin/mysqld: ready for connections.
Jun 26 15:08:58 oci.adosakana.local mysqld[9430]: Version: '10.4.13-MariaDB'  socket: '/var/lib/mysql/mysql.sock'  port: 3306  MariaDB Server
Jun 26 15:08:58 oci.adosakana.local systemd[1]: Started MariaDB 10.4.13 database server.
#
MariaDB上にWordpress用のデータベースを作成する。
# mysql -u root
Welcome to the MariaDB monitor.  Commands end with ; or \g.
Your MariaDB connection id is 8
Server version: 10.4.13-MariaDB MariaDB Server

Copyright (c) 2000, 2018, Oracle, MariaDB Corporation Ab and others.

Type 'help;' or '\h' for help. Type '\c' to clear the current input statement.

MariaDB [(none)]> create database DB名 character set utf8;
Query OK, 1 row affected (0.000 sec)

MariaDB [(none)]> grant all on DB名.* to wordpress@localhost identified by 'w@rdpress';
Query OK, 0 rows affected (0.002 sec)

MariaDB [(none)]> quit
Bye
#
firewall設定
まずfirewallを開ける。
現状のポート開放状況を確認するため「firewall-cmd –list-all」を実行
# firewall-cmd --list-all
public (active)
  target: default
  icmp-block-inversion: no
  interfaces: ens3
  sources:
  services: dhcpv6-client ssh
  ports:
  protocols:
  masquerade: no
  forward-ports:
  source-ports:
  icmp-blocks:
  rich rules:
#
httpとhttpsを追加して、設定を再読込して反映
# firewall-cmd --permanent --zone=public --add-service=http
success
# firewall-cmd --permanent --zone=public --add-service=https
success
# firewall-cmd --reload
success
# firewall-cmd --list-all
public (active)
  target: default
  icmp-block-inversion: no
  interfaces: ens3
  sources:
  services: dhcpv6-client http https ssh
  ports:
  protocols:
  masquerade: no
  forward-ports:
  source-ports:
  icmp-blocks:
  rich rules:
#
Webサーバ設定
nginxへの切り替え
最初はApacheを使おうとしたのですが、Mozilla SSL Configuration Generators推奨設定を行うにはmod_rewriteやmod_headersが含まれていませんでした。
Apache関連の追加レポジトリを探すよりはWebサーバをnginxに切り替えてnginx公式レポジトリを使った方が良いのでは?ということで「nginx: Linux packages」を元に追加
/etc/yum.repos.d/nginx.repo に下記を記載
[nginx-stable]
name=nginx stable repo
baseurl=http://nginx.org/packages/centos/$releasever/$basearch/
gpgcheck=1
enabled=1
gpgkey=https://nginx.org/keys/nginx_signing.key
module_hotfixes=true

[nginx-mainline]
name=nginx mainline repo
baseurl=http://nginx.org/packages/mainline/centos/$releasever/$basearch/
gpgcheck=1
enabled=0
gpgkey=https://nginx.org/keys/nginx_signing.key
module_hotfixes=true
# yum install nginx
<略>
--> Finished Dependency Resolution

Dependencies Resolved

================================================================================
 Package      Arch          Version                   Repository           Size
================================================================================
Installing:
 nginx        x86_64        1:1.18.0-1.el7.ngx        nginx-stable        772 k

Transaction Summary
================================================================================
Install  1 Package

Total download size: 772 k
Installed size: 2.7 M
Is this ok [y/d/N]: y
<略>
#
また、あとで確認したところphp-fpmも必要だったのでインストールします。これはサービスとしても起動します。
# yum install php-fpm
Loaded plugins: langpacks
Resolving Dependencies
--> Running transaction check
---> Package php-fpm.x86_64 0:7.4.7-1.0.1.el7 will be installed
--> Finished Dependency Resolution

Dependencies Resolved

================================================================================
 Package      Arch        Version                Repository                Size
================================================================================
Installing:
 php-fpm      x86_64      7.4.7-1.0.1.el7        ol7_developer_php74      1.7 M

Transaction Summary
================================================================================
Install  1 Package

Total download size: 1.7 M
Installed size: 6.1 M
Is this ok [y/d/N]: y
<略>
# systemctl list-unit-files|grep php
php-fpm.service                               disabled
# systemctl enable php-fpm.service
Created symlink from /etc/systemd/system/multi-user.target.wants/php-fpm.service to /usr/lib/systemd/system/php-fpm.service.
# systemctl start php-fpm.service
#
現在のApacheとnginxの自動起動設定を確認するため「systemctl list-unit-files|grep -e http -e nginx」を実行
# systemctl list-unit-files|grep -e http -e nginx
httpd.service                                 disabled
nginx-debug.service                           disabled
nginx.service                                 disabled
#
どちらも起動状態にないことを確認。
nginxを自動起動にしてから起動
# ystemctl enable nginx.service
Created symlink from /etc/systemd/system/multi-user.target.wants/nginx.service to /usr/lib/systemd/system/nginx.service.
# systemctl start nginx.service
# systemctl status nginx.service -l
● nginx.service - nginx - high performance web server
   Loaded: loaded (/usr/lib/systemd/system/nginx.service; disabled; vendor preset: disabled)
   Active: active (running) since Fri 2020-06-26 15:58:01 JST; 5s ago
     Docs: http://nginx.org/en/docs/
  Process: 10409 ExecStart=/usr/sbin/nginx -c /etc/nginx/nginx.conf (code=exited, status=0/SUCCESS)
 Main PID: 10410 (nginx)
   CGroup: /system.slice/nginx.service
           tq10410 nginx: master process /usr/sbin/nginx -c /etc/nginx/nginx.con
           mq10411 nginx: worker process

Jun 26 15:58:01 oci.adosakana.local systemd[1]: Starting nginx - high performance web server...
Jun 26 15:58:01 oci.adosakana.local systemd[1]: Can't open PID file /var/run/nginx.pid (yet?) after start: No such file or directory
Jun 26 15:58:01 oci.adosakana.local systemd[1]: Started nginx - high performance web server.
#
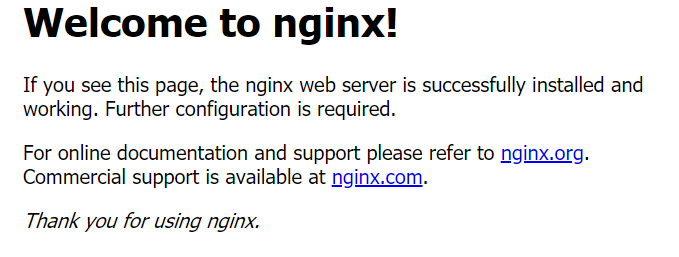
ブラウザからアクセスできるか確認
Let’s encryptを利用したSSLアクセス有効化
Oracle Autonomous Linuxにはcertbotもdehydratedもありません。
certbotはpython環境を使い大がかりになってしまうので、dehydratedの方を使用します。
githubのdehydratedからダウンロードします。
# wget https://github.com/dehydrated-io/dehydrated/archive/master.tar.gz
# tar xfz master.tar.gz
# ls -l
total 88
drwxrwxr-x. 4 root root  4096 Apr 29 04:36 dehydrated-master
-rw-r--r--. 1 root root 82951 Jun 26 16:32 master.tar.gz
#
dehydrated と config を配置します。
# cp dehydrated-master/dehydrated /usr/local/sbin/
# ls -l /usr/local/sbin/dehydrated
-rwxr-xr-x. 1 root root 69787 Jun 26 16:35 /usr/local/sbin/dehydrated
# mkdir /usr/local/etc/dehydrated
# cp dehydrated-master/docs/examples/config /usr/local/etc/dehydrated
# ls -l /usr/local/etc/dehydrated
total 8
-rw-r--r--. 1 root root 4656 Jun 26 16:36 config
#
/usr/local/etc/dehydrated/domains.txt にSSL証明書を取得するドメイン名を列挙します。
dehydratedがSSL証明書取得の際に使用する作業用Web公開ディレクトリ /var/www/dehydrated に関する設定をnginxに行います。
まず、ディレクトリを作成
# mkdir /var/www/dehydrated
#
次にnginx側の設定 を /etc/nginx/conf.d/default.conf のlisten 80に関するlocaltionに下記を追加。
location ^~ /.well-known/acme-challenge {
        alias /var/www/dehydrated;
        break;
}
そして、nginx再起動
# systemctl restart nginx
#
準備が出来たのでdehydratedで登録を開始。
# dehydrated --register
# INFO: Using main config file /usr/local/etc/dehydrated/config

To use dehydrated with this certificate authority you have to agree to their terms of service which you can find here: https://letsencrypt.org/documents/LE-SA-v1.2-November-15-2017.pdf

To accept these terms of service run `/usr/local/sbin/dehydrated --register --accept-terms`.
#  /usr/local/sbin/dehydrated --register --accept-terms
# INFO: Using main config file /usr/local/etc/dehydrated/config
+ Generating account key...
+ Registering account key with ACME server...
+ Fetching account URL...
+ Done!
#
前処理が完了したので、実際のSSL証明書発行処理を実施。
# /usr/local/sbin/dehydrated --cron
# INFO: Using main config file /usr/local/etc/dehydrated/config
Processing oci.adosakana.local
 + Creating new directory /usr/local/etc/dehydrated/certs/oci.adosakana.local ...
 + Signing domains...
 + Generating private key...
 + Generating signing request...
 + Requesting new certificate order from CA...
 + Received 1 authorizations URLs from the CA
 + Handling authorization for oci.adosakana.local
 + 1 pending challenge(s)
 + Deploying challenge tokens...
 + Responding to challenge for oci.adosakana.local authorization...
 + Challenge is valid!
 + Cleaning challenge tokens...
 + Requesting certificate...
 + Checking certificate...
 + Done!
 + Creating fullchain.pem...
 + Done!
#
SSL証明書は /usr/local/etc/dehydrated/certs/FQDN名ディレクトリ に作成されます。
nginx側の設定はMozilla SSL Configuration Generator を元に /etc/nginx/conf.d/default.conf を書き換えます。
# generated 2020-06-26, Mozilla Guideline v5.4, nginx 1.17.7, OpenSSL 1.0.1e, intermediate configuration, no OCSP
# https://ssl-config.mozilla.org/#server=nginx&version=1.17.7&config=intermediate&openssl=1.0.1e&ocsp=false&guideline=5.4
server {
    listen 80 default_server;
    listen [::]:80 default_server;

    location ^~ /.well-known/acme-challenge {
        alias /var/www/dehydrated;
    }
    return 301 https://$host$request_uri;
}

server {
    listen 443 ssl http2;
    listen [::]:443 ssl http2;

    ssl_certificate /usr/local/etc/dehydrated/certs/FQDN名ディレクトリ/fullchain.pem;
    ssl_certificate_key /usr/local/etc/dehydrated/certs/FQDN名ディレクトリ/privkey.pem;
    ssl_session_timeout 1d;
    ssl_session_cache shared:MozSSL:10m;  # about 40000 sessions

    # curl https://ssl-config.mozilla.org/ffdhe2048.txt > /path/to/dhparam
    ssl_dhparam /usr/local/etc/dehydrated/certs/dhparam;

    # intermediate configuration
    ssl_protocols TLSv1.2;
    ssl_ciphers ECDHE-ECDSA-AES128-GCM-SHA256:ECDHE-RSA-AES128-GCM-SHA256:ECDHE-ECDSA-AES256-GCM-SHA384:ECDHE-RSA-AES256-GCM-SHA384:ECDHE-ECDSA-CHACHA20-POLY1305:ECDHE-RSA-CHACHA20-POLY1305:DHE-RSA-AES128-GCM-SHA256:DHE-RSA-AES256-GCM-SHA384;
    ssl_prefer_server_ciphers off;

    # HSTS (ngx_http_headers_module is required) (63072000 seconds)
    add_header Strict-Transport-Security "max-age=63072000" always;
}
Mozilla的にはffdhe2048.txtの配置を推奨するようなので、下記でダウンロードして配置します。
# curl https://ssl-config.mozilla.org/ffdhe2048.txt > /usr/local/etc/dehydrated/certs/dhparam
  % Total    % Received % Xferd  Average Speed   Time    Time     Time  Current
                                 Dload  Upload   Total   Spent    Left  Speed
100   423  100   423    0     0    680      0 --:--:-- --:--:-- --:--:--   681
#
そして、nginxを再起動します。
# systemctl restart nginx
#
ブラウザからhttpアクセスすると、httpsアクセスに変換された上で404 Not Found表示となることを確認します。

Let’s のSSL証明書は定期的に更新処理を実行する必要があります。
/etc/cron.d/dehydrated に下記の内容のファイルを作成します。(EPEL収録のdehydratedパッケージの内容を参考にした)
45 1 * * 4 root test -s /usr/local/etc/dehydrated/domains.txt && /usr/local/sbin/dehydrated --cron
WordPress設定
/var/www/html/wordpress にtar.gzの中身を展開
# tar xfz latest.tar.gz
# ls -l
total 11956
-rw-r--r--. 1 root   root      12238031 Jun 11 06:49 latest.tar.gz
drwxr-xr-x. 5 nobody nfsnobody     4096 Jun 11 06:48 wordpress
# chown -R apache:apache wordpress/
# ls -l
total 11956
-rw-r--r--. 1 root   root   12238031 Jun 11 06:49 latest.tar.gz
drwxr-xr-x. 5 apache apache     4096 Jun 11 06:48 wordpress
#
WordPress用のnginx設定は「nginx WordPress recipe」 を参考に作成した。元はphp-cgiを使用していたが、php-cgiパッケージはないためphp-fpm使用に切り替えている。
# Upstream to abstract backend connection(s) for php
upstream php {
    server unix:/tmp/php-fpm.socket;
    server 127.0.0.1:9000;
}

# generated 2020-06-26, Mozilla Guideline v5.4, nginx 1.17.7, OpenSSL 1.0.1e, intermediate configuration, no OCSP
# https://ssl-config.mozilla.org/#server=nginx&version=1.17.7&config=intermediate&openssl=1.0.1e&ocsp=false&guideline=5.4
server {
    listen 80 default_server;
    listen [::]:80 default_server;

    location ^~ /.well-known/acme-challenge {
        alias /var/www/dehydrated;
    }
    return 301 https://$host$request_uri;
}

server {
    listen 443 ssl http2;
    listen [::]:443 ssl http2;

    ssl_certificate /usr/local/etc/dehydrated/certs/FQDN名ディレクトリ/fullchain.pem;
    ssl_certificate_key /usr/local/etc/dehydrated/certs/FQDN名ディレクトリ/privkey.pem;
    ssl_session_timeout 1d;
    ssl_session_cache shared:MozSSL:10m;  # about 40000 sessions

    # curl https://ssl-config.mozilla.org/ffdhe2048.txt > /path/to/dhparam
    ssl_dhparam /usr/local/etc/dehydrated/certs/dhparam;

    # intermediate configuration
    ssl_protocols TLSv1.2;
    ssl_ciphers ECDHE-ECDSA-AES128-GCM-SHA256:ECDHE-RSA-AES128-GCM-SHA256:ECDHE-ECDSA-AES256-GCM-SHA384:ECDHE-RSA-AES256-GCM-SHA384:ECDHE-ECDSA-CHACHA20-POLY1305:ECDHE-RSA-CHACHA20-POLY1305:DHE-RSA-AES128-GCM-SHA256:DHE-RSA-AES256-GCM-SHA384;
    ssl_prefer_server_ciphers off;

    # HSTS (ngx_http_headers_module is required) (63072000 seconds)
    add_header Strict-Transport-Security "max-age=63072000" always;

    root /var/www/html/wordpress;

    index index.php;
    location = /favicon.ico {
        log_not_found off;
        access_log off;
    }
    location = /robots.txt {
        allow all;
        log_not_found off;
        access_log off;
    }
    location / {
        try_files $uri $uri/ /index.php?$args;
    }
    location ~ \.php$ {
        #NOTE: You should have "cgi.fix_pathinfo = 0;" in php.ini
        include fastcgi_params;
        fastcgi_intercept_errors on;
        fastcgi_pass php;
        #The following parameter can be also included in fastcgi_params file
        fastcgi_param  SCRIPT_FILENAME $document_root$fastcgi_script_name;
    }
    location ~* \.(js|css|png|jpg|jpeg|gif|ico)$ {
        expires max;
        log_not_found off;
    }
}
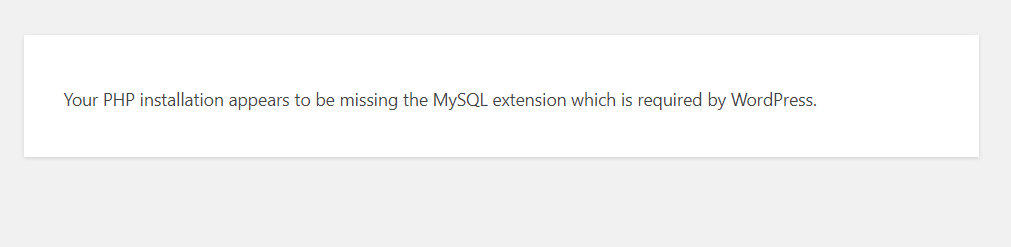
phpにMySQLアクセス用パッケージを入れていなかった・・・
またphpの日本語処理に必要なやつもなかったので「yum install php-mysql php-mbstring」でインストールして、php-fpmを再起動
# yum install php-mysql php-mbstring
<略>
--> Finished Dependency Resolution

Dependencies Resolved

================================================================================
 Package          Arch       Version              Repository               Size
================================================================================
Installing:
 php-mbstring     x86_64     7.4.7-1.0.1.el7      ol7_developer_php74     497 k
 php-mysqlnd      x86_64     7.4.7-1.0.1.el7      ol7_developer_php74     228 k
Installing for dependencies:
 php-pdo          x86_64     7.4.7-1.0.1.el7      ol7_developer_php74     121 k

Transaction Summary
================================================================================
Install  2 Packages (+1 Dependent package)

Total download size: 845 k
Installed size: 3.2 M
Is this ok [y/d/N]: y
<略>
# systemctl restart php-fpm.service
#
成功
wp-config.php については手動で/var/www/html/wordpress/wp-config.php に作成する必要があったが、それ以外は問題無く実行された。
また、Wordpress上のプラグインインストールや更新についても特に問題なく実行できた。
2020/06/30追記
WordPressのAMPプラグインを動かそうとしたら「dom」が有効にできない、と言われた。
これはphp-xmlに含まれるので「yum install php-xml」で追加したあと「systemctl restart php-fpm.service」を実行した。
2020/07/14追記
wordpressのインポートを行おうとしたらファイルが大きくて「413 Request Entity Too Large」とエラーになった。
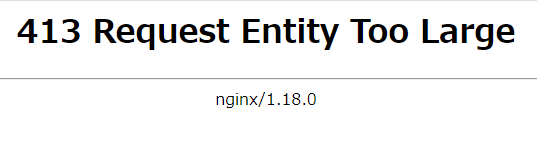
まず、 /etc/php.ini の「post_max_size」と「upload_max_filesize」の値を変更して、「systemctl restart php-fpm」を実行
; Maximum size of POST data that PHP will accept.
; Its value may be 0 to disable the limit. It is ignored if POST data reading
; is disabled through enable_post_data_reading.
; http://php.net/post-max-size
;post_max_size = 8M
post_max_size = 10M
; Maximum allowed size for uploaded files.
; http://php.net/upload-max-filesize
;upload_max_filesize = 2M
upload_max_filesize = 20M
また、「/etc/nginx/conf.d/default.conf」のポート443に関するserver定義内で「client_max_body_size」の設定を追加し、「systemctl restart nginx」で再起動します。
server {
    listen 443 ssl http2;
    listen [::]:443 ssl http2;

    client_max_body_size 20M;
<略>
}
これでアップロードが成功するようになりました。