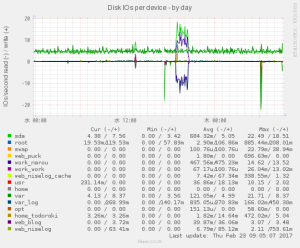
Linux LVMベースでパーテーションが構成されている環境で、muninを使ったら、Disk IOs per deviceなどで、「sda」が存在していた。

今回の環境だと、sda内に、それ以外のLVMが含まれている形となるので、sda自体を表示する意味がほとんど無いので、除外しようと思う。
資料は「diskstats 」。
「/etc/munin/plugin-conf.d/diskstats」というファイルに下記を記載した。
[diskstats]
env.exclude sda
技術的なことをメインにいろいろ書いてくサイトです
2018/07/06追記
PowerCLI Coreが無くなり、VMware PowerCLI本体の方でPowerShell Coreへの対応が行われるようになり、
RHEL7/CentOS7にも正式に対応したので、手順がだいぶ変わりました。
詳細は「CentOS7環境にPowerShell CoreとVMware PowerCLIをインストール」に記載しました。
2018/05/25 追記
時々アクセスがあるので、2018/05/25時点での状況を書いておきます。
・PowerCLIの公式ページは「https://code.vmware.com/web/dp/tool/vmware-powercli/」
・PowerCLI Coreという単品はなくなり、PowerCLI本体でPowerShellとPowerShell Core双方に対応します。
・インストーラーによる配布はなくなり、「PowerShell Galleryでの配布」になりました。
・PowerShellGalleryのPowerShellGet moduleがインストールされている環境では「Install-Module -Name VMware.PowerCLI」を実行するだけでダウンロード&インストールを行います。
・PowerShell Core 6では標準でPowerShellGet moduleがインストールされているので、コマンドを実行するだけでした。
・パッケージ名は「VMware.PowerCLI」です。パッケージのインストール状況を確認する場合は「Get-Module -ListAvailable VMware*」でやります。
(以下、過去記事)
先日、インストールしてみたPowerShell Core(Power Shell Core 6.0をCentOS7で使ってみる)。
これ、もしかして、vSphere環境の操作を行うVMware PowerCLIが動かないかな?と思って調べてみると、開発中の「PowerCLI Core」というのがあるのを発見。
「October 17, 2016 v1.0」版では、かなりサポート範囲が狭い。まさに「Core」
| Module | Description | PowerCLI for Windows | PowerCLI Core |
|---|---|---|---|
| Core | vCenter and ESXi Cmdlets | ○ | ○ |
| VDS | vSphere Distributed Switch Cmdlets | ○ | ○ |
| Storage | Storage Cmdlets | ○ | × |
| License | License View Cmdlets | ○ | × |
| VUM | Update Manager Cmdlets | ○ | × |
| Auto Deploy | Auto Deploy Cmdlets | ○ | × |
| Image Builder | Image Builder Cmdletes | ○ | × |
| VCD | vCloud Director Cmdlets | ○ | × |
| vCloud Air | vCloud Air Cmdlets | ○ | × |
| Content Library | COntent Library Cmdlets | ○ | × |
さて、インストール。
1. PowerCLI CoreからPowerCLI_Core.zipを入手
ファイルを展開し、中にある、PowerCLI.ViCore.zipとPowerCLI.Vds.zipを適当な場所に置く。
(今回は~/work/に置いた)
2. powershell Core上で「$env:PSModulePath」を実行し、モジュールを読み込むディレクトリを確認
# powershell "$env:PSModulePath"
:PSModulePath : The term ':PSModulePath' is not recognized as the name of a cmd
let, function, script file, or operable program. Check the spelling of the name
, or if a path was included, verify that the path is correct and try again.
At line:1 char:1
+ :PSModulePath
+ ~~~~~~~~~~~~~
    + CategoryInfo          : ObjectNotFound: (:PSModulePath:String) [], Comma
   ndNotFoundException
    + FullyQualifiedErrorId : CommandNotFoundException
#
ん?
# powershell
PowerShell
Copyright (C) 2016 Microsoft Corporation. All rights reserved.

PS /root> $env:PSModulePath
PS /root> exit
#
どうやら、環境変数「PSModulePath」が定義されていないらしい。
3. 個人用のModuleインストール先として「~/.local/share/powershell/Modules」を作成
# mkdir -p ~/.local/share/powershell/Modules
#
4. 作成したディレクトリ内にPowerCLI.ViCore.zipとPowerCLI.Vds.zipを展開
# cd ~/.local/share/powershell/Modules
# unzip ~/work/PowerCLI.ViCore.zip
Archive:  ~/work/PowerCLI.ViCore.zip
  inflating: PowerCLI.ViCore/ComponentDescriptor-VMware.VimAutomation.Vds.xml
  inflating: PowerCLI.ViCore/ComponentDescriptor-VMware.VimAutomation.ViCore.Cmdlets.xml
  inflating: PowerCLI.ViCore/ComponentDescriptor-VMware.VimAutomation.ViCore.xml
  inflating: PowerCLI.ViCore/ICSharpCode.SharpZipLib.Tar.dll
  inflating: PowerCLI.ViCore/ICSharpCode.SharpZipLib.Tar.pdb
  inflating: PowerCLI.ViCore/Initialize.ps1
  inflating: PowerCLI.ViCore/InternalVimService50.dll
  inflating: PowerCLI.ViCore/InventoryService55.dll
  inflating: PowerCLI.ViCore/log4net.dll
  inflating: PowerCLI.ViCore/Newtonsoft.Json.dll
  inflating: PowerCLI.ViCore/phclient.dll
  inflating: PowerCLI.ViCore/PowerCLI.ViCore.psd1
  inflating: PowerCLI.ViCore/System.Drawing.Primitives.dll
  inflating: PowerCLI.ViCore/System.Management.Automation.dll
  inflating: PowerCLI.ViCore/System.Net.WebSockets.Client.dll
  inflating: PowerCLI.ViCore/System.Net.WebSockets.dll
  inflating: PowerCLI.ViCore/System.Runtime.Serialization.Formatters.dll
  inflating: PowerCLI.ViCore/VimService.dll
  inflating: PowerCLI.ViCore/VMware.AspNet.WebApi.Client.dll
  inflating: PowerCLI.ViCore/VMware.AspNet.WebApi.Client.pdb
  inflating: PowerCLI.ViCore/VMware.Binding.Ls2.dll
  inflating: PowerCLI.ViCore/VMware.Binding.Ls2.pdb
  inflating: PowerCLI.ViCore/VMware.Binding.Wcf.dll
  inflating: PowerCLI.ViCore/VMware.Binding.Wcf.pdb
  inflating: PowerCLI.ViCore/VMware.System.Private.ServiceModel.dll
  inflating: PowerCLI.ViCore/VMware.Vim.dll
  inflating: PowerCLI.ViCore/VMware.Vim.pdb
  inflating: PowerCLI.ViCore/VMware.VimAutomation.Ceip.dll
  inflating: PowerCLI.ViCore/VMware.VimAutomation.Ceip.pdb
  inflating: PowerCLI.ViCore/VMware.VimAutomation.Common.Interop.dll
  inflating: PowerCLI.ViCore/VMware.VimAutomation.Common.Interop.pdb
  inflating: PowerCLI.ViCore/VMware.VimAutomation.Common.Types.dll
  inflating: PowerCLI.ViCore/VMware.VimAutomation.Common.Types.pdb
  inflating: PowerCLI.ViCore/VMware.VimAutomation.Common.Util10.dll
  inflating: PowerCLI.ViCore/VMware.VimAutomation.Common.Util10.pdb
  inflating: PowerCLI.ViCore/VMware.VimAutomation.Common.Util10Ps.dll
  inflating: PowerCLI.ViCore/VMware.VimAutomation.Common.Util10Ps.pdb
  inflating: PowerCLI.ViCore/VMware.VimAutomation.Format.ps1xml
  inflating: PowerCLI.ViCore/VMware.VimAutomation.Sdk.Impl.dll
  inflating: PowerCLI.ViCore/VMware.VimAutomation.Sdk.Impl.pdb
  inflating: PowerCLI.ViCore/VMware.VimAutomation.Sdk.Interop.dll
  inflating: PowerCLI.ViCore/VMware.VimAutomation.Sdk.Interop.pdb
  inflating: PowerCLI.ViCore/VMware.VimAutomation.Sdk.Types.dll
  inflating: PowerCLI.ViCore/VMware.VimAutomation.Sdk.Types.pdb
  inflating: PowerCLI.ViCore/VMware.VimAutomation.Sdk.Util10.dll
  inflating: PowerCLI.ViCore/VMware.VimAutomation.Sdk.Util10.pdb
  inflating: PowerCLI.ViCore/VMware.VimAutomation.Sdk.Util10Ps.dll
  inflating: PowerCLI.ViCore/VMware.VimAutomation.Sdk.Util10Ps.pdb
  inflating: PowerCLI.ViCore/VMware.VimAutomation.Vds.Impl.dll
  inflating: PowerCLI.ViCore/VMware.VimAutomation.Vds.Impl.pdb
  inflating: PowerCLI.ViCore/VMware.VimAutomation.Vds.Interop.dll
  inflating: PowerCLI.ViCore/VMware.VimAutomation.Vds.Interop.pdb
  inflating: PowerCLI.ViCore/VMware.VimAutomation.Vds.Types.dll
  inflating: PowerCLI.ViCore/VMware.VimAutomation.Vds.Types.pdb
  inflating: PowerCLI.ViCore/VMware.VimAutomation.ViCore.Cmdlets.dll
  inflating: PowerCLI.ViCore/VMware.VimAutomation.ViCore.Cmdlets.dll-Help.xml
  inflating: PowerCLI.ViCore/VMware.VimAutomation.ViCore.Cmdlets.pdb
  inflating: PowerCLI.ViCore/VMware.VimAutomation.ViCore.Impl.dll
  inflating: PowerCLI.ViCore/VMware.VimAutomation.ViCore.Impl.pdb
  inflating: PowerCLI.ViCore/VMware.VimAutomation.ViCore.Interop.dll
  inflating: PowerCLI.ViCore/VMware.VimAutomation.ViCore.Interop.pdb
  inflating: PowerCLI.ViCore/VMware.VimAutomation.ViCore.Types.dll
  inflating: PowerCLI.ViCore/VMware.VimAutomation.ViCore.Types.pdb
  inflating: PowerCLI.ViCore/VMware.VimAutomation.ViCore.Util10.dll
  inflating: PowerCLI.ViCore/VMware.VimAutomation.ViCore.Util10.pdb
  inflating: PowerCLI.ViCore/VMware.VimAutomation.ViCore.Util10Ps.dll
  inflating: PowerCLI.ViCore/VMware.VimAutomation.ViCore.Util10Ps.pdb
  inflating: PowerCLI.ViCore/Scripts/GetVmGuestNetworkInterface_LinuxGuest
  inflating: PowerCLI.ViCore/Scripts/GetVmGuestNetworkInterface_windows7Server64Guest.bat
  inflating: PowerCLI.ViCore/Scripts/GetVmGuestNetworkInterface_windows7_64Guest.bat
  inflating: PowerCLI.ViCore/Scripts/GetVmGuestNetworkInterface_WindowsGuest.bat
  inflating: PowerCLI.ViCore/Scripts/GetVMGuestRoute_LinuxGuest
  inflating: PowerCLI.ViCore/Scripts/GetVMGuestRoute_WindowsGuest.bat
  inflating: PowerCLI.ViCore/Scripts/GuestDiskExpansion_LinuxGuest
  inflating: PowerCLI.ViCore/Scripts/GuestDiskExpansion_rhel5Guest
  inflating: PowerCLI.ViCore/Scripts/GuestDiskExpansion_WindowsGuest.bat
  inflating: PowerCLI.ViCore/Scripts/GuestDiskExpansion_winXPProGuest.bat
  inflating: PowerCLI.ViCore/Scripts/NewVMGuestRoute_LinuxGuest
  inflating: PowerCLI.ViCore/Scripts/NewVMGuestRoute_WindowsGuest.bat
  inflating: PowerCLI.ViCore/Scripts/RemoveVMGuestRoute_LinuxGuest
  inflating: PowerCLI.ViCore/Scripts/RemoveVMGuestRoute_WindowsGuest.bat
  inflating: PowerCLI.ViCore/Scripts/SetVMGuestNetworkInterface_LinuxGuest
  inflating: PowerCLI.ViCore/Scripts/SetVMGuestNetworkInterface_windows7Server64Guest.bat
  inflating: PowerCLI.ViCore/Scripts/SetVMGuestNetworkInterface_windows7_64Guest.bat
  inflating: PowerCLI.ViCore/Scripts/SetVMGuestNetworkInterface_WindowsGuest.bat
# unzip ~/work/PowerCLI.Vds.zip
Archive:  ~/work/PowerCLI.Vds.zip
  inflating: PowerCLI.Vds/ComponentDescriptor-VMware.VimAutomation.Vds.Commands.xml
  inflating: PowerCLI.Vds/Initialize-VMware_VimAutomation_Vds.ps1
  inflating: PowerCLI.Vds/PowerCLI.Vds.psd1
  inflating: PowerCLI.Vds/VMware.VimAutomation.Vds.Commands.dll
  inflating: PowerCLI.Vds/VMware.VimAutomation.Vds.Commands.dll-Help.xml
  inflating: PowerCLI.Vds/VMware.VimAutomation.Vds.Commands.pdb
  inflating: PowerCLI.Vds/VMware.VimAutomation.Vds.Format.ps1xml
# ls -F
PowerCLI.Vds/  PowerCLI.ViCore/
#
5. PowerShell上でモジュールが認識されていることを確認
「Get-Module -ListAvailable」の出力結果内に「PowerCLI.ViCore」と「PowerCLI.Vds」があることを確認。
# powershell
PowerShell
Copyright (C) 2016 Microsoft Corporation. All rights reserved.

PS /root/work> $env:PSModulePath
PS /root/work> Get-Module -ListAvailable PowerCLI*


    Directory: /root/.local/share/powershell/Modules


ModuleType Version    Name                                ExportedCommands
---------- -------    ----                                ----------------
Binary     1.21       PowerCLI.Vds
Binary     1.21       PowerCLI.ViCore                     HookGetViewAutoCom...


PS /root/work>
6. 上記のモジュールを読み込み利用可能状態とする
PS /root/work> Get-Module -ListAvailable PowerCLI* | Import-Module
PS /root/work>
(モジュール名がPowerCLIと異なるため注意。どちらでも動かすやり方→「PowerCLIとPowerCLI Coreの双方で動くPowerShellスクリプトの作り方」)
7. vCenterへの接続テストをしてみる
PS /root/work> Connect-VIServer -Server サーバ名 -User ユーザ名 -Password "パスワード"
Connect-VIServer : 2017/02/22 17:40:20  Connect-VIServer                The libcurl library in
 use (7.29.0) and its SSL backend ("NSS/3.21 Basic ECC") do not support custom
handling of certificates. A libcurl built with OpenSSL is required.
At line:1 char:1
+ Connect-VIServer -Server サーバ名 -User ユーザ名 -Password "パスワード"
+ ~~~~~~~~~~~~~~~~~~~~~~~~~~~~~~~~~~~~~~~~~~~~~~~~~~~~~~~~~~~~~~~~~~~~~
    + CategoryInfo          : NotSpecified: (:) [Connect-VIServer], ViError
    + FullyQualifiedErrorId : Client20_ConnectivityServiceImpl_Reconnect_Excep
   tion,VMware.VimAutomation.ViCore.Cmdlets.Commands.ConnectVIServer

PS /root/work>
手順にある証明書の問題を無視する設定を飛ばしたせいかな?と次を実施。
8. 証明書の問題を無視する設定を実施
手順書では「Set-PowerCLIConfiguration -InvalidCertificateAction Ignore」、プロンプトを出したくないのであれば、「Set-PowerCLIConfiguration -InvalidCertificateAction Ignore -Confirm:$false」を実行
PS /root/work> Set-PowerCLIConfiguration -InvalidCertificateAction Ignore

Perform operation?
Performing operation 'Update PowerCLI configuration.'?
[Y] Yes  [A] Yes to All  [N] No  [L] No to All  [S] Suspend  [?] Help
(default is "Y"):y

Scope    ProxyPolicy     DefaultVIServerMode InvalidCertificateAction  DisplayD
                                                                       eprecati
                                                                       onWarnin
                                                                       gs
-----    -----------     ------------------- ------------------------  --------
Session  UseSystemProxy  Multiple            Ignore                    True
User                                         Ignore
AllUsers


PS /root/work> Connect-VIServer -Server サーバ名 -User ユーザ名 -Password "パスワード"

Connect-VIServer : 2017/02/22 17:43:23  Connect-VIServer                The libcurl library in
 use (7.29.0) and its SSL backend ("NSS/3.21 Basic ECC") do not support custom
handling of certificates. A libcurl built with OpenSSL is required.
At line:1 char:1
+ Connect-VIServer -Server サーバ名 -User ユーザ名 -Password "パスワード"
+ ~~~~~~~~~~~~~~~~~~~~~~~~~~~~~~~~~~~~~~~~~~~~~~~~~~~~~~~~~~~~~~~~~~~~~
    + CategoryInfo          : NotSpecified: (:) [Connect-VIServer], ViError
    + FullyQualifiedErrorId : Client20_ConnectivityServiceImpl_Reconnect_Excep
   tion,VMware.VimAutomation.ViCore.Cmdlets.Commands.ConnectVIServer

PS /root/work>
あれ?
証明書を無視するという問題ではなかった模様。
調べるとGithubのPowerShell Issue#2511と同じ状況
「On CentOS Powershell uses the system libcurl that does not support custom SSL certificate validation #2511」
現時点では、「CERN CentOS 7」に含まれている「libcurl-openssl」をインストールすると回避できるらしい。
CERN CentOS7を利用する回避手順
(1) 標準状態のCentOS7での「libcurl」関連パッケージの状況を確認
# yum search libcurl
読み込んだプラグイン:fastestmirror
Loading mirror speeds from cached hostfile
 * base: www.ftp.ne.jp
 * extras: www.ftp.ne.jp
 * updates: www.ftp.ne.jp
============================= N/S matched: libcurl =============================
libcurl-devel.i686 : Files needed for building applications with libcurl
libcurl-devel.x86_64 : Files needed for building applications with libcurl
libcurl.i686 : A library for getting files from web servers
libcurl.x86_64 : A library for getting files from web servers
perl-WWW-Curl.x86_64 : Perl extension interface for libcurl
python-pycurl.x86_64 : A Python interface to libcurl

  Name and summary matches only, use "search all" for everything.
#
(2) CERN CentOS 7のレポジトリ設定が含まれるcentos-release-~cern.rpmを取得
http://linuxsoft.cern.ch/cern/centos/7/cern/x86_64/Packages/から「centos-release-~.el7.cern.x86_64.rpm」の一番新しいものをダウンロード
(3) rpmファイルを展開し、CentOS-CERN.repoファイルを入手
「rpm2cpio centos-release-~.el7.cern.x86_64.rpm | cpio -ivd」で展開すると「./etc/yum.repos.d/CentOS-CERN.repo」などが作成される
2017/02/22の段階でのCentOS-CERN.repoファイルは下記の内容だった。
# CentOS-CERN.repo
#
# CERN CentOS 7 uses local repositories at http://linuxsoft.cern.ch distribution service
#

[cern]
name=CentOS-$releasever - CERN
baseurl=http://linuxsoft.cern.ch/cern/centos/$releasever/cern/$basearch/
gpgcheck=1
enabled=1
protect=1
priority=5
gpgkey=file:///etc/pki/rpm-gpg/RPM-GPG-KEY-cern

[cern-testing]
name=CentOS-$releasever - CERN Testing
baseurl=http://linuxsoft.cern.ch/cern/centos/$releasever/cern-testing/$basearch/
gpgcheck=1
enabled=0
protect=1
priority=5
gpgkey=file:///etc/pki/rpm-gpg/RPM-GPG-KEY-cern

[cernonly]
name=CentOS-$releasever - CERN Only
baseurl=http://linuxsoft.cern.ch/cern/centos/$releasever/cernonly/$basearch/
gpgcheck=1
enabled=0
protect=1
priority=5
gpgkey=file:///etc/pki/rpm-gpg/RPM-GPG-KEY-cern

[cernonly-testing]
name=CentOS-$releasever - CERN Only Testing
baseurl=http://linuxsoft.cern.ch/cern/centos/$releasever/cernonly-testing/$basearch/
gpgcheck=1
enabled=0
protect=1
priority=5
gpgkey=file:///etc/pki/rpm-gpg/RPM-GPG-KEY-cern

[cern-debug]
name=CentOS-7 - CERN - Debuginfo
baseurl=http://linuxsoft.cern.ch/cern/centos/$releasever/cern/Debug/$basearch/
gpgcheck=1
enabled=0
protect=1
priority=5
gpgkey=file:///etc/pki/rpm-gpg/RPM-GPG-KEY-cern

[cernonly-debug]
name=CentOS-7 - CERN Only - Debuginfo
baseurl=http://linuxsoft.cern.ch/cern/centos/$releasever/cernonly/Debug/$basearch/
gpgcheck=1
enabled=0
protect=1
priority=5
gpgkey=file:///etc/pki/rpm-gpg/RPM-GPG-KEY-cern

[cern-source]
name=CentOS-$releasever - CERN Sources
baseurl=http://linuxsoft.cern.ch/cern/centos/$releasever/cern/Sources/
gpgcheck=1
enabled=0
protect=1
priority=5
gpgkey=file:///etc/pki/rpm-gpg/RPM-GPG-KEY-cern

[cernonly-source]
name=CentOS-$releasever - CERN Only Sources
baseurl=http://linuxsoft.cern.ch/cern/centos/$releasever/cernonly/Sources/
gpgcheck=1
enabled=0
enabled=0
protect=1
priority=5
gpgkey=file:///etc/pki/rpm-gpg/RPM-GPG-KEY-cern

[cern-testing-source]
name=CentOS-$releasever - CERN Testing Sources
baseurl=http://linuxsoft.cern.ch/cern/centos/$releasever/cern-testing/Sources/
gpgcheck=1
enabled=0
protect=1
priority=5
gpgkey=file:///etc/pki/rpm-gpg/RPM-GPG-KEY-cern

[cernonly-testing-source]
name=CentOS-$releasever - CERN Only Testing Sources
baseurl=http://linuxsoft.cern.ch/cern/centos/$releasever/cernonly-testing/Sources/
gpgcheck=1
enabled=0
enabled=0
protect=1
priority=5
gpgkey=file:///etc/pki/rpm-gpg/RPM-GPG-KEY-cern
(4) ./etc/yum.repos.d/CentOS-CERN.repoを「/etc/yum.repos.d/」にコピー
(5) ./etc/pki/rpm-gpg/RPM-GPG-KEY-cernを「/etc/pki/rpm-gpg/」にコピー
(6) CERNレポジトリが登録されている状態で「libcurl」関連を検索
# yum search libcurl
読み込んだプラグイン:fastestmirror
Loading mirror speeds from cached hostfile
 * base: www.ftp.ne.jp
 * extras: www.ftp.ne.jp
 * updates: www.ftp.ne.jp
============================= N/S matched: libcurl =============================
libcurl-devel.i686 : Files needed for building applications with libcurl
libcurl-devel.x86_64 : Files needed for building applications with libcurl
libcurl-openssl-devel.x86_64 : Files needed for building applications with
                             : libcurl-openssl
libcurl.i686 : A library for getting files from web servers
libcurl.x86_64 : A library for getting files from web servers
libcurl-openssl.x86_64 : A library for getting files from web servers
perl-WWW-Curl.x86_64 : Perl extension interface for libcurl
python-pycurl.x86_64 : A Python interface to libcurl

  Name and summary matches only, use "search all" for everything.
#
(7) libcurl-opensslをインストール
# yum install libcurl-openssl
読み込んだプラグイン:fastestmirror
Loading mirror speeds from cached hostfile
 * base: www.ftp.ne.jp
 * extras: www.ftp.ne.jp
 * updates: www.ftp.ne.jp
依存性の解決をしています
--> トランザクションの確認を実行しています。
---> パッケージ libcurl-openssl.x86_64 0:7.51.0-2.1.el7.cern を インストール
--> 依存性解決を終了しました。

依存性を解決しました

================================================================================
 Package               アーキテクチャー
                                    バージョン                 リポジトリー
                                                                           容量
================================================================================
インストール中:
 libcurl-openssl       x86_64       7.51.0-2.1.el7.cern        cern       215 k

トランザクションの要約
================================================================================
インストール  1 パッケージ

合計容量: 215 k
インストール容量: 446 k
Is this ok [y/d/N]: y
Downloading packages:
警告: /var/cache/yum/x86_64/7/cern/packages/libcurl-openssl-7.51.0-2.1.el7.cern.x86_64.rpm: ヘッダー V4 DSA/SHA1 Signature、鍵 ID 1d1e034b: NOKEY
file:///etc/pki/rpm-gpg/RPM-GPG-KEY-cern から鍵を取得中です。
Importing GPG key 0x1D1E034B:
 Userid     : "CERN Linux Support (RPM signing key for CERN Linux Support) <linux.support@cern.ch>"
 Fingerprint: 86b5 5b37 12c1 e4a4 13c9 60e6 5e03 fde5 1d1e 034b
 From       : /etc/pki/rpm-gpg/RPM-GPG-KEY-cern
上記の処理を行います。よろしいでしょうか? [y/N]y
Running transaction check
Running transaction test
Transaction test succeeded
Running transaction
警告: RPMDB は yum 以外で変更されました。
  インストール中          : libcurl-openssl-7.51.0-2.1.el7.cern.x86_64      1/1
  検証中                  : libcurl-openssl-7.51.0-2.1.el7.cern.x86_64      1/1

インストール:
  libcurl-openssl.x86_64 0:7.51.0-2.1.el7.cern

完了しました!
#
(8)普段の運用に差し支える可能性があるので普段はCERNレポジトリを無効化する
「/etc/yum.repos.d/CentOS-CERN.repo」内にある「enabled=1」を「enabled=0」に変更する
(9) libcurl-opensslが/opt/shibboleth/lib64/にインストールされていることを確認
# ls /opt/shibboleth/lib64/
libcurl.so.4  libcurl.so.4.4.0
#
(10) LD_LIBRARY_PATHに「/opt/shibboleth/lib64/」を追加
# export LD_LIBRARY_PATH=/opt/shibboleth/lib64/:$LD_LIBRARY_PATH
#
9. 改めてPowerShellを起動しなおして接続
# powershell
PowerShell
Copyright (C) 2016 Microsoft Corporation. All rights reserved.

PS /root> Get-Module -ListAvailable PowerCLI* | Import-Module
PS /root> Connect-VIServer -Server サーバ名 -User ユーザ名 -Password "パスワード"

Name                           Port  User
----                           ----  ----
サーバ名                       443   ユーザ名


PS /root>
問題なく成功
Get-VMとかも通常のPowerCLIと同様に可能
PS /root> Get-VM

Name                 PowerState Num CPUs MemoryGB
----                 ---------- -------- --------
仮想マシン名         PoweredOn  2        8.000


PS /root>
ということで、PowerCLI COREで利用可能なコマンドレットの一覧。
PS /root> Get-Module
ModuleType Version Name ExportedCommands
---------- ------- ---- ----------------
Script 0.0 Initialize
Script 0.0 Initialize-VMware_VimAutomation_Vds
Manifest 3.1.0.0 Microsoft.PowerShell.Management {Add-Content, Clea...
Manifest 3.1.0.0 Microsoft.PowerShell.Utility {Add-Member, Add-T...
Binary 1.21 PowerCLI.Vds {Add-VDSwitchPhysi...
Binary 1.21 PowerCLI.ViCore {Add-PassthroughDe...
Script 1.2 PSReadLine {Get-PSReadlineKey...
PS /root> (Get-Module PowerCLI.ViCore).ExportedCommands
Key Value
--- -----
Add-PassthroughDevice Add-PassthroughDevice
Add-VirtualSwitchPhysicalNetworkAdapter Add-VirtualSwitchPhysicalNetworkA...
Add-VMHost Add-VMHost
Add-VMHostNtpServer Add-VMHostNtpServer
Connect-VIServer Connect-VIServer
Copy-DatastoreItem Copy-DatastoreItem
Copy-HardDisk Copy-HardDisk
Copy-VMGuestFile Copy-VMGuestFile
Disconnect-VIServer Disconnect-VIServer
Dismount-Tools Dismount-Tools
Export-VApp Export-VApp
Export-VMHostProfile Export-VMHostProfile
Format-VMHostDiskPartition Format-VMHostDiskPartition
Get-AdvancedSetting Get-AdvancedSetting
Get-AlarmAction Get-AlarmAction
Get-AlarmActionTrigger Get-AlarmActionTrigger
Get-AlarmDefinition Get-AlarmDefinition
Get-Annotation Get-Annotation
Get-CDDrive Get-CDDrive
Get-Cluster Get-Cluster
Get-ContentLibraryItem Get-ContentLibraryItem
Get-CustomAttribute Get-CustomAttribute
Get-Datacenter Get-Datacenter
Get-Datastore Get-Datastore
Get-DatastoreCluster Get-DatastoreCluster
Get-DrsRecommendation Get-DrsRecommendation
Get-DrsRule Get-DrsRule
Get-EsxCli Get-EsxCli
Get-EsxTop Get-EsxTop
Get-FloppyDrive Get-FloppyDrive
Get-Folder Get-Folder
Get-HAPrimaryVMHost Get-HAPrimaryVMHost
Get-HardDisk Get-HardDisk
Get-Inventory Get-Inventory
Get-IScsiHbaTarget Get-IScsiHbaTarget
Get-Log Get-Log
Get-LogType Get-LogType
Get-NetworkAdapter Get-NetworkAdapter
Get-NicTeamingPolicy Get-NicTeamingPolicy
Get-OSCustomizationNicMapping Get-OSCustomizationNicMapping
Get-OSCustomizationSpec Get-OSCustomizationSpec
Get-OvfConfiguration Get-OvfConfiguration
Get-PassthroughDevice Get-PassthroughDevice
Get-PowerCLIConfiguration Get-PowerCLIConfiguration
Get-PowerCLIVersion Get-PowerCLIVersion
Get-ResourcePool Get-ResourcePool
Get-ScsiController Get-ScsiController
Get-ScsiLun Get-ScsiLun
Get-ScsiLunPath Get-ScsiLunPath
Get-SecurityPolicy Get-SecurityPolicy
Get-Snapshot Get-Snapshot
Get-Stat Get-Stat
Get-StatInterval Get-StatInterval
Get-StatType Get-StatType
Get-Tag Get-Tag
Get-TagAssignment Get-TagAssignment
Get-TagCategory Get-TagCategory
Get-Task Get-Task
Get-Template Get-Template
Get-UsbDevice Get-UsbDevice
Get-VApp Get-VApp
Get-VIAccount Get-VIAccount
Get-VIEvent Get-VIEvent
Get-View Get-View
Get-VIObjectByVIView Get-VIObjectByVIView
Get-VIPermission Get-VIPermission
Get-VIPrivilege Get-VIPrivilege
Get-VIProperty Get-VIProperty
Get-VIRole Get-VIRole
Get-VirtualPortGroup Get-VirtualPortGroup
Get-VirtualSwitch Get-VirtualSwitch
Get-VM Get-VM
Get-VMGuest Get-VMGuest
Get-VMGuestNetworkInterface Get-VMGuestNetworkInterface
Get-VMGuestRoute Get-VMGuestRoute
Get-VMHost Get-VMHost
Get-VMHostAccount Get-VMHostAccount
Get-VMHostAdvancedConfiguration Get-VMHostAdvancedConfiguration
Get-VMHostAuthentication Get-VMHostAuthentication
Get-VMHostAvailableTimeZone Get-VMHostAvailableTimeZone
Get-VMHostDiagnosticPartition Get-VMHostDiagnosticPartition
Get-VMHostDisk Get-VMHostDisk
Get-VMHostDiskPartition Get-VMHostDiskPartition
Get-VMHostFirewallDefaultPolicy Get-VMHostFirewallDefaultPolicy
Get-VMHostFirewallException Get-VMHostFirewallException
Get-VMHostFirmware Get-VMHostFirmware
Get-VMHostHardware Get-VMHostHardware
Get-VMHostHba Get-VMHostHba
Get-VMHostModule Get-VMHostModule
Get-VMHostNetwork Get-VMHostNetwork
Get-VMHostNetworkAdapter Get-VMHostNetworkAdapter
Get-VMHostNtpServer Get-VMHostNtpServer
Get-VMHostPatch Get-VMHostPatch
Get-VMHostPciDevice Get-VMHostPciDevice
Get-VMHostProfile Get-VMHostProfile
Get-VMHostProfileRequiredInput Get-VMHostProfileRequiredInput
Get-VMHostRoute Get-VMHostRoute
Get-VMHostService Get-VMHostService
Get-VMHostSnmp Get-VMHostSnmp
Get-VMHostStartPolicy Get-VMHostStartPolicy
Get-VMHostStorage Get-VMHostStorage
Get-VMHostSysLogServer Get-VMHostSysLogServer
Get-VMQuestion Get-VMQuestion
Get-VMResourceConfiguration Get-VMResourceConfiguration
Get-VMStartPolicy Get-VMStartPolicy
Import-VApp Import-VApp
Import-VMHostProfile Import-VMHostProfile
Install-VMHostPatch Install-VMHostPatch
Invoke-DrsRecommendation Invoke-DrsRecommendation
Invoke-VMHostProfile Invoke-VMHostProfile
Invoke-VMScript Invoke-VMScript
Mount-Tools Mount-Tools
Move-Cluster Move-Cluster
Move-Datacenter Move-Datacenter
Move-Datastore Move-Datastore
Move-Folder Move-Folder
Move-HardDisk Move-HardDisk
Move-Inventory Move-Inventory
Move-ResourcePool Move-ResourcePool
Move-Template Move-Template
Move-VApp Move-VApp
Move-VM Move-VM
Move-VMHost Move-VMHost
New-AdvancedSetting New-AdvancedSetting
New-AlarmAction New-AlarmAction
New-AlarmActionTrigger New-AlarmActionTrigger
New-CDDrive New-CDDrive
New-Cluster New-Cluster
New-CustomAttribute New-CustomAttribute
New-Datacenter New-Datacenter
New-Datastore New-Datastore
New-DatastoreCluster New-DatastoreCluster
New-DrsRule New-DrsRule
New-FloppyDrive New-FloppyDrive
New-Folder New-Folder
New-HardDisk New-HardDisk
New-IScsiHbaTarget New-IScsiHbaTarget
New-NetworkAdapter New-NetworkAdapter
New-OSCustomizationNicMapping New-OSCustomizationNicMapping
New-OSCustomizationSpec New-OSCustomizationSpec
New-ResourcePool New-ResourcePool
New-ScsiController New-ScsiController
New-Snapshot New-Snapshot
New-StatInterval New-StatInterval
New-Tag New-Tag
New-TagAssignment New-TagAssignment
New-TagCategory New-TagCategory
New-Template New-Template
New-VApp New-VApp
New-VIPermission New-VIPermission
New-VIProperty New-VIProperty
New-VIRole New-VIRole
New-VirtualPortGroup New-VirtualPortGroup
New-VirtualSwitch New-VirtualSwitch
New-VM New-VM
New-VMGuestRoute New-VMGuestRoute
New-VMHostAccount New-VMHostAccount
New-VMHostNetworkAdapter New-VMHostNetworkAdapter
New-VMHostProfile New-VMHostProfile
New-VMHostRoute New-VMHostRoute
Open-VMConsoleWindow Open-VMConsoleWindow
Remove-AdvancedSetting Remove-AdvancedSetting
Remove-AlarmAction Remove-AlarmAction
Remove-AlarmActionTrigger Remove-AlarmActionTrigger
Remove-CDDrive Remove-CDDrive
Remove-Cluster Remove-Cluster
Remove-CustomAttribute Remove-CustomAttribute
Remove-Datacenter Remove-Datacenter
Remove-Datastore Remove-Datastore
Remove-DatastoreCluster Remove-DatastoreCluster
Remove-DrsRule Remove-DrsRule
Remove-FloppyDrive Remove-FloppyDrive
Remove-Folder Remove-Folder
Remove-HardDisk Remove-HardDisk
Remove-Inventory Remove-Inventory
Remove-IScsiHbaTarget Remove-IScsiHbaTarget
Remove-NetworkAdapter Remove-NetworkAdapter
Remove-OSCustomizationNicMapping Remove-OSCustomizationNicMapping
Remove-OSCustomizationSpec Remove-OSCustomizationSpec
Remove-PassthroughDevice Remove-PassthroughDevice
Remove-ResourcePool Remove-ResourcePool
Remove-Snapshot Remove-Snapshot
Remove-StatInterval Remove-StatInterval
Remove-Tag Remove-Tag
Remove-TagAssignment Remove-TagAssignment
Remove-TagCategory Remove-TagCategory
Remove-Template Remove-Template
Remove-UsbDevice Remove-UsbDevice
Remove-VApp Remove-VApp
Remove-VIPermission Remove-VIPermission
Remove-VIProperty Remove-VIProperty
Remove-VIRole Remove-VIRole
Remove-VirtualPortGroup Remove-VirtualPortGroup
Remove-VirtualSwitch Remove-VirtualSwitch
Remove-VirtualSwitchPhysicalNetworkAdapter Remove-VirtualSwitchPhysicalNetwo...
Remove-VM Remove-VM
Remove-VMGuestRoute Remove-VMGuestRoute
Remove-VMHost Remove-VMHost
Remove-VMHostAccount Remove-VMHostAccount
Remove-VMHostNetworkAdapter Remove-VMHostNetworkAdapter
Remove-VMHostNtpServer Remove-VMHostNtpServer
Remove-VMHostProfile Remove-VMHostProfile
Remove-VMHostRoute Remove-VMHostRoute
Restart-VM Restart-VM
Restart-VMGuest Restart-VMGuest
Restart-VMHost Restart-VMHost
Restart-VMHostService Restart-VMHostService
Set-AdvancedSetting Set-AdvancedSetting
Set-AlarmDefinition Set-AlarmDefinition
Set-Annotation Set-Annotation
Set-CDDrive Set-CDDrive
Set-Cluster Set-Cluster
Set-CustomAttribute Set-CustomAttribute
Set-Datacenter Set-Datacenter
Set-Datastore Set-Datastore
Set-DatastoreCluster Set-DatastoreCluster
Set-DrsRule Set-DrsRule
Set-FloppyDrive Set-FloppyDrive
Set-Folder Set-Folder
Set-HardDisk Set-HardDisk
Set-IScsiHbaTarget Set-IScsiHbaTarget
Set-NetworkAdapter Set-NetworkAdapter
Set-NicTeamingPolicy Set-NicTeamingPolicy
Set-OSCustomizationNicMapping Set-OSCustomizationNicMapping
Set-OSCustomizationSpec Set-OSCustomizationSpec
Set-PowerCLIConfiguration Set-PowerCLIConfiguration
Set-ResourcePool Set-ResourcePool
Set-ScsiController Set-ScsiController
Set-ScsiLun Set-ScsiLun
Set-ScsiLunPath Set-ScsiLunPath
Set-SecurityPolicy Set-SecurityPolicy
Set-Snapshot Set-Snapshot
Set-StatInterval Set-StatInterval
Set-Tag Set-Tag
Set-TagCategory Set-TagCategory
Set-Template Set-Template
Set-VApp Set-VApp
Set-VIPermission Set-VIPermission
Set-VIRole Set-VIRole
Set-VirtualPortGroup Set-VirtualPortGroup
Set-VirtualSwitch Set-VirtualSwitch
Set-VM Set-VM
Set-VMGuestNetworkInterface Set-VMGuestNetworkInterface
Set-VMHost Set-VMHost
Set-VMHostAccount Set-VMHostAccount
Set-VMHostAdvancedConfiguration Set-VMHostAdvancedConfiguration
Set-VMHostAuthentication Set-VMHostAuthentication
Set-VMHostDiagnosticPartition Set-VMHostDiagnosticPartition
Set-VMHostFirewallDefaultPolicy Set-VMHostFirewallDefaultPolicy
Set-VMHostFirewallException Set-VMHostFirewallException
Set-VMHostFirmware Set-VMHostFirmware
Set-VMHostHba Set-VMHostHba
Set-VMHostModule Set-VMHostModule
Set-VMHostNetwork Set-VMHostNetwork
Set-VMHostNetworkAdapter Set-VMHostNetworkAdapter
Set-VMHostProfile Set-VMHostProfile
Set-VMHostRoute Set-VMHostRoute
Set-VMHostService Set-VMHostService
Set-VMHostSnmp Set-VMHostSnmp
Set-VMHostStartPolicy Set-VMHostStartPolicy
Set-VMHostStorage Set-VMHostStorage
Set-VMHostSysLogServer Set-VMHostSysLogServer
Set-VMQuestion Set-VMQuestion
Set-VMResourceConfiguration Set-VMResourceConfiguration
Set-VMStartPolicy Set-VMStartPolicy
Start-VApp Start-VApp
Start-VM Start-VM
Start-VMHost Start-VMHost
Start-VMHostService Start-VMHostService
Stop-Task Stop-Task
Stop-VApp Stop-VApp
Stop-VM Stop-VM
Stop-VMGuest Stop-VMGuest
Stop-VMHost Stop-VMHost
Stop-VMHostService Stop-VMHostService
Suspend-VM Suspend-VM
Suspend-VMGuest Suspend-VMGuest
Suspend-VMHost Suspend-VMHost
Test-VMHostProfileCompliance Test-VMHostProfileCompliance
Test-VMHostSnmp Test-VMHostSnmp
Update-Tools Update-Tools
Wait-Task Wait-Task
Wait-Tools Wait-Tools
PS /root> (Get-Module PowerCLI.Vds).ExportedCommands
Key Value
--- -----
Add-VDSwitchPhysicalNetworkAdapter Add-VDSwitchPhysicalNetworkAdapter
Add-VDSwitchVMHost Add-VDSwitchVMHost
Export-VDPortGroup Export-VDPortGroup
Export-VDSwitch Export-VDSwitch
Get-VDBlockedPolicy Get-VDBlockedPolicy
Get-VDPort Get-VDPort
Get-VDPortgroup Get-VDPortgroup
Get-VDPortgroupOverridePolicy Get-VDPortgroupOverridePolicy
Get-VDSecurityPolicy Get-VDSecurityPolicy
Get-VDSwitch Get-VDSwitch
Get-VDSwitchPrivateVlan Get-VDSwitchPrivateVlan
Get-VDTrafficShapingPolicy Get-VDTrafficShapingPolicy
Get-VDUplinkLacpPolicy Get-VDUplinkLacpPolicy
Get-VDUplinkTeamingPolicy Get-VDUplinkTeamingPolicy
New-VDPortgroup New-VDPortgroup
New-VDSwitch New-VDSwitch
New-VDSwitchPrivateVlan New-VDSwitchPrivateVlan
Remove-VDPortGroup Remove-VDPortGroup
Remove-VDSwitch Remove-VDSwitch
Remove-VDSwitchPhysicalNetworkAdapter Remove-VDSwitchPhysicalNetworkAdapter
Remove-VDSwitchPrivateVlan Remove-VDSwitchPrivateVlan
Remove-VDSwitchVMHost Remove-VDSwitchVMHost
Set-VDBlockedPolicy Set-VDBlockedPolicy
Set-VDPort Set-VDPort
Set-VDPortgroup Set-VDPortgroup
Set-VDPortgroupOverridePolicy Set-VDPortgroupOverridePolicy
Set-VDSecurityPolicy Set-VDSecurityPolicy
Set-VDSwitch Set-VDSwitch
Set-VDTrafficShapingPolicy Set-VDTrafficShapingPolicy
Set-VDUplinkLacpPolicy Set-VDUplinkLacpPolicy
Set-VDUplinkTeamingPolicy Set-VDUplinkTeamingPolicy
Set-VDVlanConfiguration Set-VDVlanConfiguration
PS /root>
GithubのPowerShell Issue#2511の関連を調べたら、「PowervRA」と「PowervRO」があるのを発見。
どちらもPowerShell Core対応である模様。
vSphere環境でCentOS7やUbuntu 16.04などをインストールすると、X-Windowを起動しないコンソール画面での解像度が高くて使いにくいという問題が発生しやすい。
せめて1024×800ぐらいに収まらないか・・・と思ったら設定はあった。
「Adding video resolution modes to Windows guest operating systems (1003) 」
上記の日本語版KB「Windows ゲスト OS へのビデオ解像度モードの追加 (2078472) 」
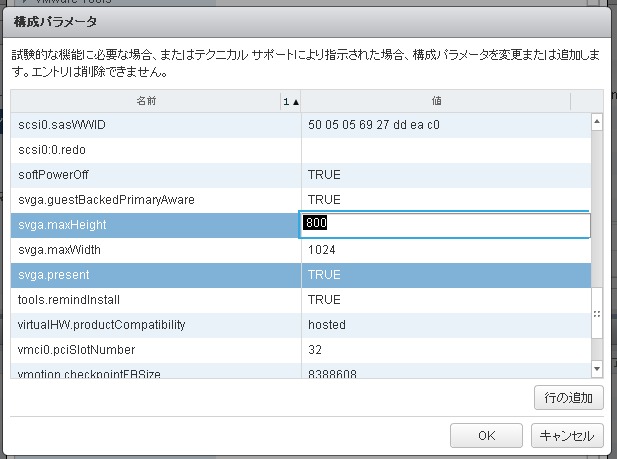
高解像度にしたい場合は、上記にある手順をいろいろやらなければならないが、低解像度にしたい場合は、vmxファイルの直接編集の必要はなく、仮想マシンオプションの詳細にて「svga.maxWidth」と「svga.maxHeight」の値を追加するだけ良い。
仮想マシンの電源を停止した状態で、仮想マシンオプションの詳細を開き、svga.maxWidthを1024、svga.maxHeightを800で追加している。

2018/05/25 追記
なお、Hyper-Vの場合は、grubへの設定で対応する。
「Changing Ubuntu Screen Resolution in a Hyper-V VM」
上記はUbuntuの場合の例となっているが、RedHat/CentOSでも基本的には同じ
grubの設定に、「video=hyperv_fb:1024×800」を追加して解像度を指定する。という形になる。
2019/07/17追記
RHEL8のインストーラで発生する英語だと問題なかったのが、日本語にした途端画面外にはみ出る、ということへの対応について「vSphere上にRHEL8を日本語でインストールしようとするとインストーラがちゃんと表示されない」で記載しました。
まぁ、インストール時のカーネルオプションとして 「inst.resolution=1024×800」 を追加する、という話ですね。
CentOS7環境でmuninを使ったら、文字化けっぽいものが・・・
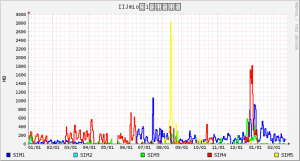
何が原因なのかわからなかったので、とりあえず切り分けのために、以前作った「IIJmioクーポンスイッチAPIを使って使用量グラフ作成」のrrdtoolをCentOS7環境で実行してみた
rrdtool graph test-year.png --imgformat=PNG \
--height=300 \
--width=600 \
--lower-limit=0 \
--end now --start end-14months \
--vertical-label "MB" \
--x-grid WEEK:1:MONTH:1:MONTH:1:0:%m/%d \
--units-exponent 0 \
--title="IIJmioの1年分使用量" \
DEF:SIM1C=hdo~.rrd:withCoupon:LAST \
DEF:SIM1N=hdo~.rrd:withoutCoupon:LAST \
DEF:SIM2C=hdo~.rrd:withCoupon:LAST \
DEF:SIM2N=hdo~.rrd:withoutCoupon:LAST \
DEF:SIM3C=hdo~.rrd:withCoupon:LAST \
DEF:SIM3N=hdo~.rrd:withoutCoupon:LAST \
DEF:SIM4C=hdo~.rrd:withCoupon:LAST \
DEF:SIM4N=hdo~.rrd:withoutCoupon:LAST \
DEF:SIM5C=hdo~.rrd:withCoupon:LAST \
DEF:SIM5N=hdo~.rrd:withoutCoupon:LAST \
CDEF:SIM1=SIM1C,SIM1N,+ \
CDEF:SIM2=SIM2C,SIM2N,+ \
CDEF:SIM3=SIM3C,SIM3N,+ \
CDEF:SIM4=SIM4C,SIM4N,+ \
CDEF:SIM5=SIM5C,SIM5N,+ \
LINE2:SIM1#0000FF:"SIM1" \
LINE2:SIM2#00FFFF:"SIM2" \
LINE2:SIM3#00FF00:"SIM3" \
LINE2:SIM4#F00F00:"SIM4" \
LINE2:SIM5#FFFF00:"SIM5"
すると下記のように「IIJmioの1年分使用量」のうち日本語文字列である「の」「年分使用量」が化けている。
では、何を追加インストールすればいいのか?
CentOS5環境では「fonts-japanese」であった。
しかし、CentOS7環境ではこのパッケージ名は存在していない。
CentOS5環境でのパッケージ情報を確認
# yum info fonts-japanese
Loaded plugins: fastestmirror, priorities
base                                                                  3667/3667
Installed Packages
Name       : fonts-japanese
Arch       : noarch
Version    : 0.20061016
Release    : 4.el5
Size       : 40 M
Repo       : installed
Summary    : フリーな日本語のビットマップ/TrueType フォント
License    : Distributable
Description: This package provides the free Japanese Bitmap/TrueType fonts.
#
そして、CentOS7環境でTrueTypeで検索してみる。
# yum search "TrueType"
読み込んだプラグイン:fastestmirror, langpacks
Loading mirror speeds from cached hostfile
 * base: www.ftp.ne.jp
 * epel: ftp.jaist.ac.jp
 * extras: www.ftp.ne.jp
 * updates: www.ftp.ne.jp
============================ N/S matched: TrueType =============================
SDL2_ttf.x86_64 : TrueType font rendering library for SDL2
SDL_ttf.x86_64 : Simple DirectMedia Layer TrueType Font library
baekmuk-ttf-batang-fonts.noarch : Korean Baekmuk TrueType Batang typeface
baekmuk-ttf-dotum-fonts.noarch : Korean Baekmuk TrueType Dotum typeface
baekmuk-ttf-fonts-common.noarch : Common files for Korean Baekmuk TrueType fonts
baekmuk-ttf-fonts-ghostscript.noarch : Ghostscript files for Korean Baekmuk
                                     : TrueType fonts
baekmuk-ttf-gulim-fonts.noarch : Korean Baekmuk TrueType Gulim typeface
baekmuk-ttf-hline-fonts.noarch : Korean Baekmuk TrueType Headline typeface
cjkuni-ukai-fonts.noarch : Chinese Unicode TrueType font in Kai face
cjkuni-uming-fonts.noarch : Chinese Unicode TrueType font in Ming face
libfonts.noarch : TrueType Font Layouting
mftrace.x86_64 : Utility for converting TeX bitmap fonts to Type 1 or TrueType
               : fonts
sazanami-fonts-common.noarch : Common files for Sazanami Japanese TrueType fonts
sazanami-gothic-fonts.noarch : Sazanami Gothic Japanese TrueType font
sazanami-mincho-fonts.noarch : Sazanami Mincho Japanese TrueType font
ttembed.x86_64 : Remove embedding limitations from TrueType fonts
ttf2pt1.x86_64 : TrueType to Adobe Type 1 font converter
ttmkfdir.x86_64 : Utility to create fonts.scale files for truetype fonts
vlgothic-fonts.noarch : Japanese TrueType font
vlgothic-p-fonts.noarch : Proportional Japanese TrueType font

  Name and summary matches only, use "search all" for everything.
#
「vlgothic-fonts.noarch : Japanese TrueType font」が怪しそうなので「yum install vlgothic-fonts.noarch」を実行してインストール。
というわけで、CentOS7環境でmunin/rrdtoolsで日本語文字列が化けるときは「vlgothic-fonts」をインストールすればよい、ということがわかった。
2022/05/13追記:Oracle Linux8の場合、vlgothic-fontsはEPEL収録になっていたため、「oracle-epel-release-el8」をインストールしたあとに「vlgothic-fonts」をインストールすることになる。
「「無料のLibreOfficeをやめて有料のWindowsとOfficeに戻すべき」という市議会の議論について開発元が反論」(2017/02/15)という記事が公開されている。
これは、ドイツのミュンヘン市が、古いWindowsとMicrosoft Officeの変わりに、LinuxとOpenOfficeを採用した、という話のその後のことである。
英語のWikipedia「LiMux」と、ドイツ語のWikipedia「LiMux」
そして、標準のOpenOffice/LibreOfficeには無く、ミュンヘン市で必要な機能を追加するための拡張モジュール「WollMux」というのが、現状確認できる文献であるようだ。
初期はDebianベースで開発され、安定して配布するために、専用ディストリビューションLiMuxという形態を取るようになったようだ。
2010年12月のLiMux 3ではUbuntu 8.10をベースに、カスタマイズされたOpenOffice
2011年08月のLiMux 4ではUbuntu 10.04 LTSベースで、OpenOffice + WollMux拡張モジュール
2012年08月のLiMux 4.1ではUbuntu 10.04 LTSベース、OpenOffice + WollMux拡張モジュール
2014年11月のLiMux 5ではUbuntu 12.04 LTSベース、LibreOffice + WollMux拡張モジュール
LinuxディストリビューションとしてのLiMuxは、これ以降の情報はなく、公式サイトも現存していないようだ。
LiMux 5で使用しているUbuntu 12.04LTSのサポート期限は、2017年4月となっているため、これ以降の更新がなければ、死亡、という感じである。
ということで、少なくとも、ミュンヘン市の事例については、Linuxディストリビューションを作成してのLinuxデスクトップの運用計画、という面では、失敗しているのは間違い無いようだ。
一般的なUbuntuデスクトップベースでの運用に切り替わっているのか、それともWindowsベースの運用なのか、はたまた、サポート切れのLiMux(Ubuntu)デスクトップを無理矢理使っていくのかは、はっきりと見えていない。
2019/11/21追記
久しぶりに状況を確認してみると「WollMux」のサイト構成が変わっていた。
ソースコードは https://github.com/WollMux/WollMux で公開されていて、最新バージョンで18.0.11で、開発中バージョンとして18.1.6が出ている。
が・・・ダウンロード先として提示されているアドレス、例えば「http://webdav.muenchen.de/limux/sonstiges/wollmux/packages/WollMux-18.0.11」はホスト名解決が行えずアクセスできない。
githubの方は頻繁に更新されており、11/20付けで18.1.7 prereleaseが出ていたりするので、サイトの管理体制に難があるようだ。
2021/11/24追記
現在はサイトの方はWollMux 18.1.14と書いてあるが githubの方では2021/10/14付けでWollMux 18.2.7 をリリースしている状態だった。
2024/04/05追記
ドイツのシュレースヴィヒ=ホルシュタイン州で州政府のパソコンを移行する、という話があるようで「ドイツ政府が3万台のPCでLinuxに乗り換えてMicrosoft OfficeからオープンソースのLibreOfficeに移行する」(2024/04/05)の記事の中でミュンヘン市の件についても触れられている。
なお、バイエルン州のミュンヘン市議会は先行して2004年にオープンソースソリューションへの切り替えを行っており、2013年にWindowsからLinuxへ完全に移行することに成功しましたが、職員へのトレーニング不足からか、一部の職員から不満の声が上がり、2017年にWindowsへ戻ってしまったとのことです。この背景には、Microsoftによるマーケティング戦略があったことも指摘されています。
ただ、額面上以上のことは確認してないようで、なんで2017年にWindowsに戻ったのかとか触れていない(LiMux 5のサポートが2017年4月で終わったけど、ほかのUbuntu系にしようとはしなかったから)
WollMux拡張がどうなったのかを確認してみると2023年7月リリースのver19.0からLibraOfficeの直轄プロジェクトとなって LibreOffice Template System としてリリースされていた。
ライセンスは European Union Public Licence (EUPL) というものを使っているようだ。
Wikipediaの記事を見ていると、このミュンヘン市の事例に触発されたように、自治体が主体となって作成したLinuxディストリビューションがいくつかあるようだ。
公式サイト:CANIMA GNU/LINUX
ベネズエラ政府系で作成しているディストリビューションで、2007年から2017年の現在も継続して提供されているもの
最新版はCANIMA 5.0でDebianベースで開発されている。
2019/11/21時点ではサイトにアクセスできない。wikipediaの記載によれば2018年3月にversion 6.0がリリースされていた模様。
フランスの国家憲兵隊で作成しているディストリビューション。
Ubuntuベースで開発されていたが、2014年6月のUbuntu 12.04LTSベースのもののリリース後、死んでいるようだ
公式サイト:Zorin OS
イタリア ヴィチェンツァ市で採用されているLinuxディストリビューション。市が作ってるわけではない)
Ubuntuベースで開発され、最新のZorin12はUbuntu 16.04LTSベースであるようだ。
2019/11/21現在では2019年3月リリースのZorin OS 15と、2019年11月リリースの軽量化版Zorin OS 15 Liteの2種類が出ている。