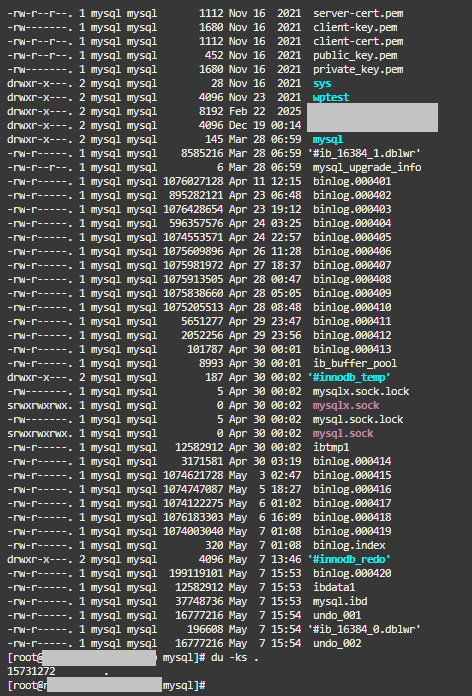
[root@xxxxxxxxxxx mysql]# ls -ltr /var/lib/mysql/binlog*
-rw-r-----. 1 mysql mysql 1076027128 Apr 11 12:15 /var/lib/mysql/binlog.000401
-rw-r-----. 1 mysql mysql  895282121 Apr 23 06:48 /var/lib/mysql/binlog.000402
-rw-r-----. 1 mysql mysql 1076428654 Apr 23 19:12 /var/lib/mysql/binlog.000403
-rw-r-----. 1 mysql mysql  596357576 Apr 24 03:25 /var/lib/mysql/binlog.000404
-rw-r-----. 1 mysql mysql 1074553571 Apr 24 22:57 /var/lib/mysql/binlog.000405
-rw-r-----. 1 mysql mysql 1075609896 Apr 26 11:28 /var/lib/mysql/binlog.000406
-rw-r-----. 1 mysql mysql 1075981972 Apr 27 18:37 /var/lib/mysql/binlog.000407
-rw-r-----. 1 mysql mysql 1075913505 Apr 28 00:47 /var/lib/mysql/binlog.000408
-rw-r-----. 1 mysql mysql 1075838660 Apr 28 05:05 /var/lib/mysql/binlog.000409
-rw-r-----. 1 mysql mysql 1075205513 Apr 28 08:48 /var/lib/mysql/binlog.000410
-rw-r-----. 1 mysql mysql    5651277 Apr 29 23:47 /var/lib/mysql/binlog.000411
-rw-r-----. 1 mysql mysql    2052256 Apr 29 23:56 /var/lib/mysql/binlog.000412
-rw-r-----. 1 mysql mysql     101787 Apr 30 00:01 /var/lib/mysql/binlog.000413
-rw-r-----. 1 mysql mysql    3171581 Apr 30 03:19 /var/lib/mysql/binlog.000414
-rw-r-----. 1 mysql mysql 1074621728 May  3 02:47 /var/lib/mysql/binlog.000415
-rw-r-----. 1 mysql mysql 1074747087 May  5 18:27 /var/lib/mysql/binlog.000416
-rw-r-----. 1 mysql mysql 1074122275 May  6 01:02 /var/lib/mysql/binlog.000417
-rw-r-----. 1 mysql mysql 1076183303 May  6 16:09 /var/lib/mysql/binlog.000418
-rw-r-----. 1 mysql mysql 1074003040 May  7 01:08 /var/lib/mysql/binlog.000419
-rw-r-----. 1 mysql mysql        320 May  7 01:08 /var/lib/mysql/binlog.index
-rw-r-----. 1 mysql mysql  286409863 May  7 16:07 /var/lib/mysql/binlog.000420
[root@xxxxxxxxxxx mysql]#
とりあえず、binlog関連の設定を「show variables like ‘binlog%’;」を実行して確認してみる
[root@xxxxxxxxxxx mysql]# mysql -u root
Welcome to the MySQL monitor.  Commands end with ; or \g.
Your MySQL connection id is 50827
Server version: 8.0.45 Source distribution

Copyright (c) 2000, 2026, Oracle and/or its affiliates.

Oracle is a registered trademark of Oracle Corporation and/or its
affiliates. Other names may be trademarks of their respective
owners.

Type 'help;' or '\h' for help. Type '\c' to clear the current input statement.

mysql> show variables like 'binlog%';
+------------------------------------------------+--------------+
| Variable_name                                  | Value        |
+------------------------------------------------+--------------+
| binlog_cache_size                              | 32768        |
| binlog_checksum                                | CRC32        |
| binlog_direct_non_transactional_updates        | OFF          |
| binlog_encryption                              | OFF          |
| binlog_error_action                            | ABORT_SERVER |
| binlog_expire_logs_auto_purge                  | ON           |
| binlog_expire_logs_seconds                     | 2592000      |
| binlog_format                                  | ROW          |
| binlog_group_commit_sync_delay                 | 0            |
| binlog_group_commit_sync_no_delay_count        | 0            |
| binlog_gtid_simple_recovery                    | ON           |
| binlog_max_flush_queue_time                    | 0            |
| binlog_order_commits                           | ON           |
| binlog_rotate_encryption_master_key_at_startup | OFF          |
| binlog_row_event_max_size                      | 8192         |
| binlog_row_image                               | FULL         |
| binlog_row_metadata                            | MINIMAL      |
| binlog_row_value_options                       |              |
| binlog_rows_query_log_events                   | OFF          |
| binlog_stmt_cache_size                         | 32768        |
| binlog_transaction_compression                 | OFF          |
| binlog_transaction_compression_level_zstd      | 3            |
| binlog_transaction_dependency_history_size     | 25000        |
| binlog_transaction_dependency_tracking         | COMMIT_ORDER |
+------------------------------------------------+--------------+
24 rows in set (0.00 sec)

mysql>
mysql> PURGE BINARY LOGS BEFORE '2026-05-01 00:00:00';
Query OK, 0 rows affected (0.02 sec)

mysql> show binary logs;
+---------------+------------+-----------+
| Log_name      | File_size  | Encrypted |
+---------------+------------+-----------+
| binlog.000415 | 1074621728 | No        |
| binlog.000416 | 1074747087 | No        |
| binlog.000417 | 1074122275 | No        |
| binlog.000418 | 1076183303 | No        |
| binlog.000419 | 1074003040 | No        |
| binlog.000420 |  377894939 | No        |
+---------------+------------+-----------+
6 rows in set (0.00 sec)

mysql>
ファイルは・・・削除されていますね
[root@xxxxxxxxxxx mysql]# ls -ltr /var/lib/mysql/binlog*
-rw-r-----. 1 mysql mysql 1074621728 May  3 02:47 /var/lib/mysql/binlog.000415
-rw-r-----. 1 mysql mysql 1074747087 May  5 18:27 /var/lib/mysql/binlog.000416
-rw-r-----. 1 mysql mysql 1074122275 May  6 01:02 /var/lib/mysql/binlog.000417
-rw-r-----. 1 mysql mysql 1076183303 May  6 16:09 /var/lib/mysql/binlog.000418
-rw-r-----. 1 mysql mysql 1074003040 May  7 01:08 /var/lib/mysql/binlog.000419
-rw-r-----. 1 mysql mysql         96 May  7 16:25 /var/lib/mysql/binlog.index
-rw-r-----. 1 mysql mysql  383435241 May  7 16:25 /var/lib/mysql/binlog.000420
[root@xxxxxxxxxxx mysql]#
[root@xxxxxxxxxxx ~]# ls -ltr /var/lib/mysql/bin*
-rw-r-----. 1 mysql mysql 1074747087 May  5 18:27 /var/lib/mysql/binlog.000416
-rw-r-----. 1 mysql mysql 1074122275 May  6 01:02 /var/lib/mysql/binlog.000417
-rw-r-----. 1 mysql mysql 1076183303 May  6 16:09 /var/lib/mysql/binlog.000418
-rw-r-----. 1 mysql mysql 1074003040 May  7 01:08 /var/lib/mysql/binlog.000419
-rw-r-----. 1 mysql mysql 1074323672 May  8 03:18 /var/lib/mysql/binlog.000420
-rw-r-----. 1 mysql mysql 1073965591 May  8 16:47 /var/lib/mysql/binlog.000421
-rw-r-----. 1 mysql mysql 1074897443 May 10 12:39 /var/lib/mysql/binlog.000422
-rw-r-----. 1 mysql mysql        128 May 10 12:39 /var/lib/mysql/binlog.index
-rw-r-----. 1 mysql mysql  576882057 May 11 14:17 /var/lib/mysql/binlog.000423
[root@xxxxxxxxxxx ~]#
さらに翌日確認して、間違いなく増加率が激減していることを確認した
[root@xxxxxxxxxxx ~]# ls -ltr /var/lib/mysql/bin*
-rw-r-----. 1 mysql mysql 1074747087 May  5 18:27 /var/lib/mysql/binlog.000416
-rw-r-----. 1 mysql mysql 1074122275 May  6 01:02 /var/lib/mysql/binlog.000417
-rw-r-----. 1 mysql mysql 1076183303 May  6 16:09 /var/lib/mysql/binlog.000418
-rw-r-----. 1 mysql mysql 1074003040 May  7 01:08 /var/lib/mysql/binlog.000419
-rw-r-----. 1 mysql mysql 1074323672 May  8 03:18 /var/lib/mysql/binlog.000420
-rw-r-----. 1 mysql mysql 1073965591 May  8 16:47 /var/lib/mysql/binlog.000421
-rw-r-----. 1 mysql mysql 1074897443 May 10 12:39 /var/lib/mysql/binlog.000422
-rw-r-----. 1 mysql mysql        128 May 10 12:39 /var/lib/mysql/binlog.index
-rw-r-----. 1 mysql mysql  867993952 May 12 11:46 /var/lib/mysql/binlog.000423
[root@xxxxxxxxxxx ~]#
[root@idm ~]# dnf search ipa-server
Last metadata expiration check: 3:17:47 ago on Mon Mar 23 12:14:08 2026.
============================================= Name Exactly Matched: ipa-server =============================================
ipa-server.x86_64 : The IPA authentication server
================================================= Name Matched: ipa-server =================================================
ipa-server-common.noarch : Common files used by IPA server
ipa-server-dns.noarch : IPA integrated DNS server with support for automatic DNSSEC signing
ipa-server-encrypted-dns.x86_64 : support for encrypted DNS in IPA integrated DNS server
ipa-server-trust-ad.x86_64 : Virtual package to install packages required for Active Directory trusts
[root@idm ~]# dnf info ipa-server
Last metadata expiration check: 3:20:51 ago on Mon Mar 23 12:14:08 2026.
Available Packages
Name         : ipa-server
Version      : 4.12.2
Release      : 24.el10_1.2
Architecture : x86_64
Size         : 400 k
Source       : ipa-4.12.2-24.el10_1.2.src.rpm
Repository   : appstream
Summary      : The IPA authentication server
URL          : http://www.freeipa.org/
License      : GPL-3.0-or-later
Description  : IPA is an integrated solution to provide centrally managed Identity (users,
             : hosts, services), Authentication (SSO, 2FA), and Authorization
             : (host access control, SELinux user roles, services). The solution provides
             : features for further integration with Linux based clients (SUDO, automount)
             : and integration with Active Directory based infrastructures (Trusts).
             : If you are installing an IPA server, you need to install this package.

[root@idm ~]#
特に追加設定しなくともインストールができそうです
今回は「統合 DNS のない IdM サーバー」を作るので ipa-server のみインストールします
[root@idm ~]# dnf install ipa-server
Last metadata expiration check: 3:21:57 ago on Mon Mar 23 12:14:08 2026.
Dependencies resolved.
============================================================================================================================
Package Architecture Version Repository Size
============================================================================================================================
Installing:
ipa-server x86_64 4.12.2-24.el10_1.2 appstream 400 k
Installing dependencies:
389-ds-base x86_64 3.1.3-7.el10_1 appstream 2.8 M
389-ds-base-libs x86_64 3.1.3-7.el10_1 appstream 1.5 M
ModemManager-glib x86_64 1.22.0-7.el10 baseos 319 k
acl x86_64 2.3.2-4.el10 baseos 79 k
adwaita-cursor-theme noarch 46.0-3.el10 appstream 522 k
adwaita-icon-theme noarch 46.0-3.el10 appstream 455 k
almalinux-logos-httpd noarch 100.3-3.el10_0 appstream 18 k
almalinux-logos-ipa noarch 100.3-3.el10_0 appstream 20 k
alsa-lib x86_64 1.2.14-2.el10_1 appstream 508 k
apache-commons-cli noarch 1.6.0-6.el10 appstream 76 k
apache-commons-codec noarch 1.17.1-1.el10 appstream 313 k
apache-commons-io noarch 1:2.16.1-1.el10 appstream 478 k
apache-commons-lang3 noarch 3.14.0-6.el10 appstream 617 k
apache-commons-logging noarch 1.3.4-1.el10 appstream 94 k
apache-commons-net noarch 3.10.0-6.el10 appstream 304 k
apr x86_64 1.7.5-2.el10 appstream 128 k
apr-util x86_64 1.6.3-23.el10_1 appstream 97 k
apr-util-lmdb x86_64 1.6.3-23.el10_1 appstream 13 k
at-spi2-atk x86_64 2.56.1-1.el10 appstream 86 k
at-spi2-core x86_64 2.56.1-1.el10 appstream 363 k
atk x86_64 2.56.1-1.el10 appstream 80 k
augeas-libs x86_64 1.14.2-0.3.20250224git6ee1282.el10 appstream 428 k
autofs x86_64 1:5.1.9-13.el10 baseos 381 k
avahi-glib x86_64 0.9~rc2-2.el10 appstream 14 k
bluez-libs x86_64 5.83-2.el10 baseos 80 k
cairo x86_64 1.18.2-2.el10 appstream 713 k
cairo-gobject x86_64 1.18.2-2.el10 appstream 17 k
certmonger x86_64 0.79.20-3.el10 appstream 608 k
checkpolicy x86_64 3.9-1.el10 appstream 366 k
cmake-filesystem x86_64 3.30.5-3.el10_0 appstream 15 k
colord-libs x86_64 1.4.7-6.el10 appstream 229 k
cups-filesystem noarch 1:2.4.10-12.el10_1.2 baseos 11 k
cups-libs x86_64 1:2.4.10-12.el10_1.2 baseos 260 k
cyrus-sasl-md5 x86_64 2.1.28-29.el10 appstream 43 k
cyrus-sasl-plain x86_64 2.1.28-29.el10 baseos 23 k
dbus-tools x86_64 1:1.14.10-5.el10 baseos 53 k
default-fonts-core-sans noarch 4.1-3.el10 baseos 34 k
ecj noarch 1:4.23-11.el10 appstream 2.4 M
exempi x86_64 2.6.4-7.el10 appstream 586 k
exiv2-libs x86_64 0.28.3-5.el10 appstream 899 k
fdk-aac-free x86_64 2.0.0-15.el10 appstream 339 k
fftw-libs-single x86_64 3.3.10-15.el10 appstream 1.1 M
flac-libs x86_64 1.4.3-6.el10 appstream 263 k
fontawesome4-fonts noarch 1:4.7.0-23.el10 appstream 204 k
fontconfig x86_64 2.15.0-7.el10 appstream 273 k
fonts-filesystem noarch 1:2.0.5-18.el10 baseos 7.7 k
fribidi x86_64 1.0.14-4.el10 appstream 91 k
fuse-common x86_64 3.16.2-5.el10 baseos 7.5 k
fuse3 x86_64 3.16.2-5.el10 baseos 60 k
gdk-pixbuf2 x86_64 2.42.12-4.el10_0 appstream 470 k
gdk-pixbuf2-modules x86_64 2.42.12-4.el10_0 appstream 28 k
geoclue2 x86_64 2.7.2-1.el10 appstream 148 k
giflib x86_64 5.2.1-22.el10 appstream 52 k
google-noto-fonts-common noarch 20240401-5.el10 baseos 17 k
google-noto-sans-vf-fonts noarch 20240401-5.el10 baseos 593 k
gpgmepp x86_64 1.23.2-6.el10.alma.1 appstream 140 k
graphene x86_64 1.10.6-10.el10 appstream 61 k
gsettings-desktop-schemas x86_64 47.1-3.el10_0 baseos 765 k
gsm x86_64 1.0.22-8.el10 appstream 36 k
gssproxy x86_64 0.9.2-10.el10 baseos 120 k
gstreamer1 x86_64 1.24.11-1.el10 appstream 1.6 M
gstreamer1-plugins-base x86_64 1.24.11-1.el10 appstream 2.1 M
gtk-update-icon-cache x86_64 3.24.43-4.el10 appstream 33 k
hicolor-icon-theme noarch 0.17-20.el10 appstream 66 k
httpcomponents-client noarch 4.5.14-9.el10 appstream 663 k
httpcomponents-core noarch 4.4.16-9.el10 appstream 639 k
httpd x86_64 2.4.63-4.el10_1.3 appstream 47 k
httpd-core x86_64 2.4.63-4.el10_1.3 appstream 1.4 M
httpd-filesystem noarch 2.4.63-4.el10_1.3 appstream 13 k
httpd-tools x86_64 2.4.63-4.el10_1.3 appstream 81 k
idm-jss x86_64 5.7.0-2.el10 appstream 1.4 M
idm-jss-tomcat x86_64 5.7.0-2.el10 appstream 39 k
idm-ldapjdk noarch 5.6.0-1.el10 appstream 472 k
idm-pki-acme noarch 11.7.0-2.el10 appstream 162 k
idm-pki-base noarch 11.7.0-2.el10 appstream 159 k
idm-pki-ca noarch 11.7.0-2.el10 appstream 1.8 M
idm-pki-java noarch 11.7.0-2.el10 appstream 3.9 M
idm-pki-kra noarch 11.7.0-2.el10 appstream 348 k
idm-pki-server noarch 11.7.0-2.el10 appstream 3.4 M
idm-pki-tools x86_64 11.7.0-2.el10 appstream 837 k
inih-cpp x86_64 58-3.el10 appstream 18 k
ipa-client x86_64 4.12.2-24.el10_1.2 appstream 131 k
ipa-client-common noarch 4.12.2-24.el10_1.2 appstream 42 k
ipa-common noarch 4.12.2-24.el10_1.2 appstream 683 k
ipa-healthcheck-core noarch 0.16-11.el10 appstream 66 k
ipa-selinux noarch 4.12.2-24.el10_1.2 appstream 37 k
ipa-server-common noarch 4.12.2-24.el10_1.2 appstream 445 k
iso-codes noarch 4.16.0-6.el10 appstream 3.6 M
java-21-openjdk x86_64 1:21.0.10.0.7-1.el10.alma.1 appstream 428 k
java-21-openjdk-devel x86_64 1:21.0.10.0.7-1.el10.alma.1 appstream 5.0 M
java-21-openjdk-headless x86_64 1:21.0.10.0.7-1.el10.alma.1 appstream 48 M
javapackages-filesystem noarch 6.4.0-1.el10 appstream 12 k
javapackages-tools noarch 6.4.0-1.el10 appstream 39 k
jbigkit-libs x86_64 2.1-31.el10 appstream 53 k
krb5-pkinit x86_64 1.21.3-8.el10_0 baseos 60 k
krb5-server x86_64 1.21.3-8.el10_0 baseos 298 k
krb5-workstation x86_64 1.21.3-8.el10_0 baseos 402 k
lame-libs x86_64 3.100-19.el10 appstream 337 k
lcms2 x86_64 2.16-6.el10 appstream 182 k
libX11 x86_64 1.8.10-1.el10 appstream 652 k
libX11-common noarch 1.8.10-1.el10 appstream 189 k
libX11-xcb x86_64 1.8.10-1.el10 appstream 12 k
libXau x86_64 1.0.11-8.el10 appstream 32 k
libXcomposite x86_64 0.4.6-5.el10 appstream 24 k
libXcursor x86_64 1.2.1-9.el10 appstream 30 k
libXdamage x86_64 1.1.6-5.el10 appstream 23 k
libXext x86_64 1.3.6-3.el10 appstream 39 k
libXfixes x86_64 6.0.1-5.el10 appstream 19 k
libXft x86_64 2.3.8-8.el10 appstream 72 k
libXi x86_64 1.8.1-7.el10 appstream 40 k
libXinerama x86_64 1.1.5-8.el10 appstream 14 k
libXrandr x86_64 1.5.4-5.el10 appstream 27 k
libXrender x86_64 0.9.11-8.el10 appstream 27 k
libXtst x86_64 1.2.4-8.el10 appstream 20 k
libXv x86_64 1.0.12-5.el10 appstream 18 k
libXxf86vm x86_64 1.1.5-8.el10 appstream 18 k
libasyncns x86_64 0.8-30.el10 appstream 30 k
libatomic x86_64 14.3.1-2.1.el10.alma.1 baseos 54 k
libcamera x86_64 0.3.2-3.el10_0 appstream 575 k
libcanberra x86_64 0.30-37.el10 appstream 89 k
libdatrie x86_64 0.2.13-11.el10 appstream 32 k
libdex x86_64 0.8.1-1.el10 appstream 83 k
libdrm x86_64 2.4.123-1.el10 appstream 150 k
libepoxy x86_64 1.5.10-9.el10 appstream 221 k
libev x86_64 4.33-14.el10 baseos 50 k
libexif x86_64 0.6.24-9.el10 appstream 458 k
libfontenc x86_64 1.1.7-5.el10 appstream 32 k
libgexiv2 x86_64 0.14.3-3.el10 appstream 104 k
libglvnd x86_64 1:1.7.0-7.el10 appstream 114 k
libglvnd-egl x86_64 1:1.7.0-7.el10 appstream 36 k
libglvnd-glx x86_64 1:1.7.0-7.el10 appstream 132 k
libgsf x86_64 1.14.53-2.el10 appstream 259 k
libgxps x86_64 0.3.2-10.el10 appstream 77 k
libipa_hbac x86_64 2.11.1-2.el10_1.1 baseos 34 k
libiptcdata x86_64 1.0.5-20.el10 appstream 60 k
libjose x86_64 14-102.el10 appstream 64 k
libjpeg-turbo x86_64 3.0.2-4.el10 appstream 253 k
libkadm5 x86_64 1.21.3-8.el10_0 baseos 76 k
liblc3 x86_64 1.0.4-7.el10 appstream 81 k
libldac x86_64 2.0.2.3-17.el10 appstream 42 k
liblerc x86_64 4.0.0-8.el10 appstream 215 k
libnfsidmap x86_64 1:2.8.3-0.el10_1.3 baseos 60 k
libnotify x86_64 0.8.6-1.el10 appstream 52 k
libogg x86_64 2:1.3.5-10.el10 appstream 33 k
libosinfo x86_64 1.11.0-8.el10 appstream 317 k
libpciaccess x86_64 0.16-16.el10 baseos 27 k
libpkgconf x86_64 2.1.0-3.el10 baseos 38 k
libportal x86_64 0.9.0-2.el10 appstream 83 k
libproxy x86_64 0.5.5-4.el10 baseos 48 k
librsvg2 x86_64 2.57.1-9.el10 appstream 1.5 M
libsbc x86_64 2.0-6.el10 appstream 46 k
libsndfile x86_64 1.2.2-5.el10 appstream 214 k
libsoup3 x86_64 3.6.5-3.el10_1.10 appstream 379 k
libsss_autofs x86_64 2.11.1-2.el10_1.1 baseos 36 k
libthai x86_64 0.1.29-10.el10 appstream 213 k
libtheora x86_64 1:1.1.1-39.el10 appstream 169 k
libtiff x86_64 4.6.0-6.el10_1.1 appstream 212 k
libtool-ltdl x86_64 2.4.7-13.el10 appstream 36 k
libtracker-sparql x86_64 3.7.3-4.el10 appstream 377 k
liburing x86_64 2.5-5.el10 baseos 39 k
libverto-libev x86_64 0.3.2-10.el10 baseos 13 k
libvorbis x86_64 1:1.3.7-12.el10 appstream 187 k
libwayland-client x86_64 1.23.1-1.el10 appstream 33 k
libwayland-cursor x86_64 1.23.1-1.el10 appstream 19 k
libwayland-egl x86_64 1.23.1-1.el10 appstream 12 k
libwayland-server x86_64 1.23.1-1.el10 appstream 41 k
libwebp x86_64 1.3.2-8.el10 appstream 288 k
libxcb x86_64 1.17.0-3.el10 appstream 238 k
libxkbcommon x86_64 1.7.0-4.el10 appstream 145 k
libxshmfence x86_64 1.3.2-5.el10 appstream 12 k
libxslt x86_64 1.1.39-8.el10_0 appstream 188 k
lksctp-tools x86_64 1.0.21-1.el10 baseos 94 k
llvm-filesystem x86_64 20.1.8-1.el10.alma.1 appstream 11 k
llvm-libs x86_64 20.1.8-1.el10.alma.1 appstream 30 M
mailcap noarch 2.1.54-8.el10 baseos 34 k
mesa-dri-drivers x86_64 25.0.7-6.el10_1.alma.1 appstream 11 M
mesa-filesystem x86_64 25.0.7-6.el10_1.alma.1 appstream 13 k
mesa-libEGL x86_64 25.0.7-6.el10_1.alma.1 appstream 130 k
mesa-libGL x86_64 25.0.7-6.el10_1.alma.1 appstream 157 k
mesa-libgbm x86_64 25.0.7-6.el10_1.alma.1 appstream 19 k
mkfontscale x86_64 1.2.2-8.el10 appstream 32 k
mod_auth_gssapi x86_64 1.6.5-8.el10 appstream 73 k
mod_lookup_identity x86_64 1.0.0-22.el10 appstream 27 k
mod_session x86_64 2.4.63-4.el10_1.3 appstream 46 k
mod_ssl x86_64 1:2.4.63-4.el10_1.3 appstream 108 k
mpg123-libs x86_64 1.32.9-1.el10 appstream 351 k
nfs-utils x86_64 1:2.8.3-0.el10_1.3 baseos 457 k
nspr x86_64 4.36.0-8.el10_0 appstream 135 k
nss x86_64 3.112.0-8.el10_0 appstream 737 k
nss-softokn x86_64 3.112.0-8.el10_0 appstream 402 k
nss-softokn-freebl x86_64 3.112.0-8.el10_0 appstream 416 k
nss-sysinit x86_64 3.112.0-8.el10_0 appstream 19 k
nss-tools x86_64 3.112.0-8.el10_0 appstream 438 k
nss-util x86_64 3.112.0-8.el10_0 appstream 85 k
oddjob x86_64 0.34.7-14.el10 appstream 71 k
oddjob-mkhomedir x86_64 0.34.7-14.el10 appstream 27 k
open-sans-fonts noarch 1.10-24.el10 appstream 472 k
openjpeg2 x86_64 2.5.2-5.el10 appstream 187 k
openldap-clients x86_64 2.6.9-1.el10 baseos 177 k
openssl x86_64 1:3.5.1-7.el10_1.alma.1 baseos 1.2 M
openssl-perl x86_64 1:3.5.1-7.el10_1.alma.1 appstream 29 k
opus x86_64 1.4-6.el10 appstream 210 k
orc x86_64 0.4.39-2.el10 appstream 225 k
osinfo-db noarch 20250606-1.el10.alma.1 appstream 307 k
osinfo-db-tools x86_64 1.11.0-8.el10 appstream 75 k
pango x86_64 1.54.0-3.el10 appstream 353 k
perl-Algorithm-Diff noarch 1.2010-14.el10 appstream 46 k
perl-Archive-Tar noarch 3.02-512.el10 appstream 75 k
perl-AutoLoader noarch 5.74-512.2.el10_0 appstream 21 k
perl-B x86_64 1.89-512.2.el10_0 appstream 176 k
perl-Carp noarch 1.54-511.el10 appstream 29 k
perl-Class-Struct noarch 0.68-512.2.el10_0 appstream 22 k
perl-Compress-Raw-Bzip2 x86_64 2.212-512.el10 appstream 35 k
perl-Compress-Raw-Lzma x86_64 2.212-3.el10 appstream 51 k
perl-Compress-Raw-Zlib x86_64 2.212-512.el10 appstream 64 k
perl-Data-Dumper x86_64 2.189-512.el10 appstream 56 k
perl-Digest noarch 1.20-511.el10 appstream 25 k
perl-Digest-MD5 x86_64 2.59-6.el10 appstream 36 k
perl-DynaLoader x86_64 1.56-512.2.el10_0 appstream 26 k
perl-Encode x86_64 4:3.21-511.el10 appstream 1.1 M
perl-Errno x86_64 1.38-512.2.el10_0 appstream 15 k
perl-Exporter noarch 5.78-511.el10 appstream 31 k
perl-Fcntl x86_64 1.18-512.2.el10_0 appstream 29 k
perl-File-Basename noarch 2.86-512.2.el10_0 appstream 17 k
perl-File-Find noarch 1.44-512.2.el10_0 appstream 25 k
perl-File-Path noarch 2.18-511.el10 appstream 35 k
perl-File-Temp noarch 1:0.231.100-512.el10 appstream 59 k
perl-File-stat noarch 1.14-512.2.el10_0 appstream 17 k
perl-FileHandle noarch 2.05-512.2.el10_0 appstream 15 k
perl-Getopt-Long noarch 1:2.58-3.el10 appstream 67 k
perl-Getopt-Std noarch 1.14-512.2.el10_0 appstream 15 k
perl-HTTP-Tiny noarch 0.088-512.el10 appstream 56 k
perl-IO x86_64 1.55-512.2.el10_0 appstream 77 k
perl-IO-Compress noarch 2.212-512.el10 appstream 307 k
perl-IO-Compress-Lzma noarch 2.206-7.el10 appstream 81 k
perl-IO-Socket-IP noarch 0.42-512.el10 appstream 42 k
perl-IO-Socket-SSL noarch 2.085-3.el10 appstream 229 k
perl-IO-Zlib noarch 1:1.15-511.el10 appstream 20 k
perl-IPC-Open3 noarch 1.22-512.2.el10_0 appstream 21 k
perl-MIME-Base64 x86_64 3.16-511.el10 appstream 30 k
perl-Mozilla-CA noarch 20231213-5.el10 appstream 14 k
perl-Net-SSLeay x86_64 1.94-8.el10 appstream 356 k
perl-POSIX x86_64 2.20-512.2.el10_0 appstream 96 k
perl-PathTools x86_64 3.91-512.el10 appstream 88 k
perl-Pod-Escapes noarch 1:1.07-511.el10 appstream 20 k
perl-Pod-Perldoc noarch 3.28.01-512.el10 appstream 88 k
perl-Pod-Simple noarch 1:3.45-511.el10 appstream 222 k
perl-Pod-Usage noarch 4:2.03-511.el10 appstream 40 k
perl-Scalar-List-Utils x86_64 5:1.63-511.el10 appstream 72 k
perl-SelectSaver noarch 1.02-512.2.el10_0 appstream 11 k
perl-Socket x86_64 4:2.038-511.el10 appstream 54 k
perl-Storable x86_64 1:3.32-511.el10 appstream 98 k
perl-Symbol noarch 1.09-512.2.el10_0 appstream 14 k
perl-Term-ANSIColor noarch 5.01-512.el10 appstream 48 k
perl-Term-Cap noarch 1.18-511.el10 appstream 22 k
perl-Term-ReadLine noarch 1.17-512.2.el10_0 appstream 19 k
perl-Text-Diff noarch 1.45-24.el10 appstream 40 k
perl-Text-ParseWords noarch 3.31-511.el10 appstream 16 k
perl-Text-Tabs+Wrap noarch 2024.001-511.el10 appstream 22 k
perl-Tie noarch 4.6-512.2.el10_0 appstream 27 k
perl-Time-Local noarch 2:1.350-511.el10 appstream 34 k
perl-URI noarch 5.27-3.el10 appstream 137 k
perl-base noarch 2.27-512.2.el10_0 appstream 16 k
perl-constant noarch 1.33-512.el10 appstream 23 k
perl-debugger noarch 1.60-512.2.el10_0 appstream 133 k
perl-if noarch 0.61.000-512.2.el10_0 appstream 14 k
perl-interpreter x86_64 4:5.40.2-512.2.el10_0 appstream 72 k
perl-libnet noarch 3.15-512.el10 appstream 130 k
perl-libs x86_64 4:5.40.2-512.2.el10_0 appstream 2.2 M
perl-locale noarch 1.12-512.2.el10_0 appstream 13 k
perl-meta-notation noarch 5.40.2-512.2.el10_0 appstream 10 k
perl-mro x86_64 1.29-512.2.el10_0 appstream 30 k
perl-overload noarch 1.37-512.2.el10_0 appstream 45 k
perl-overloading noarch 0.02-512.2.el10_0 appstream 13 k
perl-parent noarch 1:0.241-512.el10 appstream 15 k
perl-podlators noarch 1:5.01-511.el10 appstream 127 k
perl-sigtrap noarch 1.10-512.2.el10_0 appstream 15 k
perl-threads x86_64 1:2.40-511.el10 appstream 58 k
perl-threads-shared x86_64 1.69-511.el10 appstream 44 k
perl-vars noarch 1.05-512.2.el10_0 appstream 13 k
pipewire-jack-audio-connection-kit-libs x86_64 1.4.6-1.el10 appstream 144 k
pipewire-libs x86_64 1.4.6-1.el10 appstream 2.4 M
pixman x86_64 0.43.4-2.el10 appstream 285 k
pkgconf x86_64 2.1.0-3.el10 baseos 43 k
pkgconf-m4 noarch 2.1.0-3.el10 baseos 14 k
pkgconf-pkg-config x86_64 2.1.0-3.el10 baseos 9.7 k
policycoreutils-python-utils noarch 3.9-1.el10 appstream 45 k
poppler x86_64 24.02.0-7.el10_1 appstream 1.2 M
poppler-data noarch 0.4.11-9.el10 appstream 2.0 M
poppler-glib x86_64 24.02.0-7.el10_1 appstream 190 k
publicsuffix-list noarch 20240107-5.el10 appstream 87 k
pulseaudio-libs x86_64 17.0-6.el10 appstream 703 k
python3-argcomplete noarch 3.2.2-4.el10 appstream 88 k
python3-audit x86_64 4.0.3-4.el10 appstream 69 k
python3-augeas noarch 1.1.0-14.el10 appstream 39 k
python3-cffi x86_64 1.16.0-7.el10 baseos 310 k
python3-charset-normalizer noarch 3.4.2-1.el10 baseos 114 k
python3-cryptography x86_64 43.0.0-4.el10 baseos 1.4 M
python3-decorator noarch 5.1.1-12.el10 baseos 31 k
python3-distro noarch 1.9.0-5.el10 appstream 51 k
python3-dns noarch 2.6.1-1.el10 baseos 629 k
python3-file-magic noarch 5.45-8.el10 appstream 19 k
python3-gssapi x86_64 1.7.3-10.el10 appstream 657 k
python3-idm-pki noarch 11.7.0-2.el10 appstream 207 k
python3-idna noarch 3.7-4.el10 baseos 121 k
python3-ifaddr noarch 0.2.0-4.el10 appstream 34 k
python3-ipaclient noarch 4.12.2-24.el10_1.2 appstream 598 k
python3-ipalib noarch 4.12.2-24.el10_1.2 appstream 748 k
python3-ipaserver noarch 4.12.2-24.el10_1.2 appstream 1.8 M
python3-jinja2 noarch 3.1.6-1.el10_0 appstream 330 k
python3-jwcrypto noarch 1.5.6-4.el10 appstream 107 k
python3-kdcproxy noarch 1.0.0-19.el10_1 appstream 46 k
python3-ldap x86_64 3.4.4-9.el10 appstream 290 k
python3-lib389 noarch 3.1.3-7.el10_1 appstream 1.2 M
python3-libipa_hbac x86_64 2.11.1-2.el10_1.1 baseos 28 k
python3-libsemanage x86_64 3.9-1.el10 appstream 81 k
python3-lxml x86_64 5.2.1-4.el10 appstream 1.4 M
python3-markupsafe x86_64 2.1.3-6.el10 appstream 35 k
python3-mod_wsgi x86_64 5.0.0-4.el10 appstream 954 k
python3-netaddr noarch 1.3.0-2.el10 appstream 1.7 M
python3-ply noarch 3.11-25.el10 baseos 138 k
python3-policycoreutils noarch 3.9-1.el10 appstream 2.1 M
python3-psutil x86_64 5.9.8-6.el10 appstream 261 k
python3-pyasn1 noarch 0.6.2-1.el10_1 appstream 174 k
python3-pyasn1-modules noarch 0.6.2-1.el10_1 appstream 312 k
python3-pycparser noarch 2.20-16.el10 baseos 160 k
python3-pyusb noarch 1.2.1-11.el10 appstream 119 k
python3-qrcode noarch 7.4.2-13.el10 appstream 138 k
python3-requests noarch 2.32.4-1.el10_0 baseos 145 k
python3-setools x86_64 4.5.1-5.el10 baseos 691 k
python3-setuptools noarch 69.0.3-12.el10_0 baseos 1.4 M
python3-sss x86_64 2.11.1-2.el10_1.1 baseos 27 k
python3-sss-murmur x86_64 2.11.1-2.el10_1.1 baseos 17 k
python3-sssdconfig noarch 2.11.1-2.el10_1.1 baseos 74 k
python3-typing-extensions noarch 4.9.0-6.el10 baseos 77 k
python3-urllib3 noarch 1.26.19-2.el10_1.1 baseos 257 k
python3-yubico noarch 1.3.3-17.el10 appstream 82 k
quota x86_64 1:4.09-9.el10 baseos 194 k
quota-nls noarch 1:4.09-9.el10 baseos 76 k
redhat-text-vf-fonts noarch 4.1.0-1.el10 baseos 353 k
rpcbind x86_64 1.2.7-3.el10 baseos 56 k
rtkit x86_64 0.11-68.el10 appstream 59 k
slapi-nis x86_64 0.70.0-3.el10 appstream 92 k
slf4j noarch 1.7.32-13.el10 appstream 68 k
slf4j-jdk14 noarch 1.7.32-13.el10 appstream 17 k
softhsm x86_64 2.6.1-16.el10_0 appstream 444 k
sound-theme-freedesktop noarch 0.8-23.el10 appstream 385 k
spirv-tools-libs x86_64 2025.2-1.el10 appstream 1.5 M
sscg x86_64 3.0.5-12.el10 appstream 46 k
sssd-common-pac x86_64 2.11.1-2.el10_1.1 baseos 88 k
sssd-dbus x86_64 2.11.1-2.el10_1.1 baseos 124 k
sssd-idp x86_64 2.11.1-2.el10_1.1 appstream 47 k
sssd-ipa x86_64 2.11.1-2.el10_1.1 baseos 269 k
sssd-krb5 x86_64 2.11.1-2.el10_1.1 baseos 62 k
sssd-nfs-idmap x86_64 2.11.1-2.el10_1.1 baseos 35 k
sssd-tools x86_64 2.11.1-2.el10_1.1 baseos 156 k
tar x86_64 2:1.35-9.el10_1 baseos 856 k
tomcat9 noarch 1:9.0.87-8.el10_1.1 appstream 90 k
tomcat9-el-3.0-api noarch 1:9.0.87-8.el10_1.1 appstream 105 k
tomcat9-jsp-2.3-api noarch 1:9.0.87-8.el10_1.1 appstream 72 k
tomcat9-lib noarch 1:9.0.87-8.el10_1.1 appstream 6.0 M
tomcat9-servlet-4.0-api noarch 1:9.0.87-8.el10_1.1 appstream 283 k
tracker x86_64 3.7.3-4.el10 appstream 642 k
ttmkfdir x86_64 3.0.9-72.el10 appstream 57 k
tzdata-java noarch 2026a-1.el10 appstream 45 k
unbound x86_64 1.20.0-15.el10_1 appstream 980 k
unbound-anchor x86_64 1.20.0-15.el10_1 appstream 35 k
unbound-libs x86_64 1.20.0-15.el10_1 appstream 545 k
upower-libs x86_64 1.90.9-1.el10 appstream 58 k
webrtc-audio-processing x86_64 1.3-5.el10 appstream 525 k
wireplumber x86_64 0.5.10-1.el10 appstream 102 k
wireplumber-libs x86_64 0.5.10-1.el10 appstream 386 k
words noarch 3.0-47.el10 baseos 1.2 M
xdg-desktop-portal x86_64 1.20.0-2.el10 appstream 528 k
xkeyboard-config noarch 2.41-3.el10 appstream 998 k
xml-common noarch 0.6.3-65.el10 appstream 31 k
xorg-x11-fonts-Type1 noarch 7.5-40.el10 appstream 506 k
xprop x86_64 1.2.7-3.el10 appstream 35 k
zlib-ng-compat-devel x86_64 2.2.3-3.el10_1 appstream 36 k
Installing weak dependencies:
apr-util-openssl x86_64 1.6.3-23.el10_1 appstream 15 k
bash-completion noarch 1:2.11-16.el10 baseos 397 k
bind x86_64 32:9.18.33-10.el10_1.2 appstream 320 k
bind-dnssec-utils x86_64 32:9.18.33-10.el10_1.2 appstream 145 k
dconf x86_64 0.40.0-16.el10 appstream 102 k
exiv2 x86_64 0.28.3-5.el10 appstream 2.1 M
glib-networking x86_64 2.80.0-3.el10 baseos 204 k
gtk3 x86_64 3.24.43-4.el10 appstream 5.6 M
ipa-client-encrypted-dns x86_64 4.12.2-24.el10_1.2 appstream 34 k
libcamera-ipa x86_64 0.3.2-3.el10_0 appstream 133 k
libcanberra-gtk3 x86_64 0.30-37.el10 appstream 31 k
low-memory-monitor x86_64 2.1-12.el10 appstream 34 k
mod_http2 x86_64 2.0.29-3.el10 appstream 161 k
mod_lua x86_64 2.4.63-4.el10_1.3 appstream 59 k
perl-Devel-Peek x86_64 1.34-512.2.el10_0 appstream 32 k
perl-NDBM_File x86_64 1.17-512.2.el10_0 appstream 22 k
pipewire x86_64 1.4.6-1.el10 appstream 128 k
pipewire-alsa x86_64 1.4.6-1.el10 appstream 60 k
pipewire-jack-audio-connection-kit x86_64 1.4.6-1.el10 appstream 12 k
pipewire-plugin-libcamera x86_64 1.4.6-1.el10 appstream 75 k
pipewire-pulseaudio x86_64 1.4.6-1.el10 appstream 204 k
redhat-mono-vf-fonts noarch 4.1.0-1.el10 baseos 342 k
rsvg-pixbuf-loader x86_64 2.57.1-9.el10 appstream 15 k
sssd-passkey x86_64 2.11.1-2.el10_1.1 baseos 46 k
tracker-miners x86_64 3.7.3-4.el10 appstream 962 k
unbound-utils x86_64 1.20.0-15.el10_1 appstream 59 k
upower x86_64 1.90.9-1.el10 appstream 144 k
xdg-desktop-portal-gtk x86_64 1.15.3-1.el10 appstream 136 k
Transaction Summary
============================================================================================================================
Install 408 Packages
Total download size: 220 M
Installed size: 824 M
Is this ok [y/N]: y
<略>
Installed:
389-ds-base-3.1.3-7.el10_1.x86_64 389-ds-base-libs-3.1.3-7.el10_1.x86_64
ModemManager-glib-1.22.0-7.el10.x86_64 acl-2.3.2-4.el10.x86_64
adwaita-cursor-theme-46.0-3.el10.noarch adwaita-icon-theme-46.0-3.el10.noarch
almalinux-logos-httpd-100.3-3.el10_0.noarch almalinux-logos-ipa-100.3-3.el10_0.noarch
alsa-lib-1.2.14-2.el10_1.x86_64 apache-commons-cli-1.6.0-6.el10.noarch
apache-commons-codec-1.17.1-1.el10.noarch apache-commons-io-1:2.16.1-1.el10.noarch
apache-commons-lang3-3.14.0-6.el10.noarch apache-commons-logging-1.3.4-1.el10.noarch
apache-commons-net-3.10.0-6.el10.noarch apr-1.7.5-2.el10.x86_64
apr-util-1.6.3-23.el10_1.x86_64 apr-util-lmdb-1.6.3-23.el10_1.x86_64
apr-util-openssl-1.6.3-23.el10_1.x86_64 at-spi2-atk-2.56.1-1.el10.x86_64
at-spi2-core-2.56.1-1.el10.x86_64 atk-2.56.1-1.el10.x86_64
augeas-libs-1.14.2-0.3.20250224git6ee1282.el10.x86_64 autofs-1:5.1.9-13.el10.x86_64
avahi-glib-0.9~rc2-2.el10.x86_64 bash-completion-1:2.11-16.el10.noarch
bind-32:9.18.33-10.el10_1.2.x86_64 bind-dnssec-utils-32:9.18.33-10.el10_1.2.x86_64
bluez-libs-5.83-2.el10.x86_64 cairo-1.18.2-2.el10.x86_64
cairo-gobject-1.18.2-2.el10.x86_64 certmonger-0.79.20-3.el10.x86_64
checkpolicy-3.9-1.el10.x86_64 cmake-filesystem-3.30.5-3.el10_0.x86_64
colord-libs-1.4.7-6.el10.x86_64 cups-filesystem-1:2.4.10-12.el10_1.2.noarch
cups-libs-1:2.4.10-12.el10_1.2.x86_64 cyrus-sasl-md5-2.1.28-29.el10.x86_64
cyrus-sasl-plain-2.1.28-29.el10.x86_64 dbus-tools-1:1.14.10-5.el10.x86_64
dconf-0.40.0-16.el10.x86_64 default-fonts-core-sans-4.1-3.el10.noarch
ecj-1:4.23-11.el10.noarch exempi-2.6.4-7.el10.x86_64
exiv2-0.28.3-5.el10.x86_64 exiv2-libs-0.28.3-5.el10.x86_64
fdk-aac-free-2.0.0-15.el10.x86_64 fftw-libs-single-3.3.10-15.el10.x86_64
flac-libs-1.4.3-6.el10.x86_64 fontawesome4-fonts-1:4.7.0-23.el10.noarch
fontconfig-2.15.0-7.el10.x86_64 fonts-filesystem-1:2.0.5-18.el10.noarch
fribidi-1.0.14-4.el10.x86_64 fuse-common-3.16.2-5.el10.x86_64
fuse3-3.16.2-5.el10.x86_64 gdk-pixbuf2-2.42.12-4.el10_0.x86_64
gdk-pixbuf2-modules-2.42.12-4.el10_0.x86_64 geoclue2-2.7.2-1.el10.x86_64
giflib-5.2.1-22.el10.x86_64 glib-networking-2.80.0-3.el10.x86_64
google-noto-fonts-common-20240401-5.el10.noarch google-noto-sans-vf-fonts-20240401-5.el10.noarch
gpgmepp-1.23.2-6.el10.alma.1.x86_64 graphene-1.10.6-10.el10.x86_64
gsettings-desktop-schemas-47.1-3.el10_0.x86_64 gsm-1.0.22-8.el10.x86_64
gssproxy-0.9.2-10.el10.x86_64 gstreamer1-1.24.11-1.el10.x86_64
gstreamer1-plugins-base-1.24.11-1.el10.x86_64 gtk-update-icon-cache-3.24.43-4.el10.x86_64
gtk3-3.24.43-4.el10.x86_64 hicolor-icon-theme-0.17-20.el10.noarch
httpcomponents-client-4.5.14-9.el10.noarch httpcomponents-core-4.4.16-9.el10.noarch
httpd-2.4.63-4.el10_1.3.x86_64 httpd-core-2.4.63-4.el10_1.3.x86_64
httpd-filesystem-2.4.63-4.el10_1.3.noarch httpd-tools-2.4.63-4.el10_1.3.x86_64
idm-jss-5.7.0-2.el10.x86_64 idm-jss-tomcat-5.7.0-2.el10.x86_64
idm-ldapjdk-5.6.0-1.el10.noarch idm-pki-acme-11.7.0-2.el10.noarch
idm-pki-base-11.7.0-2.el10.noarch idm-pki-ca-11.7.0-2.el10.noarch
idm-pki-java-11.7.0-2.el10.noarch idm-pki-kra-11.7.0-2.el10.noarch
idm-pki-server-11.7.0-2.el10.noarch idm-pki-tools-11.7.0-2.el10.x86_64
inih-cpp-58-3.el10.x86_64 ipa-client-4.12.2-24.el10_1.2.x86_64
ipa-client-common-4.12.2-24.el10_1.2.noarch ipa-client-encrypted-dns-4.12.2-24.el10_1.2.x86_64
ipa-common-4.12.2-24.el10_1.2.noarch ipa-healthcheck-core-0.16-11.el10.noarch
ipa-selinux-4.12.2-24.el10_1.2.noarch ipa-server-4.12.2-24.el10_1.2.x86_64
ipa-server-common-4.12.2-24.el10_1.2.noarch iso-codes-4.16.0-6.el10.noarch
java-21-openjdk-1:21.0.10.0.7-1.el10.alma.1.x86_64 java-21-openjdk-devel-1:21.0.10.0.7-1.el10.alma.1.x86_64
java-21-openjdk-headless-1:21.0.10.0.7-1.el10.alma.1.x86_64 javapackages-filesystem-6.4.0-1.el10.noarch
javapackages-tools-6.4.0-1.el10.noarch jbigkit-libs-2.1-31.el10.x86_64
krb5-pkinit-1.21.3-8.el10_0.x86_64 krb5-server-1.21.3-8.el10_0.x86_64
krb5-workstation-1.21.3-8.el10_0.x86_64 lame-libs-3.100-19.el10.x86_64
lcms2-2.16-6.el10.x86_64 libX11-1.8.10-1.el10.x86_64
libX11-common-1.8.10-1.el10.noarch libX11-xcb-1.8.10-1.el10.x86_64
libXau-1.0.11-8.el10.x86_64 libXcomposite-0.4.6-5.el10.x86_64
libXcursor-1.2.1-9.el10.x86_64 libXdamage-1.1.6-5.el10.x86_64
libXext-1.3.6-3.el10.x86_64 libXfixes-6.0.1-5.el10.x86_64
libXft-2.3.8-8.el10.x86_64 libXi-1.8.1-7.el10.x86_64
libXinerama-1.1.5-8.el10.x86_64 libXrandr-1.5.4-5.el10.x86_64
libXrender-0.9.11-8.el10.x86_64 libXtst-1.2.4-8.el10.x86_64
libXv-1.0.12-5.el10.x86_64 libXxf86vm-1.1.5-8.el10.x86_64
libasyncns-0.8-30.el10.x86_64 libatomic-14.3.1-2.1.el10.alma.1.x86_64
libcamera-0.3.2-3.el10_0.x86_64 libcamera-ipa-0.3.2-3.el10_0.x86_64
libcanberra-0.30-37.el10.x86_64 libcanberra-gtk3-0.30-37.el10.x86_64
libdatrie-0.2.13-11.el10.x86_64 libdex-0.8.1-1.el10.x86_64
libdrm-2.4.123-1.el10.x86_64 libepoxy-1.5.10-9.el10.x86_64
libev-4.33-14.el10.x86_64 libexif-0.6.24-9.el10.x86_64
libfontenc-1.1.7-5.el10.x86_64 libgexiv2-0.14.3-3.el10.x86_64
libglvnd-1:1.7.0-7.el10.x86_64 libglvnd-egl-1:1.7.0-7.el10.x86_64
libglvnd-glx-1:1.7.0-7.el10.x86_64 libgsf-1.14.53-2.el10.x86_64
libgxps-0.3.2-10.el10.x86_64 libipa_hbac-2.11.1-2.el10_1.1.x86_64
libiptcdata-1.0.5-20.el10.x86_64 libjose-14-102.el10.x86_64
libjpeg-turbo-3.0.2-4.el10.x86_64 libkadm5-1.21.3-8.el10_0.x86_64
liblc3-1.0.4-7.el10.x86_64 libldac-2.0.2.3-17.el10.x86_64
liblerc-4.0.0-8.el10.x86_64 libnfsidmap-1:2.8.3-0.el10_1.3.x86_64
libnotify-0.8.6-1.el10.x86_64 libogg-2:1.3.5-10.el10.x86_64
libosinfo-1.11.0-8.el10.x86_64 libpciaccess-0.16-16.el10.x86_64
libpkgconf-2.1.0-3.el10.x86_64 libportal-0.9.0-2.el10.x86_64
libproxy-0.5.5-4.el10.x86_64 librsvg2-2.57.1-9.el10.x86_64
libsbc-2.0-6.el10.x86_64 libsndfile-1.2.2-5.el10.x86_64
libsoup3-3.6.5-3.el10_1.10.x86_64 libsss_autofs-2.11.1-2.el10_1.1.x86_64
libthai-0.1.29-10.el10.x86_64 libtheora-1:1.1.1-39.el10.x86_64
libtiff-4.6.0-6.el10_1.1.x86_64 libtool-ltdl-2.4.7-13.el10.x86_64
libtracker-sparql-3.7.3-4.el10.x86_64 liburing-2.5-5.el10.x86_64
libverto-libev-0.3.2-10.el10.x86_64 libvorbis-1:1.3.7-12.el10.x86_64
libwayland-client-1.23.1-1.el10.x86_64 libwayland-cursor-1.23.1-1.el10.x86_64
libwayland-egl-1.23.1-1.el10.x86_64 libwayland-server-1.23.1-1.el10.x86_64
libwebp-1.3.2-8.el10.x86_64 libxcb-1.17.0-3.el10.x86_64
libxkbcommon-1.7.0-4.el10.x86_64 libxshmfence-1.3.2-5.el10.x86_64
libxslt-1.1.39-8.el10_0.x86_64 lksctp-tools-1.0.21-1.el10.x86_64
llvm-filesystem-20.1.8-1.el10.alma.1.x86_64 llvm-libs-20.1.8-1.el10.alma.1.x86_64
low-memory-monitor-2.1-12.el10.x86_64 mailcap-2.1.54-8.el10.noarch
mesa-dri-drivers-25.0.7-6.el10_1.alma.1.x86_64 mesa-filesystem-25.0.7-6.el10_1.alma.1.x86_64
mesa-libEGL-25.0.7-6.el10_1.alma.1.x86_64 mesa-libGL-25.0.7-6.el10_1.alma.1.x86_64
mesa-libgbm-25.0.7-6.el10_1.alma.1.x86_64 mkfontscale-1.2.2-8.el10.x86_64
mod_auth_gssapi-1.6.5-8.el10.x86_64 mod_http2-2.0.29-3.el10.x86_64
mod_lookup_identity-1.0.0-22.el10.x86_64 mod_lua-2.4.63-4.el10_1.3.x86_64
mod_session-2.4.63-4.el10_1.3.x86_64 mod_ssl-1:2.4.63-4.el10_1.3.x86_64
mpg123-libs-1.32.9-1.el10.x86_64 nfs-utils-1:2.8.3-0.el10_1.3.x86_64
nspr-4.36.0-8.el10_0.x86_64 nss-3.112.0-8.el10_0.x86_64
nss-softokn-3.112.0-8.el10_0.x86_64 nss-softokn-freebl-3.112.0-8.el10_0.x86_64
nss-sysinit-3.112.0-8.el10_0.x86_64 nss-tools-3.112.0-8.el10_0.x86_64
nss-util-3.112.0-8.el10_0.x86_64 oddjob-0.34.7-14.el10.x86_64
oddjob-mkhomedir-0.34.7-14.el10.x86_64 open-sans-fonts-1.10-24.el10.noarch
openjpeg2-2.5.2-5.el10.x86_64 openldap-clients-2.6.9-1.el10.x86_64
openssl-1:3.5.1-7.el10_1.alma.1.x86_64 openssl-perl-1:3.5.1-7.el10_1.alma.1.x86_64
opus-1.4-6.el10.x86_64 orc-0.4.39-2.el10.x86_64
osinfo-db-20250606-1.el10.alma.1.noarch osinfo-db-tools-1.11.0-8.el10.x86_64
pango-1.54.0-3.el10.x86_64 perl-Algorithm-Diff-1.2010-14.el10.noarch
perl-Archive-Tar-3.02-512.el10.noarch perl-AutoLoader-5.74-512.2.el10_0.noarch
perl-B-1.89-512.2.el10_0.x86_64 perl-Carp-1.54-511.el10.noarch
perl-Class-Struct-0.68-512.2.el10_0.noarch perl-Compress-Raw-Bzip2-2.212-512.el10.x86_64
perl-Compress-Raw-Lzma-2.212-3.el10.x86_64 perl-Compress-Raw-Zlib-2.212-512.el10.x86_64
perl-Data-Dumper-2.189-512.el10.x86_64 perl-Devel-Peek-1.34-512.2.el10_0.x86_64
perl-Digest-1.20-511.el10.noarch perl-Digest-MD5-2.59-6.el10.x86_64
perl-DynaLoader-1.56-512.2.el10_0.x86_64 perl-Encode-4:3.21-511.el10.x86_64
perl-Errno-1.38-512.2.el10_0.x86_64 perl-Exporter-5.78-511.el10.noarch
perl-Fcntl-1.18-512.2.el10_0.x86_64 perl-File-Basename-2.86-512.2.el10_0.noarch
perl-File-Find-1.44-512.2.el10_0.noarch perl-File-Path-2.18-511.el10.noarch
perl-File-Temp-1:0.231.100-512.el10.noarch perl-File-stat-1.14-512.2.el10_0.noarch
perl-FileHandle-2.05-512.2.el10_0.noarch perl-Getopt-Long-1:2.58-3.el10.noarch
perl-Getopt-Std-1.14-512.2.el10_0.noarch perl-HTTP-Tiny-0.088-512.el10.noarch
perl-IO-1.55-512.2.el10_0.x86_64 perl-IO-Compress-2.212-512.el10.noarch
perl-IO-Compress-Lzma-2.206-7.el10.noarch perl-IO-Socket-IP-0.42-512.el10.noarch
perl-IO-Socket-SSL-2.085-3.el10.noarch perl-IO-Zlib-1:1.15-511.el10.noarch
perl-IPC-Open3-1.22-512.2.el10_0.noarch perl-MIME-Base64-3.16-511.el10.x86_64
perl-Mozilla-CA-20231213-5.el10.noarch perl-NDBM_File-1.17-512.2.el10_0.x86_64
perl-Net-SSLeay-1.94-8.el10.x86_64 perl-POSIX-2.20-512.2.el10_0.x86_64
perl-PathTools-3.91-512.el10.x86_64 perl-Pod-Escapes-1:1.07-511.el10.noarch
perl-Pod-Perldoc-3.28.01-512.el10.noarch perl-Pod-Simple-1:3.45-511.el10.noarch
perl-Pod-Usage-4:2.03-511.el10.noarch perl-Scalar-List-Utils-5:1.63-511.el10.x86_64
perl-SelectSaver-1.02-512.2.el10_0.noarch perl-Socket-4:2.038-511.el10.x86_64
perl-Storable-1:3.32-511.el10.x86_64 perl-Symbol-1.09-512.2.el10_0.noarch
perl-Term-ANSIColor-5.01-512.el10.noarch perl-Term-Cap-1.18-511.el10.noarch
perl-Term-ReadLine-1.17-512.2.el10_0.noarch perl-Text-Diff-1.45-24.el10.noarch
perl-Text-ParseWords-3.31-511.el10.noarch perl-Text-Tabs+Wrap-2024.001-511.el10.noarch
perl-Tie-4.6-512.2.el10_0.noarch perl-Time-Local-2:1.350-511.el10.noarch
perl-URI-5.27-3.el10.noarch perl-base-2.27-512.2.el10_0.noarch
perl-constant-1.33-512.el10.noarch perl-debugger-1.60-512.2.el10_0.noarch
perl-if-0.61.000-512.2.el10_0.noarch perl-interpreter-4:5.40.2-512.2.el10_0.x86_64
perl-libnet-3.15-512.el10.noarch perl-libs-4:5.40.2-512.2.el10_0.x86_64
perl-locale-1.12-512.2.el10_0.noarch perl-meta-notation-5.40.2-512.2.el10_0.noarch
perl-mro-1.29-512.2.el10_0.x86_64 perl-overload-1.37-512.2.el10_0.noarch
perl-overloading-0.02-512.2.el10_0.noarch perl-parent-1:0.241-512.el10.noarch
perl-podlators-1:5.01-511.el10.noarch perl-sigtrap-1.10-512.2.el10_0.noarch
perl-threads-1:2.40-511.el10.x86_64 perl-threads-shared-1.69-511.el10.x86_64
perl-vars-1.05-512.2.el10_0.noarch pipewire-1.4.6-1.el10.x86_64
pipewire-alsa-1.4.6-1.el10.x86_64 pipewire-jack-audio-connection-kit-1.4.6-1.el10.x86_64
pipewire-jack-audio-connection-kit-libs-1.4.6-1.el10.x86_64 pipewire-libs-1.4.6-1.el10.x86_64
pipewire-plugin-libcamera-1.4.6-1.el10.x86_64 pipewire-pulseaudio-1.4.6-1.el10.x86_64
pixman-0.43.4-2.el10.x86_64 pkgconf-2.1.0-3.el10.x86_64
pkgconf-m4-2.1.0-3.el10.noarch pkgconf-pkg-config-2.1.0-3.el10.x86_64
policycoreutils-python-utils-3.9-1.el10.noarch poppler-24.02.0-7.el10_1.x86_64
poppler-data-0.4.11-9.el10.noarch poppler-glib-24.02.0-7.el10_1.x86_64
publicsuffix-list-20240107-5.el10.noarch pulseaudio-libs-17.0-6.el10.x86_64
python3-argcomplete-3.2.2-4.el10.noarch python3-audit-4.0.3-4.el10.x86_64
python3-augeas-1.1.0-14.el10.noarch python3-cffi-1.16.0-7.el10.x86_64
python3-charset-normalizer-3.4.2-1.el10.noarch python3-cryptography-43.0.0-4.el10.x86_64
python3-decorator-5.1.1-12.el10.noarch python3-distro-1.9.0-5.el10.noarch
python3-dns-2.6.1-1.el10.noarch python3-file-magic-5.45-8.el10.noarch
python3-gssapi-1.7.3-10.el10.x86_64 python3-idm-pki-11.7.0-2.el10.noarch
python3-idna-3.7-4.el10.noarch python3-ifaddr-0.2.0-4.el10.noarch
python3-ipaclient-4.12.2-24.el10_1.2.noarch python3-ipalib-4.12.2-24.el10_1.2.noarch
python3-ipaserver-4.12.2-24.el10_1.2.noarch python3-jinja2-3.1.6-1.el10_0.noarch
python3-jwcrypto-1.5.6-4.el10.noarch python3-kdcproxy-1.0.0-19.el10_1.noarch
python3-ldap-3.4.4-9.el10.x86_64 python3-lib389-3.1.3-7.el10_1.noarch
python3-libipa_hbac-2.11.1-2.el10_1.1.x86_64 python3-libsemanage-3.9-1.el10.x86_64
python3-lxml-5.2.1-4.el10.x86_64 python3-markupsafe-2.1.3-6.el10.x86_64
python3-mod_wsgi-5.0.0-4.el10.x86_64 python3-netaddr-1.3.0-2.el10.noarch
python3-ply-3.11-25.el10.noarch python3-policycoreutils-3.9-1.el10.noarch
python3-psutil-5.9.8-6.el10.x86_64 python3-pyasn1-0.6.2-1.el10_1.noarch
python3-pyasn1-modules-0.6.2-1.el10_1.noarch python3-pycparser-2.20-16.el10.noarch
python3-pyusb-1.2.1-11.el10.noarch python3-qrcode-7.4.2-13.el10.noarch
python3-requests-2.32.4-1.el10_0.noarch python3-setools-4.5.1-5.el10.x86_64
python3-setuptools-69.0.3-12.el10_0.noarch python3-sss-2.11.1-2.el10_1.1.x86_64
python3-sss-murmur-2.11.1-2.el10_1.1.x86_64 python3-sssdconfig-2.11.1-2.el10_1.1.noarch
python3-typing-extensions-4.9.0-6.el10.noarch python3-urllib3-1.26.19-2.el10_1.1.noarch
python3-yubico-1.3.3-17.el10.noarch quota-1:4.09-9.el10.x86_64
quota-nls-1:4.09-9.el10.noarch redhat-mono-vf-fonts-4.1.0-1.el10.noarch
redhat-text-vf-fonts-4.1.0-1.el10.noarch rpcbind-1.2.7-3.el10.x86_64
rsvg-pixbuf-loader-2.57.1-9.el10.x86_64 rtkit-0.11-68.el10.x86_64
slapi-nis-0.70.0-3.el10.x86_64 slf4j-1.7.32-13.el10.noarch
slf4j-jdk14-1.7.32-13.el10.noarch softhsm-2.6.1-16.el10_0.x86_64
sound-theme-freedesktop-0.8-23.el10.noarch spirv-tools-libs-2025.2-1.el10.x86_64
sscg-3.0.5-12.el10.x86_64 sssd-common-pac-2.11.1-2.el10_1.1.x86_64
sssd-dbus-2.11.1-2.el10_1.1.x86_64 sssd-idp-2.11.1-2.el10_1.1.x86_64
sssd-ipa-2.11.1-2.el10_1.1.x86_64 sssd-krb5-2.11.1-2.el10_1.1.x86_64
sssd-nfs-idmap-2.11.1-2.el10_1.1.x86_64 sssd-passkey-2.11.1-2.el10_1.1.x86_64
sssd-tools-2.11.1-2.el10_1.1.x86_64 tar-2:1.35-9.el10_1.x86_64
tomcat9-1:9.0.87-8.el10_1.1.noarch tomcat9-el-3.0-api-1:9.0.87-8.el10_1.1.noarch
tomcat9-jsp-2.3-api-1:9.0.87-8.el10_1.1.noarch tomcat9-lib-1:9.0.87-8.el10_1.1.noarch
tomcat9-servlet-4.0-api-1:9.0.87-8.el10_1.1.noarch tracker-3.7.3-4.el10.x86_64
tracker-miners-3.7.3-4.el10.x86_64 ttmkfdir-3.0.9-72.el10.x86_64
tzdata-java-2026a-1.el10.noarch unbound-1.20.0-15.el10_1.x86_64
unbound-anchor-1.20.0-15.el10_1.x86_64 unbound-libs-1.20.0-15.el10_1.x86_64
unbound-utils-1.20.0-15.el10_1.x86_64 upower-1.90.9-1.el10.x86_64
upower-libs-1.90.9-1.el10.x86_64 webrtc-audio-processing-1.3-5.el10.x86_64
wireplumber-0.5.10-1.el10.x86_64 wireplumber-libs-0.5.10-1.el10.x86_64
words-3.0-47.el10.noarch xdg-desktop-portal-1.20.0-2.el10.x86_64
xdg-desktop-portal-gtk-1.15.3-1.el10.x86_64 xkeyboard-config-2.41-3.el10.noarch
xml-common-0.6.3-65.el10.noarch xorg-x11-fonts-Type1-7.5-40.el10.noarch
xprop-1.2.7-3.el10.x86_64 zlib-ng-compat-devel-2.2.3-3.el10_1.x86_64
Complete!
[root@idm ~]#
[root@idm ~]# ipa-server-install

The log file for this installation can be found in /var/log/ipaserver-install.log
==============================================================================
This program will set up the IPA Server.
Version 4.12.2

This includes:
  * Configure a stand-alone CA (dogtag) for certificate management
  * Configure the NTP client (chronyd)
  * Create and configure an instance of Directory Server
  * Create and configure a Kerberos Key Distribution Center (KDC)
  * Configure Apache (httpd)
  * Configure SID generation
  * Configure the KDC to enable PKINIT

To accept the default shown in brackets, press the Enter key.

Do you want to configure integrated DNS (BIND)? [no]: no

Enter the fully qualified domain name of the computer
on which you're setting up server software. Using the form
<hostname>.<domainname>
Example: master.example.com


Server host name [idm.adsample.local]:

The domain name has been determined based on the host name.

Please confirm the domain name [adsample.local]:

The kerberos protocol requires a Realm name to be defined.
This is typically the domain name converted to uppercase.

Please provide a realm name [ADSAMPLE.LOCAL]:
続けて、「Directory Manager」、「IPA admin」のパスワードを設定
Certain directory server operations require an administrative user.
This user is referred to as the Directory Manager and has full access
to the Directory for system management tasks and will be added to the
instance of directory server created for IPA.
The password must be at least 8 characters long.

Directory Manager password:<パスワード>
Password (confirm):<パスワード>

The IPA server requires an administrative user, named 'admin'.
This user is a regular system account used for IPA server administration.

IPA admin password:<パスワード>
Password (confirm):<パスワード>
NetBIOS名の指定は、基本的に標準値のままでOK
Trust is configured but no NetBIOS domain name found, setting it now.
Enter the NetBIOS name for the IPA domain.
Only up to 15 uppercase ASCII letters, digits and dashes are allowed.
Example: EXAMPLE.


NetBIOS domain name [ADSAMPLE]:
NTPサーバの設定を変更する場合はyesにするんでしょうけど、とりあえずnoで進める
Do you want to configure chrony with NTP server or pool address? [no]:
ここまでの選択で問題無いかを確認します
The IPA Master Server will be configured with:
Hostname:       idm.adsample.local
IP address(es): 240b:10:aa20:6e00:20c:29ff:fe2a:9ab6, 192.168.1.12
Domain name:    adsample.local
Realm name:     ADSAMPLE.LOCAL

The CA will be configured with:
Subject DN:   CN=Certificate Authority,O=ADSAMPLE.LOCAL
Subject base: O=ADSAMPLE.LOCAL
Chaining:     self-signed

Continue to configure the system with these values? [no]:
「yes」と入力して先に進める
Continue to configure the system with these values? [no]: yes

The following operations may take some minutes to complete.
Please wait until the prompt is returned.

Disabled p11-kit-proxy
Synchronizing time
No SRV records of NTP servers found and no NTP server or pool address was provided.
Using default chrony configuration.
Attempting to sync time with chronyc.
Time synchronization was successful.
Configuring directory server (dirsrv). Estimated time: 30 seconds
  [1/42]: creating directory server instance
Validate installation settings ...
Create file system structures ...
Perform SELinux labeling ...
Create database backend: dc=adsample,dc=local ...
Perform post-installation tasks ...
  [2/42]: adding default schema
  [3/42]: enabling memberof plugin
  [4/42]: enabling winsync plugin
  [5/42]: configure password logging
  [6/42]: configuring replication version plugin
  [7/42]: enabling IPA enrollment plugin
  [8/42]: configuring uniqueness plugin
  [9/42]: configuring uuid plugin
  [10/42]: configuring modrdn plugin
  [11/42]: configuring DNS plugin
  [12/42]: enabling entryUSN plugin
  [13/42]: configuring lockout plugin
  [14/42]: configuring graceperiod plugin
  [15/42]: configuring topology plugin
  [16/42]: creating indices
  [17/42]: enabling referential integrity plugin
  [18/42]: configuring certmap.conf
  [19/42]: configure new location for managed entries
  [20/42]: configure dirsrv ccache and keytab
  [21/42]: enabling SASL mapping fallback
  [22/42]: restarting directory server
  [23/42]: adding sasl mappings to the directory
  [24/42]: adding default layout
  [25/42]: adding delegation layout
  [26/42]: creating container for managed entries
  [27/42]: configuring user private groups
  [28/42]: configuring netgroups from hostgroups
  [29/42]: creating default Sudo bind user
  [30/42]: creating default Auto Member layout
  [31/42]: adding range check plugin
  [32/42]: creating default HBAC rule allow_all
  [33/42]: adding entries for topology management
  [34/42]: initializing group membership
  [35/42]: adding master entry
  [36/42]: initializing domain level
  [37/42]: configuring Posix uid/gid generation
  [38/42]: adding replication acis
  [39/42]: activating sidgen plugin
  [40/42]: activating extdom plugin
  [41/42]: configuring directory to start on boot
  [42/42]: restarting directory server
Done configuring directory server (dirsrv).
Configuring Kerberos KDC (krb5kdc)
  [1/11]: adding kerberos container to the directory
  [2/11]: configuring KDC
  [3/11]: initialize kerberos container
  [4/11]: adding default ACIs
  [5/11]: creating a keytab for the directory
  [6/11]: creating a keytab for the machine
  [7/11]: adding the password extension to the directory
  [8/11]: creating anonymous principal
  [9/11]: starting the KDC
  [10/11]: configuring KDC to start on boot
  [11/11]: enable PAC ticket signature support
Done configuring Kerberos KDC (krb5kdc).
Configuring kadmin
  [1/2]: starting kadmin
  [2/2]: configuring kadmin to start on boot
Done configuring kadmin.
Configuring ipa-custodia
  [1/5]: Making sure custodia container exists
  [2/5]: Generating ipa-custodia config file
  [3/5]: Generating ipa-custodia keys
  [4/5]: starting ipa-custodia
  [5/5]: configuring ipa-custodia to start on boot
Done configuring ipa-custodia.
Forcing random serial numbers to be enabled for the mdb backend
Configuring certificate server (pki-tomcatd). Estimated time: 3 minutes
  [1/33]: configuring certificate server instance
  [2/33]: stopping certificate server instance to update CS.cfg
  [3/33]: backing up CS.cfg
  [4/33]: Add ipa-pki-wait-running
Set start up timeout of pki-tomcatd service to 90 seconds
  [5/33]: secure AJP connector
  [6/33]: reindex attributes
  [7/33]: exporting Dogtag certificate store pin
  [8/33]: disabling nonces
  [9/33]: set up CRL publishing
  [10/33]: enable PKIX certificate path discovery and validation
  [11/33]: authorizing RA to modify profiles
  [12/33]: authorizing RA to manage lightweight CAs
  [13/33]: Ensure lightweight CAs container exists
  [14/33]: Enable lightweight CA monitor
  [15/33]: Ensuring backward compatibility
  [16/33]: enable certificate pruning
  [17/33]: updating IPA configuration
  [18/33]: starting certificate server instance
  [19/33]: configure certmonger for renewals
  [20/33]: requesting RA certificate from CA
  [21/33]: publishing the CA certificate
  [22/33]: adding RA agent as a trusted user
  [23/33]: configure certificate renewals
  [24/33]: Configure HTTP to proxy connections
  [25/33]: enabling CA instance
  [26/33]: importing IPA certificate profiles
  [27/33]: migrating certificate profiles to LDAP
  [28/33]: adding default CA ACL
  [29/33]: adding 'ipa' CA entry
  [30/33]: Recording random serial number state
  [31/33]: Recording HSM configuration state
  [32/33]: configuring certmonger renewal for lightweight CAs
  [33/33]: deploying ACME service
Done configuring certificate server (pki-tomcatd).
Configuring directory server (dirsrv)
  [1/3]: configuring TLS for DS instance
  [2/3]: adding CA certificate entry
  [3/3]: restarting directory server
Done configuring directory server (dirsrv).
Configuring ipa-otpd
  [1/2]: starting ipa-otpd
  [2/2]: configuring ipa-otpd to start on boot
Done configuring ipa-otpd.
Configuring the web interface (httpd)
  [1/22]: stopping httpd
  [2/22]: backing up ssl.conf
  [3/22]: disabling nss.conf
  [4/22]: configuring mod_ssl certificate paths
  [5/22]: setting mod_ssl protocol list
  [6/22]: configuring mod_ssl log directory
  [7/22]: disabling mod_ssl OCSP
  [8/22]: adding URL rewriting rules
  [9/22]: configuring httpd
Nothing to do for configure_httpd_wsgi_conf
  [10/22]: setting up httpd keytab
  [11/22]: configuring Gssproxy
  [12/22]: setting up ssl
  [13/22]: configure certmonger for renewals
  [14/22]: publish CA cert
  [15/22]: clean up any existing httpd ccaches
  [16/22]: enable ccache sweep
  [17/22]: configuring SELinux for httpd
  [18/22]: create KDC proxy config
  [19/22]: enable KDC proxy
  [20/22]: starting httpd
  [21/22]: configuring httpd to start on boot
  [22/22]: enabling oddjobd
Done configuring the web interface (httpd).
Configuring Kerberos KDC (krb5kdc)
  [1/1]: installing X509 Certificate for PKINIT
Done configuring Kerberos KDC (krb5kdc).
Applying LDAP updates
Upgrading IPA:. Estimated time: 1 minute 30 seconds
  [1/10]: stopping directory server
  [2/10]: saving configuration
  [3/10]: disabling listeners
  [4/10]: enabling DS global lock
  [5/10]: disabling Schema Compat
  [6/10]: starting directory server
  [7/10]: upgrading server
  [8/10]: stopping directory server
  [9/10]: restoring configuration
  [10/10]: starting directory server
Done.
Restarting the KDC
Configuring SID generation
  [1/8]: adding RID bases
  [2/8]: creating samba domain object
  [3/8]: adding admin(group) SIDs
  [4/8]: updating Kerberos config
'dns_lookup_kdc' already set to 'true', nothing to do.
  [5/8]: activating sidgen task
  [6/8]: restarting Directory Server to take MS PAC and LDAP plugins changes into account
  [7/8]: adding fallback group
  [8/8]: adding SIDs to existing users and groups
This step may take considerable amount of time, please wait..
Done.
Configuring client side components
This program will set up IPA client.
Version 4.12.2

Using existing certificate '/etc/ipa/ca.crt'.
Client hostname: idm.adsample.local
Realm: ADSAMPLE.LOCAL
DNS Domain: adsample.local
IPA Server: idm.adsample.local
BaseDN: dc=adsample,dc=local

Configured /etc/sssd/sssd.conf
Systemwide CA database updated.
Adding SSH public key from /etc/ssh/ssh_host_ed25519_key.pub
Adding SSH public key from /etc/ssh/ssh_host_ecdsa_key.pub
Adding SSH public key from /etc/ssh/ssh_host_rsa_key.pub
Could not update DNS SSHFP records.
SSSD enabled
Configured /etc/openldap/ldap.conf
Configured /etc/ssh/ssh_config
Configured /etc/ssh/sshd_config.d/04-ipa.conf
Configuring adsample.local as NIS domain.
Client configuration complete.
The ipa-client-install command was successful

Please add records in this file to your DNS system: /tmp/ipa.system.records.i7pp68cx.db
==============================================================================
Setup complete

Next steps:
        1. You must make sure these network ports are open:
                TCP Ports:
                  * 80, 443: HTTP/HTTPS
                  * 389, 636: LDAP/LDAPS
                  * 88, 464: kerberos
                  * 53: bind
                UDP Ports:
                  * 88, 464: kerberos
                  * 53: bind
                  * 123: ntp

        2. You can now obtain a kerberos ticket using the command: 'kinit admin'
           This ticket will allow you to use the IPA tools (e.g., ipa user-add)
           and the web user interface.

Be sure to back up the CA certificates stored in /root/cacert.p12
These files are required to create replicas. The password for these
files is the Directory Manager password
The ipa-server-install command was successful
[root@idm ~]#
・・・?
なんかNTP 123 UDPが設定されていますね
とりあえずおいといて「Please add records in this file to your DNS system: /tmp/ipa.system.records.i7pp68cx.db」にあるファイルの中身を確認
[root@idm ~]# cat /tmp/ipa.system.records.i7pp68cx.db
_kerberos-master._tcp.adsample.local. 3600 IN SRV 0 100 88 idm.adsample.local.
_kerberos-master._udp.adsample.local. 3600 IN SRV 0 100 88 idm.adsample.local.
_kerberos._tcp.adsample.local. 3600 IN SRV 0 100 88 idm.adsample.local.
_kerberos._udp.adsample.local. 3600 IN SRV 0 100 88 idm.adsample.local.
_kerberos.adsample.local. 3600 IN TXT "ADSAMPLE.LOCAL"
_kerberos.adsample.local. 3600 IN URI 0 100 "krb5srv:m:tcp:idm.adsample.local."
_kerberos.adsample.local. 3600 IN URI 0 100 "krb5srv:m:udp:idm.adsample.local."
_kpasswd._tcp.adsample.local. 3600 IN SRV 0 100 464 idm.adsample.local.
_kpasswd._udp.adsample.local. 3600 IN SRV 0 100 464 idm.adsample.local.
_kpasswd.adsample.local. 3600 IN URI 0 100 "krb5srv:m:tcp:idm.adsample.local."
_kpasswd.adsample.local. 3600 IN URI 0 100 "krb5srv:m:udp:idm.adsample.local."
_ldap._tcp.adsample.local. 3600 IN SRV 0 100 389 idm.adsample.local.
ipa-ca.adsample.local. 3600 IN A 192.168.1.12
ipa-ca.adsample.local. 3600 IN AAAA 240b:10:aa20:6e00:20c:29ff:fe2a:9ab6[root@idm ~]#
[root@idm ~]# ipa user-add
ipa: ERROR: did not receive Kerberos credentials
[root@idm ~]#
上記のようなエラーとなる場合は「kinit」を実行してkerberos認証を通しておく必要がある
[root@idm ~]# kinit
Password for root@ADSAMPLE.LOCAL:<パスワード>
[root@idm ~]# ipa user-add
First name: test
Last name: user
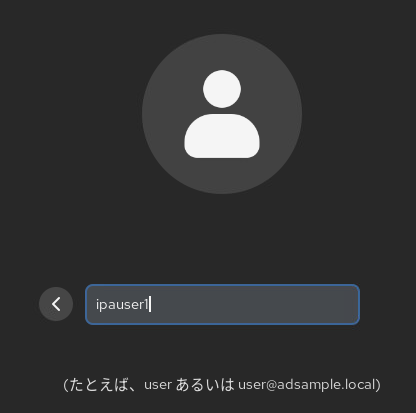
User login [tuser]: ipauser1
---------------------
Added user "ipauser1"
---------------------
User login: ipauser1
First name: test
Last name: user
Full name: test user
Display name: test user
Initials: tu
Home directory: /home/ipauser1
GECOS: test user
Login shell: /bin/sh
Principal name: ipauser1@ADSAMPLE.LOCAL
Principal alias: ipauser1@ADSAMPLE.LOCAL
Email address: ipauser1@adsample.local
UID: 1540800003
GID: 1540800003
Password: False
Member of groups: ipausers
Kerberos keys available: False
[root@idm ~]#
[root@idm ~]# ipa user-mod ipauser1 --password
Password:<パスワード>
Enter Password again to verify:<パスワード>
------------------------
Modified user "ipauser1"
------------------------
  User login: ipauser1
  First name: test
  Last name: user
  Home directory: /home/ipauser1
  Login shell: /bin/sh
  Principal name: ipauser1@ADSAMPLE.LOCAL
  Principal alias: ipauser1@ADSAMPLE.LOCAL
  Email address: ipauser1@adsample.local
  UID: 1540800003
  GID: 1540800003
  Account disabled: False
  Password: True
  Member of groups: ipausers
  Kerberos keys available: True
[root@idm ~]#
[root@idm ~]# ipa-server-install

The log file for this installation can be found in /var/log/ipaserver-install.log
==============================================================================
This program will set up the IPA Server.
Version 4.12.2

This includes:
  * Configure a stand-alone CA (dogtag) for certificate management
  * Configure the NTP client (chronyd)
  * Create and configure an instance of Directory Server
  * Create and configure a Kerberos Key Distribution Center (KDC)
  * Configure Apache (httpd)
  * Configure SID generation
  * Configure the KDC to enable PKINIT

To accept the default shown in brackets, press the Enter key.

Do you want to configure integrated DNS (BIND)? [no]: yes
今回はDNS統合するので標準値ではなく「yes」を指定
その後は標準値で実行
Enter the fully qualified domain name of the computer
on which you're setting up server software. Using the form
<hostname>.<domainname>
Example: master.example.com


Server host name [idm.ipasample.local]:

Warning: skipping DNS resolution of host idm.ipasample.local
The domain name has been determined based on the host name.

Please confirm the domain name [ipasample.local]:

The kerberos protocol requires a Realm name to be defined.
This is typically the domain name converted to uppercase.

Please provide a realm name [IPASAMPLE.LOCAL]:
“Direcotry Manager”,”IPA admin”のパスワードを設定
Certain directory server operations require an administrative user.
This user is referred to as the Directory Manager and has full access
to the Directory for system management tasks and will be added to the
instance of directory server created for IPA.
The password must be at least 8 characters long.

Directory Manager password:<パスワード>
Password (confirm):<パスワード>

The IPA server requires an administrative user, named 'admin'.
This user is a regular system account used for IPA server administration.

IPA admin password:<パスワード>
Password (confirm):<パスワード>
DNSサーバの設定を開始。とりあえず現在上位のDNSサーバ設定を確認
Checking DNS domain ipasample.local., please wait ...
Invalid IP address fe80::20c:29ff:fe13:ded7 for idm.ipasample.local: cannot use link-local IP address fe80::20c:29ff:fe13:ded7
Do you want to configure DNS forwarders? [yes]:
Following DNS servers are configured in /etc/resolv.conf: 192.168.1.10, 2404:1a8:7f01:b::3, 2404:1a8:7f01:a::3
Do you want to configure these servers as DNS forwarders? [yes]:
All detected DNS servers were added. You can enter additional addresses now:
Enter an IP address for a DNS forwarder, or press Enter to skip:
うーん…失敗
DNS forwarders: 192.168.1.10, 2404:1a8:7f01:b::3, 2404:1a8:7f01:a::3
Checking DNS forwarders, please wait ...
DNS server 192.168.1.10: query '. SOA': All nameservers failed to answer the query . IN SOA: Server Do53:192.168.1.10@53 answered FORMERR
DNS server 192.168.1.10: query '. SOA': All nameservers failed to answer the query . IN SOA: Server Do53:192.168.1.10@53 answered FORMERR
The ipa-server-install command failed. See /var/log/ipaserver-install.log for more information
[root@idm ~]#
[root@idm ~]# ipa-server-install

The log file for this installation can be found in /var/log/ipaserver-install.log
==============================================================================
This program will set up the IPA Server.
Version 4.12.2

This includes:
  * Configure a stand-alone CA (dogtag) for certificate management
  * Configure the NTP client (chronyd)
  * Create and configure an instance of Directory Server
  * Create and configure a Kerberos Key Distribution Center (KDC)
  * Configure Apache (httpd)
  * Configure SID generation
  * Configure the KDC to enable PKINIT

To accept the default shown in brackets, press the Enter key.

Do you want to configure integrated DNS (BIND)? [no]: yes

Enter the fully qualified domain name of the computer
on which you're setting up server software. Using the form
<hostname>.<domainname>
Example: master.example.com


Server host name [idm.ipasample.local]:

Warning: skipping DNS resolution of host idm.ipasample.local
The domain name has been determined based on the host name.

Please confirm the domain name [ipasample.local]:

The kerberos protocol requires a Realm name to be defined.
This is typically the domain name converted to uppercase.

Please provide a realm name [IPASAMPLE.LOCAL]:
Certain directory server operations require an administrative user.
This user is referred to as the Directory Manager and has full access
to the Directory for system management tasks and will be added to the
instance of directory server created for IPA.
The password must be at least 8 characters long.

Directory Manager password:
Password (confirm):

The IPA server requires an administrative user, named 'admin'.
This user is a regular system account used for IPA server administration.

IPA admin password:
Password (confirm):

Checking DNS domain ipasample.local., please wait ...
Invalid IP address fe80::20c:29ff:fe13:ded7 for idm.ipasample.local: cannot use link-local IP address fe80::20c:29ff:fe13:ded7
Do you want to configure DNS forwarders? [yes]:
Following DNS servers are configured in /etc/resolv.conf: 192.168.1.40
Do you want to configure these servers as DNS forwarders? [yes]:
All detected DNS servers were added. You can enter additional addresses now:
Enter an IP address for a DNS forwarder, or press Enter to skip:
DNS forwarders: 192.168.1.40
Checking DNS forwarders, please wait ...
Do you want to search for missing reverse zones? [yes]:
Checking DNS domain 1.168.192.in-addr.arpa., please wait ...
DNS zone 1.168.192.in-addr.arpa. already exists in DNS and is handled by server(s): adserver.tmh-gw.jp.
The ipa-server-install command failed. See /var/log/ipaserver-install.log for more information
[root@idm ~]#
[root@idm ~]# ipa-server-install

The log file for this installation can be found in /var/log/ipaserver-install.log
==============================================================================
This program will set up the IPA Server.
Version 4.12.2

This includes:
  * Configure a stand-alone CA (dogtag) for certificate management
  * Configure the NTP client (chronyd)
  * Create and configure an instance of Directory Server
  * Create and configure a Kerberos Key Distribution Center (KDC)
  * Configure Apache (httpd)
  * Configure SID generation
  * Configure the KDC to enable PKINIT

To accept the default shown in brackets, press the Enter key.

Do you want to configure integrated DNS (BIND)? [no]: yes

Enter the fully qualified domain name of the computer
on which you're setting up server software. Using the form
<hostname>.<domainname>
Example: master.example.com


Server host name [idm.ipasample.local]:

Warning: skipping DNS resolution of host idm.ipasample.local
The domain name has been determined based on the host name.

Please confirm the domain name [ipasample.local]:

The kerberos protocol requires a Realm name to be defined.
This is typically the domain name converted to uppercase.

Please provide a realm name [IPASAMPLE.LOCAL]:
Certain directory server operations require an administrative user.
This user is referred to as the Directory Manager and has full access
to the Directory for system management tasks and will be added to the
instance of directory server created for IPA.
The password must be at least 8 characters long.

Directory Manager password:
Password (confirm):

The IPA server requires an administrative user, named 'admin'.
This user is a regular system account used for IPA server administration.

IPA admin password:
Password (confirm):

Checking DNS domain ipasample.local., please wait ...
Invalid IP address fe80::20c:29ff:fe13:ded7 for idm.ipasample.local: cannot use link-local IP address fe80::20c:29ff:fe13:ded7
Do you want to configure DNS forwarders? [yes]:
Following DNS servers are configured in /etc/resolv.conf: 8.8.8.8
Do you want to configure these servers as DNS forwarders? [yes]:
All detected DNS servers were added. You can enter additional addresses now:
Enter an IP address for a DNS forwarder, or press Enter to skip:
DNS forwarders: 8.8.8.8
Checking DNS forwarders, please wait ...
Do you want to search for missing reverse zones? [yes]:
Checking DNS domain 1.168.192.in-addr.arpa., please wait ...
Checking DNS domain 0.0.e.6.0.2.a.a.0.1.0.0.b.0.4.2.ip6.arpa., please wait ...
Do you want to create reverse zone for IP 192.168.1.12 [yes]:
Please specify the reverse zone name [1.168.192.in-addr.arpa.]:
Checking DNS domain 1.168.192.in-addr.arpa., please wait ...
Do you want to create reverse zone for IP 240b:10:aa20:6e00:20c:29ff:fe13:ded7 [yes]:
Please specify the reverse zone name [0.0.e.6.0.2.a.a.0.1.0.0.b.0.4.2.ip6.arpa.]:
Checking DNS domain 0.0.e.6.0.2.a.a.0.1.0.0.b.0.4.2.ip6.arpa., please wait ...
Using reverse zone(s) 1.168.192.in-addr.arpa., 0.0.e.6.0.2.a.a.0.1.0.0.b.0.4.2.ip6.arpa.
Trust is configured but no NetBIOS domain name found, setting it now.
ようやく通過
NetBIOS名の設定などを設定して進む
NetBIOS domain name [IPASAMPLE]:

Do you want to configure chrony with NTP server or pool address? [no]:

The IPA Master Server will be configured with:
Hostname:       idm.ipasample.local
IP address(es): 192.168.1.12, 240b:10:aa20:6e00:20c:29ff:fe13:ded7
Domain name:    ipasample.local
Realm name:     IPASAMPLE.LOCAL

The CA will be configured with:
Subject DN:   CN=Certificate Authority,O=IPASAMPLE.LOCAL
Subject base: O=IPASAMPLE.LOCAL
Chaining:     self-signed

BIND DNS server will be configured to serve IPA domain with:
Forwarders:       8.8.8.8
Forward policy:   only
Reverse zone(s):  1.168.192.in-addr.arpa., 0.0.e.6.0.2.a.a.0.1.0.0.b.0.4.2.ip6.arpa.

Continue to configure the system with these values? [no]:
ここから、作成を開始します
Continue to configure the system with these values? [no]: yes

The following operations may take some minutes to complete.
Please wait until the prompt is returned.

Adding [192.168.1.12 idm.ipasample.local] to your /etc/hosts file
Adding [240b:10:aa20:6e00:20c:29ff:fe13:ded7 idm.ipasample.local] to your /etc/hosts file
Disabled p11-kit-proxy
Synchronizing time
No SRV records of NTP servers found and no NTP server or pool address was provided.
Using default chrony configuration.
Attempting to sync time with chronyc.
Time synchronization was successful.
Configuring directory server (dirsrv). Estimated time: 30 seconds
  [1/42]: creating directory server instance
Validate installation settings ...
Create file system structures ...
Perform SELinux labeling ...
Create database backend: dc=ipasample,dc=local ...
Perform post-installation tasks ...
  [2/42]: adding default schema
  [3/42]: enabling memberof plugin
  [4/42]: enabling winsync plugin
  [5/42]: configure password logging
  [6/42]: configuring replication version plugin
  [7/42]: enabling IPA enrollment plugin
  [8/42]: configuring uniqueness plugin
  [9/42]: configuring uuid plugin
  [10/42]: configuring modrdn plugin
  [11/42]: configuring DNS plugin
  [12/42]: enabling entryUSN plugin
  [13/42]: configuring lockout plugin
  [14/42]: configuring graceperiod plugin
  [15/42]: configuring topology plugin
  [16/42]: creating indices
  [17/42]: enabling referential integrity plugin
  [18/42]: configuring certmap.conf
  [19/42]: configure new location for managed entries
  [20/42]: configure dirsrv ccache and keytab
  [21/42]: enabling SASL mapping fallback
  [22/42]: restarting directory server
  [23/42]: adding sasl mappings to the directory
  [24/42]: adding default layout
  [25/42]: adding delegation layout
  [26/42]: creating container for managed entries
  [27/42]: configuring user private groups
  [28/42]: configuring netgroups from hostgroups
  [29/42]: creating default Sudo bind user
  [30/42]: creating default Auto Member layout
  [31/42]: adding range check plugin
  [32/42]: creating default HBAC rule allow_all
  [33/42]: adding entries for topology management
  [34/42]: initializing group membership
  [35/42]: adding master entry
  [36/42]: initializing domain level
  [37/42]: configuring Posix uid/gid generation
  [38/42]: adding replication acis
  [39/42]: activating sidgen plugin
  [40/42]: activating extdom plugin
  [41/42]: configuring directory to start on boot
  [42/42]: restarting directory server
Done configuring directory server (dirsrv).
Configuring Kerberos KDC (krb5kdc)
  [1/11]: adding kerberos container to the directory
  [2/11]: configuring KDC
  [3/11]: initialize kerberos container
  [4/11]: adding default ACIs
  [5/11]: creating a keytab for the directory
  [6/11]: creating a keytab for the machine
  [7/11]: adding the password extension to the directory
  [8/11]: creating anonymous principal
  [9/11]: starting the KDC
  [10/11]: configuring KDC to start on boot
  [11/11]: enable PAC ticket signature support
Done configuring Kerberos KDC (krb5kdc).
Configuring kadmin
  [1/2]: starting kadmin
  [2/2]: configuring kadmin to start on boot
Done configuring kadmin.
Configuring ipa-custodia
  [1/5]: Making sure custodia container exists
  [2/5]: Generating ipa-custodia config file
  [3/5]: Generating ipa-custodia keys
  [4/5]: starting ipa-custodia
  [5/5]: configuring ipa-custodia to start on boot
Done configuring ipa-custodia.
Forcing random serial numbers to be enabled for the mdb backend
Configuring certificate server (pki-tomcatd). Estimated time: 3 minutes
  [1/33]: configuring certificate server instance
  [2/33]: stopping certificate server instance to update CS.cfg
  [3/33]: backing up CS.cfg
  [4/33]: Add ipa-pki-wait-running
Set start up timeout of pki-tomcatd service to 90 seconds
  [5/33]: secure AJP connector
  [6/33]: reindex attributes
  [7/33]: exporting Dogtag certificate store pin
  [8/33]: disabling nonces
  [9/33]: set up CRL publishing
  [10/33]: enable PKIX certificate path discovery and validation
  [11/33]: authorizing RA to modify profiles
  [12/33]: authorizing RA to manage lightweight CAs
  [13/33]: Ensure lightweight CAs container exists
  [14/33]: Enable lightweight CA monitor
  [15/33]: Ensuring backward compatibility
  [16/33]: enable certificate pruning
  [17/33]: updating IPA configuration
  [18/33]: starting certificate server instance
  [19/33]: configure certmonger for renewals
  [20/33]: requesting RA certificate from CA
  [21/33]: publishing the CA certificate
  [22/33]: adding RA agent as a trusted user
  [23/33]: configure certificate renewals
  [24/33]: Configure HTTP to proxy connections
  [25/33]: enabling CA instance
  [26/33]: importing IPA certificate profiles
  [27/33]: migrating certificate profiles to LDAP
  [28/33]: adding default CA ACL
  [29/33]: adding 'ipa' CA entry
  [30/33]: Recording random serial number state
  [31/33]: Recording HSM configuration state
  [32/33]: configuring certmonger renewal for lightweight CAs
  [33/33]: deploying ACME service
Done configuring certificate server (pki-tomcatd).
Configuring directory server (dirsrv)
  [1/3]: configuring TLS for DS instance
  [2/3]: adding CA certificate entry
  [3/3]: restarting directory server
Done configuring directory server (dirsrv).
Configuring ipa-otpd
  [1/2]: starting ipa-otpd
  [2/2]: configuring ipa-otpd to start on boot
Done configuring ipa-otpd.
Configuring the web interface (httpd)
  [1/22]: stopping httpd
  [2/22]: backing up ssl.conf
  [3/22]: disabling nss.conf
  [4/22]: configuring mod_ssl certificate paths
  [5/22]: setting mod_ssl protocol list
  [6/22]: configuring mod_ssl log directory
  [7/22]: disabling mod_ssl OCSP
  [8/22]: adding URL rewriting rules
  [9/22]: configuring httpd
Nothing to do for configure_httpd_wsgi_conf
  [10/22]: setting up httpd keytab
  [11/22]: configuring Gssproxy
  [12/22]: setting up ssl
  [13/22]: configure certmonger for renewals
  [14/22]: publish CA cert
  [15/22]: clean up any existing httpd ccaches
  [16/22]: enable ccache sweep
  [17/22]: configuring SELinux for httpd
  [18/22]: create KDC proxy config
  [19/22]: enable KDC proxy
  [20/22]: starting httpd
  [21/22]: configuring httpd to start on boot
  [22/22]: enabling oddjobd
Done configuring the web interface (httpd).
Configuring Kerberos KDC (krb5kdc)
  [1/1]: installing X509 Certificate for PKINIT
Done configuring Kerberos KDC (krb5kdc).
Applying LDAP updates
Upgrading IPA:. Estimated time: 1 minute 30 seconds
  [1/10]: stopping directory server
  [2/10]: saving configuration
  [3/10]: disabling listeners
  [4/10]: enabling DS global lock
  [5/10]: disabling Schema Compat
  [6/10]: starting directory server
  [7/10]: upgrading server
  [8/10]: stopping directory server
  [9/10]: restoring configuration
  [10/10]: starting directory server
Done.
Restarting the KDC
dnssec-validation yes
Configuring DNS (named)
  [1/13]: generating rndc key file
  [2/13]: adding DNS container
  [3/13]: setting up our zone
  [4/13]: setting up reverse zone
  [5/13]: setting up our own record
  [6/13]: setting up records for other masters
  [7/13]: adding NS record to the zones
  [8/13]: setting up kerberos principal
  [9/13]: setting up LDAPI autobind
  [10/13]: setting up named.conf
created new /etc/named.conf
created named user config '/etc/named/ipa-ext.conf'
created named user config '/etc/named/ipa-options-ext.conf'
created named user config '/etc/named/ipa-logging-ext.conf'
  [11/13]: setting up server configuration
  [12/13]: configuring named to start on boot
  [13/13]: changing resolv.conf to point to ourselves
Done configuring DNS (named).
Restarting the web server to pick up resolv.conf changes
Configuring DNS key synchronization service (ipa-dnskeysyncd)
  [1/7]: checking status
  [2/7]: setting up bind-dyndb-ldap working directory
  [3/7]: setting up kerberos principal
  [4/7]: setting up SoftHSM
  [5/7]: adding DNSSEC containers
  [6/7]: creating replica keys
  [7/7]: configuring ipa-dnskeysyncd to start on boot
Done configuring DNS key synchronization service (ipa-dnskeysyncd).
Restarting ipa-dnskeysyncd
Restarting named
Updating DNS system records
Configuring SID generation
  [1/8]: adding RID bases
  [2/8]: creating samba domain object
  [3/8]: adding admin(group) SIDs
  [4/8]: updating Kerberos config
'dns_lookup_kdc' already set to 'true', nothing to do.
  [5/8]: activating sidgen task
  [6/8]: restarting Directory Server to take MS PAC and LDAP plugins changes into account
  [7/8]: adding fallback group
  [8/8]: adding SIDs to existing users and groups
This step may take considerable amount of time, please wait..
Done.
Configuring client side components
This program will set up IPA client.
Version 4.12.2

Using existing certificate '/etc/ipa/ca.crt'.
Client hostname: idm.ipasample.local
Realm: IPASAMPLE.LOCAL
DNS Domain: ipasample.local
IPA Server: idm.ipasample.local
BaseDN: dc=ipasample,dc=local

Configured /etc/sssd/sssd.conf
Systemwide CA database updated.
Adding SSH public key from /etc/ssh/ssh_host_ecdsa_key.pub
Adding SSH public key from /etc/ssh/ssh_host_ed25519_key.pub
Adding SSH public key from /etc/ssh/ssh_host_rsa_key.pub
SSSD enabled
Configured /etc/openldap/ldap.conf
Configured /etc/ssh/ssh_config
Configured /etc/ssh/sshd_config.d/04-ipa.conf
Configuring ipasample.local as NIS domain.
Client configuration complete.
The ipa-client-install command was successful

==============================================================================
Setup complete

Next steps:
        1. You must make sure these network ports are open:
                TCP Ports:
                  * 80, 443: HTTP/HTTPS
                  * 389, 636: LDAP/LDAPS
                  * 88, 464: kerberos
                  * 53: bind
                UDP Ports:
                  * 88, 464: kerberos
                  * 53: bind
                  * 123: ntp

        2. You can now obtain a kerberos ticket using the command: 'kinit admin'
           This ticket will allow you to use the IPA tools (e.g., ipa user-add)
           and the web user interface.

Be sure to back up the CA certificates stored in /root/cacert.p12
These files are required to create replicas. The password for these
files is the Directory Manager password
The ipa-server-install command was successful
[root@idm ~]#
[root@idm ~]# klist
klist: Credentials cache 'KCM:0' not found
[root@idm ~]# kinit
Password for root@IPASAMPLE.LOCAL:
[root@idm ~]# klist
Ticket cache: KCM:0
Default principal: admin@IPASAMPLE.LOCAL

Valid starting       Expires              Service principal
2026-03-23T19:16:16  2026-03-24T18:32:46  krbtgt/IPASAMPLE.LOCAL@IPASAMPLE.LOCAL
[root@idm ~]# ipa user-add --password
First name: test
Last name: user
User login [tuser]: ipauser1
Password:
確認のため再び Password を入力してください:
---------------------
Added user "ipauser1"
---------------------
  User login: ipauser1
  First name: test
  Last name: user
  Full name: test user
  Display name: test user
  Initials: tu
  Home directory: /home/ipauser1
  GECOS: test user
  Login shell: /bin/sh
  Principal name: ipauser1@IPASAMPLE.LOCAL
  Principal alias: ipauser1@IPASAMPLE.LOCAL
  User password expiration: 20260323101719Z
  Email address: ipauser1@ipasample.local
  UID: 1573600003
  GID: 1573600003
  Password: True
  Member of groups: ipausers
  Kerberos keys available: True
[root@idm ~]#
[root@linux ~]# which ipa-client-install
/usr/bin/which: no ipa-client-install in (/root/.local/bin:/root/bin:/usr/local/sbin:/usr/local/bin:/usr/sbin:/usr/bin)
[root@linux ~]#
[root@linux ~]# ipa-client-install --mkhomedir
This program will set up IPA client.
Version 4.12.2

invalid hostname: not fully qualified
The ipa-client-install command failed. See /var/log/ipaclient-install.log for more information
[root@linux ~]# hostname
linux
[root@linux ~]#
おっと、ホスト名が不適切だった
設定しなおして、再実行
[root@linux ~]# ipa-client-install --mkhomedir
This program will set up IPA client.
Version 4.12.2

Discovery was successful!
Do you want to configure chrony with NTP server or pool address? [no]:
Client hostname: linux.ipasample.local
Realm: IPASAMPLE.LOCAL
DNS Domain: ipasample.local
IPA Server: idm.ipasample.local
BaseDN: dc=ipasample,dc=local

Continue to configure the system with these values? [no]: yes
Synchronizing time
No SRV records of NTP servers found and no NTP server or pool address was provided.
Using default chrony configuration.
Attempting to sync time with chronyc.
Time synchronization was successful.
User authorized to enroll computers:
続いてIdMドメインに登録出来る管理者アカウント名を入力
User authorized to enroll computers: admin
Password for admin@IPASAMPLE.LOCAL:<パスワード>
Successfully retrieved CA cert
    Subject:     CN=Certificate Authority,O=IPASAMPLE.LOCAL
    Issuer:      CN=Certificate Authority,O=IPASAMPLE.LOCAL
    Valid From:  2026-03-23 09:40:42+00:00
    Valid Until: 2046-03-23 09:40:42+00:00

Enrolled in IPA realm IPASAMPLE.LOCAL
Created /etc/ipa/default.conf
Configured /etc/sssd/sssd.conf
Systemwide CA database updated.
Hostname (linux.ipasample.local) does not have A/AAAA record.
Missing reverse record(s) for address(es): 192.168.1.76.
Adding SSH public key from /etc/ssh/ssh_host_ecdsa_key.pub
Adding SSH public key from /etc/ssh/ssh_host_ed25519_key.pub
Adding SSH public key from /etc/ssh/ssh_host_rsa_key.pub
SSSD enabled
Configured /etc/openldap/ldap.conf
Configured /etc/ssh/ssh_config
Configured /etc/ssh/sshd_config.d/04-ipa.conf
Configuring ipasample.local as NIS domain.
Configured /etc/krb5.conf for IPA realm IPASAMPLE.LOCAL
Client configuration complete.
The ipa-client-install command was successful
[root@linux ~]#
一般ユーザでのログイン試験
あら・・・初回ログイン時にパスワード変更が要求されていました
ん??処理が終わらない
sshでログインを試してみる
[root@idm ~]# ssh ipauser1@192.168.1.76
(ipauser1@192.168.1.76) Password:
(ipauser1@192.168.1.76) Password:
Last failed login: Mon Mar 23 19:52:37 JST 2026 from 192.168.1.12 on ssh:notty
There was 1 failed login attempt since the last successful login.
Last login: Mon Mar 23 19:51:57 2026
-sh-5.2$ who
ipauser1 pts/0        2026-03-23 19:52 (192.168.1.12)
-sh-5.2$ whoami
ipauser1
-sh-5.2$ id
uid=1573600003(ipauser1) gid=1573600003(ipauser1) groups=1573600003(ipauser1) context=unconfined_u:unconfined_r:unconfined_t:s0-s0:c0.c1023
-sh-5.2$ pwd
/home/ipauser1
-sh-5.2$
[root@linux2 ~]# dnf install ipa-client
AlmaLinux 10 - AppStream                        2.3 MB/s | 2.3 MB     00:00
AlmaLinux 10 - BaseOS                           6.4 MB/s |  18 MB     00:02
AlmaLinux 10 - CRB                              763 kB/s | 523 kB     00:00
AlmaLinux 10 - Extras                            20 kB/s |  12 kB     00:00
Dependencies resolved.
================================================================================
 Package                      Arch   Version                    Repo       Size
================================================================================
Installing:
 ipa-client                   x86_64 4.12.2-24.el10_1.2         appstream 131 k
Installing dependencies:
 acl                          x86_64 2.3.2-4.el10               baseos     79 k
 augeas-libs                  x86_64 1.14.2-0.3.20250224git6ee1282.el10
                                                                appstream 428 k
 autofs                       x86_64 1:5.1.9-13.el10            baseos    381 k
 bind-libs                    x86_64 32:9.18.33-10.el10_1.2     appstream 1.3 M
 bind-license                 noarch 32:9.18.33-10.el10_1.2     appstream  13 k
 bind-utils                   x86_64 32:9.18.33-10.el10_1.2     appstream 217 k
 certmonger                   x86_64 0.79.20-3.el10             appstream 608 k
 checkpolicy                  x86_64 3.9-1.el10                 appstream 366 k
 dbus-tools                   x86_64 1:1.14.10-5.el10           baseos     53 k
 fstrm                        x86_64 0.6.1-12.el10              appstream  28 k
 gssproxy                     x86_64 0.9.2-10.el10              baseos    120 k
 ipa-client-common            noarch 4.12.2-24.el10_1.2         appstream  42 k
 ipa-common                   noarch 4.12.2-24.el10_1.2         appstream 683 k
 ipa-selinux                  noarch 4.12.2-24.el10_1.2         appstream  37 k
 krb5-pkinit                  x86_64 1.21.3-8.el10_0            baseos     60 k
 krb5-workstation             x86_64 1.21.3-8.el10_0            baseos    402 k
 libev                        x86_64 4.33-14.el10               baseos     50 k
 libipa_hbac                  x86_64 2.11.1-2.el10              baseos     34 k
 libjose                      x86_64 14-102.el10                appstream  64 k
 libkadm5                     x86_64 1.21.3-8.el10_0            baseos     76 k
 libmaxminddb                 x86_64 1.9.1-4.el10               appstream  42 k
 libnfsidmap                  x86_64 1:2.8.3-0.el10_1.3         baseos     60 k
 libsss_autofs                x86_64 2.11.1-2.el10              baseos     36 k
 libuv                        x86_64 1:1.51.0-1.el10_0          appstream 262 k
 libverto-libev               x86_64 0.3.2-10.el10              baseos     13 k
 nfsv4-client-utils           x86_64 1:2.8.3-0.el10_1.3         appstream 151 k
 nspr                         x86_64 4.36.0-8.el10_0            appstream 135 k
 nss                          x86_64 3.112.0-8.el10_0           appstream 737 k
 nss-softokn                  x86_64 3.112.0-8.el10_0           appstream 402 k
 nss-softokn-freebl           x86_64 3.112.0-8.el10_0           appstream 416 k
 nss-sysinit                  x86_64 3.112.0-8.el10_0           appstream  19 k
 nss-tools                    x86_64 3.112.0-8.el10_0           appstream 438 k
 nss-util                     x86_64 3.112.0-8.el10_0           appstream  85 k
 oddjob                       x86_64 0.34.7-14.el10             appstream  71 k
 oddjob-mkhomedir             x86_64 0.34.7-14.el10             appstream  27 k
 openssl                      x86_64 1:3.5.1-3.el10.alma.1      baseos    1.2 M
 policycoreutils-python-utils noarch 3.9-1.el10                 appstream  45 k
 protobuf-c                   x86_64 1.5.0-6.el10               baseos     32 k
 python3-argcomplete          noarch 3.2.2-4.el10               appstream  88 k
 python3-audit                x86_64 4.0.3-4.el10               appstream  69 k
 python3-augeas               noarch 1.1.0-14.el10              appstream  39 k
 python3-cffi                 x86_64 1.16.0-7.el10              baseos    310 k
 python3-charset-normalizer   noarch 3.4.2-1.el10               baseos    114 k
 python3-cryptography         x86_64 43.0.0-4.el10              baseos    1.4 M
 python3-decorator            noarch 5.1.1-12.el10              baseos     31 k
 python3-distro               noarch 1.9.0-5.el10               appstream  51 k
 python3-dns                  noarch 2.6.1-1.el10               baseos    629 k
 python3-gssapi               x86_64 1.7.3-10.el10              appstream 657 k
 python3-idna                 noarch 3.7-4.el10                 baseos    121 k
 python3-ifaddr               noarch 0.2.0-4.el10               appstream  34 k
 python3-ipaclient            noarch 4.12.2-24.el10_1.2         appstream 598 k
 python3-ipalib               noarch 4.12.2-24.el10_1.2         appstream 748 k
 python3-jinja2               noarch 3.1.6-1.el10_0             appstream 330 k
 python3-jwcrypto             noarch 1.5.6-4.el10               appstream 107 k
 python3-ldap                 x86_64 3.4.4-9.el10               appstream 290 k
 python3-libipa_hbac          x86_64 2.11.1-2.el10              baseos     28 k
 python3-libsemanage          x86_64 3.9-1.el10                 appstream  81 k
 python3-markupsafe           x86_64 2.1.3-6.el10               appstream  35 k
 python3-netaddr              noarch 1.3.0-2.el10               appstream 1.7 M
 python3-ply                  noarch 3.11-25.el10               baseos    138 k
 python3-policycoreutils      noarch 3.9-1.el10                 appstream 2.1 M
 python3-pyasn1               noarch 0.6.2-1.el10_1             appstream 174 k
 python3-pyasn1-modules       noarch 0.6.2-1.el10_1             appstream 312 k
 python3-pycparser            noarch 2.20-16.el10               baseos    160 k
 python3-pyusb                noarch 1.2.1-11.el10              appstream 119 k
 python3-qrcode               noarch 7.4.2-13.el10              appstream 138 k
 python3-requests             noarch 2.32.4-1.el10_0            baseos    145 k
 python3-setools              x86_64 4.5.1-5.el10               baseos    691 k
 python3-setuptools           noarch 69.0.3-12.el10_0           baseos    1.4 M
 python3-sss                  x86_64 2.11.1-2.el10              baseos     27 k
 python3-sss-murmur           x86_64 2.11.1-2.el10_1.1          baseos     17 k
 python3-sssdconfig           noarch 2.11.1-2.el10              baseos     74 k
 python3-typing-extensions    noarch 4.9.0-6.el10               baseos     77 k
 python3-urllib3              noarch 1.26.19-2.el10_1.1         baseos    257 k
 python3-yubico               noarch 1.3.3-17.el10              appstream  82 k
 sssd-common-pac              x86_64 2.11.1-2.el10              baseos     88 k
 sssd-dbus                    x86_64 2.11.1-2.el10              baseos    124 k
 sssd-idp                     x86_64 2.11.1-2.el10              appstream  47 k
 sssd-ipa                     x86_64 2.11.1-2.el10              baseos    269 k
 sssd-krb5                    x86_64 2.11.1-2.el10              baseos     62 k
 sssd-nfs-idmap               x86_64 2.11.1-2.el10              baseos     35 k
 sssd-tools                   x86_64 2.11.1-2.el10              baseos    156 k
 unbound                      x86_64 1.20.0-15.el10_1           appstream 980 k
 unbound-anchor               x86_64 1.20.0-15.el10_1           appstream  35 k
 unbound-libs                 x86_64 1.20.0-15.el10_1           appstream 545 k
Installing weak dependencies:
 ipa-client-encrypted-dns     x86_64 4.12.2-24.el10_1.2         appstream  34 k
 sssd-passkey                 x86_64 2.11.1-2.el10              baseos     46 k
 unbound-utils                x86_64 1.20.0-15.el10_1           appstream  59 k

Transaction Summary
================================================================================
Install  89 Packages

Total download size: 25 M
Installed size: 96 M
Is this ok [y/N]: y
<略>
Complete!
[root@linux2 ~]#
「ipa-client-install –mkhomedir」で登録
[root@linux2 ~]# ipa-client-install --mkhomedir
This program will set up IPA client.
Version 4.12.2

Discovery was successful!
Do you want to configure chrony with NTP server or pool address? [no]:
Client hostname: linux2.ipasample.local
Realm: IPASAMPLE.LOCAL
DNS Domain: ipasample.local
IPA Server: idm.ipasample.local
BaseDN: dc=ipasample,dc=local

Continue to configure the system with these values? [no]: yes
Synchronizing time
No SRV records of NTP servers found and no NTP server or pool address was provided.
Using default chrony configuration.
Attempting to sync time with chronyc.
Time synchronization was successful.
User authorized to enroll computers: admin
Password for admin@IPASAMPLE.LOCAL:
Successfully retrieved CA cert
    Subject:     CN=Certificate Authority,O=IPASAMPLE.LOCAL
    Issuer:      CN=Certificate Authority,O=IPASAMPLE.LOCAL
    Valid From:  2026-03-23 09:40:42+00:00
    Valid Until: 2046-03-23 09:40:42+00:00

Enrolled in IPA realm IPASAMPLE.LOCAL
Created /etc/ipa/default.conf
Configured /etc/sssd/sssd.conf
Systemwide CA database updated.
Hostname (linux2.ipasample.local) does not have A/AAAA record.
Missing reverse record(s) for address(es): 192.168.1.77, 240b:10:aa20:6e00:20c:29ff:fe4c:b3e0.
Adding SSH public key from /etc/ssh/ssh_host_ecdsa_key.pub
Adding SSH public key from /etc/ssh/ssh_host_ed25519_key.pub
Adding SSH public key from /etc/ssh/ssh_host_rsa_key.pub
SSSD enabled
Configured /etc/openldap/ldap.conf
Configured /etc/ssh/ssh_config
Configured /etc/ssh/sshd_config.d/04-ipa.conf
Configuring ipasample.local as NIS domain.
Configured /etc/krb5.conf for IPA realm IPASAMPLE.LOCAL
Client configuration complete.
The ipa-client-install command was successful
[root@linux2 ~]#
IdMユーザの情報を持ってこれるか「id ユーザ名」を実行して確認
[root@linux2 ~]# id ipauser1
uid=1573600003(ipauser1) gid=1573600003(ipauser1) groups=1573600003(ipauser1)
[root@linux2 ~]#
情報がひけていることを確認
[root@idm ~]# ssh ipauser1@192.168.1.77
The authenticity of host '192.168.1.77 (192.168.1.77)' can't be established.
ED25519 key fingerprint is SHA256:iZZU51dTabKk0vwoKfKfxd1o+nLkxIHDXc2yMAw+SW4.
This key is not known by any other names.
Are you sure you want to continue connecting (yes/no/[fingerprint])? yes
Warning: Permanently added '192.168.1.77' (ED25519) to the list of known hosts.
(ipauser1@192.168.1.77) Password:
(ipauser1@192.168.1.77) Password:
Last failed login: Mon Mar 23 20:12:51 JST 2026 from 192.168.1.12 on ssh:notty
There was 1 failed login attempt since the last successful login.
-sh-5.2$ pwd
/home/ipauser1
-sh-5.2$ whoami
ipauser1
-sh-5.2$ id
uid=1573600003(ipauser1) gid=1573600003(ipauser1) groups=1573600003(ipauser1) context=unconfined_u:unconfined_r:unconfined_t:s0-s0:c0.c1023
-sh-5.2$
[root@rhel10 ~]# authselect select sssd with-mkhomedir with-sudo
プロファイル "sssd" が設定されました。

Make sure that SSSD service is configured and enabled. See SSSD documentation for more information.

- with-mkhomedir is selected, make sure pam_oddjob_mkhomedir module
  is present and oddjobd service is enabled and active
  - systemctl enable --now oddjobd.service

[root@rhel10 ~]# authselect current
プロファイル ID: sssd
有効な機能:
- with-mkhomedir
- with-sudo
[root@rhel10 ~]#
[root@netvault ~]# ipa dnsrecord-add ipasample.local
Record name: nvclient
Please choose a type of DNS resource record to be added
The most common types for this type of zone are: A, AAAA

DNS resource record type: A
A IP Address: 192.168.1.75
  Record name: nvclient
  A record: 192.168.1.75
[root@netvault ~]#
[root@netvault ~]# ipa dnsrecord-add ipasample.local test  --a-ip-address=192.168.1.75
  Record name: test
  A record: 192.168.1.75
[root@netvault ~]# ipa dnsrecord-show ipasample.local test
  Record name: test
  A record: 192.168.1.75
[root@netvault ~]#
[root@netvault ~]# ipa dnsrecord-add ipasample.local test2 --a-rec=192.168.1.75
  Record name: test2
  A record: 192.168.1.75
[root@netvault ~]# ipa dnsrecord-show ipasample.local test2
  Record name: test2
  A record: 192.168.1.75
[root@netvault ~]#
[root@netvault ~]# ipa dnsrecord-del ipasample.local test
No option to delete specific record provided.
Delete all? Yes/No (default No): yes
---------------------
Deleted record "test"
---------------------
[root@netvault ~]# ipa dnsrecord-show ipasample.local test
ipa: ERROR: test: DNS resource record not found
[root@netvault ~]#
オプションを指定して削除することもできる
削除の場合は「–a-rec=IPアドレス」のみ
[root@netvault ~]# ipa dnsrecord-del ipasample.local test2 --a-rec=192.168.1.75
----------------------
Deleted record "test2"
----------------------
[root@netvault ~]# ipa dnsrecord-show ipasample.local test2
ipa: ERROR: test2: DNS resource record not found
[root@netvault ~]#
[root@idm ~]# ipa dnsconfig-show
---------------------------------
Global DNS configuration is empty
---------------------------------
  IPA DNS servers: idm.ipasample.local
[root@idm ~]#
[root@idm ~]# ipa dnsconfig-mod --forwarder=192.168.1.1
Server will check DNS forwarder(s).
This may take some time, please wait ...
ipa: WARNING: Forwarding policy conflicts with some automatic empty zones. Queries for zones specified by RFC 6303 will ignore forwarding and recursion and always result in NXDOMAIN answers. To override this behavior use forward policy 'only'.
ipa: WARNING: DNS server 192.168.1.1 does not support DNSSEC: answer to query '. SOA' is missing DNSSEC signatures (no RRSIG data).
If DNSSEC validation is enabled on IPA server(s), please disable it.
  Global forwarders: 192.168.1.1
  IPA DNS servers: idm.ipasample.local
[root@idm ~]# ipa dnsconfig-show
  Global forwarders: 192.168.1.1
  IPA DNS servers: idm.ipasample.local
[root@idm ~]#
[root@idm ~]# ipa dnsforwardzone-find
----------------------------
Number of entries returned 0
----------------------------
[root@idm ~]# ipa dnsserver-find
--------------------
1 DNS server matched
--------------------
  Server name: idm.ipasample.local
  SOA mname override: idm.ipasample.local.
  Forwarders: 8.8.8.8
  Forward policy: only
----------------------------
Number of entries returned 1
----------------------------
[root@idm ~]# ipa dnsconfig-show
  Global forwarders: 192.168.1.1
  IPA DNS servers: idm.ipasample.local
[root@idm ~]#
dnsserver設定にforwarder設定があった
まずは先ほど追加したdnsconfigの方のGlobal forwarder設定を削除
[root@idm ~]# ipa dnsconfig-mod --forwarder=""
---------------------------------
Global DNS configuration is empty
---------------------------------
  IPA DNS servers: idm.ipasample.local
[root@idm ~]# ipa dnsconfig-show
---------------------------------
Global DNS configuration is empty
---------------------------------
  IPA DNS servers: idm.ipasample.local
[root@idm ~]#
続けてdnsserver-modで変更
[root@idm ~]# ipa dnsserver-mod idm.ipasample.local --forwarder=192.168.1.1
-----------------------------------------
Modified DNS server "idm.ipasample.local"
-----------------------------------------
  Server name: idm.ipasample.local
  SOA mname override: idm.ipasample.local.
  Forwarders: 192.168.1.1
  Forward policy: only
[root@idm ~]# ipa dnsserver-find
--------------------
1 DNS server matched
--------------------
  Server name: idm.ipasample.local
  SOA mname override: idm.ipasample.local.
  Forwarders: 192.168.1.1
  Forward policy: only
----------------------------
Number of entries returned 1
----------------------------
[root@idm ~]#
だめか・・・
[root@idm ~]# nslookup www.google.co.jp
;; Got SERVFAIL reply from 127.0.0.1, trying next server
;; Got SERVFAIL reply from ::1
Server:         ::1
Address:        ::1#53

** server can't find www.google.co.jp: SERVFAIL

[root@idm ~]#
試しにdnsconfigの方のforwarderも設定しても状況は変わらない
[root@idm ~]# ipa dnsconfig-mod --forwarder=192.168.1.1
Server will check DNS forwarder(s).
This may take some time, please wait ...
ipa: WARNING: Forwarding policy conflicts with some automatic empty zones. Queries for zones specified by RFC 6303 will ignore forwarding and recursion and always result in NXDOMAIN answers. To override this behavior use forward policy 'only'.
ipa: WARNING: DNS server 192.168.1.1 does not support DNSSEC: answer to query '. SOA' is missing DNSSEC signatures (no RRSIG data).
If DNSSEC validation is enabled on IPA server(s), please disable it.
  Global forwarders: 192.168.1.1
  IPA DNS servers: idm.ipasample.local
[root@idm ~]# ipa dnsconfig-show
  Global forwarders: 192.168.1.1
  IPA DNS servers: idm.ipasample.local
[root@idm ~]# nslookup www.google.co.jp
;; Got SERVFAIL reply from 127.0.0.1, trying next server
;; Got SERVFAIL reply from ::1
Server:         ::1
Address:        ::1#53

** server can't find www.google.co.jp: SERVFAIL
[root@idm ~]#