NFSv4でマウントするとrootがnobodyになる

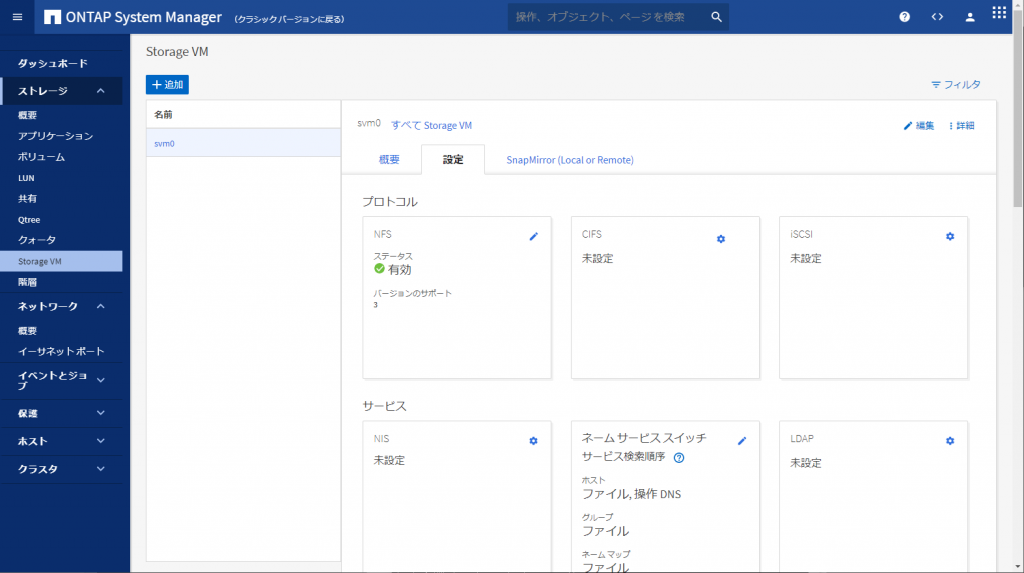
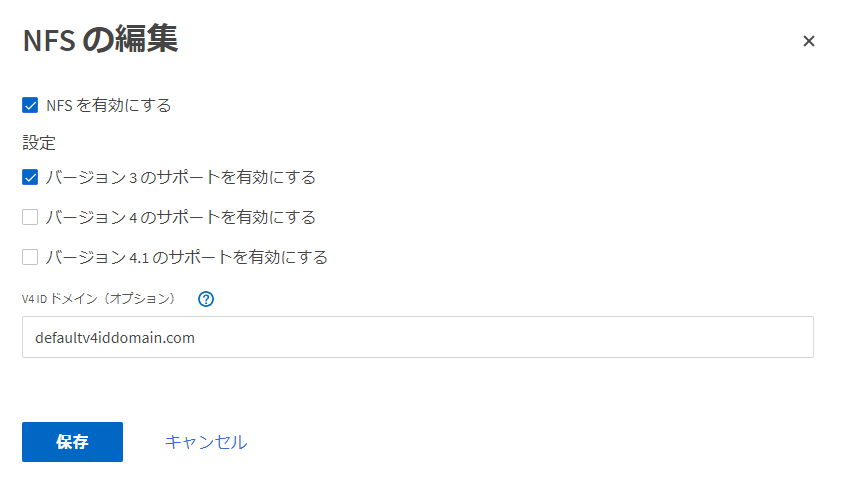
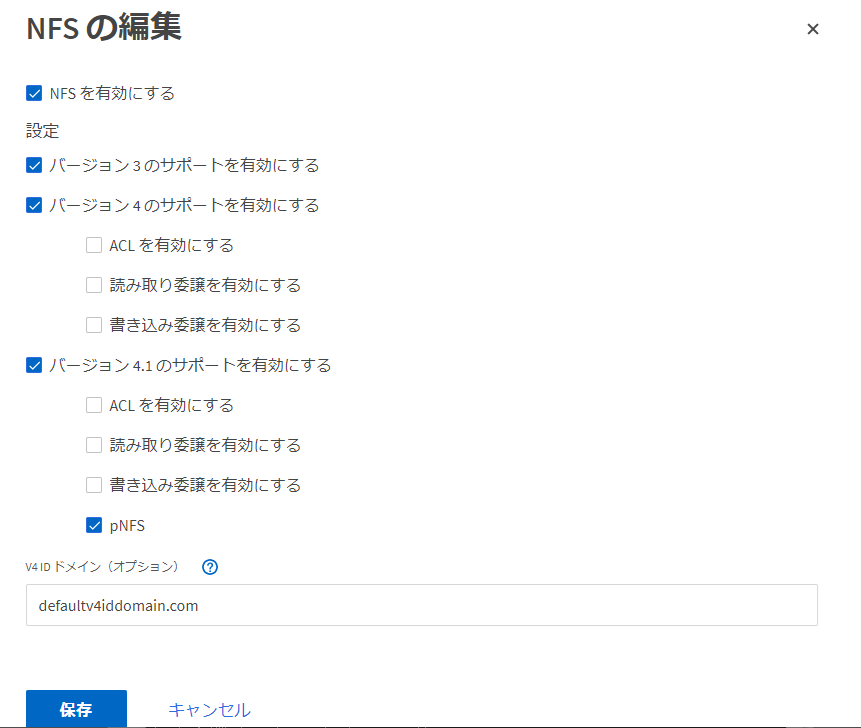
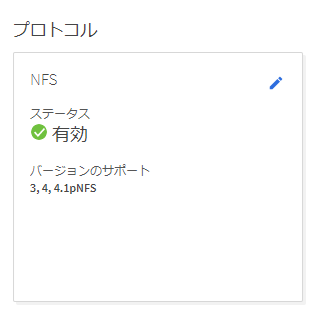
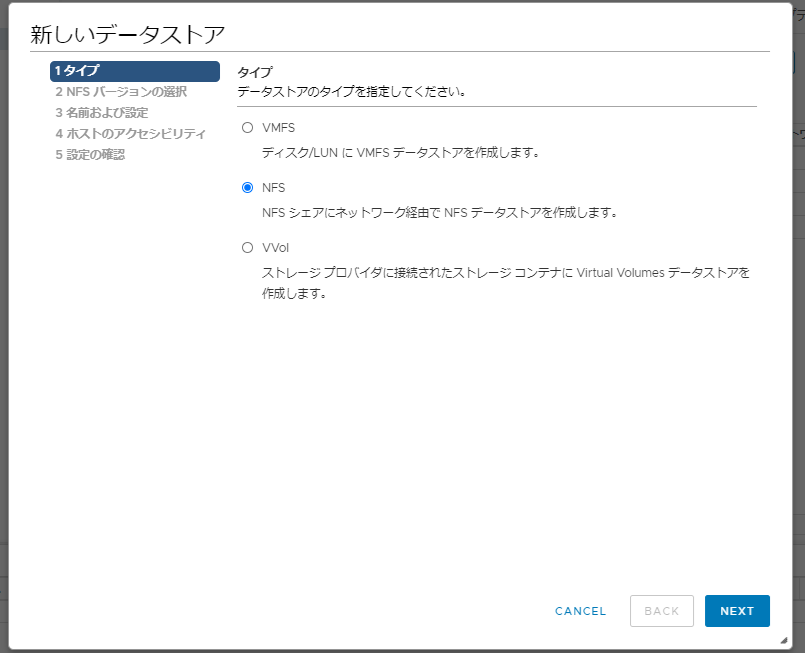
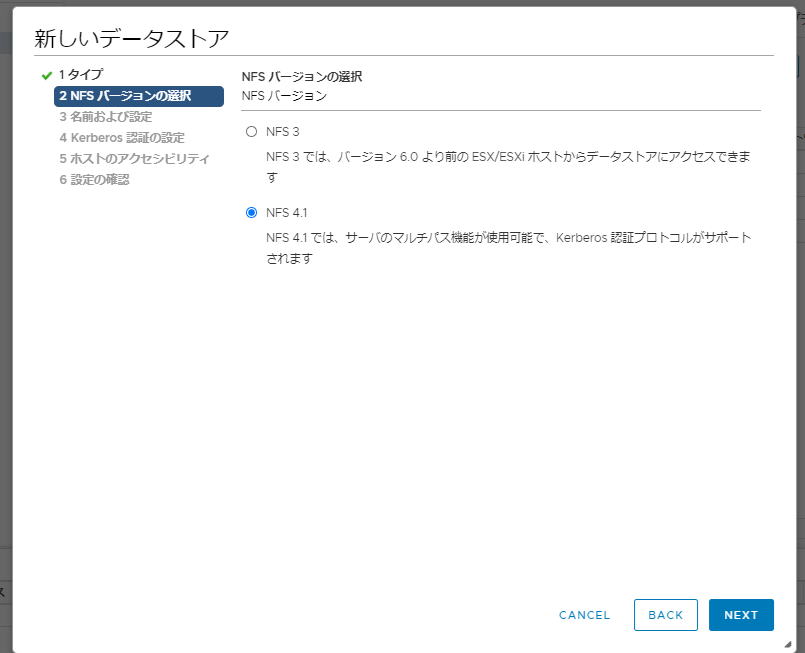
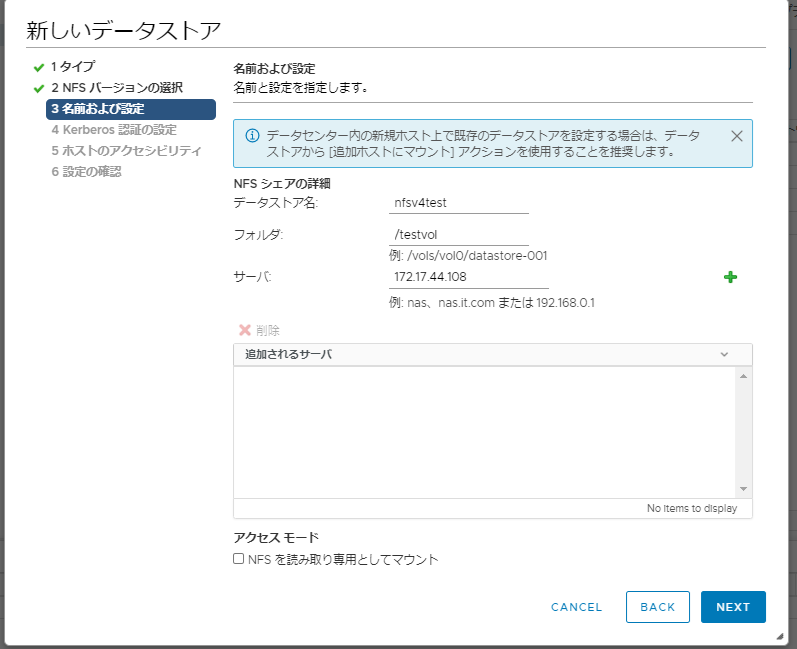
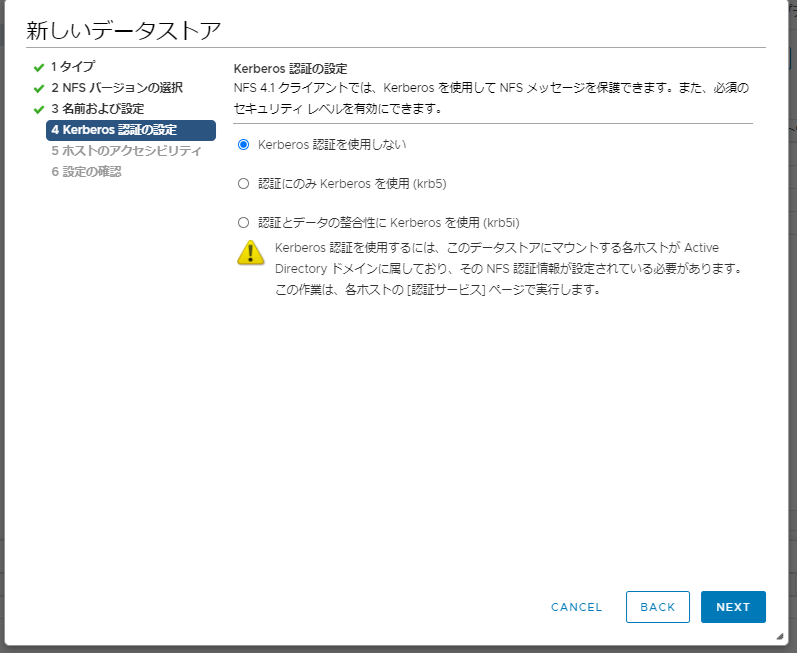
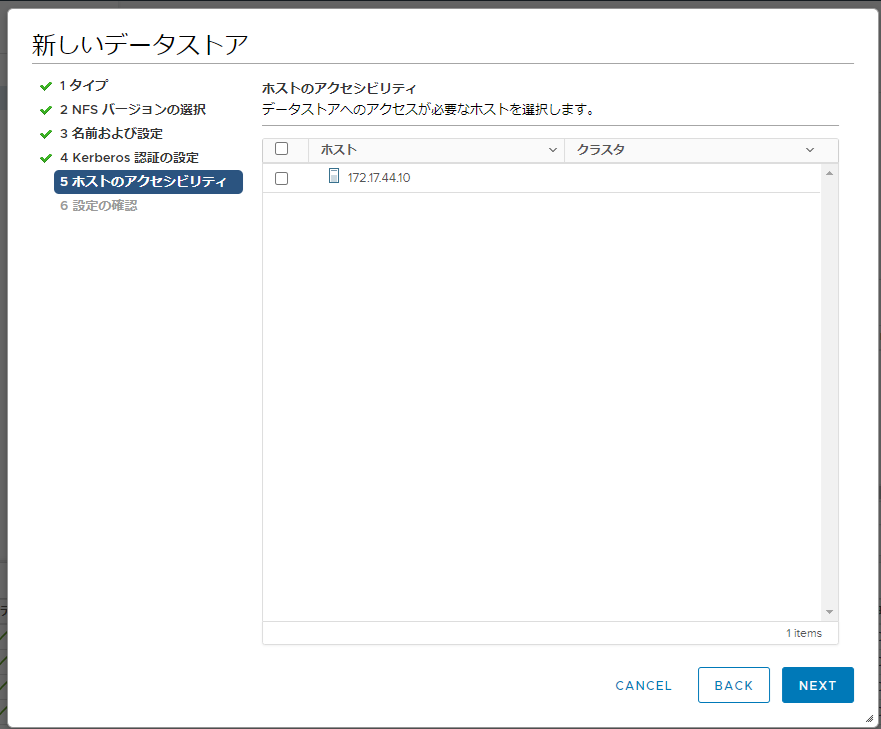
NetApp ONTAP 9.7ファイルサーバを作る時にNFS v3.0/v4.0/v4.1を有効にして、CentOS7からNFSマウントしてみた。

[root@centos7 ~]# mount 172.17.44.108:/ /mnt
[root@centos7 ~]# ls -l /mnt
合計 4
drwxr-xr-x. 11 nobody nobody 4096  8月 31 16:07 testvol
[root@centos7 ~]# ls -l /mnt/testvol/
合計 36
drwxrwxrwx. 2 nobody nobody 4096  8月 31 16:07 ntfs-test1
drwxrwxrwx. 4 nobody nobody 4096  7月 17 14:08 test
drwxr-xr-x. 3 nobody nobody 4096  8月 28 15:59 test1
drwxr-xr-x. 2 nobody nobody 4096  7月 17 14:08 test2
drwxr-xr-x. 2 nobody nobody 4096  8月 28 15:16 test3
drwxr-xr-x. 2 nobody nobody 4096  8月 28 15:16 test4
drwxr-xr-x. 2 nobody nobody 4096  8月 28 15:16 test5
drwxr-xr-x. 2 nobody nobody 4096  8月 28 15:08 testtere
drwxr-xr-x. 2 nobody nobody 4096  7月 31 17:46 testvm
[root@centos7 ~]# cat /proc/mounts |grep mnt
172.17.44.108:/ /mnt nfs4 rw,relatime,vers=4.1,rsize=65536,wsize=65536,namlen=255,hard,proto=tcp,timeo=600,retrans=2,sec=sys,clientaddr=172.17.44.103,local_lock=none,addr=172.17.44.108 0 0
172.17.44.108:/testvol /mnt/testvol nfs4 rw,relatime,vers=4.1,rsize=65536,wsize=65536,namlen=255,hard,proto=tcp,timeo=600,retrans=2,sec=sys,clientaddr=172.17.44.103,local_lock=none,addr=172.17.44.108 0 0
[root@centos7 ~]#

rootユーザで作成したはずの所有者が「nobody / nobody」で表示されている。

この時、/var/log/messages には以下のログが出ていた。

Aug 31 17:13:54 centos7 kernel: FS-Cache: Loaded
Aug 31 17:13:54 centos7 kernel: FS-Cache: Netfs 'nfs' registered for caching
Aug 31 17:13:54 centos7 kernel: Key type dns_resolver registered
Aug 31 17:13:55 centos7 kernel: NFS: Registering the id_resolver key type
Aug 31 17:13:55 centos7 kernel: Key type id_resolver registered
Aug 31 17:13:55 centos7 kernel: Key type id_legacy registered
Aug 31 17:13:55 centos7 nfsidmap[1748]: nss_getpwnam: name 'root@defaultv4iddomain.com' does not map into domain 'adosakana.local'
Aug 31 17:13:55 centos7 nfsidmap[1750]: nss_name_to_gid: name 'root@defaultv4iddomain.com' does not map into domain 'adosakana.local'
Aug 31 17:13:55 centos7 kernel: nfs4filelayout_init: NFSv4 File Layout Driver Registering...

関連する用語は「idmapd」

RedHat NFSv4 マウントで、すべてのファイルの所有者が nobody:nobody と誤って表示される
SUSE NFS4 mount shows all ownership as “nobody” or 4294967294
Solaris10 nfsmapid デーモン でNFS v4マウント時のいろいろについて詳細解説されている
Solaris11 nfsmapidデーモン

上記資料だとNFSサーバとして動作させる話も入っている。

CentOS7でNFSクライアントとして使う場合に気にする必要があるのは、/etc/idmapd.conf の「[General]」セクションに「Domain = NFS V4 IDドメイン」の設定を行う、ということのみ。

rpcidmapd.service / nfs-idmapd.service / nfs-idmap.service の起動状態について気にする必要は無く、ただたんに/etc/idmapd.conf を編集してからマウントすればOKだった。

ただし、試した限りでは、一度NFS v4でマウントし、nobodyとして認識されてしまうとキャッシュか何かが残っているようで、OS再起動する必要があった。

Linuxの場合、nfsidmapコマンドを実行すると現状認識しているドメイン名の確認ができ、また、キャッシュの削除を行うことができた。

現状のNFS v4デフォルトドメイン確認が「nfsidmap -d」で、キャシュクリアが「nfsidmap -c」となる。

# nfsidmap -d
adosakana.local
# nfsidmap -c
#

今回は、NetAppのデフォルトNFS V4 IDドメイン「defaultv4iddomain.com」を使用しているので、/etc/idmapd.conf には「Domain = defaultv4iddomain.com」と設定した

この状態でマウントしてみると下記の様になり、期待通りにrootユーザが認識された。

[root@centos7 ~]# mount 172.17.44.108:/ /mnt
[root@centos7 ~]# ls -l /mnt/
合計 4
drwxr-xr-x. 11 root root 4096  8月 31 16:07 testvol
[root@centos7 ~]# ls -l /mnt/testvol/
合計 36
drwxrwxrwx. 2 root root 4096  8月 31 16:07 ntfs-test1
drwxrwxrwx. 4 root root 4096  7月 17 14:08 test
drwxr-xr-x. 3 root root 4096  8月 28 15:59 test1
drwxr-xr-x. 2 root root 4096  7月 17 14:08 test2
drwxr-xr-x. 2 root root 4096  8月 28 15:16 test3
drwxr-xr-x. 2 root root 4096  8月 28 15:16 test4
drwxr-xr-x. 2 root root 4096  8月 28 15:16 test5
drwxr-xr-x. 2 root root 4096  8月 28 15:08 testtere
drwxr-xr-x. 2 root root 4096  7月 31 17:46 testvm
[root@centos7 ~]# tail /var/log/messages
Aug 31 17:19:06 centos7 systemd: Created slice User Slice of root.
Aug 31 17:19:06 centos7 systemd-logind: New session 1 of user root.
Aug 31 17:19:06 centos7 systemd: Started Session 1 of user root.
Aug 31 17:19:12 centos7 kernel: FS-Cache: Loaded
Aug 31 17:19:12 centos7 kernel: FS-Cache: Netfs 'nfs' registered for caching
Aug 31 17:19:12 centos7 kernel: Key type dns_resolver registered
Aug 31 17:19:12 centos7 kernel: NFS: Registering the id_resolver key type
Aug 31 17:19:12 centos7 kernel: Key type id_resolver registered
Aug 31 17:19:12 centos7 kernel: Key type id_legacy registered
Aug 31 17:19:12 centos7 kernel: nfs4filelayout_init: NFSv4 File Layout Driver Registering...
[root@centos7 ~]#
[root@centos7 ~]# cat /proc/mounts |grep mnt
172.17.44.108:/ /mnt nfs4 rw,relatime,vers=4.1,rsize=65536,wsize=65536,namlen=255,hard,proto=tcp,timeo=600,retrans=2,sec=sys,clientaddr=172.17.44.103,local_lock=none,addr=172.17.44.108 0 0
172.17.44.108:/testvol /mnt/testvol nfs4 rw,relatime,vers=4.1,rsize=65536,wsize=65536,namlen=255,hard,proto=tcp,timeo=600,retrans=2,sec=sys,clientaddr=172.17.44.103,local_lock=none,addr=172.17.44.108 0 0
[root@centos7 ~]#

lsで該当領域を見た後、キャッシュが残っている間であれば「nfsidmap -l」(小文字L」を実行すると、その時点で使ったユーザ名認識を表示してくれる。

# nfsidmap -l
2 .id_resolver keys found:
  uid:root@adosakana.local
  gid:root@adosakana.local
#

CentOS5をNFSクライアントとしてマウントしてみたところ、CentOS5は「mount -t nfs4 ~」でマウントする必要があること、nfsidmapコマンドは存在しないことがわかりました。


CentOS7環境で、一般ユーザがNFS v3で書くとちゃんとNFSv4側でもユーザが認識されるけど、NFS v4で書くと認識されない、という現象が発生して悩んだ。

# grep /mnt /proc/mounts
172.17.44.82:/sharevol /mnt nfs4 rw,relatime,vers=4.1,rsize=65536,wsize=65536,namlen=255,hard,proto=tcp,timeo=600,retrans=2,sec=null,clientaddr=172.17.44.103,local_lock=none,addr=172.17.44.82 0 0
172.17.44.82:/sharevol /mnt2 nfs rw,relatime,vers=3,rsize=65536,wsize=65536,namlen=255,hard,proto=tcp,timeo=600,retrans=2,sec=sys,mountaddr=172.17.44.82,mountvers=3,mountport=635,mountproto=udp,local_lock=none,addr=172.17.44.82 0 0
#

いろいろためした結果、上記の/proc/mounts から失敗が読み取れることが分かった。

NFS v4マウント側で「sec=null」となっている!

CentOS7でマウントオプション指定無しでマウントするとこの設定だった。

このため、「-o sec=sys」オプションを指定してマウントしたところ、期待通りに動作になった。

# mount -o sec=sys 172.17.44.82:/sharevol /mnt
# grep /mnt /proc/mounts
172.17.44.82:/sharevol /mnt2 nfs rw,relatime,vers=3,rsize=65536,wsize=65536,namlen=255,hard,proto=tcp,timeo=600,retrans=2,sec=sys,mountaddr=172.17.44.82,mountvers=3,mountport=635,mountproto=udp,local_lock=none,addr=172.17.44.82 0 0
172.17.44.82:/sharevol /mnt nfs4 rw,relatime,vers=4.1,rsize=65536,wsize=65536,namlen=255,hard,proto=tcp,timeo=600,retrans=2,sec=sys,clientaddr=172.17.44.103,local_lock=none,addr=172.17.44.82 0 0
#

標準設定でのマウントには注意が必要なようです


Solaris 11クライアントで確認する場合の例

「sharectl get nfs」か「sharectl get -p nfsmapid_domain nfs」でドメイン名を確認できる。

また、「/system/volatile/nfs4_domain」の値にも設定される(NFS Version 4 のドメインを確認する)

(Solaris 11.4側をNFSサーバにしてみた環境だと、”nfsmapid_domain=”は値設定なしだが、/system/volatile/nfs4_domain には値が入っている、という例があった。)

マウント状況は「nfsstat -m」で確認

root@solaris11:~# sharectl get nfs
servers=1024
lockd_listen_backlog=32
lockd_servers=1024
lockd_retransmit_timeout=5
grace_period=90
server_versmin=2
server_versmax=4
client_versmin=2
client_versmax=4
server_delegation=on
nfsmapid_domain=defaultv4iddomain.com
max_connections=-1
protocol=ALL
listen_backlog=32
device=
showmount_info=full
server_authz_cache_refresh=600
netgroup_refresh=600
resvport=false
root@solaris11:~# sharectl get -p nfsmapid_domain nfs
nfsmapid_domain=defaultv4iddomain.com
root@solaris11:~# cat /system/volatile/nfs4_domain
defaultv4iddomain.com
root@solaris11:~# nfsstat -m
/mnt from 172.17.44.226:/
 Flags:         vers=4,proto=tcp,sec=sys,hard,intr,link,symlink,rsize=65536,wsize=65536,retrans=5,timeo=600
 Attr cache:    acregmin=3,acregmax=60,acdirmin=30,acdirmax=60

root@solaris11:~#

NetVault 用firewall設定 for RHEL/Windows

NetVaultサーバをRHEL上にたてて、クライアントにNetAppとRHELとWindows Serverがいる場合のファイアウォール設定サンプル。

必要なポートについては「Netvault 13.1.2 管理ガイド NetVaultが使用するポートNetVault 12.0管理ガイド ファイアウォールの設定の例より流用。

NetVaultサーバ/クライアント間の基本的な通信はネットワークマネージャによりポート20031のTCP/UDPで行われる。
またクライアント上でコミュニケーションマネージャがポート20032 TCPを使用する。

また、NDMPバックアップの場合、NetVaultサーバ側でポート10000 TCPと40000 TCPを使用する。

設定はOS側のfirewall設定と、NetVault側のファイアウォール設定の2つを行う。

NetVault側ファイアウォール設定

NetVaultサーバ側は以下のように設定する。設定したあとはサービス再起動が必須。

デバイス待ち受けポート50100-50199
デバイス接続ポート50200-50299
メッセージ チャンネルの待ち受けポート50300-50399
メッセージ チャンネルの接続ポート50400-50499
NDMPコントロール チャンネルの接続ポート10000
NetVault NDMPデータ チャンネルの待ち受けポート40000
NetVaultマシン間の内部的な通信に使用するポート50500-50599

クライアント側はNDMP関連設定がなくでも良い。設定したあとはサービス再起動が必須。

デバイス待ち受けポート50100-50199
デバイス接続ポート50200-50299
メッセージ チャンネルの待ち受けポート50300-50399
メッセージ チャンネルの接続ポート50400-50499
NDMPコントロール チャンネルの接続ポート
NetVault NDMPデータ チャンネルの待ち受けポート
NetVaultマシン間の内部的な通信に使用するポート50500-50599

クライアント側のfirewallが動いている場合、NetVaultサーバからの設定変更を受け付けることができない。Windowsの場合はスタートメニューにある「NetVault Configurator」を起動して変更する。

Linuxの場合は、NetVaultクライアント側で「txtconfig」コマンドを実行して設定を変更する。(Windowsにもtxtconfigがあるが、日本語が文字化けをする)

txtconfigを実行すると以下のような画面が表示される。

「p」と入力すると、2枚目のメニューが表示される。この中の「19. ファイアウォール」を変更するため「19」と入力する。

上から順に設定を変更していく。

最後は「s」を入力し、変更を保存して終了する。(qだと設定を反映しない)

OS側firewall設定

サーバ側として以下を開ける
 ・8443 TCP (管理画面)
 ・10000 TCP (NDMP)
 ・40000 TCP (NDMP)
 ・20031-20032 TCP
 ・20031 UDP
 ・50100-50599 TCP

クライアント側は管理画面用の8443と、NDMP用の10000と40000の設定を抜く。

CentOS7クライアントの場合以下とした

# firewall-cmd --permanent --zone=public --add-port=8443/tcp
# firewall-cmd --permanent --zone=public --add-port=10000/tcp
# firewall-cmd --permanent --zone=public --add-port=40000/tcp
# firewall-cmd --permanent --zone=public --add-port=20031-20032/tcp
# firewall-cmd --permanent --zone=public --add-port=20031/udp
# firewall-cmd --permanent --zone=public --add-port=50100-50599/tcp
# firewall-cmd --reload

Windowsクライアントの場合以下とした。

netsh advfirewall firewall add rule name=”NVBU TCP in ports” dir=in protocol=tcp localport=20031-20032 action=allow
netsh advfirewall firewall add rule name=”NVBU TCP in ports” dir=in protocol=tcp localport=50100-50599 action=allow

netsh advfirewall firewall add rule name=”NVBU TCP out ports” dir=out protocol=tcp localport=20031-20032 action=allow
netsh advfirewall firewall add rule name=”NVBU TCP out ports” dir=out protocol=tcp localport=50100-50599 action=allow

netsh advfirewall firewall add rule name=”NVBU UDP in ports” dir=in protocol=udp localport=20031 action=allow
netsh advfirewall firewall add rule name=”NVBU UDP out ports” dir=out protocol=udp localport=20031 action=allow

最後にNetVaultのクライアント管理にてクライアント追加を行う際に「クライアントはファイアウォールの外側に存在」にチェックを入れることを忘れないこと。(入れないとNetVaultサーバからクライアントへのアクセスに指定したポートを使用しない)

vSphere ESXiで切断されたNFSに再接続する

NFSサーバが起動する前にESXiが起動してしまった場合、NFSが切断状態となる。

FCやiSCSIであれば勝手に再接続とかしてくれるが、NFSだと切れたままになる。

VMware KB「切断された NFS データストアの ESXi/ESX コマンド ラインからの再マウント (1005057)

一度NFSマウントの設定を削除して再設定する必要がある、とのこと。

VMware KBには「esxcli storage nfs list」といったコマンドが書かれているが、これはNFS v3.0向けのコマンドで、NFS v4.1については「esxcli storage nfs41 list」というようにコマンドを実行する必要があった。(以下、esxcli nfs41として記載しているが、NFS v3の場合はesxcli nfsで実行する)

まず、現在の設定を確認するため「esxcli storage nfs41 list」を実行

[root@esxiserver:~] esxcli storage nfs41 list
Volume Name  Host(s)        Share     Accessible  Mounted  Read-Only  Security   isPE  Hardware Acceleration
-----------  -------------  --------  ----------  -------  ---------  --------  -----  ---------------------
nfsv4test    172.17.44.108  /testvol       false    false      false  AUTH_SYS  false  Unknown
[root@esxiserver:~] 

エントリを削除するため「esxcli storage nfs41 remove –volume-name=nfsv4test」を実行

[root@esxiserver:~] esxcli storage nfs41 remove --volume-name=nfsv4test
[root@esxiserver:~] esxcli storage nfs41 list
[root@esxiserver:~] 

listで表示された内容をベースに「esxcli storage nfs41 add –volume-name=~ –hosts=~ –share=~ –sec=~」というように登録コマンドを実行する。

[root@esxiserver:~] esxcli storage nfs41 add --volume-name=nfsv4test --hosts=172
.17.44.108 --share=/testvol --sec=AUTH_SYS
[root@esxiserver:~] 

登録されたことを確認

[root@esxiserver:~] esxcli storage nfs41 list
Volume Name  Host(s)        Share     Accessible  Mounted  Read-Only  Security   isPE  Hardware Acceleration
-----------  -------------  --------  ----------  -------  ---------  --------  -----  ---------------------
nfsv4test    172.17.44.108  /testvol        true     true      false  AUTH_SYS  false  Supported
[root@esxiserver:~]

vSphere ESXiでNetApp ONTAP9のNFS4.1を使う

NetApp ONTAP 9.7環境にてNFS4.1を有効にして、vSphere ESXi 6.7のNFSデータストアにしてみた。

NetApp ONTAP9側

NFS 4.1有効化

ONTAP 9.7管理画面でNFSを有効にした場合、NFS v3.0のみが有効化されている。

プロトコルの「NFS」から編集を選ぶと以下の様に設定変更ができる。

とりあえず「バージョン4のサポートを有効にする」と「バージョン4.1のサポートを有効にする」にチェックを入れると下記のようになる。

「pNFS」にもチェックが入っている状態になるが、このまま設定する。

設定後のプロトコル表示は下記の様になる。

通常のNFSと同じくエクスポートルールの設定などはちゃんと行うこと。

ONTAPでNFS経由のVAAIを許可するエクスポート ポリシーの設定

NFS vStorage Support有効化

NetAppのStorage VM(SVM)に対してNFS vStorage Support(VAAI連携)を有効化する。

現在値の確認は「vserver nfs show -ins」で「NFS vStorage Support」の値を確認する。

ontap-select-cluster::> vserver nfs show -ins

                                        Vserver: svm0
                             General NFS Access: true
                                         NFS v3: enabled
                                       NFS v4.0: enabled
                                   UDP Protocol: enabled
                                   TCP Protocol: enabled
                           Default Windows User: -
                            NFSv4.0 ACL Support: disabled
                NFSv4.0 Read Delegation Support: disabled
               NFSv4.0 Write Delegation Support: disabled
                        NFSv4 ID Mapping Domain: defaultv4iddomain.com
            NFSv4 Grace Timeout Value (in secs): 45
Preserves and Modifies NFSv4 ACL (and NTFS File Permissions in Unified Security Style): enabled
                  NFSv4.1 Minor Version Support: enabled
                                  Rquota Enable: disabled
                   NFSv4.1 Parallel NFS Support: enabled
                            NFSv4.1 ACL Support: disabled
                           NFS vStorage Support: disabled
            NFSv4 Support for Numeric Owner IDs: enabled
                          Default Windows Group: -
                NFSv4.1 Read Delegation Support: disabled
               NFSv4.1 Write Delegation Support: disabled
                            NFS Mount Root Only: enabled
                                  NFS Root Only: disabled
            Permitted Kerberos Encryption Types: des, des3, aes-128, aes-256
                              Showmount Enabled: enabled
Set the Protocol Used for Name Services Lookups for Exports: udp
                    NFSv3 MS-DOS Client Support: disabled
     Idle Connection Timeout Value (in seconds): 360
             Are Idle NFS Connections Supported: disabled
Hide Snapshot Directory under NFSv3 Mount Point: disabled
           Provide Root Path as Showmount State: disabled

ontap-select-cluster::> 

vStorage Supportの項目だけ確認する場合は「vserver nfs show -fields vstorage」でも良い。

ontap-select-cluster::> vserver nfs show -fields vstorage
vserver vstorage
------- --------
svm0    disabled

ontap-select-cluster::>

有効にする場合は「vserver nfs modify -vserver SVM名 -vstorage enabled」を実行する。

ontap-select-cluster::> vserver nfs modify -vserver svm0 -vstorage enabled

ontap-select-cluster::> vserver nfs show

変更後は以下のような出力結果となる。

ontap-select-cluster::> vserver nfs show -ins

                                        Vserver: svm0
                             General NFS Access: true
                                         NFS v3: enabled
                                       NFS v4.0: enabled
                                   UDP Protocol: enabled
                                   TCP Protocol: enabled
                           Default Windows User: -
                            NFSv4.0 ACL Support: disabled
                NFSv4.0 Read Delegation Support: disabled
               NFSv4.0 Write Delegation Support: disabled
                        NFSv4 ID Mapping Domain: defaultv4iddomain.com
            NFSv4 Grace Timeout Value (in secs): 45
Preserves and Modifies NFSv4 ACL (and NTFS File Permissions in Unified Security Style): enabled
                  NFSv4.1 Minor Version Support: enabled
                                  Rquota Enable: disabled
                   NFSv4.1 Parallel NFS Support: enabled
                            NFSv4.1 ACL Support: disabled
                           NFS vStorage Support: enabled
            NFSv4 Support for Numeric Owner IDs: enabled
                          Default Windows Group: -
                NFSv4.1 Read Delegation Support: disabled
               NFSv4.1 Write Delegation Support: disabled
                            NFS Mount Root Only: enabled
                                  NFS Root Only: disabled
            Permitted Kerberos Encryption Types: des, des3, aes-128, aes-256
                              Showmount Enabled: enabled
Set the Protocol Used for Name Services Lookups for Exports: udp
                    NFSv3 MS-DOS Client Support: disabled
     Idle Connection Timeout Value (in seconds): 360
             Are Idle NFS Connections Supported: disabled
Hide Snapshot Directory under NFSv3 Mount Point: disabled
           Provide Root Path as Showmount State: disabled

ontap-select-cluster::> vserver nfs show -fields vstorage
vserver vstorage
------- --------
svm0    enabled

ontap-select-cluster::>

vSphere側

データストアの追加から「NFS」の「NFS 4.1」を追加する

VAAIプラグインを追加

ESXiに「NetApp NFS Plug-in for VMware VAAI」をインストールすることで、VAAI機能が有効になる。

すでにNFSマウントされているデータストアがVAAIでアクセスされているか確認するにはESXi shellでコマンドを実行する。

[root@esxiserver:~] esxcli storage nfs41 list
Volume Name  Host(s)        Share     Accessible  Mounted  Read-Only  Security   isPE  Hardware Acceleration
-----------  -------------  --------  ----------  -------  ---------  --------  -----  ---------------------
nfsv4test    172.17.44.108  /testvol        true     true      false  AUTH_SYS  false  Not Supported
[root@esxiserver:~]

「Hardware Acceleration」が「Not Supported」となっている場合、VAAIが有効な状態ではない。

また「vmkfstools -Ph /vmfs/volumes/<データストア名>」を実行した結果内の「NAS VAAI Supported」でも確認できる。

[root@esxiserver:~] vmkfstools -Ph /vmfs/volumes/nfsv4test
NFS41-4.01 (Raw Major Version: 0) file system spanning 1 partitions.
File system label (if any): nfsv4test
Mode: public
Capacity 50 GB, 48.0 GB available, file block size 4 KB, max supported file size 16.0 TB
Disk Block Size: 512/512/0
UUID: a135f63e-34806068-0000-000000000000
Partitions spanned (on "notDCS"):
        NFS41:a135f63e-34806068-0000-000000000000
NAS VAAI Supported: NO
Is Native Snapshot Capable: NO
[root@esxiserver:~]

ESXi shellからVAAIプラグインをインストールする。

[root@esxiserver:~] esxcli software vib install -d /vmfs/volumes/software/netapp
/nfs_plugin_VAAI/1.1.2/NetAppNasPlugin.v23.zip
Installation Result
   Message: The update completed successfully, but the system needs to be rebooted for the changes to be effective.
   Reboot Required: true
   VIBs Installed: NetApp_bootbank_NetAppNasPlugin_1.1.2-3
   VIBs Removed:
   VIBs Skipped:
[root@esxiserver:~]

「Reboot Required: true」と再起動が要求されたので、ESXiを再起動します。

再起動後、「esxcli storage nfs41 list」で確認すると「Hardware Acceleration Supported」。

[root@esxiserver:~] esxcli storage nfs41 list
Volume Name  Host(s)        Share     Accessible  Mounted  Read-Only  Security   isPE  Hardware Acceleration
-----------  -------------  --------  ----------  -------  ---------  --------  -----  ---------------------
nfsv4test    172.17.44.108  /testvol        true     true      false  AUTH_SYS  false  Supported
[root@esxiserver:~]

「vmkfstools -Ph /vmfs/volumes/<データストア名>」は「NAS VAAI Supported: YES」に変わります。

[root@esxiserver:~] vmkfstools -Ph /vmfs/volumes/nfsv4test
NFS41-4.01 (Raw Major Version: 0) file system spanning 1 partitions.
File system label (if any): nfsv4test
Mode: public
Capacity 50 GB, 48.0 GB available, file block size 4 KB, max supported file size 16.0 TB
Disk Block Size: 512/512/0
UUID: a135f63e-34806068-0000-000000000000
Partitions spanned (on "notDCS"):
        NFS41:a135f63e-34806068-0000-000000000000
NAS VAAI Supported: YES
Is Native Snapshot Capable: YES
[root@esxiserver:~]

2020/08/04追記

export policy関連設定

svmのrootボリュームのexport policyをread onlyの0.0.0.0/0にして、vSphere用NFS共有のexport policyをread/write 0.0.0.0/0にしておいたところ、ESXi 7.0からのNFS4.1データストア登録に失敗。

svmのrootボリュームへの書き込み権限も必要だった。

ONTAP 9.5でsambaドメインに参加できない & ONTAP 9.7で失敗

samba 4.11.6で作ったActive DirectoryにONTAP 9.5を参加させようとするとエラーになる。

ONTAP API が失敗しました: Failed to create the Active Directory machine account "ファイルサーバ名". Reason: LDAP Error: Strong authentication is required Details: Error: Machine account creation procedure failed [ 136] Loaded the preliminary configuration. [ 215] Successfully connected to ip ADサーバIP, port 88 using TCP [ 284] Successfully connected to ip ADサーバIP, port 389 using TCP [ 308] Unable to connect to LDAP (Active Directory) service on ADサーバホスト名 (Error: Strong(er) authentication required) **[ 308] FAILURE: Unable to make a connection (LDAP (Active ** Directory):AD名), result: 7609 . (エラー:13001)

調べたところ、sambaのglobal設定で「ldap server require strong auth = no」を設定する、とのこと。

これを設定し、sambaを再起動したところ、参加できた。


ONTAP 9.7にて、上記手順を実施した上で参加を試みたところ「Unable to connect to NetLogon service on」というエラーになった。

netapp::> vserver cifs create -vserver ファイルサーバ名 -cifs-server ファイルサーバ名 -domain AD名 -ou CN=Computers -default-site "" -status-admin up -comment "" -netbios-aliases ファイルサーバ名

In order to create an Active Directory machine account for the CIFS server, you
must supply the name and password of a Windows account with sufficient
privileges to add computers to the "CN=Computers" container within the
"AD名" domain.

Enter the user name: administrator

Enter the password:

Warning: An account by this name already exists in Active Directory at
         CN=ファイルサーバ名,CN=Computers,DC=xx,DC=xx.
         If there is an existing DNS entry for the name ファイルサーバ名, it must be
         removed. Data ONTAP cannot remove such an entry.
         Use an external tool to remove it after this command completes.
         Ok to reuse this account? {y|n}: y

Error: Machine account creation procedure failed
  [    31] Loaded the preliminary configuration.
  [   107] Created a machine account in the domain
  [   108] SID to name translations of Domain Users and Admins
           completed successfully
  [   113] Modified account 'cn=ファイルサーバ名,CN=Computers,dc=xx
           =CO,dc=JP'
  [   114] Successfully connected to ip xx.xx.xx.xx, port 88 using
           TCP
  [   129] Successfully connected to ip xx.xx.xx.xx, port 464
           using TCP
  [   216] Kerberos password set for 'ファイルサーバ名$@AD名'
           succeeded
  [   216] Set initial account password
  [   223] Successfully connected to ip xx.xx.xx.xx, port 445
           using TCP
  [   274] Successfully connected to ip xx.xx.xx.xx, port 88 using
           TCP
  [   297] Successfully authenticated with DC
           adserver.AD名
  [   322] Unable to connect to NetLogon service on
           adserver.AD名 (Error:
           RESULT_ERROR_GENERAL_FAILURE)
**[   322] FAILURE: Unable to make a connection
**         (NetLogon:AD名), result: 3
  [   322] Unable to make a NetLogon connection to
           adserver.AD名 using the new machine account

Error: command failed: Failed to create the Active Directory machine account
       "ファイルサーバ名". Reason: general failure.

netapp::>

このとき「vserver cifs security show -vserver ファイルサーバ名」で確認する「SMB? Enabled for DC Connections」は下記の通り。

netapp::> vserver cifs security show -vserver ファイルサーバ名

Vserver: ファイルサーバ名

                            Kerberos Clock Skew:                   - minutes
                            Kerberos Ticket Age:                   - hours
                           Kerberos Renewal Age:                   - days
                           Kerberos KDC Timeout:                   - seconds
                            Is Signing Required:                   -
                Is Password Complexity Required:                   -
           Use start_tls for AD LDAP connection:               false
                      Is AES Encryption Enabled:               false
                         LM Compatibility Level:  lm-ntlm-ntlmv2-krb
                     Is SMB Encryption Required:                   -
                        Client Session Security:                none
                SMB1 Enabled for DC Connections:               false
                SMB2 Enabled for DC Connections:      system-default
  LDAP Referral Enabled For AD LDAP connections:               false
               Use LDAPS for AD LDAP connection:               false

netapp::>

「SMB1 Enabled for DC Connections」をtrueに変更しても状況は変わらず。

Sambaサーバの /usr/local/samba/var/log.samba を確認すると、以下の出力があった。

[2020/08/07 14:26:55.226653,  0] ../../source4/rpc_server/netlogon/dcerpc_netlogon.c:284(dcesrv_netr_ServerAuthenticate3_helper)
  dcesrv_netr_ServerAuthenticate3_helper: schannel required but client failed to offer it. Client was ファイルサーバ名$

「schannel」というオプションが必要らしい。

Netlogon Issue “schannel required”」を参考に設定してみたところ、schannelというオプションはないというエラー…「Bug 13464 – smb.conf-configuration “server schannel = auto” needed in future versions」を見ると「server schannel = auto」が正しい模様。

/usr/local/samba/etc/smb.conf を下記の様に修正して、sambaを再起動したところ、ONTAP 9.7でのActive Directoryの参加が可能になった。

# Global parameters
[global]
        netbios name = ADサーバ名
        realm = AD名
        server role = active directory domain controller
        workgroup = AD名
        idmap_ldb:use rfc2307 = yes
        ldap server require strong auth = no
        server schannel = auto

[netlogon]
        path = /usr/local/samba/var/locks/sysvol/AD名/scripts
        read only = No

[sysvol]
        path = /usr/local/samba/var/locks/sysvol
        read only = No

モバイルバージョンを終了