CentOS 7 / Oracle Linux 7でWordPressサーバを建てる

この間、Oracle Linux 7ベースのOracle Autonomouse Linux 環境にWordPressサーバを建てる手順を書いたけど、そういえばベースとなるCent OS 7(Oracle Linux 7)環境でWordpressサーバを建てる手順を書いたことなかったな、と書いてみる。

前準備

CentOS7として基本的な設定を行っていく。

準備1:パッケージのアップデート

インストール済みのパッケージを最新にするため「yum update」を実行する

$ sudo yum update -y

準備2:日本時間にする

日本に住んでいる場合、日本時間表記の方が使いやすいので、OSも日本時間表示に設定する。

$ sudo timedatectl set-timezone Japan

変更されたことを確認するには「timedatectl」を実行する。

$ timedatectl
      Local time: Tue 2020-07-07 10:04:40 JST
  Universal time: Tue 2020-07-07 01:04:40 UTC
        RTC time: Tue 2020-07-07 01:04:38
       Time zone: Japan (JST, +0900)
     NTP enabled: yes
NTP synchronized: yes
 RTC in local TZ: no
      DST active: n/a
$

準備3:パッケージの自動アップデート設定をする

方針にもよりますが、最近は死ぬパッケージが配布されることは少ないので、自動アップデートしてしまえ、と、yum-cronによる自動アップデート設定を入れています。

まず、yum-cron パッケージをインストールします。

$ sudo yum install yum-cron

次に /etc/yum/yum-cron.conf を編集して自動アップデートを有効にします。

$ sudo vi /etc/yum/yum-cron.conf

ファイル内にある「apply_updates = no」を「apply_updates = yes」に変更します。

変更後の該当部分は以下の様になります。

# Whether updates should be applied when they are available.  Note
# that download_updates must also be yes for the update to be applied.
apply_updates = yes

準備4:EPELレポジトリの追加

EPELレポジトリが必要になるので追加します。

$ sudo yum install epel-release

注:RHEL 7の場合は epelパッケージをダウンロードしてインストールします。

また、後述するphpおよびMariaDBのインストールでは、ol7_addons収録のoniguruma-5.9.5 を使用します。epel収録のoniguruma-6.8.2では依存関係解決でエラーとなりますので、epel収録のonigurumaを使用しないよう設定します。

設定は /etc/yum.repos.d/epel.repo の[epel]に対して「exclude=oniguruma」という記述を追加します。

[epel]
name=Extra Packages for Enterprise Linux 7 - $basearch
#baseurl=http://download.fedoraproject.org/pub/epel/7/$basearch
metalink=https://mirrors.fedoraproject.org/metalink?repo=epel-7&arch=$basearch&infra=$infra&content=$contentdir
failovermethod=priority
enabled=1
gpgcheck=1
gpgkey=file:///etc/pki/rpm-gpg/RPM-GPG-KEY-EPEL-7
exclude=oniguruma

インターネット公開用準備

インターネット公開にあたりやっておいた方が良いことです。

fail2ban導入

公開サーバには各種アタックが頻繁にやってきます。管理用sshポートにも行われ無駄にCPU資源とトラフィックを食われます。

多少なりとも低減した方がいいので、fail2banというEPELレポジトリに含まれるソフトウェアを導入します。

fail2banは、ログイン失敗ログなどを監視し、一定数を超えたら該当するIPアドレスからのアクセスを一定期間受け付けなくする仕組みです。

$  sudo yum install fail2ban

fail2banの設定は /etc/fail2ban/ にあり、fail2ban.confやjail.confなどがあります。

しかし、ユーザ側で設定を追加修正したい場合はこれらのファイルを直接編集するのではなく、 /etc/fail2ban/jail.local というファイルを作成してそこに行っていきます。

$ sudo vi /etc/fail2ban/jail.local

/etc/fail2ban/jail.localには下記の様な内容を記載します。

[DEFAULT]
# 86400秒=24時間以内に5回不審なアクセスがあったら24時間BAN
bantime  = 86400
findtime  = 86400
maxretry = 5
# 259200秒=3日以内に5回不審なアクセスがあったら3日間BAN
#bantime  = 259200
#findtime  = 259200
#maxretry = 5

# 除外IP
ignoreip = 127.0.0.1 127.0.0.0/8 10.0.0.0/8 172.16.0.0/12 192.168.0.0/16 <既知>の固定IPがあれば追加>

[sshd]
enabled = true
banaction = firewallcmd-ipset

bantime/findtimeは2種類書いてありますが、まずは24時間で設定して、管理アクセス等に問題がないことを確認したら3日に変更するなどしてください。

設定が終わったらfail2banサービスを起動するための設定を入れていきます。

まず、初期状態は起動しない設定であるためenableに変更します。

$ systemctl list-unit-files|grep fail
fail2ban.service                              disabled
$ sudo systemctl enable fail2ban.service
Created symlink from /etc/systemd/system/multi-user.target.wants/fail2ban.service to /usr/lib/systemd/system/fail2ban.service.
$ systemctl list-unit-files|grep fail
fail2ban.service                              enabled
$

次にfail2banを起動します。

$ systemctl status fail2ban.service
● fail2ban.service - Fail2Ban Service
   Loaded: loaded (/usr/lib/systemd/system/fail2ban.service; enabled; vendor preset: disabled)
   Active: inactive (dead)
     Docs: man:fail2ban(1)
$ sudo systemctl start fail2ban.service
$ systemctl status fail2ban.service
● fail2ban.service - Fail2Ban Service
   Loaded: loaded (/usr/lib/systemd/system/fail2ban.service; enabled; vendor preset: disabled)
   Active: active (running) since Tue 2020-07-07 10:23:36 JST; 2s ago
     Docs: man:fail2ban(1)
  Process: 2099 ExecStartPre=/bin/mkdir -p /run/fail2ban (code=exited, status=0/SUCCESS)
 Main PID: 2100 (f2b/server)
   CGroup: /system.slice/fail2ban.service
           mq2100 /usr/bin/python -s /usr/bin/fail2ban-server -xf start

Jul 07 10:23:36 phoenix-websa-jp systemd[1]: Starting Fail2Ban Service...
Jul 07 10:23:36 phoenix-websa-jp systemd[1]: Started Fail2Ban Service.
Jul 07 10:23:37 phoenix-websa-jp fail2ban-server[2100]: Server ready

動作確認を行います。

わざとパスワードを間違えるなどして /var/log/fail2ban.log にログが出力されることを確認します。

Webサーバ用ポート公開設定

標準ではdhcpv6-clientとsshのポートしか公開されていないため、Webサーバを建てても外部からアクセスできません。

http(ポート80)とhttps(ポート443)を公開する設定を行います。

まず現状を確認します。

$ sudo firewall-cmd --list-all
public (active)
  target: default
  icmp-block-inversion: no
  interfaces: ens3
  sources:
  services: dhcpv6-client ssh
  ports:
  protocols:
  masquerade: no
  forward-ports:
  source-ports:
  icmp-blocks:
  rich rules:
$ 

httpとhttpsの公開設定を入れます。

$ sudo firewall-cmd --permanent --zone=public --add-service=http
success
$ sudo firewall-cmd --permanent --zone=public --add-service=https
success
$

reloadを行って設定を反映します。

$ sudo firewall-cmd --reload
success
$ sudo firewall-cmd --list-all
public (active)
  target: default
  icmp-block-inversion: no
  interfaces: ens3
  sources:
  services: dhcpv6-client http https ssh
  ports:
  protocols:
  masquerade: no
  forward-ports:
  source-ports:
  icmp-blocks:
  rich rules:
$

php 7.4追加編

Oralce Linux 7だと簡単に追加できたりするPHP Packages for Oracle Linuxを利用する。

/etc/yum.repos.d/oracle-php.repo というファイルを作って下記を記載する。(sudo vi /etc/yum.repos.d/oracle-php.repo )

[ol7_developer_php74]
name=Oracle Linux $releasever PHP 7.4 Packages for Development and test ($basearch)
baseurl=https://yum.oracle.com/repo/OracleLinux/OL7/developer/php74/$basearch/
#gpgkey=file:///etc/pki/rpm-gpg/RPM-GPG-KEY-oracle
gpgcheck=0
enabled=1

[ol7_addons]
name=Oracle Linux $releasever Add ons ($basearch)
baseurl=https://yum.oracle.com/repo/OracleLinux/OL7/addons/$basearch/
#gpgkey=file:///etc/pki/rpm-gpg/RPM-GPG-KEY-oracle
gpgcheck=0
enabled=1

上記では「ol7_developer_php74」と「ol7_addons」を追加しているが、ol7_addonsの方はMariaDBのインストール時にも必要になるレポジトリとなる。

phpをインストールします。あとでWordpressから要求されるパッケージもあるのでいろいろインストールします。(php-pecl-imagick と php-mbstring はパッケージの依存の問題でインストール不可だった )

$ sudo yum install php php-json php-bcmath php-pear-Net-Curl php-gd php-mbstring
<略>
--> Finished Dependency Resolution

Dependencies Resolved

================================================================================
 Package                 Arch   Version               Repository           Size
================================================================================
Installing:
 php                     x86_64 7.4.7-1.0.1.el7       ol7_developer_php74 3.4 M
 php-bcmath              x86_64 7.4.7-1.0.1.el7       ol7_developer_php74  56 k
 php-gd                  x86_64 7.4.7-1.0.1.el7       ol7_developer_php74  72 k
 php-json                x86_64 7.4.7-1.0.1.el7       ol7_developer_php74  58 k
 php-pear-Net-Curl       noarch 1.2.5-10.el7          epel                 13 k
 php-mbstring            x86_64 7.4.7-1.0.1.el7       ol7_developer_php74  500 k
Installing for dependencies:
 apr                     x86_64 1.4.8-5.el7           base                103 k
 apr-util                x86_64 1.5.2-6.el7           base                 92 k
 dejavu-fonts-common     noarch 2.33-6.el7            base                 64 k
 dejavu-sans-fonts       noarch 2.33-6.el7            base                1.4 M
 fontconfig              x86_64 2.13.0-4.3.el7        base                254 k
 fontpackages-filesystem noarch 1.44-8.el7            base                9.9 k
 gd-last                 x86_64 2.1.1-2.el7           ol7_developer_php74 140 k
 httpd                   x86_64 2.4.6-93.el7.centos   base                2.7 M
 httpd-tools             x86_64 2.4.6-93.el7.centos   base                 92 k
 jbigkit-libs            x86_64 2.0-11.el7            base                 46 k
 libX11                  x86_64 1.6.7-2.el7           base                607 k
 libX11-common           noarch 1.6.7-2.el7           base                164 k
 libXau                  x86_64 1.0.8-2.1.el7         base                 29 k
 libXpm                  x86_64 3.5.12-1.el7          base                 55 k
 libjpeg-turbo           x86_64 1.2.90-8.el7          base                135 k
 libtiff                 x86_64 4.0.3-32.el7          base                171 k
 libvpx                  x86_64 1.3.0-5.el7_0         base                498 k
 libxcb                  x86_64 1.13-1.el7            base                214 k
 libxslt                 x86_64 1.1.28-5.el7          base                242 k
 mailcap                 noarch 2.1.41-2.el7          base                 31 k
 php-cli                 x86_64 7.4.7-1.0.1.el7       ol7_developer_php74 5.1 M
 php-common              x86_64 7.4.7-1.0.1.el7       ol7_developer_php74 1.1 M
 php-pear                noarch 1:1.9.4-21.el7        base                357 k
 php-process             x86_64 7.4.7-1.0.1.el7       ol7_developer_php74  76 k
 php-xml                 x86_64 7.4.7-1.0.1.el7       ol7_developer_php74 185 k
 oniguruma               x86_64 5.9.5-3.el7           ol7_addons          128 k

Transaction Summary
================================================================================
Install  6 Packages (+26 Dependent packages)

Total download size: 17 M
Installed size: 68 M
Is this ok [y/d/N]: y
<略>
$

この操作によりWebサーバもインストールされている。

なお、php-mbstringのインストールで失敗する場合、epel収録のoniguruma 6がインストールされているか、oniguruma 5がレポジトリ内に見つからない、というものです。

oniguruma 5はol7_addonに含まれます。

MariaDB設定編

CentOS7ではmariadb 5.5.65が用意されている。しかし、このバージョンはWordPress推奨ではないため、最新版のMariaDBをMariaDB Foundationから入手しインストールする。

「/etc/yum.repos.d/mariadb.repo」というファイルを作り、以下の内容を入力。(sudo vi /etc/yum.repos.d/mariadb.repo)

# MariaDB 10.5 CentOS repository list - created 2020-07-07 02:24 UTC
# http://downloads.mariadb.org/mariadb/repositories/
[mariadb]
name = MariaDB
baseurl = http://yum.mariadb.org/10.5/centos7-amd64
gpgkey=https://yum.mariadb.org/RPM-GPG-KEY-MariaDB
gpgcheck=1

そして、mariadb-serverをインストールします。

$ sudo yum install MariaDB-server MariaDB-client
<略>
--> Finished Dependency Resolution

Dependencies Resolved

================================================================================
 Package                    Arch      Version                  Repository  Size
================================================================================
Installing:
 MariaDB-client             x86_64    10.5.4-1.el7.centos      mariadb     13 M
 MariaDB-compat             x86_64    10.5.4-1.el7.centos      mariadb    2.2 M
     replacing  mariadb-libs.x86_64 1:5.5.65-1.el7
 MariaDB-server             x86_64    10.5.4-1.el7.centos      mariadb     26 M
Installing for dependencies:
 MariaDB-common             x86_64    10.5.4-1.el7.centos      mariadb     81 k
 boost-program-options      x86_64    1.53.0-28.el7            base       156 k
 galera-4                   x86_64    26.4.5-1.el7.centos      mariadb    9.5 M
 pcre2                      x86_64    10.23-2.el7              base       201 k
 perl-Compress-Raw-Bzip2    x86_64    2.061-3.el7              base        32 k
 perl-Compress-Raw-Zlib     x86_64    1:2.061-4.el7            base        57 k
 perl-DBI                   x86_64    1.627-4.el7              base       802 k
 perl-Data-Dumper           x86_64    2.145-3.el7              base        47 k
 perl-IO-Compress           noarch    2.061-2.el7              base       260 k
 perl-Net-Daemon            noarch    0.48-5.el7               base        51 k
 perl-PlRPC                 noarch    0.2020-14.el7            base        36 k
 socat                      x86_64    1.7.3.2-2.el7            base       290 k

Transaction Summary
================================================================================
Install  3 Packages (+12 Dependent packages)

Total download size: 52 M
Is this ok [y/d/N]: y
<略>
$

MariaDBサーバの自動起動を設定します。

$ systemctl list-unit-files|grep mariadb
mariadb.service                               disabled
mariadb@.service                              disabled
$ sudo systemctl enable mariadb.service
Created symlink from /etc/systemd/system/multi-user.target.wants/mariadb.service to /usr/lib/systemd/system/mariadb.service.
$ systemctl list-unit-files|grep mariadb
mariadb.service                               enabled
mariadb@.service                              disabled
$

MariaDBを起動します。

$ systemctl status mariadb.service
● mariadb.service - MariaDB 10.5.4 database server
   Loaded: loaded (/usr/lib/systemd/system/mariadb.service; enabled; vendor preset: disabled)
  Drop-In: /etc/systemd/system/mariadb.service.d
           mqmigrated-from-my.cnf-settings.conf
   Active: inactive (dead)
     Docs: man:mariadbd(8)
           https://mariadb.com/kb/en/library/systemd/
$ sudo systemctl start mariadb.service
$ systemctl status mariadb.service
● mariadb.service - MariaDB 10.5.4 database server
   Loaded: loaded (/usr/lib/systemd/system/mariadb.service; enabled; vendor preset: disabled)
  Drop-In: /etc/systemd/system/mariadb.service.d
           mqmigrated-from-my.cnf-settings.conf
   Active: active (running) since Tue 2020-07-07 11:30:10 JST; 1s ago
     Docs: man:mariadbd(8)
           https://mariadb.com/kb/en/library/systemd/
  Process: 32580 ExecStartPost=/bin/sh -c systemctl unset-environment _WSREP_START_POSITION (code=exited, status=0/SUCCESS)
  Process: 32554 ExecStartPre=/bin/sh -c [ ! -e /usr/bin/galera_recovery ] && VAR= ||   VAR=`cd /usr/bin/..; /usr/bin/galera_recovery`; [ $? -eq 0 ]   && systemctl set-environment _WSREP_START_POSITION=$VAR || exit 1 (code=exited, status=0/SUCCESS)
  Process: 32552 ExecStartPre=/bin/sh -c systemctl unset-environment _WSREP_START_POSITION (code=exited, status=0/SUCCESS)
 Main PID: 32565 (mariadbd)
   Status: "Taking your SQL requests now..."
   CGroup: /system.slice/mariadb.service
           mq32565 /usr/sbin/mariadbd

Jul 07 11:30:10 phoenix-websa-jp mariadbd[32565]: 2020-07-07 11:30:10 0 [Note...
Jul 07 11:30:10 phoenix-websa-jp mariadbd[32565]: Version: '10.5.4-MariaDB'  ...
Jul 07 11:30:10 phoenix-websa-jp systemd[1]: Started MariaDB 10.5.4 database....
Hint: Some lines were ellipsized, use -l to show in full.
$

最後にWordpress用データベースを作成します。

$ sudo mysql -u root
Welcome to the MariaDB monitor.  Commands end with ; or \g.
Your MariaDB connection id is 4
Server version: 10.5.4-MariaDB MariaDB Server

Copyright (c) 2000, 2018, Oracle, MariaDB Corporation Ab and others.

Type 'help;' or '\h' for help. Type '\c' to clear the current input statement.

MariaDB [(none)]> create database DB名 character set utf8;
Query OK, 1 row affected (0.000 sec)

MariaDB [(none)]> grant all on DB名.* to wordpress@localhost identified by 'パスワード';
Query OK, 0 rows affected (0.002 sec)

MariaDB [(none)]> quit
Bye
$

Webサーバ SSL設定編

昨今のWebサーバはSSL化が必須です。

Let’s Encriptを利用したSSL化が使用しやすいですが、certbotだと仕組みが大がかりになってしまうので小回りが利くshellベースのdehydratedを使用します。

EPELレポジトリに含まれているため導入は簡単です。

$ sudo yum install dehydrated
<略>--> Finished Dependency Resolution

Dependencies Resolved

================================================================================
 Package             Arch            Version                Repository     Size
================================================================================
Installing:
 dehydrated          noarch          0.6.5-1.el7            epel           85 k

Transaction Summary
================================================================================
Install  1 Package

Total download size: 85 k
Installed size: 164 k
Is this ok [y/d/N]: y
<略>
$

dehydratedによるSSL証明書取得処理には /var/www/dehydrated が使用されるためディレクトリを作成します。

$ sudo mkdir  /var/www/dehydrated

http://~/.well-known/acme-challenge でアクセスした時に上記ディレクトリが開くようApacheの設定を /etc/httpd/conf.d/dehydrated.conf として作成します。(sudo vi /etc/httpd/conf.d/dehydrated.conf )

Alias /.well-known/acme-challenge /var/www/dehydrated
<Directory /var/www/dehydrated/>
</Directory>

Webサーバが自動起動するように設定します。

$ systemctl list-unit-files |grep http
httpd.service                                 disabled
$ sudo systemctl enable httpd.service
Created symlink from /etc/systemd/system/multi-user.target.wants/httpd.service to /usr/lib/systemd/system/httpd.service.
$ systemctl list-unit-files |grep http
httpd.service                                 enabled
$

続いてWebサーバを起動します。

$ systemctl status httpd.service
● httpd.service - The Apache HTTP Server
   Loaded: loaded (/usr/lib/systemd/system/httpd.service; enabled; vendor preset: disabled)
   Active: inactive (dead)
     Docs: man:httpd(8)
           man:apachectl(8)
$ sudo systemctl start httpd.service
$ systemctl status httpd.service
● httpd.service - The Apache HTTP Server
   Loaded: loaded (/usr/lib/systemd/system/httpd.service; enabled; vendor preset: disabled)
   Active: active (running) since Tue 2020-07-07 10:55:23 JST; 14s ago
     Docs: man:httpd(8)
           man:apachectl(8)
 Main PID: 30854 (httpd)
   Status: "Total requests: 0; Current requests/sec: 0; Current traffic:   0 B/sec"
   CGroup: /system.slice/httpd.service
           tq30854 /usr/sbin/httpd -DFOREGROUND
           tq30855 /usr/sbin/httpd -DFOREGROUND
           tq30856 /usr/sbin/httpd -DFOREGROUND
           tq30857 /usr/sbin/httpd -DFOREGROUND
           tq30858 /usr/sbin/httpd -DFOREGROUND
           mq30859 /usr/sbin/httpd -DFOREGROUND

Jul 07 10:55:22 phoenix-websa-jp systemd[1]: Starting The Apache HTTP Server...
Jul 07 10:55:23 phoenix-websa-jp systemd[1]: Started The Apache HTTP Server.
Hint: Some lines were ellipsized, use -l to show in full.
$

SSL証明書を発行するホスト名を /etc/dehydrated/domains.txt に記載する。(sudo vi /etc/dehydrated/domains.txt)

1行に複数のホスト名を記載するとaliasになります。

登録作業を開始します。

$ sudo dehydrated --register
# INFO: Using main config file /etc/dehydrated/config
# INFO: Using additional config file /etc/dehydrated/conf.d/local.sh

To use dehydrated with this certificate authority you have to agree to their terms of service which you can find here: https://letsencrypt.org/documents/LE-SA-v1.2-November-15-2017.pdf

To accept these terms of service run `/bin/dehydrated --register --accept-terms`.
$
$ sudo dehydrated --register --accept-terms
# INFO: Using main config file /etc/dehydrated/config
# INFO: Using additional config file /etc/dehydrated/conf.d/local.sh
+ Generating account key...
+ Registering account key with ACME server...
+ Fetching account ID...
+ Done!
$

初回のSSL証明書発行処理を実行します。

$ sudo dehydrated --cron
# INFO: Using main config file /etc/dehydrated/config
# INFO: Using additional config file /etc/dehydrated/conf.d/local.sh
 + Creating chain cache directory /etc/dehydrated/chains
Processing phoenix.websa.jp
 + Creating new directory /etc/dehydrated/certs/phoenix.websa.jp ...
 + Signing domains...
 + Generating private key...
 + Generating signing request...
 + Requesting new certificate order from CA...
 + Received 1 authorizations URLs from the CA
 + Handling authorization for phoenix.websa.jp
 + 1 pending challenge(s)
 + Deploying challenge tokens...
 + Responding to challenge for phoenix.websa.jp authorization...
 + Challenge is valid!
 + Cleaning challenge tokens...
 + Requesting certificate...
 + Checking certificate...
 + Done!
 + Creating fullchain.pem...
 + Done!
$

/etc/dehydrated/certs/ にdomais.txtの各行の一番最初に書いたホスト名のディレクトリが作られており、その中に証明書が配置されています。

$ sudo ls -l /etc/dehydrated/certs/
total 0
drwx------. 2 root root 239 Jul  7 11:04 phoenix.websa.jp
$ sudo ls -l /etc/dehydrated/certs/phoenix.websa.jp/
total 20
-rw-------. 1 root root 1655 Jul  7 11:04 cert-1594087457.csr
-rw-------. 1 root root 2256 Jul  7 11:04 cert-1594087457.pem
lrwxrwxrwx. 1 root root   19 Jul  7 11:04 cert.csr -> cert-1594087457.csr
lrwxrwxrwx. 1 root root   19 Jul  7 11:04 cert.pem -> cert-1594087457.pem
-rw-------. 1 root root 1648 Jul  7 11:04 chain-1594087457.pem
lrwxrwxrwx. 1 root root   20 Jul  7 11:04 chain.pem -> chain-1594087457.pem
-rw-------. 1 root root 3904 Jul  7 11:04 fullchain-1594087457.pem
lrwxrwxrwx. 1 root root   24 Jul  7 11:04 fullchain.pem -> fullchain-1594087457.pem
-rw-------. 1 root root 3243 Jul  7 11:04 privkey-1594087457.pem
lrwxrwxrwx. 1 root root   22 Jul  7 11:04 privkey.pem -> privkey-1594087457.pem
$

なお、Let’s EncryptのSSL証明書は有効期限90日ですが、 /etc/cron.d/dehydrated に更新処理が設定されています。

Apacheに対する設定変更

phpインストール時に導入されたのはhttpのみで、httpsアクセスに関連するモジュール(mod_ssl)はインストールされていません。

$ sudo yum install mod_ssl
<略>
$

mod_sslによりSSL設定ファイルが /etc/httpd/conf.d/ssl.conf に配置されます。

しかし今どきじゃないようなので、ApacheのSSL対応設定をMozilla SSL Configuration Generatorベースの設定をssl-mozilla.confとして記載します。

$ sudo vi /etc/httpd/conf.d/ssl-mozilla.conf 

記載する内容は下記の様になる。

# generated 2020-07-07, Mozilla Guideline v5.4, Apache 2.4.6, OpenSSL 1.0.2k, intermediate configuration, no OCSP
# https://ssl-config.mozilla.org/#server=apache&version=2.4.6&config=intermediate&openssl=1.0.2k&ocsp=false&guideline=5.4

# this configuration requires mod_ssl, mod_rewrite, and mod_headers
<VirtualHost *:80>
    RewriteEngine On
    RewriteRule ^(.*)$ https://%{HTTP_HOST}$1 [R=301,L]
</VirtualHost>

<VirtualHost *:443>
    SSLEngine on
    SSLCertificateFile      /etc/dehydrated/certs/<ホスト名>/cert.pem
    SSLCertificateChainFile /etc/dehydrated/certs/<ホスト名>/chain.pem
    SSLCertificateKeyFile   /etc/dehydrated/certs/<ホスト名>/privkey.pem

    # HTTP Strict Transport Security (mod_headers is required) (63072000 seconds)
    Header always set Strict-Transport-Security "max-age=63072000"
</VirtualHost>

# intermediate configuration
SSLProtocol             all -SSLv3 -TLSv1 -TLSv1.1
SSLCipherSuite          ECDHE-ECDSA-AES128-GCM-SHA256:ECDHE-RSA-AES128-GCM-SHA256:ECDHE-ECDSA-AES256-GCM-SHA384:ECDHE-RSA-AES256-GCM-SHA384:ECDHE-ECDSA-CHACHA20-POLY1305:ECDHE-RSA-CHACHA20-POLY1305:DHE-RSA-AES128-GCM-SHA256:DHE-RSA-AES256-GCM-SHA384
SSLHonorCipherOrder     off

変更後、Webサービスを再起動する。

$ sudo systemctl restart httpd
$

WordPress導入

EPELレポジトリにWordPressパッケージがありますがバージョンが5.1.6と古く、また、WordPress管理画面からのアップデートとのバッティング問題がありますので、パッケージは使用しません。

/var/www/htmlにwordpressのtar.gzを展開します。

$ cd /var/www/html
$ sudo wget https://wordpress.org/latest.tar.gz
$ ls
latest.tar.gz
$ sudo tar xfz latest.tar.gz
$ ls
latest.tar.gz  wordpress
$ sudo rm latest.tar.gz
$ ls -l
total 4
drwxr-xr-x. 5 nobody nfsnobody 4096 Jun 11 06:48 wordpress
$

WordPressディレクトリの所有者をWebサービスのユーザである「apache」に変更します。

$ ps -ef|grep http
root     32093     1  0 11:17 ?        00:00:00 /usr/sbin/httpd -DFOREGROUND
apache   32094 32093  0 11:17 ?        00:00:00 /usr/sbin/httpd -DFOREGROUND
apache   32095 32093  0 11:17 ?        00:00:00 /usr/sbin/httpd -DFOREGROUND
apache   32096 32093  0 11:17 ?        00:00:00 /usr/sbin/httpd -DFOREGROUND
apache   32097 32093  0 11:17 ?        00:00:00 /usr/sbin/httpd -DFOREGROUND
apache   32098 32093  0 11:17 ?        00:00:00 /usr/sbin/httpd -DFOREGROUND
apache   32103 32093  0 11:18 ?        00:00:00 /usr/sbin/httpd -DFOREGROUND
apache   32113 32093  0 11:19 ?        00:00:00 /usr/sbin/httpd -DFOREGROUND
opc      32700  1911  0 11:38 pts/0    00:00:00 grep --color=auto http
$ sudo chown -R apache:apache wordpress
$ ls -l
total 4
drwxr-xr-x. 5 apache apache 4096 Jun 11 06:48 wordpress
$

/var/www/html/wordpress をDocumentRootとするように ssl-mozilla.conf に追加する。

# generated 2020-07-07, Mozilla Guideline v5.4, Apache 2.4.6, OpenSSL 1.0.2k, intermediate configuration, no OCSP
# https://ssl-config.mozilla.org/#server=apache&version=2.4.6&config=intermediate&openssl=1.0.2k&ocsp=false&guideline=5.4

# this configuration requires mod_ssl, mod_rewrite, and mod_headers
<VirtualHost *:80>
    RewriteEngine On
    RewriteRule ^(.*)$ https://%{HTTP_HOST}$1 [R=301,L]
</VirtualHost>

<VirtualHost *:443>
    DocumentRoot /var/www/html/wordpress
    SSLEngine on
    SSLCertificateFile      /etc/dehydrated/certs/<ホスト名>/cert.pem
    SSLCertificateChainFile /etc/dehydrated/certs/<ホスト名>/chain.pem
    SSLCertificateKeyFile   /etc/dehydrated/certs/<ホスト名>/privkey.pem

    # HTTP Strict Transport Security (mod_headers is required) (63072000 seconds)
    Header always set Strict-Transport-Security "max-age=63072000"
</VirtualHost>

# intermediate configuration
SSLProtocol             all -SSLv3 -TLSv1 -TLSv1.1
SSLCipherSuite          ECDHE-ECDSA-AES128-GCM-SHA256:ECDHE-RSA-AES128-GCM-SHA256:ECDHE-ECDSA-AES256-GCM-SHA384:ECDHE-RSA-AES256-GCM-SHA384:ECDHE-ECDSA-CHACHA20-POLY1305:ECDHE-RSA-CHACHA20-POLY1305:DHE-RSA-AES128-GCM-SHA256:DHE-RSA-AES256-GCM-SHA384
SSLHonorCipherOrder     off

設定後、Webサーバを再起動する

$ systemctl restart httpd
$

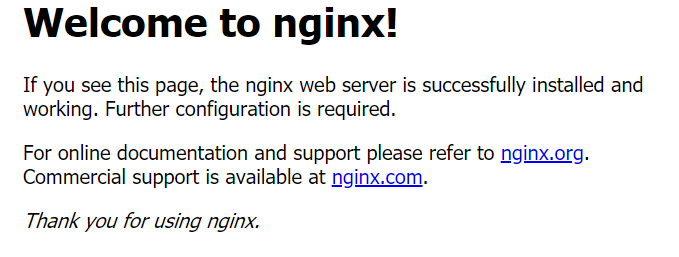
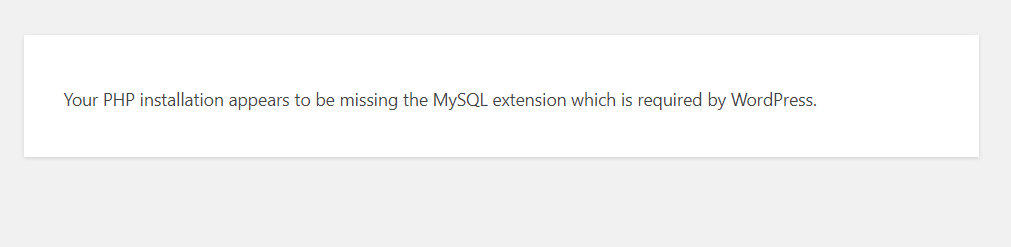
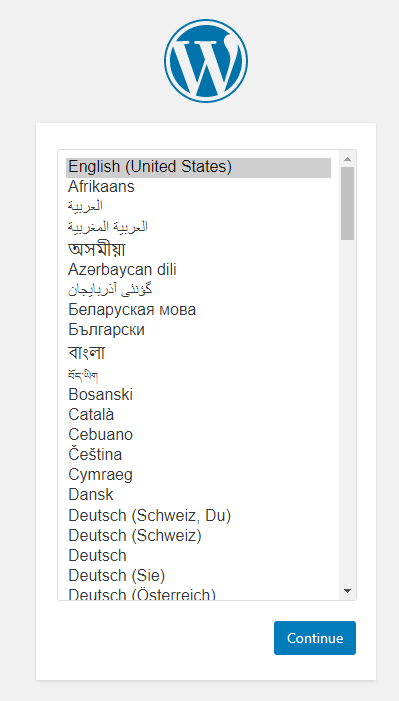
https://~/ にアクセスしてみると・・・

phpからmariadbにアクセスするためのパッケージが抜けていました。

$ sudo yum install php-mysql
<略>
--> Finished Dependency Resolution

Dependencies Resolved

================================================================================
 Package         Arch       Version               Repository               Size
================================================================================
Installing:
 php-mysqlnd     x86_64     7.4.7-1.0.1.el7       ol7_developer_php74     228 k
Installing for dependencies:
 php-pdo         x86_64     7.4.7-1.0.1.el7       ol7_developer_php74     121 k

Transaction Summary
================================================================================
Install  1 Package (+1 Dependent package)

Total download size: 349 k
Installed size: 1.2 M
Is this ok [y/d/N]: y
<略>
$

php関連のパッケージを変更した場合は、httpdを再起動します。

$ sudo systemctl restart httpd
$

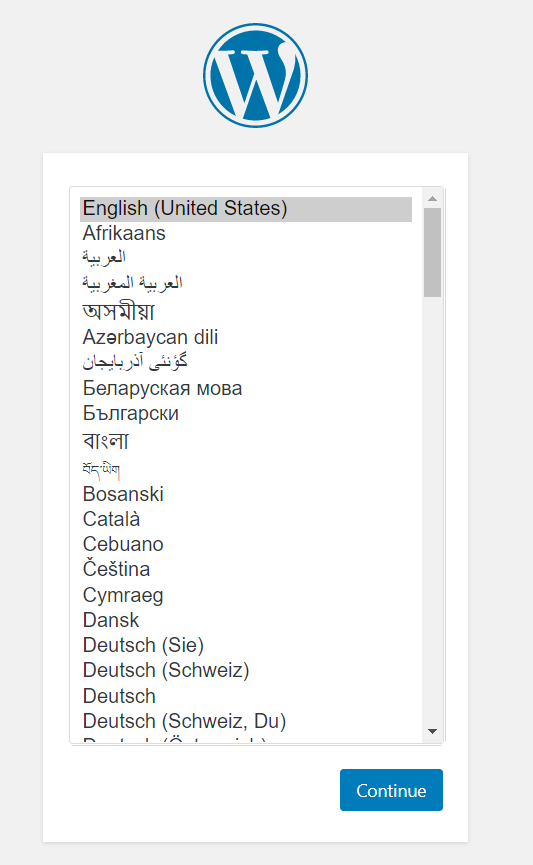
無事にWordpress初期画面が確認出来ました。

途中、wp-config.php に書き込めないと出ますので、「sudo vi /var/www/html/wordpress/wp-config.php」を実行し、指定された内容を記載します。

$ sudo vi /var/www/html/wordpress/wp-config.php

以上で完了です。

Oracle Autonomous Linuxでwordpressサーバを建ててみた

2021/04/25追記: この手順はOracle Autonomouse Linuxが通常のOracle Linuxとは異なるレポジトリで運用されていた2020年12月以前のものです。

2020年12月にOracle Autonomous Linuxでレポジトリ仕様の変更があった がありましたので、現状は普通のOracle Linux環境として設定できますので「CentOS 7 / Oracle Linux 7でWordPressサーバを建てる」を参照ください。

WebサーバをApacheではなくnginxで構成したい、という場合はこの記事を参照してもいいかもしれません。

2023/09/07追記: 2022年ごろ以降のOracle CloudではFree TierでOracle Autonomouse Linuxを使う事ができなくなっています。


Oracle CloudのTOKYOリージョンでFree tierのOracle Autonomouse Linux 7.8環境の作成が出来た。

できたんだけど、標準で提供されているレポジトリの範囲が狭く、通常のOracle Linux 7.8の標準レポジトリにも足りていない。

このため、wordpressサーバを建ててみるかと思っても、要求されるphpおよびmariadbのバージョンに足りていない。

Oracle Autonomous Linuxとしてのマニュアルがなく、ソフトウェア追加に関する制限事項等が分からないが、他に使い道も無いので、通常のOracle Linux 7.8で設定されているレポジトリとかを追加してみることにした。

注意:普通のOracle Linux 7.8やCentOS7にWordpressをインストールする場合は「CentOS 7 / Oracle Linux 7でWordPressサーバを建てる」を参照してください。

php 7.4追加編

いろいろある中、Oracle自身が出していてOracle Linux 7.8でも追加できるPHP Packages for Oracle Linuxかな、と追加してみる。

Oracle Linuxのレポジトリ設定の中からphp7.4部分を抜き出して /etc/yum.repos.d/oracle-php.repo というファイルを作成。

[ol7_developer_php74]
name=Oracle Linux $releasever PHP 7.4 Packages for Development and test ($basearch)
baseurl=https://yum$ociregion.oracle.com/repo/OracleLinux/OL7/developer/php74/$basearch/
gpgkey=file:///etc/pki/rpm-gpg/RPM-GPG-KEY-oracle
gpgcheck=1
enabled=1

そしてphpをインストール

# yum install php
<略>
--> Finished Dependency Resolution

Dependencies Resolved

================================================================================
 Package         Arch       Version               Repository               Size
================================================================================
Installing:
 php             x86_64     7.4.7-1.0.1.el7       ol7_developer_php74     3.4 M
Installing for dependencies:
 apr             x86_64     1.4.8-5.el7           al7                     103 k
 apr-util        x86_64     1.5.2-6.0.1.el7       al7                      91 k
 httpd           x86_64     2.4.6-93.0.1.el7      al7                     1.2 M
 httpd-tools     x86_64     2.4.6-93.0.1.el7      al7                      92 k
 mailcap         noarch     2.1.41-2.el7          al7                      30 k
 php-cli         x86_64     7.4.7-1.0.1.el7       ol7_developer_php74     5.1 M
 php-common      x86_64     7.4.7-1.0.1.el7       ol7_developer_php74     1.1 M

Transaction Summary
================================================================================
Install  1 Package (+7 Dependent packages)

Total download size: 11 M
Installed size: 47 M
Is this ok [y/d/N]: y
<略>
Installed:
  php.x86_64 0:7.4.7-1.0.1.el7

Dependency Installed:
  apr.x86_64 0:1.4.8-5.el7              apr-util.x86_64 0:1.5.2-6.0.1.el7
  httpd.x86_64 0:2.4.6-93.0.1.el7       httpd-tools.x86_64 0:2.4.6-93.0.1.el7
  mailcap.noarch 0:2.1.41-2.el7         php-cli.x86_64 0:7.4.7-1.0.1.el7
  php-common.x86_64 0:7.4.7-1.0.1.el7

Complete!
#

httpdも一緒にインストールされました。

また、wp-cliで使うphp-jsonとサイトヘルスで表示されるエラー対応としてphp-bcmath を追加します。

# yum install php-json php-bcmath
<略>
--> Finished Dependency Resolution

Dependencies Resolved

================================================================================
 Package        Arch       Version                Repository               Size
================================================================================
Installing:
 php-bcmath     x86_64     7.4.7-1.0.1.el7        ol7_developer_php74      56 k
 php-json       x86_64     7.4.7-1.0.1.el7        ol7_developer_php74      58 k

Transaction Summary
================================================================================
Install  2 Packages

Total download size: 114 k
Installed size: 160 k
Is this ok [y/d/N]: y
<略>
#

しかし、AMP pluginで使うphp-pear-Net-Curlとサイトヘルスのphp-pecl-imagick はepel系パッケージ、サイトヘルスのphp-gd は依存パッケージのlibvpx(Oracle Linuxでは標準パッケージに含まれる)がなくインストールできなかった。

MariaDB追加編

SQLサーバのmariadb-serverパッケージについては、MariaDB Foundationからmariadb 10.5を導入することにした。

「/etc/yum.repos.d/mariadb.repo」というファイルを作り、以下の内容を入力

# MariaDB 10.5 RedHat repository list - created 2020-06-26 04:54 UTC
# http://downloads.mariadb.org/mariadb/repositories/
[mariadb]
name = MariaDB
baseurl = http://yum.mariadb.org/10.5/rhel7-amd64
gpgkey=https://yum.mariadb.org/RPM-GPG-KEY-MariaDB
gpgcheck=1
#

そののち「yum install MariaDB-server MariaDB-client」を実行してmariadb-serverをインストール

# yum install MariaDB-server MariaDB-client
<中略>
---> Package perl-Compress-Raw-Zlib.x86_64 1:2.061-4.el7 will be installed
--> Finished Dependency Resolution
Error: Package: MariaDB-client-10.5.4-1.el7.centos.x86_64 (mariadb)
           Requires: libpcre2-8.so.0()(64bit)
Error: Package: galera-4-26.4.5-1.el7.centos.x86_64 (mariadb)
           Requires: socat
Error: Package: MariaDB-server-10.5.4-1.el7.centos.x86_64 (mariadb)
           Requires: libpcre2-8.so.0()(64bit)
 You could try using --skip-broken to work around the problem
 You could try running: rpm -Va --nofiles --nodigest
#

どうやら「pcre2」と「socat」がOracle Autonomous Linuxでは提供されていないパッケージであるようだ。(標準のOralce Linux 7.8ではol7_latestレポジトリに含まれている)

先ほど指定したmariadbレポジトリはRedHat Enterprise Linux 7用だったので、CentOS7用(baseurl=http://yum.mariadb.org/10.5/centos7-amd64 )に変更しても状況は変わらず。

では、とバージョンを10.4に下げてみると成功。成功時のmariadb.repoは以下

# MariaDB 10.4 RedHat repository list - created 2020-06-26 06:01 UTC
# http://downloads.mariadb.org/mariadb/repositories/
[mariadb]
name = MariaDB
baseurl = http://yum.mariadb.org/10.4/rhel7-amd64
gpgkey=https://yum.mariadb.org/RPM-GPG-KEY-MariaDB
gpgcheck=1
# yum install MariaDB-server MariaDB-client
<略>
--> Finished Dependency Resolution

Dependencies Resolved

================================================================================
 Package                   Arch     Version                     Repository
                                                                           Size
================================================================================
Installing:
 MariaDB-client            x86_64   10.4.13-1.el7.centos        mariadb    12 M
 MariaDB-compat            x86_64   10.4.13-1.el7.centos        mariadb   2.2 M
     replacing  mariadb-libs.x86_64 1:5.5.65-1.el7
 MariaDB-server            x86_64   10.4.13-1.el7.centos        mariadb    26 M
Installing for dependencies:
 MariaDB-common            x86_64   10.4.13-1.el7.centos        mariadb    81 k
 boost-program-options     x86_64   1.53.0-28.el7               al7       156 k
 galera-4                  x86_64   26.4.4-1.rhel7.el7.centos   mariadb   9.5 M
 perl-Compress-Raw-Bzip2   x86_64   2.061-3.el7                 al7        32 k
 perl-Compress-Raw-Zlib    x86_64   1:2.061-4.el7               al7        57 k
 perl-DBI                  x86_64   1.627-4.el7                 al7       801 k
 perl-Data-Dumper          x86_64   2.145-3.el7                 al7        47 k
 perl-IO-Compress          noarch   2.061-2.el7                 al7       259 k
 perl-Net-Daemon           noarch   0.48-5.el7                  al7        50 k
 perl-PlRPC                noarch   0.2020-14.el7               al7        35 k

Transaction Summary
================================================================================
Install  3 Packages (+10 Dependent packages)

Total download size: 51 M
Is this ok [y/d/N]: y
<略>

Installed:
  MariaDB-client.x86_64 0:10.4.13-1.el7.centos
  MariaDB-compat.x86_64 0:10.4.13-1.el7.centos
  MariaDB-server.x86_64 0:10.4.13-1.el7.centos

Dependency Installed:
  MariaDB-common.x86_64 0:10.4.13-1.el7.centos
  boost-program-options.x86_64 0:1.53.0-28.el7
  galera-4.x86_64 0:26.4.4-1.rhel7.el7.centos
  perl-Compress-Raw-Bzip2.x86_64 0:2.061-3.el7
  perl-Compress-Raw-Zlib.x86_64 1:2.061-4.el7
  perl-DBI.x86_64 0:1.627-4.el7
  perl-Data-Dumper.x86_64 0:2.145-3.el7
  perl-IO-Compress.noarch 0:2.061-2.el7
  perl-Net-Daemon.noarch 0:0.48-5.el7
  perl-PlRPC.noarch 0:0.2020-14.el7

Replaced:
  mariadb-libs.x86_64 1:5.5.65-1.el7

Complete!
#

MariaDB設定編

まず、現在のMariaDBサーバの自動起動設定を確認。

# systemctl list-unit-files|grep mariadb
mariadb.service                               disabled
mariadb@.service                              disabled
#

自動起動しない設定になっているので、自動起動するように変更する

# systemctl enable mariadb.service
Created symlink from /etc/systemd/system/mysql.service to /usr/lib/systemd/system/mariadb.service.
Created symlink from /etc/systemd/system/mysqld.service to /usr/lib/systemd/system/mariadb.service.
Created symlink from /etc/systemd/system/multi-user.target.wants/mariadb.service to /usr/lib/systemd/system/mariadb.service.
#

続いてMariaDBの起動状況を確認

# systemctl status mariadb
● mariadb.service - MariaDB 10.4.13 database server
   Loaded: loaded (/usr/lib/systemd/system/mariadb.service; enabled; vendor preset: disabled)
  Drop-In: /etc/systemd/system/mariadb.service.d
           mqmigrated-from-my.cnf-settings.conf
   Active: inactive (dead)
     Docs: man:mysqld(8)
           https://mariadb.com/kb/en/library/systemd/
#

「Active: inactive (dead)」なので起動していないので「systemctl start mariadb」で起動する。

# systemctl start mariadb
# systemctl status mariadb -l
● mariadb.service - MariaDB 10.4.13 database server
   Loaded: loaded (/usr/lib/systemd/system/mariadb.service; enabled; vendor preset: disabled)
  Drop-In: /etc/systemd/system/mariadb.service.d
           mqmigrated-from-my.cnf-settings.conf
   Active: active (running) since Fri 2020-06-26 15:08:58 JST; 37s ago
     Docs: man:mysqld(8)
           https://mariadb.com/kb/en/library/systemd/
  Process: 9464 ExecStartPost=/bin/sh -c systemctl unset-environment _WSREP_START_POSITION (code=exited, status=0/SUCCESS)
  Process: 9419 ExecStartPre=/bin/sh -c [ ! -e /usr/bin/galera_recovery ] && VAR= ||   VAR=`cd /usr/bin/..; /usr/bin/galera_recovery`; [ $? -eq 0 ]   && systemctl set-environment _WSREP_START_POSITION=$VAR || exit 1 (code=exited, status=0/SUCCESS)
  Process: 9417 ExecStartPre=/bin/sh -c systemctl unset-environment _WSREP_START_POSITION (code=exited, status=0/SUCCESS)
 Main PID: 9430 (mysqld)
   Status: "Taking your SQL requests now..."
   CGroup: /system.slice/mariadb.service
           mq9430 /usr/sbin/mysqld

Jun 26 15:08:57 oci.adosakana.local mysqld[9430]: 2020-06-26 15:08:57 0 [Note] InnoDB: 10.4.13 started; log sequence number 60972; transaction id 21
Jun 26 15:08:57 oci.adosakana.local mysqld[9430]: 2020-06-26 15:08:57 0 [Note] InnoDB: Loading buffer pool(s) from /var/lib/mysql/ib_buffer_pool
Jun 26 15:08:57 oci.adosakana.local mysqld[9430]: 2020-06-26 15:08:57 0 [Note] InnoDB: Buffer pool(s) load completed at 200626 15:08:57
Jun 26 15:08:57 oci.adosakana.local mysqld[9430]: 2020-06-26 15:08:57 0 [Note] Plugin 'FEEDBACK' is disabled.
Jun 26 15:08:57 oci.adosakana.local mysqld[9430]: 2020-06-26 15:08:57 0 [Note] Server socket created on IP: '::'.
Jun 26 15:08:58 oci.adosakana.local mysqld[9430]: 2020-06-26 15:08:58 0 [Note] Reading of all Master_info entries succeeded
Jun 26 15:08:58 oci.adosakana.local mysqld[9430]: 2020-06-26 15:08:58 0 [Note] Added new Master_info '' to hash table
Jun 26 15:08:58 oci.adosakana.local mysqld[9430]: 2020-06-26 15:08:58 0 [Note] /usr/sbin/mysqld: ready for connections.
Jun 26 15:08:58 oci.adosakana.local mysqld[9430]: Version: '10.4.13-MariaDB'  socket: '/var/lib/mysql/mysql.sock'  port: 3306  MariaDB Server
Jun 26 15:08:58 oci.adosakana.local systemd[1]: Started MariaDB 10.4.13 database server.
#

MariaDB上にWordpress用のデータベースを作成する。

# mysql -u root
Welcome to the MariaDB monitor.  Commands end with ; or \g.
Your MariaDB connection id is 8
Server version: 10.4.13-MariaDB MariaDB Server

Copyright (c) 2000, 2018, Oracle, MariaDB Corporation Ab and others.

Type 'help;' or '\h' for help. Type '\c' to clear the current input statement.

MariaDB [(none)]> create database DB名 character set utf8;
Query OK, 1 row affected (0.000 sec)

MariaDB [(none)]> grant all on DB名.* to wordpress@localhost identified by 'w@rdpress';
Query OK, 0 rows affected (0.002 sec)

MariaDB [(none)]> quit
Bye
#

firewall設定

まずfirewallを開ける。

現状のポート開放状況を確認するため「firewall-cmd –list-all」を実行

# firewall-cmd --list-all
public (active)
  target: default
  icmp-block-inversion: no
  interfaces: ens3
  sources:
  services: dhcpv6-client ssh
  ports:
  protocols:
  masquerade: no
  forward-ports:
  source-ports:
  icmp-blocks:
  rich rules:
#

httpとhttpsを追加して、設定を再読込して反映

# firewall-cmd --permanent --zone=public --add-service=http
success
# firewall-cmd --permanent --zone=public --add-service=https
success
# firewall-cmd --reload
success
# firewall-cmd --list-all
public (active)
  target: default
  icmp-block-inversion: no
  interfaces: ens3
  sources:
  services: dhcpv6-client http https ssh
  ports:
  protocols:
  masquerade: no
  forward-ports:
  source-ports:
  icmp-blocks:
  rich rules:
#

Webサーバ設定

nginxへの切り替え

最初はApacheを使おうとしたのですが、Mozilla SSL Configuration Generators推奨設定を行うにはmod_rewriteやmod_headersが含まれていませんでした。

Apache関連の追加レポジトリを探すよりはWebサーバをnginxに切り替えてnginx公式レポジトリを使った方が良いのでは?ということで「nginx: Linux packages」を元に追加

/etc/yum.repos.d/nginx.repo に下記を記載

[nginx-stable]
name=nginx stable repo
baseurl=http://nginx.org/packages/centos/$releasever/$basearch/
gpgcheck=1
enabled=1
gpgkey=https://nginx.org/keys/nginx_signing.key
module_hotfixes=true

[nginx-mainline]
name=nginx mainline repo
baseurl=http://nginx.org/packages/mainline/centos/$releasever/$basearch/
gpgcheck=1
enabled=0
gpgkey=https://nginx.org/keys/nginx_signing.key
module_hotfixes=true
# yum install nginx
<略>
--> Finished Dependency Resolution

Dependencies Resolved

================================================================================
 Package      Arch          Version                   Repository           Size
================================================================================
Installing:
 nginx        x86_64        1:1.18.0-1.el7.ngx        nginx-stable        772 k

Transaction Summary
================================================================================
Install  1 Package

Total download size: 772 k
Installed size: 2.7 M
Is this ok [y/d/N]: y
<略>
#

また、あとで確認したところphp-fpmも必要だったのでインストールします。これはサービスとしても起動します。

# yum install php-fpm
Loaded plugins: langpacks
Resolving Dependencies
--> Running transaction check
---> Package php-fpm.x86_64 0:7.4.7-1.0.1.el7 will be installed
--> Finished Dependency Resolution

Dependencies Resolved

================================================================================
 Package      Arch        Version                Repository                Size
================================================================================
Installing:
 php-fpm      x86_64      7.4.7-1.0.1.el7        ol7_developer_php74      1.7 M

Transaction Summary
================================================================================
Install  1 Package

Total download size: 1.7 M
Installed size: 6.1 M
Is this ok [y/d/N]: y
<略>
# systemctl list-unit-files|grep php
php-fpm.service                               disabled
# systemctl enable php-fpm.service
Created symlink from /etc/systemd/system/multi-user.target.wants/php-fpm.service to /usr/lib/systemd/system/php-fpm.service.
# systemctl start php-fpm.service
#

現在のApacheとnginxの自動起動設定を確認するため「systemctl list-unit-files|grep -e http -e nginx」を実行

# systemctl list-unit-files|grep -e http -e nginx
httpd.service                                 disabled
nginx-debug.service                           disabled
nginx.service                                 disabled
#

どちらも起動状態にないことを確認。

nginxを自動起動にしてから起動

# ystemctl enable nginx.service
Created symlink from /etc/systemd/system/multi-user.target.wants/nginx.service to /usr/lib/systemd/system/nginx.service.
# systemctl start nginx.service
# systemctl status nginx.service -l
● nginx.service - nginx - high performance web server
   Loaded: loaded (/usr/lib/systemd/system/nginx.service; disabled; vendor preset: disabled)
   Active: active (running) since Fri 2020-06-26 15:58:01 JST; 5s ago
     Docs: http://nginx.org/en/docs/
  Process: 10409 ExecStart=/usr/sbin/nginx -c /etc/nginx/nginx.conf (code=exited, status=0/SUCCESS)
 Main PID: 10410 (nginx)
   CGroup: /system.slice/nginx.service
           tq10410 nginx: master process /usr/sbin/nginx -c /etc/nginx/nginx.con
           mq10411 nginx: worker process

Jun 26 15:58:01 oci.adosakana.local systemd[1]: Starting nginx - high performance web server...
Jun 26 15:58:01 oci.adosakana.local systemd[1]: Can't open PID file /var/run/nginx.pid (yet?) after start: No such file or directory
Jun 26 15:58:01 oci.adosakana.local systemd[1]: Started nginx - high performance web server.
#

ブラウザからアクセスできるか確認

Let’s encryptを利用したSSLアクセス有効化

Oracle Autonomous Linuxにはcertbotもdehydratedもありません。

certbotはpython環境を使い大がかりになってしまうので、dehydratedの方を使用します。

githubのdehydratedからダウンロードします。

# wget https://github.com/dehydrated-io/dehydrated/archive/master.tar.gz
# tar xfz master.tar.gz
# ls -l
total 88
drwxrwxr-x. 4 root root  4096 Apr 29 04:36 dehydrated-master
-rw-r--r--. 1 root root 82951 Jun 26 16:32 master.tar.gz 
# 

dehydrated と config を配置します。

# cp dehydrated-master/dehydrated /usr/local/sbin/
# ls -l /usr/local/sbin/dehydrated
-rwxr-xr-x. 1 root root 69787 Jun 26 16:35 /usr/local/sbin/dehydrated
# mkdir /usr/local/etc/dehydrated
# cp dehydrated-master/docs/examples/config /usr/local/etc/dehydrated
# ls -l /usr/local/etc/dehydrated
total 8
-rw-r--r--. 1 root root 4656 Jun 26 16:36 config
#

/usr/local/etc/dehydrated/domains.txt にSSL証明書を取得するドメイン名を列挙します。

dehydratedがSSL証明書取得の際に使用する作業用Web公開ディレクトリ /var/www/dehydrated に関する設定をnginxに行います。

まず、ディレクトリを作成

# mkdir /var/www/dehydrated
#

次にnginx側の設定 を /etc/nginx/conf.d/default.conf のlisten 80に関するlocaltionに下記を追加。

location ^~ /.well-known/acme-challenge {
        alias /var/www/dehydrated;
        break;
}

そして、nginx再起動

# systemctl restart nginx
#

準備が出来たのでdehydratedで登録を開始。

# dehydrated --register
# INFO: Using main config file /usr/local/etc/dehydrated/config

To use dehydrated with this certificate authority you have to agree to their terms of service which you can find here: https://letsencrypt.org/documents/LE-SA-v1.2-November-15-2017.pdf

To accept these terms of service run `/usr/local/sbin/dehydrated --register --accept-terms`.
#  /usr/local/sbin/dehydrated --register --accept-terms
# INFO: Using main config file /usr/local/etc/dehydrated/config
+ Generating account key...
+ Registering account key with ACME server...
+ Fetching account URL...
+ Done!
# 

前処理が完了したので、実際のSSL証明書発行処理を実施。

# /usr/local/sbin/dehydrated --cron
# INFO: Using main config file /usr/local/etc/dehydrated/config
Processing oci.adosakana.local
 + Creating new directory /usr/local/etc/dehydrated/certs/oci.adosakana.local ...
 + Signing domains...
 + Generating private key...
 + Generating signing request...
 + Requesting new certificate order from CA...
 + Received 1 authorizations URLs from the CA
 + Handling authorization for oci.adosakana.local
 + 1 pending challenge(s)
 + Deploying challenge tokens...
 + Responding to challenge for oci.adosakana.local authorization...
 + Challenge is valid!
 + Cleaning challenge tokens...
 + Requesting certificate...
 + Checking certificate...
 + Done!
 + Creating fullchain.pem...
 + Done!
#

SSL証明書は /usr/local/etc/dehydrated/certs/FQDN名ディレクトリ に作成されます。

nginx側の設定はMozilla SSL Configuration Generator を元に /etc/nginx/conf.d/default.conf を書き換えます。

# generated 2020-06-26, Mozilla Guideline v5.4, nginx 1.17.7, OpenSSL 1.0.1e, intermediate configuration, no OCSP
# https://ssl-config.mozilla.org/#server=nginx&version=1.17.7&config=intermediate&openssl=1.0.1e&ocsp=false&guideline=5.4
server {
    listen 80 default_server;
    listen [::]:80 default_server;

    location ^~ /.well-known/acme-challenge {
        alias /var/www/dehydrated;
    }
    return 301 https://$host$request_uri;
}

server {
    listen 443 ssl http2;
    listen [::]:443 ssl http2;

    ssl_certificate /usr/local/etc/dehydrated/certs/FQDN名ディレクトリ/fullchain.pem;
    ssl_certificate_key /usr/local/etc/dehydrated/certs/FQDN名ディレクトリ/privkey.pem;
    ssl_session_timeout 1d;
    ssl_session_cache shared:MozSSL:10m;  # about 40000 sessions

    # curl https://ssl-config.mozilla.org/ffdhe2048.txt > /path/to/dhparam
    ssl_dhparam /usr/local/etc/dehydrated/certs/dhparam;

    # intermediate configuration
    ssl_protocols TLSv1.2;
    ssl_ciphers ECDHE-ECDSA-AES128-GCM-SHA256:ECDHE-RSA-AES128-GCM-SHA256:ECDHE-ECDSA-AES256-GCM-SHA384:ECDHE-RSA-AES256-GCM-SHA384:ECDHE-ECDSA-CHACHA20-POLY1305:ECDHE-RSA-CHACHA20-POLY1305:DHE-RSA-AES128-GCM-SHA256:DHE-RSA-AES256-GCM-SHA384;
    ssl_prefer_server_ciphers off;

    # HSTS (ngx_http_headers_module is required) (63072000 seconds)
    add_header Strict-Transport-Security "max-age=63072000" always;
}

Mozilla的にはffdhe2048.txtの配置を推奨するようなので、下記でダウンロードして配置します。

# curl https://ssl-config.mozilla.org/ffdhe2048.txt > /usr/local/etc/dehydrated/certs/dhparam
  % Total    % Received % Xferd  Average Speed   Time    Time     Time  Current
                                 Dload  Upload   Total   Spent    Left  Speed
100   423  100   423    0     0    680      0 --:--:-- --:--:-- --:--:--   681
#

そして、nginxを再起動します。

# systemctl restart nginx
#

ブラウザからhttpアクセスすると、httpsアクセスに変換された上で404 Not Found表示となることを確認します。

Let’s のSSL証明書は定期的に更新処理を実行する必要があります。

/etc/cron.d/dehydrated に下記の内容のファイルを作成します。(EPEL収録のdehydratedパッケージの内容を参考にした)

45 1 * * 4 root test -s /usr/local/etc/dehydrated/domains.txt && /usr/local/sbin/dehydrated --cron

WordPress設定

/var/www/html/wordpress にtar.gzの中身を展開

# tar xfz latest.tar.gz
# ls -l
total 11956
-rw-r--r--. 1 root   root      12238031 Jun 11 06:49 latest.tar.gz
drwxr-xr-x. 5 nobody nfsnobody     4096 Jun 11 06:48 wordpress
# chown -R apache:apache wordpress/
# ls -l
total 11956
-rw-r--r--. 1 root   root   12238031 Jun 11 06:49 latest.tar.gz
drwxr-xr-x. 5 apache apache     4096 Jun 11 06:48 wordpress
#

WordPress用のnginx設定は「nginx WordPress recipe」 を参考に作成した。元はphp-cgiを使用していたが、php-cgiパッケージはないためphp-fpm使用に切り替えている。

# Upstream to abstract backend connection(s) for php
upstream php {
    server unix:/tmp/php-fpm.socket;
    server 127.0.0.1:9000;
}

# generated 2020-06-26, Mozilla Guideline v5.4, nginx 1.17.7, OpenSSL 1.0.1e, intermediate configuration, no OCSP
# https://ssl-config.mozilla.org/#server=nginx&version=1.17.7&config=intermediate&openssl=1.0.1e&ocsp=false&guideline=5.4
server {
    listen 80 default_server;
    listen [::]:80 default_server;

    location ^~ /.well-known/acme-challenge {
        alias /var/www/dehydrated;
    }
    return 301 https://$host$request_uri;
}

server {
    listen 443 ssl http2;
    listen [::]:443 ssl http2;

    ssl_certificate /usr/local/etc/dehydrated/certs/FQDN名ディレクトリ/fullchain.pem;
    ssl_certificate_key /usr/local/etc/dehydrated/certs/FQDN名ディレクトリ/privkey.pem;
    ssl_session_timeout 1d;
    ssl_session_cache shared:MozSSL:10m;  # about 40000 sessions

    # curl https://ssl-config.mozilla.org/ffdhe2048.txt > /path/to/dhparam
    ssl_dhparam /usr/local/etc/dehydrated/certs/dhparam;

    # intermediate configuration
    ssl_protocols TLSv1.2;
    ssl_ciphers ECDHE-ECDSA-AES128-GCM-SHA256:ECDHE-RSA-AES128-GCM-SHA256:ECDHE-ECDSA-AES256-GCM-SHA384:ECDHE-RSA-AES256-GCM-SHA384:ECDHE-ECDSA-CHACHA20-POLY1305:ECDHE-RSA-CHACHA20-POLY1305:DHE-RSA-AES128-GCM-SHA256:DHE-RSA-AES256-GCM-SHA384;
    ssl_prefer_server_ciphers off;

    # HSTS (ngx_http_headers_module is required) (63072000 seconds)
    add_header Strict-Transport-Security "max-age=63072000" always;

    root /var/www/html/wordpress;

    index index.php;
    location = /favicon.ico {
        log_not_found off;
        access_log off;
    }
    location = /robots.txt {
        allow all;
        log_not_found off;
        access_log off;
    }
    location / {
        try_files $uri $uri/ /index.php?$args;
    }
    location ~ \.php$ {
        #NOTE: You should have "cgi.fix_pathinfo = 0;" in php.ini
        include fastcgi_params;
        fastcgi_intercept_errors on;
        fastcgi_pass php;
        #The following parameter can be also included in fastcgi_params file
        fastcgi_param  SCRIPT_FILENAME $document_root$fastcgi_script_name;
    }
    location ~* \.(js|css|png|jpg|jpeg|gif|ico)$ {
        expires max;
        log_not_found off;
    }
}

phpにMySQLアクセス用パッケージを入れていなかった・・・

またphpの日本語処理に必要なやつもなかったので「yum install php-mysql php-mbstring」でインストールして、php-fpmを再起動

# yum install php-mysql php-mbstring
<略>
--> Finished Dependency Resolution

Dependencies Resolved

================================================================================
 Package          Arch       Version              Repository               Size
================================================================================
Installing:
 php-mbstring     x86_64     7.4.7-1.0.1.el7      ol7_developer_php74     497 k
 php-mysqlnd      x86_64     7.4.7-1.0.1.el7      ol7_developer_php74     228 k
Installing for dependencies:
 php-pdo          x86_64     7.4.7-1.0.1.el7      ol7_developer_php74     121 k

Transaction Summary
================================================================================
Install  2 Packages (+1 Dependent package)

Total download size: 845 k
Installed size: 3.2 M
Is this ok [y/d/N]: y
<略>
# systemctl restart php-fpm.service
#

成功

wp-config.php については手動で/var/www/html/wordpress/wp-config.php に作成する必要があったが、それ以外は問題無く実行された。

また、Wordpress上のプラグインインストールや更新についても特に問題なく実行できた。


2020/06/30追記

WordPressのAMPプラグインを動かそうとしたら「dom」が有効にできない、と言われた。

これはphp-xmlに含まれるので「yum install php-xml」で追加したあと「systemctl restart php-fpm.service」を実行した。


2020/07/14追記

wordpressのインポートを行おうとしたらファイルが大きくて「413 Request Entity Too Large」とエラーになった。

まず、 /etc/php.ini の「post_max_size」と「upload_max_filesize」の値を変更して、「systemctl restart php-fpm」を実行

; Maximum size of POST data that PHP will accept.
; Its value may be 0 to disable the limit. It is ignored if POST data reading
; is disabled through enable_post_data_reading.
; http://php.net/post-max-size
;post_max_size = 8M
post_max_size = 10M
; Maximum allowed size for uploaded files.
; http://php.net/upload-max-filesize
;upload_max_filesize = 2M
upload_max_filesize = 20M

また、「/etc/nginx/conf.d/default.conf」のポート443に関するserver定義内で「client_max_body_size」の設定を追加し、「systemctl restart nginx」で再起動します。

server {
    listen 443 ssl http2;
    listen [::]:443 ssl http2;

    client_max_body_size 20M;
<略>
}

これでアップロードが成功するようになりました。

LTOテープをファイルシステムとして使うLTFSについて 2022/11/09版

前回LTFSの現状についてまとめた記事から2年が経過した。
(「LTOテープをファイルシステムとして使うLTFSについて 2018/01/04版」)

LTO-8のテープメディアに関して発生していた特許騒動も解決し、ようやくLTO-8が普通に使える状況になりました。最近の状況について調査した。

2020/05/11 初回投稿
2020/11/11 部分修正
2021/02/04 LTFS 2.5.1対応
2021/03/10 IBM版の更新を反映
2022/04/11 ISOに関して追記。細々修正
2022/10/14 HPEとOracleの記述修正
2022/11/09 HPE StoreOpenがテープチェンジャ非対応ということが確定。オープンソース版追加


過去のLTFS関連記事
 「LTOテープをファイルシステムとして使うLTFS(2012/11/28)
 「テープ装置メーカ純正のLTFS一覧(2013/12/20更新)
 「IBM版LTFSをRHEL5で使ってみた(2013/05/20)
 「LTOテープをファイルシステムとして使うLTFSについて 2014/06/09版
 「LTOテープをファイルシステムとして使うLTFSについて 2015/11/18版
 「LTOテープをファイルシステムとして使うLTFSについて 2018/01/04版


LTFSとは?

LTO-5/LTO-6からは、メディアを2つの領域に分割して利用することが可能になった。
その機能を活かし、1本のテープメディアの中に、メディア内データの管理情報と、実データを分割して保存することを可能とした。
これにより、これまで実現出来なかった、1本のテープメディアだけで可搬性のあるファイルシステム構築、というものが可能となり、その実装として、LTFS(Linear Tape File System)というのがある。

使用用途としては、バックアップ用ではなく、長期保存のためのアーカイブ用や、大容量データの持ち運び用として使用されている。

LTFSを実現するためのソフトウェアについては、基本的には、IBMが大本のベースを作り、それを各LTOドライブメーカが、自社ドライブ向けにカスタマイズして提供しているような形となっている。

LTFSのバージョン(フォーマット)

LTFSには、バージョンがいくつかあり、現状の最新バージョンはLTFS v2.5
・LTFS 1.0
・LTFS 2.0 : ファイルインデックス関連で機能をいろいろ追加
・LTFS 2.1 : 2012/05/18リリース。LTFS2.0+シンボリックリンク
・LTFS 2.2 : 2013/12/21リリース。管理情報の改良。2016年4月にISO/IEC 20919:2016として登録
・LTFS 2.3 : 2016/03/08リリース。各ファイルのハッシュ情報とファイル名のエンコーディングを追加
・LTFS 2.4 : 2017/12/01リリース。ボリュームのロックなどの追加
・LTFS 2.5 : 2019/05/19リリース。(Revision Historyが規格書に書かれていない…)Incremental Indexの追加
・LTFS 2.5.1: 2020/08/18リリース。細かい修正。2021年7月にISO/IEC 20919:2021 として登録

「LTFSのバージョン」と「LTFSソフトウェアのバージョン」は別物なので注意が必要。
たとえば、OracleのLTFSソフトウェアは「ver1.2.7」だが、「LTFS 2.2」に対応している。

LTFS2.2対応は重要だが、LTFS2.3対応はそれほど重要ではないので、とりあえず、現行リリースされているLTFSソフトウェアはほぼLTFS2.2以降対応なので、あまり心配しなくてもよさそう。2022/11/09時点でもLTFS v2.5対応はまだ無い模様。

LTFSv2.5の規格書はSNIAの「Linear Tape File System (LTFS)」の「Linear Tape File System (LTFS) Format Specification」にてpdfで公開されている。
LTFS v2.5で追加された「Incremental Backup」というのは、いままでは「フルバックアップ」と「前のバックアップとの増加分のバックアップ(Diff)」という2つの概念だったものが、「前のフルバックアップからの増加分のバックアップ(Incr)」が追加されたというもので、バックアップソフト側の概念としては昔からあるものになる。

その他、いろんな情報は、LTOの規格団体の「LTFS Overview」にある。

LTFSソフトウェアの種類

LTFSの公式認証を取得しているLTFSソフトウェアについては、「LTFS Compliance Verification」にて紹介されていたが、2021/03/10現在では該当ページが消滅している。

2020/05/11時点では以下の8個が登録されていた・・・「Date tested」の最新が2016年というあたりメンテナンスされていないのがわかるページだったので消滅も仕方がない感じである。

CompanyProductVersionLTFS VersionLTO GenerationDate tested
QuantumQuantum Scalar LTFS Appliance2.0.22.0.1LTO5 & 69/11/13
HPHP StoreOpen Standalone2.1.02.1.0LTO5 & 69/11/13
IBMIBM Single Drive Version1.3.02.1.0LTO5 & 69/11/13
IBMIBM LTFS Library EditionV1R32.1.0LTO5 & 610/2/13
QuantumQuantum LTFS2.1.02.1.0LTO5 & 611/29/13
HPHP StoreOpen Automation1.2.02.0.1LTO5 & 611/29/13
Spectra LogicSpectra Logic Black Pearl1.12.2LTO5 & 69/11/15
MT-ConsultingNODEUM1.12.1.0LTO5 & 67/05/16

なお、LTFSソフトウェアのバージョンと、対応しているLTFSフォーマットのバージョンに直接の関連性は無いので注意が必要。

また、LTOの規格団体の「LTFS Overview」のページに「Get Started Using LTFS」として紹介されているものは「HPE LTFS」「IBM LTFS」「Quantum LTFS (リンクは死んでいる)」の3種類である。


現状開発が継続していると思われるLTFSソフトウェアについて

・オープンソース版

よく探したらgithubにオープンソース版の開発ツリーがあった

公式: https://github.com/LinearTapeFileSystem/ltfs

単体ドライブ用で、IBM,HP,Quantumドライブに対応している

v2.4.0.0リリースからgithubに移動したらしい。

・IBM

公式: IBM Spectrum Archive(IBM Linear Tape File System)

IBMのLTFSは「IBM Spectrum Archive」という商品名になっている。テープベンダのSpectra Logicとは関係がない。

サポートURLは以前は各プロダクト用ページがあったが、2022/11/09現在は見当たらず「IBM Support」から検索、という感じのようだ。それぞれ「IBM Spectrum Archive Single Drive Edition (SDE)」「IBM Spectrum Archive Library Edition (LE)」「IBM Spectrum Archive Enterprise Edition (EE)」となる。

ドキュメントは「IBM Spectrum Archive Single Drive Edition (SDE) documentation」「IBM Spectrum Archive Library Edition (LE) documentation」「IBM Spectrum Archive Enterprise Edition (EE) documentation」。

また、アップデート用ファイルの入手は、「Fix Central」にて「製品グループ:System Storage」-「Tape Systems」-「Tape drives and software」の下にある「IBM Spectrum Archive Single Drive Edition(SDE) (旧名:LTFS Single Drive Edition)」や「IBM Spectrum Archive Library Edition(LE)(旧名:LTFS Library Edition)」「IBM Spectrum Archive Enterprise Edition(EE)」を選択することで入手する。

なお、LEとEEの方はアップデータのみの配布で、元になるソフトウェアについては、IBMから別途入手する必要がある。
基本的には、Single Drive Edition(SDE)が、他の全てのLTFSソフトウェアの原型になっているもの・・・という感じである。

2022/11/09時点での最新は、
IBM Spectrum Archive Enterprise Edition: ver1.3.3.0(2022/06/30) LTO-9対応/LTFS2.4対応
IBM Spectrum Archive Library Edition : ver2.4.5.0(2022/06/30) LTO-9対応/LTFS2.4対応
IBM Spectrum Archive Single Drive Edition: ver2.4.5.0(2022/06/30) LTO-9対応/LTFS2.4対応

・HP

公式: HPE StoreOpen and Linear Tape File System (LTFS) Software
公式2: HPE StoreOpen and Linear Tape File System (LTFS) Software
日本語情報: HP LTFS (Linear Tape File System)
HPEサポートセンター: HPE LTFS Software

以前は単体ドライブ向けの「日本語の導入マニュアル」が公開されていたがアクセスできなくなっている。

ソフトウェア関連は「HPE LTFS Software」からたどる事になる。

ソフトウェアの入手は、以前は単体ドライブ向けの「HP StoreOpen Standalone」とチェンジャー向け「HP StoreOpen Automation」が分かれていたが、現在は「HPE StoreOpen Software(LTFS)」に統合されているに統合されたことになっているのだが、試してみた感じでは単体ドライブ用の機能しかなかった。

この件について「HPE StoreOpen Software Linux and Mac 3.5 User Guide Frequently asked questions」にWindows向けStoreOpen については ver 3.4.0 以降ではライブラリ/チェンジャーに対応しているが、Linux向けについては単体ドライブしかサポートしない、との記載があることを確認した

Q: Can I use LTFS with tape libraries?
A: From v3.4, the Windows version of StoreOpen Software does offer support for HPE’s range of tape libraries; however the Linux & Mac versions do not provide such support. Tape drives located in tape libraries can be used, but there is no support for listing or changing cartridges. It may be possible to use other third party utilities for such purposes but that is beyond the scope of StoreOpen Software and HPE is unable to support customers experimenting with such configurations.

2022/11/09時点での最新は、
HP StoreOpen Software : ver3.5.0(2022/01/24) LTO-9対応/LTFS 2.4対応
また、ソースコードもダウンロードできる。

・Quantum

公式: Linear Tape File System

ソフトウェア入手は上記の公式ページの「Software」タブから行う。
ソースコードについては、LTFS Open Source Filesから。どちらも2019年から更新されていない。

2022/11/09時点での最新は下記
Linux/Mac : ver2.4.0.2(2019/03) LTO-8/LTFS2.4対応
Windows Model Bドライブ向け: ver3.0(2016/04) LTO-6以降という曖昧な記述のみ
Windows Model Cドライブ向け: ver2.4.0.2(2018/04) LTO-8/LTFS2.4対応。おそらくLinux/Mac向けと同じベース

Linux版のReleasenoteには、Quantum LTOドライブのほか、IBM LTOドライブにも対応という記述がある。

・Spectra Logic

公式:Linear Tape File System (LTFS)

LTFSを紹介するページはあるものの、LTFSを利用するソフトウェアに関するページが見当たらない。
「Spectra libraries are compatible with LTFS software and hardware solutions from a range of providers.」とあるので自社では直接提供していないようだ。

・MT-C NODEUM

公式:NODEUM

リストには「MT-Consulting」とあるが「MT-C」と改称した模様。
階層型ストレージとして、ディスクとテープなどを組み合わせて使用できるようにする、ソフトウェアのみを販売している?


リストに載っていないか死んだLTFS

・Quantum Scalar LTFS Appliance

公式:Scalar LTFSアプライアンス

ハードウェアがセットになったアプライアンス。
これの下にFC経由などでテープチェンジャーを繋いで使うもの。

バックアップアプライアンスに統合されたんだと思われる。

・TANDBERG DATA

2022/04/11時点のメーカWebには掲載が無くなっていたが、2022/11/09に再確認したら、「LTO Ultrium LTFS」でページは復帰していた。しかし、LTFS Softwareの入手先として「IBM SPECTRUM ARCHIVE SINGLE DRIVE EDITION」とIBM版を直接示すようになっているため、独自開発からは撤退した模様。

公式: LTFS for Archive

以前は「LTFS for Big Data」という扱いだったが、「Archive」にかえたようだ。

ソフトウェアの入手は「LTFS Downloads for LTO-5/6(legacy drive)」か「LTFS Downloads for OV-TAD LTO(LTO-7/8)」から行う。

2021/03/10時点での最新は
LTO-5/6向け: ver 3.3.0
LTO-7/8向け: ver 2.4.1.2

ページは英語表記だが、ドキュメントアイコンが日の丸になってるとおり、ダウンロードできるドキュメントはLinux用/Windows用が日本語化されている。
一部TANBERGカスタマイズが入っているようだが、基本的にはIBM Archive Single Drive Edition相当品。

・Oracle

2022/04/11時点ではメーカWebから記載が消えた。ossサイトにあったものも消えた。
2022/10/14時点では、https://lb-oss.oracle.com/projects/ltfs/ から単体ドライブ用のltfs-1.2.7が入手可能となっていた。

公式: Oracle’s StorageTek Linear Tape File System, Open Edition
以前はOracle製品としてのページ: Oracle StorageTek Linear Tape File System (LTFS), Open Edition and Library Edition があったが2021/03/10現在では消滅しているので基本は自社提供はしていないようだ。

現状でも、Oracle版のLTFSソフトウェアのうち単体ドライブ向けの入手は「https://oss.oracle.com/projects/ltfs/files/」から行うことはできる。(ライブラリ向けLTFS-LEは入手不可)

2021/03/10時点での最新は2015年時点と変わらず
ltfs-1.2.7(2015/10/07)

IBM LTFS 2.2.0.2とHP LTFS 2.2.1を組み合わせ、Oracle/StorageTek用の設定を入れたもの。
Oracle LTOドライブ,IBM LTOドライブ,HP LTOドライブに対応している。

LTFS For Dummies」という51ページのPDFを公開しているのが興味深い。
??? For Dummiesは、アメリカで販売されているいろんな分野の初心者向け書籍シリーズ。「ダミー人形向けの」→「バカでも分かる」というものなんだけど・・・このLFS for Dummies、解説具合が微妙過ぎるなぁ・・・

StorageTek Linear Tape File System, Library Edition Japanese Online Documentation」にて日本語ドキュメント群がhtml/pdfで公開されている。以下の4種類がすべてちゃんとした日本語なのは貴重。

StorageTek Linear Tape File System, Library Edition 計画およびインストールガイド
StorageTek Linear Tape File System, Library Edition 管理ガイド
StorageTek Linear Tape File System, Library Edition Web サービスアプリケーションプログラミングインタフェースプログラマーズガイド
StorageTek Linear Tape File System, Library Edition セキュリティーガイド


LTFS関連のツール紹介

・LTOpers

公式: https://github.com/amiaopensource/ltopers

LTFSを使いやすくするためのBASHスクリプトのフロントエンドプログラム
Quantum LTFS 2.4向けで、Homebrewでインストールし、ということなので、MacOSX向けとして作られているようだが、スクリプトを読むと.linuxbrewディレクトリがあった場合の条件分岐があるので、Linuxでも使えそう。


ドキュメント紹介

・富士通のドキュメント

富士通のWebにいくつか日本語解説ページがある。

カートリッジテープに記録されているデータをファイル形式で扱える LTFSオプション

書庫探(しょこたん) > ストレージ技術用語解説 > LTFSとは

マニュアル一覧にて「テープライブラリ (ETERNUS LT)」で検索して出てくる「ETERNUS LT series 用 LTFSオプション ユーザーズガイド

とくに「LTFSオプション ユーザーズガイド」はLTFS全般に関して日本語で解説されているよい文章と言える

コマンド操作についてはチェンジャー/オートローダー利用時の使い方がメインであるが、単体ドライブの場合についてもだいたい同じである。

・Oracleのドキュメント

いまは更新が停止しているがOracle版ltfsについては日本語マニュアルが完備している。

StorageTek Linear Tape File System, Library Edition Japanese Online Documentation Library
Release 1.0

 ・Planning and Installation Guide
 ・Administration Guide
 ・Application Programming Interface Guide
 ・Security Guide

EC-CUBE 4.0をSELinux有効状態のOracle Linux 7上に構築する手順(仮

EC-CUBE 4.0のテスト環境が必要になったので、Oracle Cloud上のOracle Linux 7インスタンスを立てて、その上に作成した。

が・・・公式ドキュメントはSELinux関連の設定とか触れてないし、かなり面倒だった。
厳密にやろうとするとかなりキツイので、SELinux有効の中でも簡単な対処としている。

環境初期準備

タイムゾーンを日本に設定

# timedatectl set-timezone Japan

fail2ban設定

sshアタックがあった場合にとっととIPバンするためにfail2banをインストール。
・・・いや、ターゲットにされるとホント、すごい勢いでsshアクセスの試行がありますよ。

# yum install -y fail2ban fail2ban-hostsdeny fail2ban-systemd
# systemctl enable fail2ban.service
# cat <<EOF > /etc/fail2ban/jail.local
[DEFAULT]
# 24時間以内に3回不審なアクセスがあったら24時間BAN
#bantime  = 86400
#findtime  = 86400
bantime  = 259200
findtime  = 259200
maxretry = 5

#CentOS7なのでsystemd
#backend = systemd # jail.d/00-systemd.conf で設定されてた

# 除外IP
ignoreip = 127.0.0.1 127.0.0.0/8 10.0.0.0/8 172.16.0.0/12 192.168.0.0/16 <除外したいIPを追加>
[sshd]
enabled = true
banaction = firewallcmd-ipset
EOF
# systemctl start fail2ban.service
#

webサーバとphp設定

phpはOracleが用意しているphp 7.2を使用するため、「oracle-php-release-el7」をインストール。現状の標準設定だとphp 7.2が標準選択されている。なお、php 7.1かphp 7.0を使うこともできるが、いまさら利点は無いので使用しない方がよい。

# yum install oracle-php-release-el7
# 

phpパッケージとhttpdをインストールして、firewall開け設定実施

# yum install -y httpd mod_ssl php php-json php-mbstring php-pdo php-xml php-zip php-mysqlnd php-intl 
# systemctl enable httpd
# systemctl start httpd
# firewall-cmd --permanent --zone=public --add-service=http
# firewall-cmd --permanent --zone=public --add-service=https
# firewall-cmd --reload

APCU(php-pecl-apcu)のインストールを推奨されたが、パッケージのコンフリクトが発生していたのでインストールしなかった。

SQLサーバ設定

今回はmariadbをSQLサーバとして使用した。

# yum install -y mariadb-server
# systemctl enable mariadb
# systemctl start mariadb
#

SQL起動後、ECCUBE用のデータベースを作成した。

# mysql -u root
Welcome to the MariaDB monitor.  Commands end with ; or \g.
Your MariaDB connection id is 2
Server version: 5.5.64-MariaDB MariaDB Server

Copyright (c) 2000, 2018, Oracle, MariaDB Corporation Ab and others.

Type 'help;' or '\h' for help. Type '\c' to clear the current input statement.

MariaDB [(none)]> create database eccube character set utf8;
Query OK, 1 row affected (0.00 sec)

MariaDB [(none)]> grant all on eccube.* to cubesql@localhost identified by 'dbsqlp@ss';
Query OK, 0 rows affected (0.08 sec)

MariaDB [(none)]> exit
Bye
#

ECCUBEファイル展開

/var/www/html/eccube にEC-CUBE 4.0.3を展開した。

展開した中に.htaccessファイルが含まれていますが、標準設定では読み込まないのでApacheに設定追加を行います。 (もっとセキュリティを強化してもいいとは思いますが、面倒だったので・・・)

# cat <<EOF> /etc/httpd/conf.d/eccube.conf
<Directory "/var/www/html/eccube">
    Options Indexes FollowSymLinks
    AllowOverride All
    Require all granted
</Directory>
EOF
# systemctl restart httpd
#

で・・・SELinuxがらみがどうなるかですが、おもいっきり引っかかりまくりました。

とりあえず該当するコンテンツに対して「httpd_sys_rw_content_t」を割り当てることで対処しました。

最初は個別に対処していこうとしたのですが、インストールプロセスを進めていくと、/var/www/html/eccube全体に対して権限を要求されたため、最終的には下記となりました。

# chcon -t httpd_sys_rw_content_t -R /var/www/html/eccube
#

とりあえず、これでEC-CUBE 4.0の初期セットアップ完了までできるようになりました。

なお、サイトによっては「getsebool -a|grep httpd_can_network_connect」で「httpd_can_network_connect」の値を確認し、offであればonに変更する、と記載されているものもありますが、必要ありませんでした。

エラーコレクション

SELinux設定をしていく中で出てきたエラー群です。

まず、 http://IPアドレス/eccube/ にアクセスすると以下が現れました。

(2/2) ContextErrorException
Warning: file_put_contents(/var/www/html/eccube/var/cache/install/EccubeInstallDebugProjectContainerDeprecations.log): failed to open stream: No such file or directory

(1/2) RuntimeException
Unable to create the cache directory (/var/www/html/eccube/var/cache/install)

このときに表示された /var/www/html/eccube/var に対して「chcon -t httpd_sys_rw_content_t -R /var/www/html/eccube/var」を実行しました。

次にでたエラーは下記です。

Filesystem->copy('/var/www/html/eccube/html/template/default/assets/img/common/favicon.ico', '/var/www/html/eccube/html/user_data/assets/img/common/favicon.ico')

/var/www/html/eccube/html/user_data以下に書き込む権限がないというもの。
eccubeディレクトリ内を探すと他にも「user_data」というディレクトリがあったため、「chcon -t httpd_sys_rw_content_t -R /var/www/html/eccube/html/user_data」と「chcon -t httpd_sys_rw_content_t -R /var/www/html/eccube/app/template/user_data」を実行した。

最後に「権限チェック」で引っかかった。

以下のファイルまたはディレクトリに書き込み権限を付与してください。
>>☓:/var/www/html/eccube
>>☓:/var/www/html/eccube/app/Plugin
>>☓:/var/www/html/eccube/app/PluginData
>>☓:/var/www/html/eccube/app/proxy
>>☓:/var/www/html/eccube/app/template
>>☓:/var/www/html/eccube/html
>>☓:/var/www/html/eccube/vendor
<略>
>>☓:/var/www/html/eccube/vendor/ocramius/proxy-manager/README.md
>>☓:/var/www/html/eccube/vendor/ocramius/proxy-manager/composer.json
>>☓:/var/www/html/eccube/composer.json
>>☓:/var/www/html/eccube/composer.lock

ようはここまでで「httpd_sys_rw_content_t」を設定しなかった全ファイル。

「chcon -t httpd_sys_rw_content_t -R /var/www/html/eccube」を実行して再チェック・・・

>>○:アクセス権限は正常です

これでセットアップを進めることができました。

Oracle Cloudでは使用状況レポートを有効にしないとVM内にアクセスエラーログがたまりまくるので注意

東京リージョンでOracle Cloud Always Freeインスタンスを作れないので、US West(Phoenix)リージョンでアカウントを作り直してOracle Linux 7インスタンスを作ってみたところ /var/log/oracle-cloud-agent/agent.log にスクリプトの実行エラーが毎秒出ている。

作り直し前の方ではagent.logは正常なのに何故?と思ったら、Oracle Cloudコンソールの「アカウント管理」の「使用状況レポート」が未設定なためだった。

上記にある様に「アイデンティティ」の「ポリシー」にて「ポリシーの作成」をクリックし、上記ページに書かれている「ステートメント1」「ステートメント2」を下記画面の「ポリシーステートメント」に貼り付ければOK。(名前と説明は適当につける)

なお、ステートメント2にある「<group>」は「Administrators」に置き換える必要がある。(「アイデンティティ」の「グループ」に登録済みのグループ名に置き換える)

この設定を行ったあと、agent.logへエラーを吐き出していたインスタンス上で「 systemctrl restart oracle-cloud-agent.service 」を実行することでエラーは収まりました。

モバイルバージョンを終了