::> set diag
Warning: These diagnostic commands are for use by NetApp personnel only.
Do you want to continue? {y|n}: y
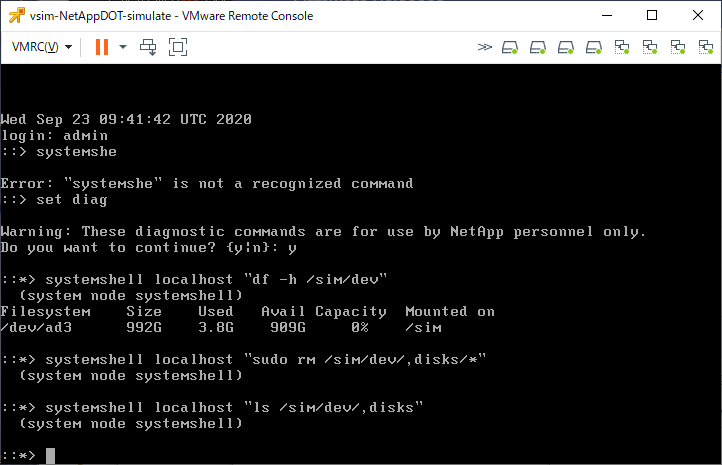
::*> system node systemshell local "df -h /sim/dev"
Filesystem Size Used Avail Capacity Mounted on
/dev/ad3 223G 11G 194G 5% /sim
::*>
nas01c::> storage aggregate add-disks -aggregate aggr0_nas01c_01 -diskcount 7
Warning: Aggregate "aggr0_nas01c_01" is a root aggregate. Adding disks to the root aggregate is not recommended. Once added, disks cannot be removed without
         reinitializing the node.
Do you want to continue? {y|n}: y
Info: Disks would be added to aggregate "aggr0_nas01c_01" on node "nas01c-01" in the following manner:
      First Plex
        RAID Group rg0, 9 disks (block checksum, raid_dp)
                                                            Usable Physical
          Position   Disk                      Type           Size     Size
          ---------- ------------------------- ---------- -------- --------
          data       NET-1.18                  FCAL         1000MB   1.00GB
          data       NET-1.19                  FCAL         1000MB   1.00GB
          data       NET-1.20                  FCAL         1000MB   1.00GB
          data       NET-1.21                  FCAL         1000MB   1.00GB
          data       NET-1.22                  FCAL         1000MB   1.00GB
          data       NET-1.23                  FCAL         1000MB   1.00GB
          data       NET-1.24                  FCAL         1000MB   1.00GB
      Aggregate capacity available for volume use would be increased by 5.27GB.
Do you want to continue? {y|n}: y
nas01c::>
nas01c::> set adv
Warning: These advanced commands are potentially dangerous; use them only when
         directed to do so by NetApp personnel.
Do you want to continue? {y|n}: y
nas01c::*>
nas01c::*> system image show
                 Is      Is                                Install
Node     Image   Default Current Version                   Date
-------- ------- ------- ------- ------------------------- -------------------
nas01c-01
         image1  true    true    9.7                       -
nas01c-02
         image1  true    true    9.7                       -
2 entries were displayed.
nas01c::*> system image package show
nas01c::*>
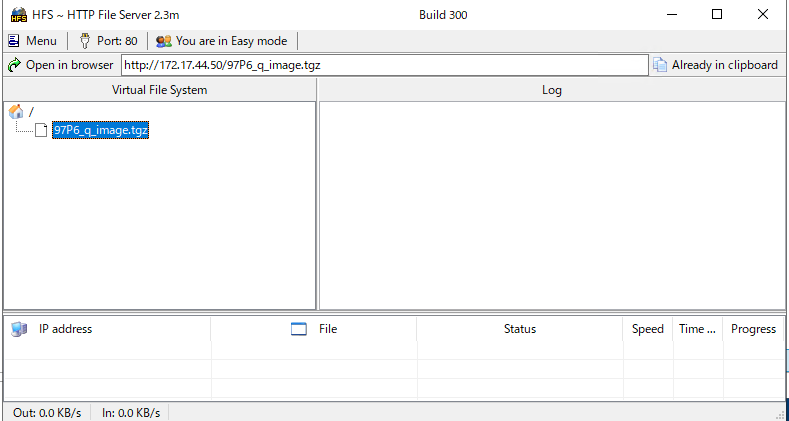
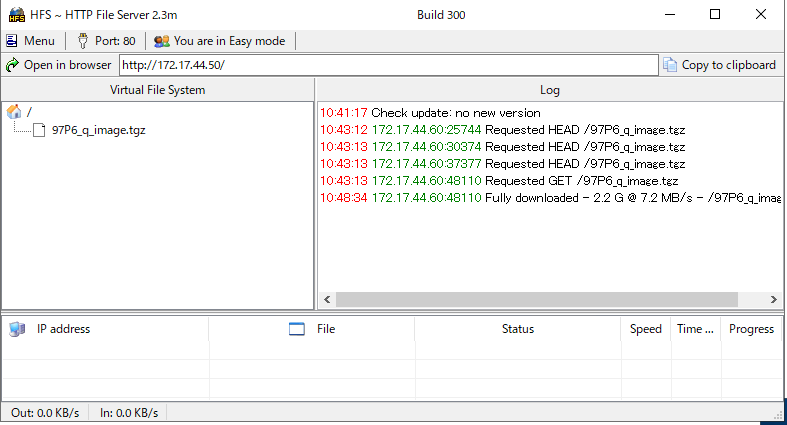
nas01c::*> system image update -node nas01c-01 -package http://172.17.44.103/97P6_q_image.tgz -replace image2
Software update started on node nas01c-02. Updating image2 with package http://.../97P6_q_image.tgz.
Downloading package. This may take up to 20 minutes.
99% downloaded
Download complete.
Listing package contents.
Decompressing package contents.
Verifying package signature.
Invoking script (install phase). This may take up to 60 minutes.
Mode of operation is UPDATE
Current image is image1
Alternate image is image2
Versions are compatible
Available space on boot device is 1452 MB
Required  space on boot device is 740 MB
Kernel binary matches install machine type
external keymanager check script has run successfully.
Getting ready to install image
Directory /cfcard/x86_64/freebsd/image2 created
Syncing device...
Extracting to /cfcard/x86_64/freebsd/image2...
x netboot/VERSION
x netboot/COMPAT.TXT
x netboot/BUILD
x netboot/kernel.sig
x netboot/key_fingerprint.csfc.sig
x netboot/key_fingerprint.sig
x netboot/platform.ko.sig
x netboot/platfs.img.sig
x netboot/rootfs.img.sig
x netboot/kernel.csfc.sig
x netboot/platform.ko.csfc.sig
x netboot/platfs.img.csfc.sig
x netboot/rootfs.img.csfc.sig
x netboot/CHECKSUM
x netboot/metadata.xml
x netboot/nvdimm.ko
x netboot/pvscsi.ko
x netboot/INSTALL
x netboot/if_vmx.ko
x netboot/bsdboot.tgz
x netboot/cap.xml
x netboot/mpt.ko
x netboot/platform.ko
x netboot/platfs.img
x netboot/kernel
x netboot/fw.tgz
x netboot/pmroot_late.tgz
x netboot/rootfs.img
Installed MD5 checksums pass
Installing diagnostic and firmware files
Firmware MD5 checksums pass
Updating FreeBSD boot partition
Successfully updated FreeBSD boot partition
Installation complete. image2 updated on node nas01c-01.
nas01c::*>
nas01c::*> system image show
                 Is      Is                                Install
Node     Image   Default Current Version                   Date
-------- ------- ------- ------- ------------------------- -------------------
nas01c-01
         image1  true    true    9.7                       -
         image2  false   false   9.7P6                     9/2/2020 14:51:02
nas01c-02
         image1  true    true    9.7                       -
3 entries were displayed.
nas01c::*> system image package show
             Package
Node         Repository     Package File Name
------------ -------------- -----------------
nas01c-01
             mroot
                            97P6_q_image.tgz
1 entries were displayed.
nas01c::*>
問題がないようであれば、もう片方のノードにもアップロードします。
nas01c::*> system image update -node nas01c-02 -package http://172.17.44.103/97P6_q_image.tgz -replace image2
Software update started on node nas01c-02. Updating image2 with package http://.../97P6_q_image.tgz.
Downloading package. This may take up to 20 minutes.
99% downloaded
Download complete.
Listing package contents.
Decompressing package contents.
Verifying package signature.
Invoking script (install phase). This may take up to 60 minutes.
Mode of operation is UPDATE
Current image is image1
Alternate image is image2
Versions are compatible
Available space on boot device is 1452 MB
Required  space on boot device is 740 MB
Kernel binary matches install machine type
external keymanager check script has run successfully.
Getting ready to install image
Directory /cfcard/x86_64/freebsd/image2 created
Syncing device...
Extracting to /cfcard/x86_64/freebsd/image2...
x netboot/VERSION
x netboot/COMPAT.TXT
x netboot/BUILD
x netboot/kernel.sig
x netboot/key_fingerprint.csfc.sig
x netboot/key_fingerprint.sig
x netboot/platform.ko.sig
x netboot/platfs.img.sig
x netboot/rootfs.img.sig
x netboot/kernel.csfc.sig
x netboot/platform.ko.csfc.sig
x netboot/platfs.img.csfc.sig
x netboot/rootfs.img.csfc.sig
x netboot/CHECKSUM
x netboot/metadata.xml
x netboot/nvdimm.ko
x netboot/pvscsi.ko
x netboot/INSTALL
x netboot/if_vmx.ko
x netboot/bsdboot.tgz
x netboot/cap.xml
x netboot/mpt.ko
x netboot/platform.ko
x netboot/platfs.img
x netboot/kernel
x netboot/fw.tgz
x netboot/pmroot_late.tgz
x netboot/rootfs.img
Installed MD5 checksums pass
Installing diagnostic and firmware files
Firmware MD5 checksums pass
Updating FreeBSD boot partition
Successfully updated FreeBSD boot partition
Installation complete. image2 updated on node nas01c-02.
nas01c::*> system image show
                 Is      Is                                Install
Node     Image   Default Current Version                   Date
-------- ------- ------- ------- ------------------------- -------------------
nas01c-01
         image1  true    true    9.7                       -
         image2  false   false   9.7P6                     9/2/2020 14:51:02
nas01c-02
         image1  true    true    9.7                       -
         image2  false   false   9.7P6                     9/2/2020 16:37:32
4 entries were displayed.
nas01c::*> system image package show
             Package
Node         Repository     Package File Name
------------ -------------- -----------------
nas01c-01
             mroot
                            97P6_q_image.tgz
nas01c-02
             mroot
                            97P6_q_image.tgz
2 entries were displayed.
nas01c::*>
nas01c::*> system image modify -node nas01c-01 -image image2 -isdefault true
After a clean shutdown, image2 will be set as the default boot image on node
nas01c-01.
nas01c::*>
Is Default設定が変更されているかを「system image show」で確認します。
nas01c::*> system image show
                 Is      Is                                Install
Node     Image   Default Current Version                   Date
-------- ------- ------- ------- ------------------------- -------------------
nas01c-01
         image1  false   true    9.7                       -
         image2  true    false   9.7P6                     9/2/2020 14:51:02
nas01c-02
         image1  true    true    9.7                       -
         image2  false   false   9.7P6                     9/2/2020 16:37:32
4 entries were displayed.
nas01c::*>
変更したノードを「reboot -node ノード名」で再起動します。
nas01c::*> reboot -node nas01c-01
  (system node reboot)
Warning: This operation will cause node "nas01c-01" to be marked as unhealthy. Unhealthy nodes do not participate in quorum voting. If the node
         goes out of service and one more node goes out of service there will be a data serving failure for the entire cluster. This will cause a
         client disruption. Use "cluster show" to verify cluster state. If possible bring other nodes online to improve the resiliency of this
         cluster.
Do you want to continue? {y|n}: y
nas01c::*>
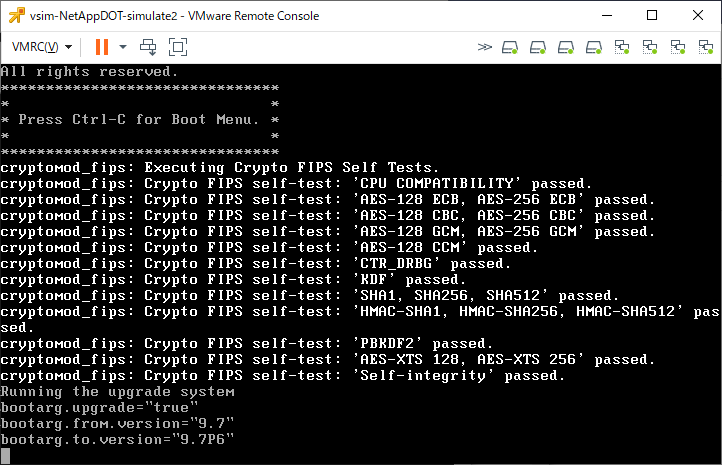
再起動中、下記の様な形で「Running the upgrade system」という表示があったりします。
nas01c::*> system image show
                 Is      Is                                Install
Node     Image   Default Current Version                   Date
-------- ------- ------- ------- ------------------------- -------------------
nas01c-01
         image1  false   false   9.7                       -
         image2  true    true    9.7P6                     9/2/2020 14:51:02
nas01c-02
         image1  true    true    9.7                       -
         image2  false   false   9.7P6                     9/2/2020 16:37:32
4 entries were displayed.
nas01c::*>
また「version -node *」を実行してOSバージョンが変更されていることを確認します。
nas01c::*> version -node *
nas01c-01  :
NetApp Release 9.7P6: Tue Jul 28 04:06:27 UTC 2020
nas01c-02  :
NetApp Release 9.7: Thu Jan 09 11:10:19 UTC 2020
2 entries were displayed.
nas01c::*>
その10 もう片側も同様に再起動
もう片側のノードにも同じ事を実行します。
途中は省略。
「system image show」を実行して、Is Default, Is Currectが両方とも変更されたことを確認。
nas01c::*> system image show
                 Is      Is                                Install
Node     Image   Default Current Version                   Date
-------- ------- ------- ------- ------------------------- -------------------
nas01c-01
         image1  false   false   9.7                       -
         image2  true    true    9.7P6                     9/2/2020 14:51:02
nas01c-02
         image1  false   false   9.7                       -
         image2  true    true    9.7P6                     9/2/2020 16:37:32
4 entries were displayed.
nas01c::*>
「version -node *」を実行して、両ノードのOSバージョンが変更されたことを確認。
nas01c::*> version -node *
nas01c-01  :
NetApp Release 9.7P6: Tue Jul 28 04:06:27 UTC 2020
nas01c-02  :
NetApp Release 9.7P6: Tue Jul 28 04:06:27 UTC 2020
2 entries were displayed.
nas01c::*>
トラブル事例
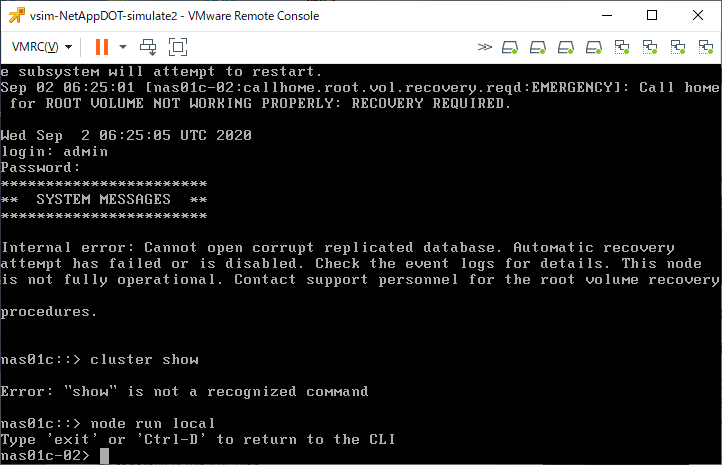
いきなり下記の様なメッセージが出力されて動かなくなりました。
nas01c::*>
The management gateway server restarted. Waiting to see if the connection can be reestablished.
The connection with the management gateway server has been reestablished.
If the root cause of the interruption was a process core, you can see the core file details by issuing the following command:
        system node coredump show -node local -type application -corename mgwd.* -instance
***********************
**  SYSTEM MESSAGES  **
***********************
CRITICAL: This node is not healthy because the root volume is low on space
(<10MB). The node can still serve data, but it cannot participate in cluster
operations until this situation is rectified. Free space using the nodeshell or
contact technical support for assistance.
nas01c::>
メッセージにある「system node coredump show」を実行してもなにもないなー
nas01c::> system node coredump show
This table is currently empty.
nas01c::>  system node coredump show -node local -type application -corename mgwd.* -instance
There are no entries matching your query.
nas01c::>
じゃぁ、ディスク容量はどうだ?
nas01c::> system node run -node nas01c-02 df
Filesystem              kbytes       used      avail capacity  Mounted on
/vol/vol0/             5976884    5974408       2476     100%  /vol/vol0/
/vol/vol0/.snapshot     314572    3254436          0     1035%  /vol/vol0/.snapshot
nas01c::>
snapshotが領域を超え、通常ボリュームに進出して使用量が100%となっていました。
snapshotを削除します。
現状のsnapshotを確認
nas01c::> system node run -node nas01c-02 snap list
Volume vol0
working...
  %/used       %/total  date          name
----------  ----------  ------------  --------
 50% (50%)   48% (48%)  Sep 02 16:02  hourly.0
 52% ( 6%)   52% ( 3%)  Sep 02 15:45  hourly.1
nas01c::>
snapshotを削除
nas01c::> system node run -node nas01c-02 snap delete vol0 hourly.0
nas01c::> system node run -node nas01c-02 snap delete vol0 hourly.1
nas01c::>
ディスク容量が空きました。
nas01c::> system node run -node nas01c-02 df
Filesystem              kbytes       used      avail capacity  Mounted on
/vol/vol0/             5976884    3029024    2947860      51%  /vol/vol0/
/vol/vol0/.snapshot     314572          0     314572       0%  /vol/vol0/.snapshot
nas01c::>
上記は「system node run -node ノード名 snap ~」で実行していますがONTAP OSの起動状況によっては「snap show ~」「snap delete ~」が使える場合もあります。
(dfコマンドを実行してちゃんとボリュームが表示される場合は使えるでしょう)
その場合、snap deleteコマンドの際にアスタリスクが使用できるので、全削除が簡単です。
下記はその実行例
nas01c::*> snap show
                                                                 ---Blocks---
Vserver  Volume   Snapshot                                  Size Total% Used%
-------- -------- ------------------------------------- -------- ------ -----
nas01c-01
         vol0
                  hourly.5                                1.37MB     0%    0%
                  hourly.4                               374.7MB     6%   10%
                  hourly.3                               316.9MB     5%    9%
                  hourly.2                               192.8MB     3%    5%
                  hourly.1                               245.9MB     4%    7%
                  hourly.0                               181.7MB     3%    5%
                  nightly.1                              276.1MB     4%    8%
                  nightly.0                              185.5MB     3%    5%
nas01c-02
         vol0
                  hourly.2                               107.8MB     2%    3%
                  hourly.1                               286.0MB     5%    8%
                  nightly.0                              252.2MB     4%    7%
                  hourly.0                               228.9MB     4%    6%
svm0     svm0_root
                  daily.2020-09-03_0010                    336KB     2%   39%
                  hourly.2020-09-03_0405                   128KB     1%   19%
                  hourly.2020-09-03_0505                   128KB     1%   19%
                                                                 ---Blocks---
Vserver  Volume   Snapshot                                  Size Total% Used%
-------- -------- ------------------------------------- -------- ------ -----
svm0     svm0_root
                  hourly.2020-09-03_0605                   364KB     2%   40%
                  hourly.2020-09-03_0854                   128KB     1%   19%
                  hourly.2020-09-03_0905                   128KB     1%   19%
                  hourly.2020-09-03_1005                   120KB     1%   18%
         testvol
                  daily.2020-09-03_0010                    152KB     0%    8%
                  hourly.2020-09-03_0505                   144KB     0%    8%
                  hourly.2020-09-03_0605                   152KB     0%    8%
                  hourly.2020-09-03_0705                   152KB     0%    8%
                  hourly.2020-09-03_0805                   164KB     0%    9%
                  hourly.2020-09-03_0905                   152KB     0%    8%
                  hourly.2020-09-03_1005                   144KB     0%    8%
26 entries were displayed.
nas01c::*> snap delete -vserver
    nas01c-01 nas01c-02 svm0
nas01c::*> snap delete -vserver nas01c-01 -volume vol0 -snapshot
    hourly.5  hourly.4  hourly.3  hourly.2  hourly.1  hourly.0  nightly.1
    nightly.0
nas01c::*> snap delete -vserver nas01c-01 -volume vol0 -snapshot *
Warning: Deleting a Snapshot copy permanently removes any data that is stored
         only in that Snapshot copy. Are you sure you want to delete Snapshot
         copy "hourly.5" for volume "vol0" in Vserver "nas01c-01" ?
          {y|n}: y
Warning: Deleting a Snapshot copy permanently removes any data that is stored
         only in that Snapshot copy. Are you sure you want to delete Snapshot
         copy "hourly.4" for volume "vol0" in Vserver "nas01c-01" ?
          {y|n}: y
Warning: Deleting a Snapshot copy permanently removes any data that is stored
         only in that Snapshot copy. Are you sure you want to delete Snapshot
         copy "hourly.3" for volume "vol0" in Vserver "nas01c-01" ?
          {y|n}: y
Warning: Deleting a Snapshot copy permanently removes any data that is stored
         only in that Snapshot copy. Are you sure you want to delete Snapshot
         copy "hourly.2" for volume "vol0" in Vserver "nas01c-01" ?
          {y|n}: y
Warning: Deleting a Snapshot copy permanently removes any data that is stored
         only in that Snapshot copy. Are you sure you want to delete Snapshot
         copy "hourly.1" for volume "vol0" in Vserver "nas01c-01" ?
          {y|n}: y
Warning: Deleting a Snapshot copy permanently removes any data that is stored
         only in that Snapshot copy. Are you sure you want to delete Snapshot
         copy "hourly.0" for volume "vol0" in Vserver "nas01c-01" ?
          {y|n}: y
Warning: Deleting a Snapshot copy permanently removes any data that is stored
         only in that Snapshot copy. Are you sure you want to delete Snapshot
         copy "nightly.1" for volume "vol0" in Vserver "nas01c-01" ?
          {y|n}: y
Warning: Deleting a Snapshot copy permanently removes any data that is stored
         only in that Snapshot copy. Are you sure you want to delete Snapshot
         copy "nightly.0" for volume "vol0" in Vserver "nas01c-01" ?
          {y|n}: y
8 entries were acted on.
nas01c::*> snap delete -vserver nas01c-02 -volume vol0 -snapshot *
Warning: Deleting a Snapshot copy permanently removes any data that is stored
         only in that Snapshot copy. Are you sure you want to delete Snapshot
         copy "hourly.2" for volume "vol0" in Vserver "nas01c-02" ?
          {y|n}: y
Warning: Deleting a Snapshot copy permanently removes any data that is stored
         only in that Snapshot copy. Are you sure you want to delete Snapshot
         copy "hourly.1" for volume "vol0" in Vserver "nas01c-02" ?
          {y|n}: y
Warning: Deleting a Snapshot copy permanently removes any data that is stored
         only in that Snapshot copy. Are you sure you want to delete Snapshot
         copy "nightly.0" for volume "vol0" in Vserver "nas01c-02" ?
          {y|n}: y
Warning: Deleting a Snapshot copy permanently removes any data that is stored
         only in that Snapshot copy. Are you sure you want to delete Snapshot
         copy "hourly.0" for volume "vol0" in Vserver "nas01c-02" ?
          {y|n}: y
4 entries were acted on.
nas01c::*> snap show
                                                                 ---Blocks---
Vserver  Volume   Snapshot                                  Size Total% Used%
-------- -------- ------------------------------------- -------- ------ -----
svm0     svm0_root
                  daily.2020-09-03_0010                    336KB     2%   39%
                  hourly.2020-09-03_0405                   128KB     1%   19%
                  hourly.2020-09-03_0505                   128KB     1%   19%
                  hourly.2020-09-03_0605                   364KB     2%   40%
                  hourly.2020-09-03_0854                   128KB     1%   19%
                  hourly.2020-09-03_0905                   128KB     1%   19%
                  hourly.2020-09-03_1005                   120KB     1%   18%
         testvol
                  daily.2020-09-03_0010                    152KB     0%    8%
                  hourly.2020-09-03_0505                   144KB     0%    8%
                  hourly.2020-09-03_0605                   152KB     0%    8%
                  hourly.2020-09-03_0705                   152KB     0%    8%
                  hourly.2020-09-03_0805                   164KB     0%    9%
                  hourly.2020-09-03_0905                   152KB     0%    8%
                  hourly.2020-09-03_1005                   144KB     0%    8%
14 entries were displayed.
nas01c::*>
トラブル事例2
アップデートを実行したところ「Failed to verify the signatures of the image.」で失敗した。
ontap97-sub::*> system image update -package http://~/patch/97P18_q_image.tgz
Warning: The recommended best-practice is to use the automated update procedure
         if you are attempting an upgrade or a minor version downgrade. Refer
         to the Clustered Data ONTAP Upgrade and Revert/Downgrade Guide for
         details.
Do you want to continue? {y|n}: y
Software update started on node ontap97-sub-01. Updating image2 with package http://.../97P18_q_image.tgz.
Downloading package. This may take up to 20 minutes.
100% downloaded
Download complete.
Listing package contents.
Decompressing package contents.
Verifying package signature.
Install Failed.
Failed to verify the signatures of the image. The image may have been corrupted.
Replace the image, and then try the command again.
Error: command failed: Install Failed. Failed to verify the signatures of the
       image. The image may have been corrupted. Replace the image, and then
       try the command again.
ontap97-sub::*>
ontap97-sub::*> system image update -package http://~/patch/97P14_q_image.tgz
Warning: The recommended best-practice is to use the automated update procedure
         if you are attempting an upgrade or a minor version downgrade. Refer
         to the Clustered Data ONTAP Upgrade and Revert/Downgrade Guide for
         details.
Do you want to continue? {y|n}: y
Software update started on node ontap97-sub-01. Updating image2 with package http://.../97P14_q_image.tgz.
Downloading package. This may take up to 20 minutes.
Install Failed.
Cannot update or install image because the system management storage area is
almost out of space. To make space available, delete old Snapshot copies. For
further assistance, contact technical support.
Error: command failed: Install Failed. Cannot update or install image because
       the system management storage area is almost out of space. To make space
       available, delete old Snapshot copies. For further assistance, contact
       technical support.
ontap97-sub::*>
netapp9101dr::> cluster image package show-repository
Package Version  Package Build Time
---------------- ------------------
9.10.1P12        4/13/2023 09:30:59
netapp9101dr::>
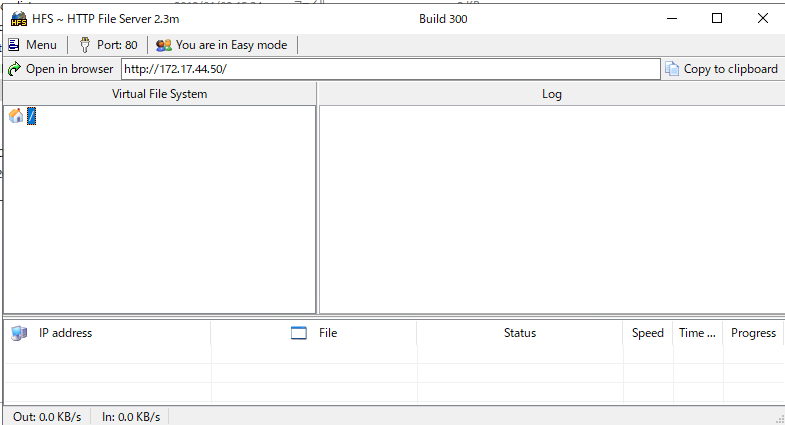
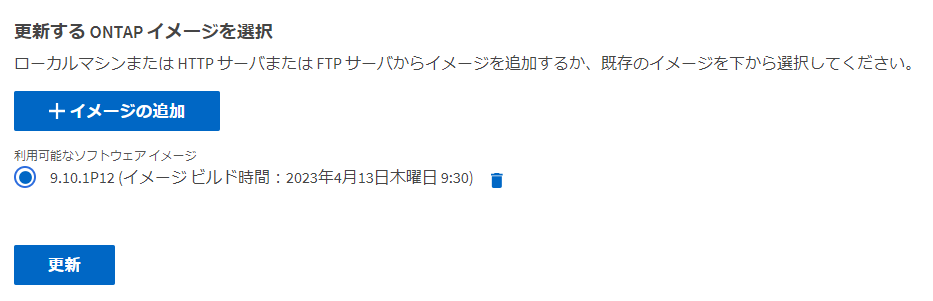
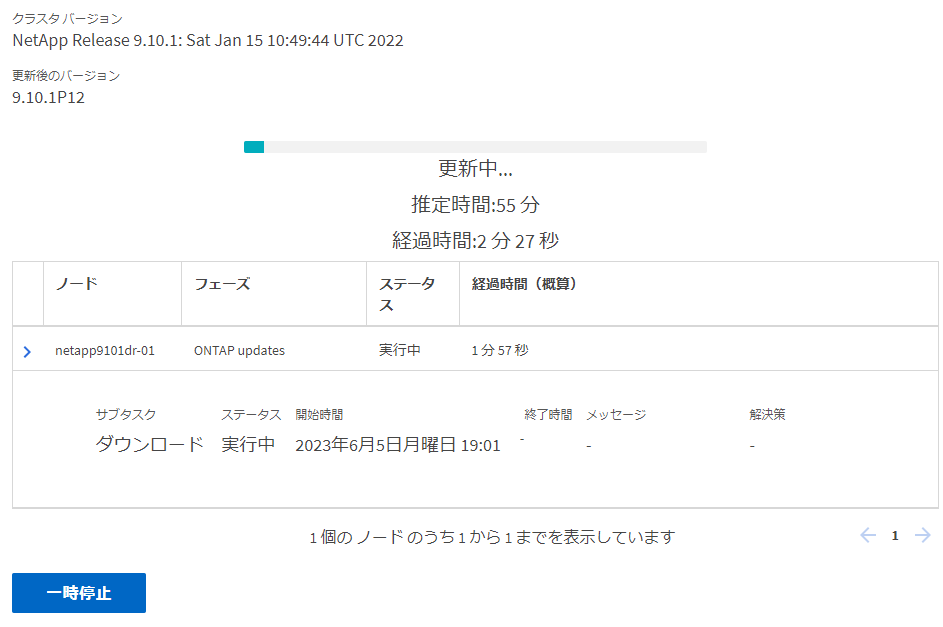
Web側でみると下記の様になっている
その4 現状のイメージを確認
netapp9101dr::> cluster image show
Node                 Current Version         Installation Date
-------------------- ----------------------- -------------------
netapp9101dr-01      9.10.1                  -
netapp9101dr::>
netapp9101dr::> cluster image validate -version 9.10.1P12
It can take several minutes to complete validation...
WARNING: There are additional manual upgrade validation checks that must be performed after these automated validation checks have completed successfully.
Refer to the Upgrade Advisor Plan or the "What should I verify before I upgrade with or without Upgrade Advisor" section in the "Upgrade ONTAP" documentation for the remaining manual validation checks that need to be performed before update.
Upgrade ONTAP documentation available at: https://docs.netapp.com/us-en/ontap/upgrade/index.html
The list of checks are available at: https://docs.netapp.com/us-en/ontap/upgrade/task_what_to_check_before_upgrade.html
Failing to do so can result in an update failure or an I/O disruption.
Please use Interoperability Matrix Tool (IMT  http://mysupport.netapp.com/matrix) to verify host system supportability configuration information.
Validation checks started successfully.  Run the "cluster image show-update-progress" command to check validation status.
netapp9101dr::>
netapp9101dr::> cluster image show-update-progress
Estimated Elapsed
Update Phase Status Duration Duration
-------------------- ----------------- --------------- ---------------
Pre-update checks completed 00:10:00 00:00:30
Details:
Pre-update Check Status Error-Action
-------------------- ----------------- --------------------------------------
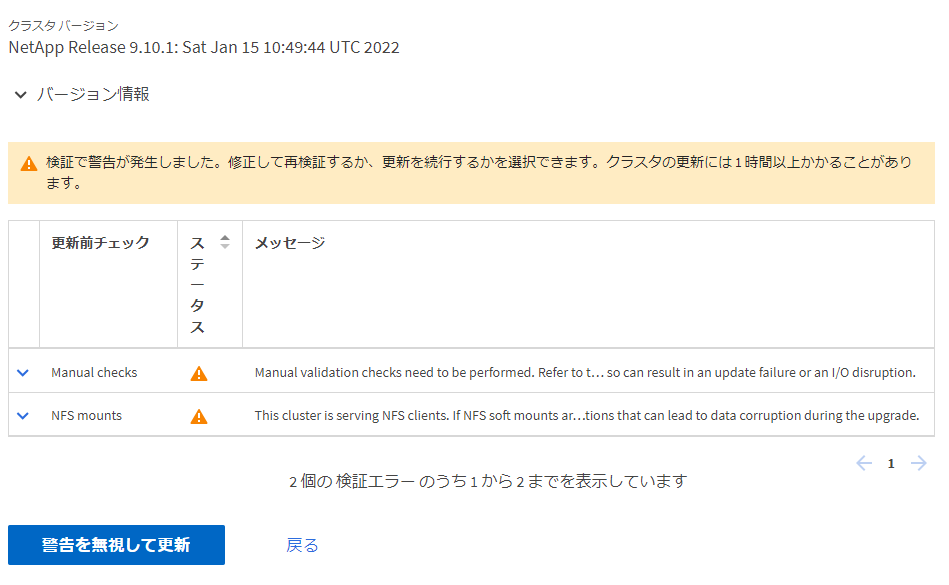
Manual checks Warning Warning: Manual validation checks
need to be performed. Refer to the
Upgrade Advisor Plan or the "What
should I verify before I upgrade with
or without Upgrade Advisor" section
in the "Upgrade ONTAP" documentation
for the remaining validation checks
that need to be performed before
update. Failing to do so can result
in an update failure or an I/O
disruption.
Action: Refer to the Upgrade Advisor
Plan or the "What should I verify
before I upgrade with or without
Upgrade Advisor" section in the
"Upgrade ONTAP" documentation for the
remaining validation checks that need
to be performed before update.
Estimated Elapsed
Update Phase Status Duration Duration
-------------------- ----------------- --------------- ---------------
Pre-update checks completed 00:10:00 00:00:30
Details:
Pre-update Check Status Error-Action
-------------------- ----------------- --------------------------------------
NFS mounts Warning Warning: This cluster is serving NFS
clients. If NFS soft mounts are used,
there is a possibility of frequent
NFS timeouts and race conditions that
can lead to data corruption during
the upgrade.
Action: Use NFS hard mounts, if
possible. To list Vservers running
NFS, run the following command:
vserver nfs show
2 entries were displayed.
netapp9101dr::>
netapp9101dr::> cluster image update -version 9.10.1P12
Starting validation for this update...
上記でしばらくとまったあと
netapp9101dr::> cluster image update -version 9.10.1P12
Starting validation for this update...
It can take several minutes to complete validation...
WARNING: There are additional manual upgrade validation checks that must be performed after these automated validation checks have completed successfully.
Refer to the Upgrade Advisor Plan or the "What should I verify before I upgrade with or without Upgrade Advisor" section in the "Upgrade ONTAP" documentation for the remaining manual validation checks that need to be performed before update.
Upgrade ONTAP documentation available at: https://docs.netapp.com/us-en/ontap/upgrade/index.html
The list of checks are available at: https://docs.netapp.com/us-en/ontap/upgrade/task_what_to_check_before_upgrade.html
Failing to do so can result in an update failure or an I/O disruption.
Please use Interoperability Matrix Tool (IMT  http://mysupport.netapp.com/matrix) to verify host system supportability configuration information.
Pre-update Check      Status     Error-Action
--------------------- ---------- --------------------------------------------
Manual checks         Warning    Warning: Manual validation checks need to
                                 be performed. Refer to the Upgrade Advisor
                                 Plan or the "What should I verify before I
                                 upgrade with or without Upgrade Advisor"
                                 section in the "Upgrade ONTAP"
                                 documentation for the remaining validation
                                 checks that need to be performed before
                                 update. Failing to do so can result in an
                                 update failure or an I/O disruption.
                                 Action: Refer to the Upgrade Advisor Plan
                                 or the "What should I verify before I
                                 upgrade with or without Upgrade Advisor"
                                 section in the "Upgrade ONTAP"
                                 documentation for the remaining validation
                                 checks that need to be performed before
                                 update.
NFS mounts            Warning    Warning: This cluster is serving NFS
                                 clients. If NFS soft mounts are used, there
                                 is a possibility of frequent NFS timeouts
                                 and race conditions that can lead to data
                                 corruption during the upgrade.
                                 Action: Use NFS hard mounts, if possible.
                                 To list Vservers running NFS, run the
                                 following command: vserver nfs show
Overall Status        Warning
3 entries were displayed.
Warning: Validation has reported warnings.
Warning: This is a single node cluster and the update will be disruptive.
Do you want to continue? {y|n}:
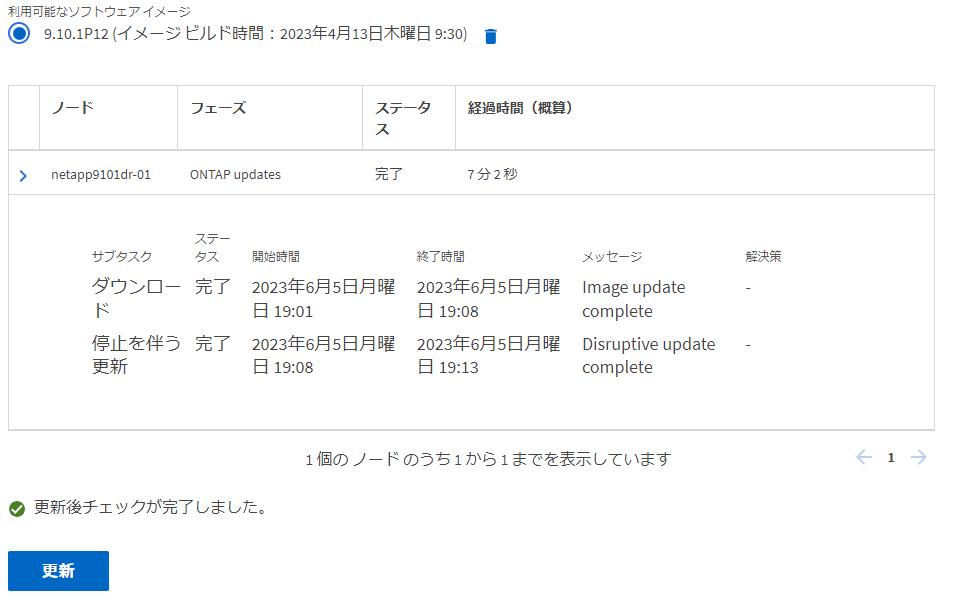
「y」を入力してアップデートを実施します。
Do you want to continue? {y|n}: y
Starting update...
Info: Run the "cluster image show-update-progress" command to check update status.
netapp9101dr::>
netapp9101dr::> cluster image show-update-history
           Package   Start      Completion              Previous  Updated
Status     Version   Time       Time       Component ID Version   Version
---------- --------- ---------- ---------- ------------ --------- ---------
successful 9.10.1P12 6/5/2023   6/5/2023   netapp9101dr 9.10.1    9.10.1P12
                     19:01:05   19:13:15   -01
netapp9101dr::> cluster image show-update-history  -ins
    Component ID: netapp9101dr-01
      Start Time: 6/5/2023 19:01:05
 Package Version: 9.10.1P12
          Status: successful
 Completion Time: 6/5/2023 19:13:15
Previous Version: 9.10.1
 Updated Version: 9.10.1P12
netapp9101dr::>
なお、アップデートに使用したファイルはvol0領域を2GB~3GB使用するため削除しましょう
netapp9101dr::> cluster image package show
Package Version  Package Build Time
---------------- ------------------
9.10.1P12        4/13/2023 09:30:59
netapp9101dr::> cluster image package
    delete          get             show-repository
netapp9101dr::> cluster image package delete -version 9.10.1P12
Package Delete Operation Completed Successfully
netapp9101dr::> cluster image package show
There are no packages in the repository.
netapp9101dr::>
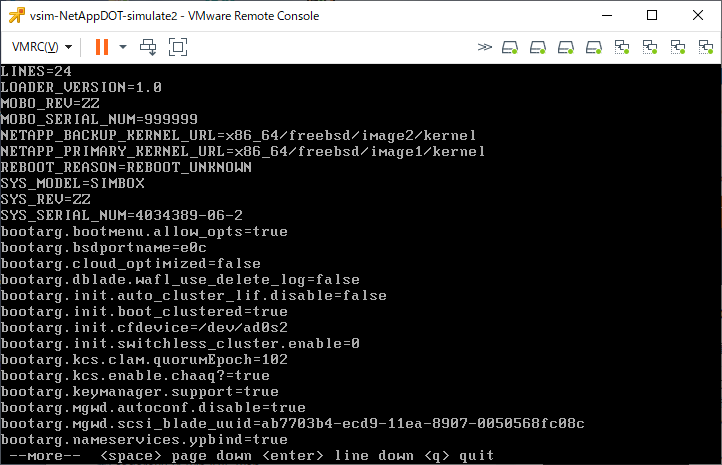
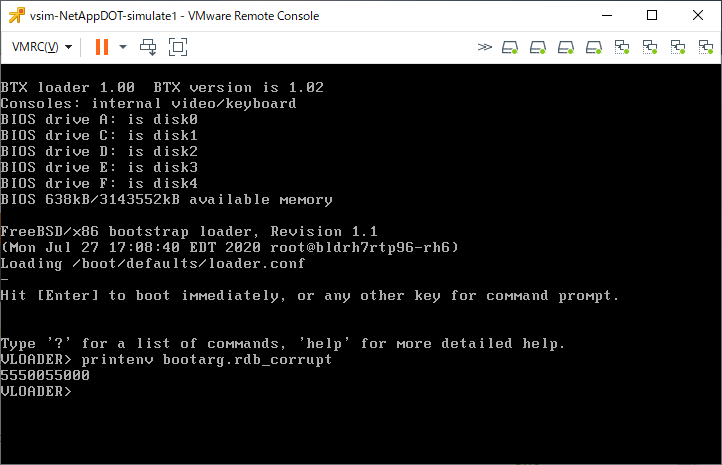
また、これらの対処を行って再起動してもまた「ROOT VOLUME NOT WORKING PROPERLY: RECOVERY REQUIRED」となる場合がある。 この場合はおそらくvol0領域が小さいためなので、vol0を拡張した上で、ONTAP再起動をかけ、BOOT> で止めて「unsetenv bootarg.rdb_corrupt」を実行して再起動することで対応できます。